How to Get Marks Off Walls Without Damaging the Paint
Start by testing a small hidden spot, then identify the mark and your paint finish. You’ll work from gentle to stronger methods: soft dry erasers or microfiber cloths with mild detergent for scuffs, a hairdryer then blotting for crayon, dish soap or a degreaser for grease, and targeted ink removers for pen. Avoid abrasive pads, undiluted solvents, and excess water. Protect floors and work carefully; continue and you’ll find step-by-step techniques and product tips.
Quick Answer How to Remove Marks from Walls Without Damaging Paint
Start by testing a small, hidden area to make sure your cleaning method won’t strip or dull the paint.
You’ll gently use a soft cloth, mild detergent or a magic eraser on stubborn scuffs, rinse, and pat dry.
Work from least to most abrasive, avoid harsh solvents, and repeat cautiously.
This practical approach shows how to get marks off wall without damaging paint.
Understanding Wall Marks and Paint Types
You’ll first want to identify the mark—scuffs, crayon, grease, pen, adhesive residue, or water stains each need different treatments.
Then consider your paint finish: flat and eggshell are delicate, satin and semi-gloss stand up better to scrubbing, and gloss is the most durable.
Finally, remember that harsh abrasion, strong solvents, or excess moisture can strip or discolor paint, so match your method to the mark and finish.
Common types of wall marks (scuffs, crayon, grease, pen, adhesive residue, water stains)
Walls collect a surprising variety of marks—scuffs from shoes or furniture, crayon and marker scribbles, greasy fingerprints, ink or ballpoint pen lines, sticky adhesive residue, and water stains—and each type reacts differently depending on the paint finish.
You’ll treat scuffs with gentle erasing, crayon with mild solvent, grease with degreaser, pen with targeted removers, adhesive with oil or adhesive remover, and water stains with drying and spot priming.
Basic paint finishes and how they react (flat, eggshell, satin, semi-gloss, gloss)
Those smudges and stains behave differently depending on the paint finish, so it helps to know what each sheen does and how it reacts to cleaning.
Flat hides imperfections but’s delicate.
Eggshell offers slight durability for gentle wipes.
Satin handles light scrubbing well.
Semi-gloss resists moisture and cleans easily.
Gloss is toughest, tolerating stronger cleaning without losing sheen, so treat accordingly.
Why some cleaning methods damage paint (abrasion, solvents, moisture)
Because paint finishes vary in hardness and composition, certain cleaning methods can strip, dull, or warp the surface if you’re not careful.
You’ll damage delicate eggshell or flat paint with heavy scrubbing; abrasive pads remove sheen. Strong solvents break binders and lift pigment. Excess moisture softens primer and causes bubbling or staining.
Test gently in an inconspicuous spot first.
Safety and Preparation Before Cleaning
Before you start, gather a checklist of supplies so you won’t be hunting for tools mid-clean.
Test a hidden spot first with your chosen cleaner to confirm it won’t harm the paint.
Protect floors, furniture, and trim with drop cloths or painter’s tape to avoid accidental damage.
Gather supplies checklist
Start by assembling a small kit of essentials so you won’t interrupt the job to hunt for tools.
Keep everything within reach: cleaning solutions, soft cloths, and protective gear. Gather mild detergent, a magic eraser or sponge, and a microfiber cloth.
- Mild cleaner
- Soft sponge/eraser
- Gloves + towel
Test a hidden spot first patch test procedure
Now that your supplies are ready, pick an inconspicuous area—behind a baseboard, inside a closet, or near a doorframe—and try your cleaner there first.
Apply a small amount, wait five minutes, then blot gently. Look for color change, sheen loss, or bubbling.
If paint’s unaffected, proceed cautiously on the mark. If damage appears, stop and choose a milder method.
Protect floor, furniture, and trim
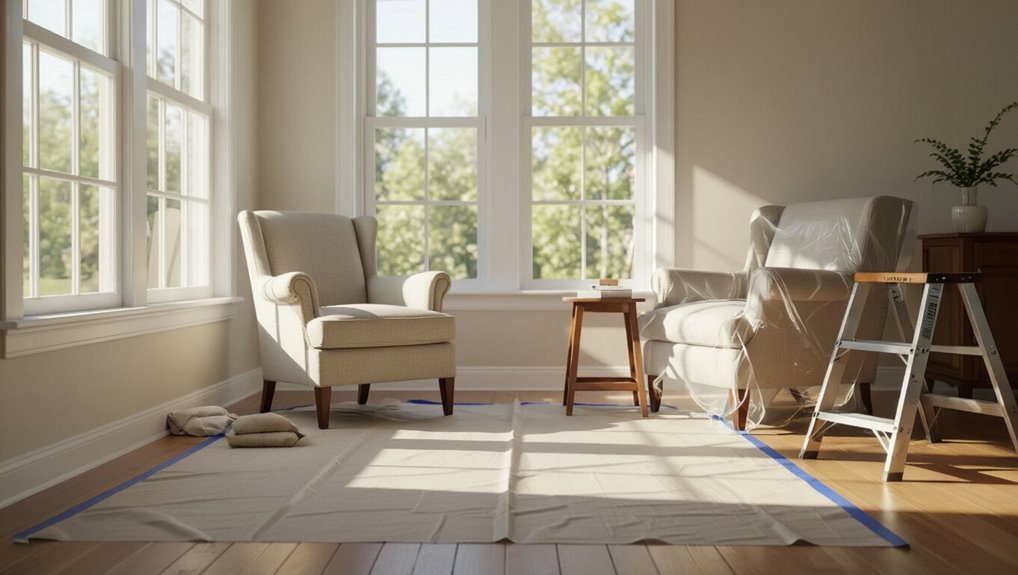
1 simple step will save you cleanup later: move furniture out of the way or cover it with drop cloths, then tape plastic or paper sheeting along baseboards and over trim to catch drips and abrasive residue.
Protect floors with layered cloths or kraft paper, secure edges with low‑tack tape, and wrap delicate furniture.
Remove rugs and keep pets out until surfaces fully dry.
Step-by-Step Removal Methods (Progressive, Least-Abrasive to Stronger)
Start with the least abrasive options and work up only if marks won’t come off.
Try dry methods first—soft cloth, eraser sponge, or microfiber—then move to mild soap and water, a baking soda paste, a vinegar solution, and finally commercial cleaners or degreasers as needed.
Always follow recipes, test an inconspicuous spot, and dry the area between steps.
Step 1 Dry methods (soft cloth, eraser sponge, microfibre)
Begin with the gentlest approach: dry methods that lift most scuffs without moisture or cleaners. You’ll test a small area first, use light pressure, and avoid painted edges.
Try these tools in order:
- Soft cloth or cotton pad, rubbing gently.
- Art gum or pencil eraser, small circular motions.
- Melamine eraser sponge, dampened slightly only if necessary.
Step 2 Mild soap and water method (recipe, technique, drying)
If dry methods don’t fully remove the mark, move on to a mild soap-and-water solution to lift residue without harming paint.
Mix a few drops of gentle liquid dish soap in warm water.
Dip a soft sponge, wring it well, and gently rub the mark in circular motions.
Rinse with a damp cloth, then pat dry with a clean towel to avoid streaks.
Step 3 Baking soda paste method (mix, apply, rinse)
When the soap-and-water rinse doesn’t fully lift stubborn marks, try a gentle baking soda paste: mix about two parts baking soda with one part water to form a spreadable paste.
Apply it with a soft cloth or sponge, rub lightly in a circular motion, then rinse with a damp cloth and pat dry.
Test first in a hidden spot, don’t scrub hard, repeat if needed.
Step 4 Vinegar and water solution (ratios, uses, precautions)
Step 4 uses a mild vinegar-and-water solution to tackle grease, crayon, and many stubborn marks without harsh abrasives.
Mix one part white vinegar with two parts warm water in a spray bottle. Lightly mist a soft cloth, wipe the mark, then rinse with a damp cloth.
Spot-test first, avoid prolonged scrubbing, and don’t use on delicate or waxed finishes.
Step 5 Commercial cleaners and degreasers (when to use, dilution, spot-test)
Having tried gentler vinegar solutions, you’ll reach marks that need a stronger approach: commercial cleaners and degreasers are designed for heavy grease, oil, adhesive residue, and baked-on stains that household mixtures can’t lift.
Choose pH-appropriate, paint-safe products, dilute per label, wear gloves, and ventilate.
Spot-test unseen area for 24 hours, apply with soft cloth, rinse thoroughly, and repeat only if paint remains intact.
Step 6 Isopropyl alcohol and stain-specific solvents (inks, marker) safe use guidelines
6. Use isopropyl alcohol sparingly on a hidden spot first; rub gently with a soft cloth.
For ink or marker, try a solvent labeled for that stain, applied to the cloth—not the wall. Work inward from the stain’s edge, blotting rather than scrubbing.
Ventilate the area, wear gloves, and stop if paint softens or color changes; rinse with water afterward.
Step 7 Adhesive and sticker residue removal (oils, heat gun caution)
1. Use vegetable oil or commercial adhesive remover on a cloth; rub gently to lift sticker residue.
Test a hidden spot first. For stubborn bits, warm the area briefly with a hair dryer at low heat to soften adhesive—don’t use a heat gun.
Wipe away softened glue, then clean with mild soap and water. Rinse and dry to protect paint.
Step 8 Tough stains and repainting as last resort (priming and touch-up tips)
When gentler cleaners and spot treatments won’t budge a stain, it’s time to accept repainting as a last resort and proceed methodically: try progressively stronger stain removers and light sanding first.
Then prime and touch up only the affected area to restore an even finish. Match sheen and color, feather edges with thin coats, let primer cure, and blend strokes until the repair disappears.
Comparison of Cleaning Tools and Products
You’ll often choose between simple household items and specialty cleaners depending on the stain and paint finish.
For light scuffs try a damp cloth, mild soap, or an eraser sponge; save chemical cleaners for stubborn marks or textured surfaces.
Know that eraser sponges are gentler on most paints, while stronger chemicals can remove residue more quickly but risk damage if overused.
Household items vs. specialty cleaners
Although everyday household items can tackle many common wall marks, specialty cleaners are formulated to remove tougher stains without damaging paint or finishes. You’ll try baking soda or mild soap for scuffs, but reach for specialty formulas for grease or crayon. Test any product in an inconspicuous spot first.
| Household items | Specialty cleaners |
|---|---|
| Soap/water | Paint-safe degreaser |
| Baking soda | Non-abrasive stain remover |
When to choose an eraser sponge vs. chemical cleaner
If a scuff is superficial and your paint’s finish is matte or eggshell, reach for an eraser sponge first since it lifts marks mechanically without harsh chemicals; save chemical cleaners for greasy, stained, or textured surfaces where a sponge just smears the mess or risks damage.
Test any cleaner in an inconspicuous spot, work gently, rinse residue, and ventilate for safety.
Common Mistakes That Damage Paint
Don’t scrub hard or use abrasive pads—those will sand the paint right off.
Avoid undiluted solvents or bleach, which can strip color and finish.
Also don’t soak the wall or ignore the paint’s finish, because excess moisture and the wrong cleaner can cause peeling or shine loss.
Over-scrubbing and abrasive tools
One scrubbing session can leave permanent scratches or thin the paint if you use the wrong pressure or abrasive tools; you’ll want to be careful about what you use and how hard you rub.
Test a soft cloth and gentle circular motion in an inconspicuous spot first. Avoid steel wool, rough sponges, and heavy scrubbing.
Use a microfiber cloth and mild cleanser instead.
Using undiluted strong solvents or bleach
Using concentrated solvents or straight bleach can strip or discolor paint almost instantly, so you’ll want to dilute cleaners and spot-test first.
Don’t dunk a rag or splash undiluted chemicals on painted surfaces. Mix mild detergent or a proper cleaner per instructions, test in an inconspicuous spot, and wait to confirm no fading.
Use gentle blotting and rinse residue promptly to protect finish.
Excessive moisture and peeling
If you let walls stay damp, paint will soften, blister, and eventually peel away from the surface.
Don’t soak surfaces when cleaning; use a lightly damp cloth and blot spills quickly.
Fix leaks, improve ventilation, and dry areas thoroughly before touching up.
Excess moisture undermines adhesion and invites mold, forcing you into repainting instead of simple spot cleaning.
Ignoring finish type before cleaning
Fixing moisture and leaks is only half the battle—what you do next depends on the paint finish.
If you don’t check whether it’s flat, eggshell, satin, or semi-gloss, you can scrub too hard and dull or strip the coating.
Test a hidden spot, use gentler cleaners on flat finishes, and reserve stronger solutions and scrubbing for durable, high-sheen paints.
Preventive Measures and Best Practices
You can stop many marks before they start by keeping a regular light cleaning schedule and choosing washable paint or protective coatings in high-traffic areas.
Put furniture pads, corner guards, and trim protection on vulnerable spots to prevent scuffs.
When marks do appear, act quickly with the right cleaner to avoid permanent staining.
Regular light cleaning schedule
When you keep a light cleaning schedule, marks on walls rarely become stubborn stains, so maintenance stays quick and easy.
You should wipe high-contact areas weekly with a soft microfiber and gentle cleaner, spot-treat scuffs immediately, and rotate tasks monthly for ceilings and baseboards.
Consistent, small efforts prevent buildup, reduce deep-clean needs, and extend painted surfaces’ appearance without harsh scrubbing.
Use washable paint or protective coatings in high-traffic areas
Although paint won’t stop every scuff, choosing a washable formula or adding a clear protective coating makes routine cleaning far easier in high-traffic spots.
Pick paints labeled scrubbable or high-sheen for durability, and test cleaners on a small area first.
Apply clear polyurethane or acrylic topcoat where appropriate, follow manufacturer cure times, and you’ll reduce staining while preserving finish and color.
Furniture pads, corner guards, and trim protection
Adding durable paint or a clear topcoat helps cleaning, but preventing marks in the first place saves time and keeps finishes pristine.
Use felt pads under furniture legs, attach adhesive corner guards to vulnerable edges, and install protective trim where chairs hit walls. You’ll avoid scuffs and repainting.
Quick, inexpensive barriers preserve paint and reduce maintenance.
- Felt pads
- Corner guards
- Protective trim
Quick-response tips for fresh marks
1 quick action can keep a fresh scuff from becoming a permanent stain: blot any wet residue, then gently rub with a soft cloth and a mild cleaner appropriate for your paint or finish.
Move quickly, test cleaners in an inconspicuous spot, work outward from the mark, avoid harsh scrubbing, and dry the area.
Repeat gently if needed, and address spills immediately.
Tools and Product Recommendations (Beginner, Budget, Professional)
You’ll want a small kit of household items—like a soft sponge, white vinegar, baking soda, and a magic eraser—for most everyday marks.
For tougher stains, keep grease-cutting cleaners, rubbing alcohol, and a mild abrasive paste on hand, and consider specific commercial removers labeled for crayon, ink, or scuff marks.
If you’re tackling frequent or large jobs, professional-grade cleaners and microfiber pads will save time and give the best results.
Best household items to keep on hand
When stains, scuffs, or pencil marks show up on your walls, having a small, well-chosen kit saves time and prevents damage; here are the essential items you should keep on hand for beginner, budget, and professional-level fixes.
- Soft microfiber cloths, magic eraser (gentle), and sponges.
- Mild dish soap, baking soda paste, and isopropyl alcohol.
- Small paint touch-up kit, fine sandpaper, and painter’s tape.
Recommended commercial products by stain type
For common wall blemishes—scuffs, crayon, marker, grease, and stubborn stains—pick products matched to the stain type and your skill level: beginner-friendly cleaners like melamine sponges and all-purpose sprays work for most scuffs, budget options such as baking-soda-based cleaners and rubbing alcohol handle ink and grease, and professional-grade removers and touch-up paints are best for persistent or delicate finishes.
| Stain | Product |
|---|---|
| Scuffs | Melamine sponge |
| Crayon | Goo Gone |
| Marker | Isopropyl alcohol |
| Grease | Degreasing spray |
| Stubborn | Touch-up paint |
Quick Troubleshooting Guide
If a scuff won’t budge, try a stronger remover or gently sand and then clean the spot before reassessing next steps.
If cleaning dulls the paint, you can often restore the sheen with a light polish or a matching clear coat.
For small peeled spots, use a temporary filler and paint-stick for now, and plan a proper touch-up when you have matching paint and time.
Scuff won’t come off next steps
Though you’ve tried the usual cleaners and a magic eraser, some scuffs resist removal; here’s what to do next so you can fix them without damaging the paint.
Try a soft-bristled brush with mild detergent, then rinse and dry.
If still visible, gently rub a fine art gum eraser or very fine sanding sponge, test first in an inconspicuous spot, then touch up with matching paint.
Paint dulls after cleaning how to restore sheen
After scrubbing a stubborn scuff you may notice the paint looks flat or chalky; that happens when cleaners strip surface oils or leave a residue.
Rinse the area with clean water, blot dry, then buff gently with a microfiber cloth.
If sheen’s still uneven, apply a small amount of restorative cleaner or a high-quality furniture polish sparingly, test first in an inconspicuous spot.
Small peeled spots temporary fixes vs. touch-up
When you spot tiny peeled areas, decide whether a quick patch or a proper touch-up will give the lasting result you want: for hairline lifts, press down edges, clean gently, and apply a dab of matching paint or clear nail polish to seal.
For larger flakes, sand, prime, and repaint the area. Choose the method that matches spot size and visibility.
Frequently Asked Questions
You’ve probably got specific questions like whether every mark can come off without repainting and if magic erasers are safe on flat paint.
You might wonder how to remove crayon, tackle grease splatters, or touch up paint to hide stubborn stains.
I’ll answer those clearly so you can choose the right fix for each situation.
Can all marks be removed without repainting?
Can every mark on your wall come off without repainting? Not always.
Light scuffs, pencil, and many fingerprints often lift with gentle cleaners or erasers, but deep scratches, ink stains, water damage, or paint loss may be permanent without touch-up.
Assess the mark, test a small area, and choose appropriate cleaning or repair. When in doubt, consult a pro.
Is it safe to use magic erasers on flat paint?
If the mark seems stubborn after gentle cleaners, you might reach for a melamine sponge—commonly called a Magic Eraser—but be careful on flat (matte) paint.
It can abrade and dull the finish because flat paints are softer. Test on an inconspicuous spot first, use light pressure, and limit passes.
If the finish dulls, stop and try milder methods or touch-up paint.
How do I remove crayon from painted walls?
Crayons are waxy and pigment-rich, so you’ll usually start by softening the wax and lifting pigment without scrubbing too hard—this protects the paint beneath.
Warm a hairdryer to soften marks, blot with a soft cloth or paper towel, then use a mild dish soap solution or baking soda paste applied gently.
Rinse, pat dry, and repeat lightly until residue’s gone.
What’s the best method for removing grease splatters?
Where do you start with grease splatters on painted walls? First blot excess with a paper towel, don’t rub.
Mix a few drops of dish soap with warm water, gently wipe with a soft cloth in circular motions. Rinse with a clean damp cloth, dry lightly.
For stubborn spots, try a baking soda paste, test hidden area first to avoid paint damage.
How do I touch up paint to hide stubborn stains?
Start by matching the paint and preparing the surface so your touch-up blends in and stays put.
Clean the stain, sand glossy areas lightly, and prime bare spots.
Use the original finish and apply thin coats, feathering edges with a small brush or roller.
Let each coat dry fully, then inspect under different light and repeat until the repair disappears.