How to Paint Stripes on a Ceiling With Clean Even Lines
You can get crisp, even stripes on a ceiling by measuring and marking a centered layout, snapping straight chalk lines or using a laser level, and applying low‑tack painter’s tape sealed with a putty knife to prevent bleed. Cut in edges with a brush, roll with a 3/8–1/2″ nap roller working wet‑to‑wet, then remove tape while paint’s tacky and touch up as needed; follow a few pro tips and you’ll finish with clean, professional results if you want to learn more.
Quick Answer Can You Paint Clean, Even Stripes on a Ceiling?
Yes — you can get clean, even stripes on a ceiling with the right prep and about a day for taping, cutting in, and two coats of paint.
Choose ceiling stripes when you want to add height, draw the eye, or make a bold focal point; pick other accents (like a painted border or stenciling) if you prefer subtlety or less prep.
With steady taping and a good angled brush or roller, the results look professional without an oversized time commitment.
Short summary of outcome and time estimate
You can get clean, even stripes on a ceiling with the right prep, tools, and a steady hand; expect the whole job—taping, priming (if needed), painting two coats, and touch-ups—to take a weekend for an average-sized room (6–10 hours of active work spread over two days).
You’ll end with crisp, professional-looking bands if you follow how to paint stripes on a ceiling methodically and allow proper drying time.
When to choose stripes on a ceiling vs. other accents
When deciding whether to paint stripes on a ceiling or choose a different accent, think about the room’s shape, ceiling height, and your goal: stripes draw the eye and can make a low ceiling feel taller or a narrow room seem wider, while subtler accents—like a single bold color, a painted medallion, or stenciling—work better if you want interest without strong directional lines.
Choose stripes for drama; pick softer accents for balance.
Basic Understanding What Are Ceiling Stripes and Why Paint Them?
Ceiling stripes can be anything from wide or narrow bands to alternating color patterns or faux beams, and you can pick a style that suits your room’s vibe.
They’ll change how a space reads—making it feel taller, longer, or giving you a clear focal point.
You can also use stripes to conceal minor imperfections and draw attention away from problem areas.
Types of ceiling stripe designs (wide, narrow, alternating colors, faux beams)
Stripes come in many styles, and choosing between wide, narrow, alternating colors, or faux beams will shape your room’s character and visual scale.
You’ll pick based on mood, ceiling height, and overall decor; each style has a clear personality and installation approach.
- Wide stripes for bold, modern looks
- Narrow stripes for subtle texture
- Alternating colors for contrast
- Faux beams for rustic warmth
- Painted ribbing for architectural detail
Visual effects and functional reasons (make room look taller/longer, focal point, hide imperfections)
A painted pattern can change how you perceive a room, making the ceiling feel higher, the space longer, or drawing attention to a specific area.
Use vertical stripes to lift, horizontal to widen, and contrasting tones to create a focal point. Subtle stripes hide cracks and uneven texture.
Thoughtful placement directs sightlines, balances proportions, and masks imperfections without structural work.
Planning Your Stripe Project (Overview and Materials)
Before you start painting, measure your ceiling and sketch a layout so you can decide stripe width and spacing that fit the room’s proportions.
Gather the right tools—paint, rollers, brushes, painter’s tape, a level, chalk line, and drop cloths—so you won’t be hunting for supplies mid-job.
Pick complementary paint colors and ceiling-appropriate finishes (flat or eggshell) to guarantee the stripes look crisp and suit the room’s light.
Measuring and planning stripe layout how to determine stripe width and spacing
Start by measuring the ceiling length and width so you can calculate stripe widths and spacing that look balanced in the room.
Divide dimensions by the number of stripes you want, test full and half-stripe layouts, and adjust for fixtures or molding.
Mark a centered reference line, then lay out stripe lines symmetrically from that center so edges land evenly around the perimeter.
Necessary tools and materials (paints, rollers, brushes, painter’s tape, level, chalk line, drop cloths)
Gather the right tools and materials so your stripe project goes smoothly and the finish looks professional. You’ll need quality paint, smooth rollers, angled brushes for edges, reliable painter’s tape, and tools to mark straight lines.
Prep and protection are key to crisp stripes and easy cleanup.
- Paint and primer
- Rollers and tray
- Angled brushes
- Painter’s tape and level
- Chalk line and drop cloths
Choosing paint colors and finishes for ceilings
When planning ceiling stripes, pick colors and sheens that work with the room’s light, scale, and mood so the pattern complements rather than competes with your space.
Choose lighter tones to open low rooms, darker accents for drama, and mid-tones for balance.
Use flat or matte for hiding imperfections, and satin for easy cleaning.
Test samples under actual lighting before committing.
Prepping the Room and Ceiling Surface
Before you tape off stripes, clean and repair the ceiling—remove dust and stains, fill cracks, and consider how texture will affect paint adhesion.
Prime patched or stained areas and allow full drying times to guarantee even coverage.
Protect furniture and floors with drop cloths and secure tape along edges so paint stays only where you want it.
Cleaning and repairing the ceiling (dust, stains, cracks, texture considerations)
Start by clearing dust, stains, and any loose material from the ceiling so your stripes will look crisp and last—vacuum or brush away cobwebs, wipe greasy or nicotine-stained areas with a trisodium phosphate (TSP) solution or a mild degreaser, and spot-treat water stains with a stain-blocking primer.
Scrape flaking paint, fill cracks and nail holes with lightweight spackle, sand smooth, and blend texture variations.
Priming and drying times for even coverage
Now that you’ve cleaned and repaired the ceiling, prime it to seal stains and create a uniform surface so your stripe paint lays down evenly.
Use a high-quality, stain-blocking primer; apply one even coat. Let it dry per manufacturer directions—usually 1–4 hours for latex, longer for oil-based—then lightly sand if needed.
Confirm full cure before taping or painting stripes.
Protecting furniture and flooring taping and drop cloth placement
1) Move furniture to the center of the room and cover it with lightweight drop cloths or plastic sheeting, then secure the edges with painter’s tape so dust and paint splatter can’t sneak underneath.
Next, tape baseboards and trim, overlap floor protection by several inches, and weight corners with tape or clips.
Keep pathways clear and use a tarp for high-traffic exits to prevent tracking paint.
Marking and Laying Out Even Stripes
Start by finding the ceiling’s center and edges with tape measure and snap a chalk line to anchor your layout.
Use a laser level or a plumb bob to extend that centerline and create a straight stripe guide across the room.
Measure and mark each stripe interval so you can snap parallel chalk lines and keep widths consistent as you paint.
Using measurements and chalk line to mark center and edges
Before you pick up the chalk line, measure the ceiling and determine the stripe widths so you can locate the exact center and outer boundary lines; this confirms your pattern sits balanced in the room.
Then mark the center with a pencil, measure equal distances to each edge, snap chalk lines for stripe edges, and double-check measurements before taping to verify straight, evenly spaced stripes.
Creating a stripe guide with laser level or plumb bob
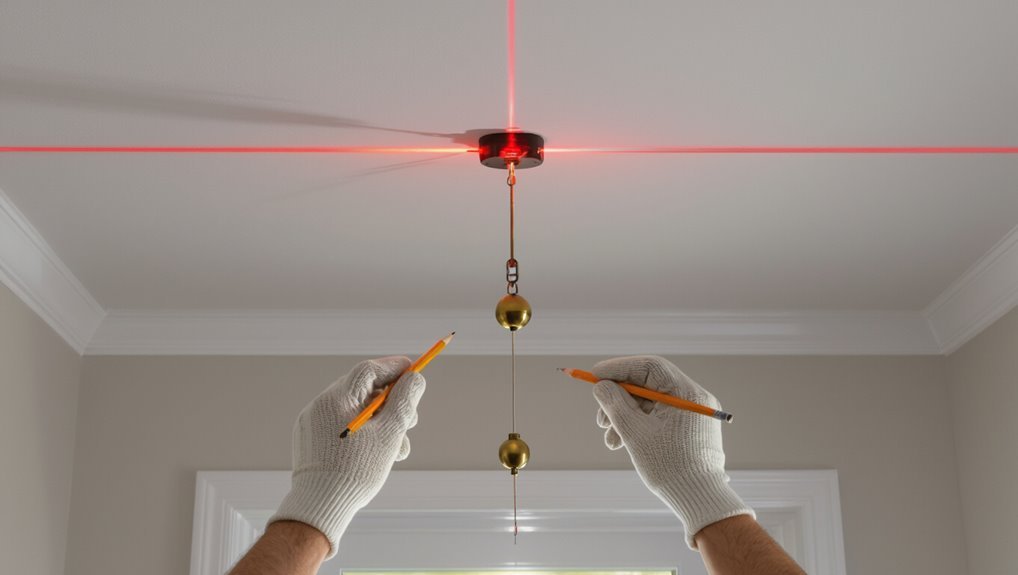
A laser level or plumb bob gives you a foolproof vertical reference for transferring ceiling center and edge marks down to the walls, so you can align your tape and keep stripes perfectly straight.
Set device at ceiling marks, project or drop points to wall at several spots, then connect them with a pencil.
Use those lines to position painter’s tape before painting.
Techniques for consistent stripe width across the room
With your vertical reference lines visible on the walls, you can lay out stripe spacing that stays uniform across the room.
Measure stripe width from one reference to the next, mark light pencil ticks every few feet, and snap chalk lines across the ceiling.
Use a straightedge or laser to transfer marks, double-check diagonals for squareness, and adjust before taping to guarantee consistent widths.
Taping Techniques for Clean Lines
Choose the right painter’s tape—use low-tack on fresh drywall and delicate finishes, and high-adhesion on textured or older surfaces.
Seal edges to prevent bleed by running a putty knife or burnishing tool along the tape and, for extra protection, applying paint-on caulk or a thin layer of base color.
For complex patterns, use stencils or custom masking templates to keep lines consistent and speed up the process.
Choosing the right painter’s tape and when to use low-tack vs. high-adhesion
Painter’s tape comes in different adhesives and backings, so pick one that matches your ceiling surface and paint type.
Use low-tack for delicate textures, fresh drywall, or recently painted surfaces to avoid peeling.
Choose high-adhesion for glossy finishes, rough stucco, or outdoor ceilings where stronger hold prevents lifting.
Test a small strip first and remove tape at a 45° angle after paint skins over.
Edge-sealing methods to prevent bleed (paint-on caulk, burnishing tape)
After you’ve picked the right tape and tested adhesion, seal the tape edges so paint won’t creep underneath.
Run a thin bead of paint-on caulk along the tape line, smooth it into the gap, and let it skin.
Alternatively, firmly burnish the tape with a plastic card to compress edges.
Both methods create a barrier; remove tape at the right time for razor-sharp stripes.
When to use stencils or custom masking templates
When your stripe design includes complex shapes, repeatable motifs, or precise curves that tape alone can’t achieve, use stencils or custom masking templates to get consistent, clean results.
They’re especially helpful on textured ceilings, large rooms where you’ll repeat a pattern, or when you need crisp edges around corners and fixtures.
Cut templates from stiff cardstock or plastic, secure with repositionable adhesive, then paint in thin layers.
Painting Steps Step-by-Step Process
Start by cutting in the stripe edges with a brush. Then roll paint inside the taped areas for smooth, even coverage.
Apply a second coat while maintaining wet edges and plan your tape removal carefully to prevent peeling.
After the tape comes off, do quick touch-ups where needed to finish the stripes cleanly.
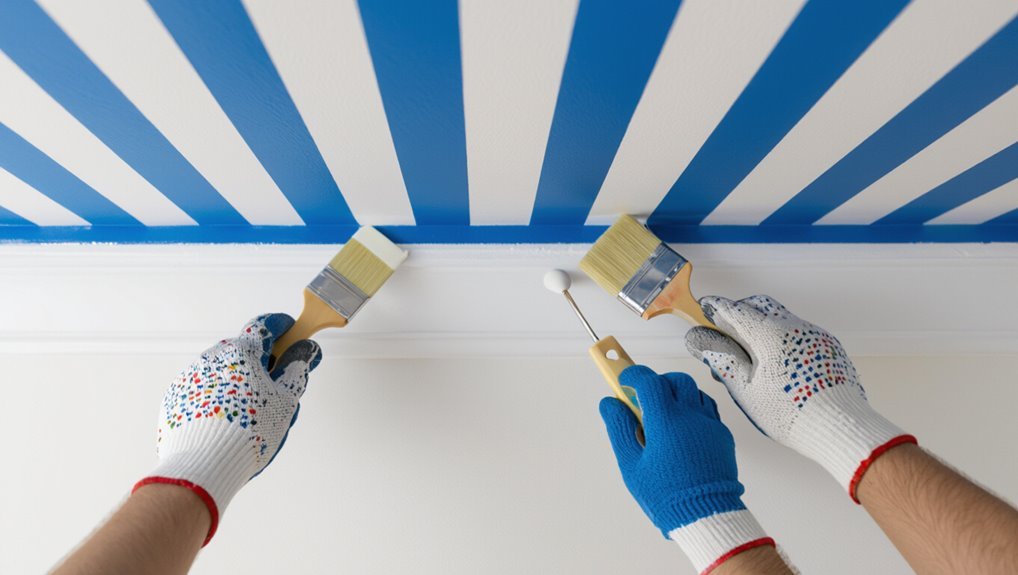
Step 1: Cut-in first stripe edges with brush
Before you roll, grab a sash brush and cut in the first stripe edges with steady, confident strokes; this creates a clean boundary you’ll follow with the roller.
Work in manageable sections, keeping the brush loaded but not dripping. Hold the brush at a slight angle, feathering toward the stripe center.
Keep a wet edge to avoid lap marks and guarantee crisp, even lines.
Step 2: Roll paint inside taped areas for even coverage

Lay the roller nap flat and roll paint evenly inside the taped stripe, working from one end to the other so you keep a wet edge and avoid lap marks.
Use light, consistent pressure, reload the roller often, and overlap short strokes to blend.
Roll parallel to the tape, staying slightly away from the edge to prevent seepage, then smooth toward the tape for uniform coverage.
Step 3: Apply second coat and maintain wet edges
Keep the edges wet as you apply the second coat to guarantee seamless coverage and prevent lap marks.
Work in small sections, brushing along tape lines and immediately rolling outward to blend. Maintain a wet edge between sections so strokes overlap slightly.
Check for thin spots and touch them while paint’s wet. Take care not to press tape or disturb crisp lines.
Step 4: Timing for tape removal to avoid peeling (wet vs. dry removal)
If you peel the tape too soon or wait until the paint’s fully cured, you risk pulling fresh paint off with it, so timing the removal is essential to crisp stripes.
Remove tape while paint’s tacky but not wet—usually 20–60 minutes after cutting in, depending on humidity and product.
Pull slowly at a 45° angle back on itself for a clean edge.
Step 5: Touch-ups after tape removal
Inspect the edges immediately after removing the tape so you can spot any thin lines, smudges, or tiny chips while the paint is still fresh enough to blend easily.
Use a small angled brush, matching the ceiling paint, and feather corrections outward.
For raised nibs or bleed-through, lightly sand with fine grit, wipe clean, then touch up.
Step back often to verify straight, seamless stripes.
Special Techniques for Different Ceiling Types
If your ceiling has popcorn or heavy texture, you’ll need different rollers and lighter pressure to keep stripes crisp without tearing the finish.
Work carefully around fixtures, crown molding, and beams by cutting in with a brush and using painter’s tape tailored to the contours.
For sloped or vaulted ceilings, plan stripe orientation and use scaffold or adjustable poles so your lines stay straight on the angle.
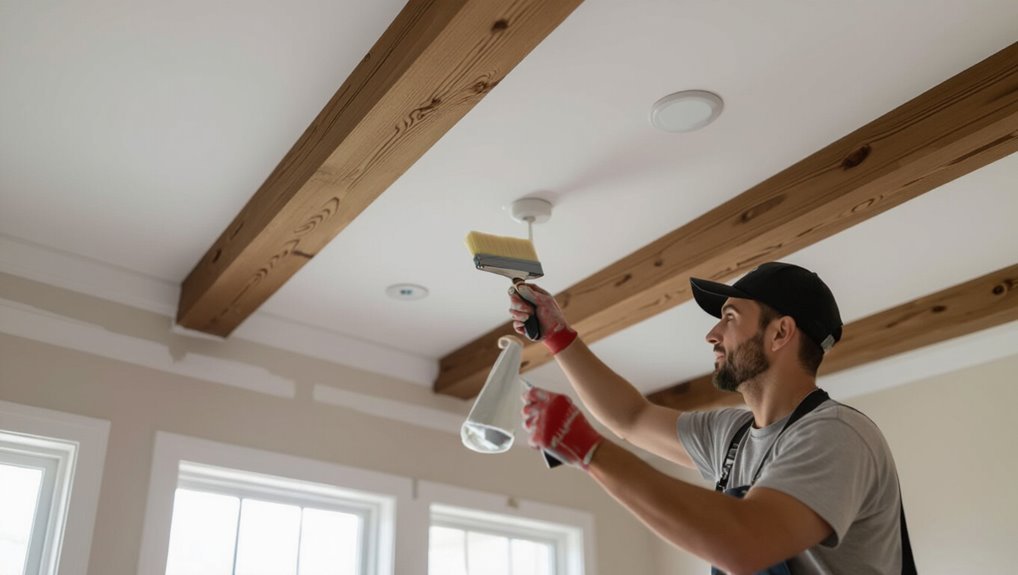
Painting popcorn or textured ceilings
When you’re tackling popcorn or heavily textured ceilings, you’ll need a different approach than for smooth plaster—these surfaces hold paint differently and can hide imperfections, so preparation and technique matter more.
Use a thick-nap roller or sprayer to reach crevices, prime first with a stain-blocking primer, and apply thinner, even coats.
Tape carefully and touch up with a small brush for crisp stripe edges.
Working around fixtures, crown molding, and beams
Because fixtures, crown molding, and beams interrupt your painting plane, you’ll need a steady hand and the right tools to keep stripes crisp and consistent.
Remove or cover light fixtures, use painter’s tape cut to fit molding profiles, and employ angled brushes for tight edges.
Paint short sections between obstacles, peel tape while wet, and touch up with a fine brush for seamless results.
Stripe patterns on sloped or vaulted ceilings
Working around fixtures and moldings gives you good practice, but sloped or vaulted ceilings bring different challenges that call for tailored stripe techniques.
Measure along rafters, mark plumb lines from the peak, and use a long level or laser to keep stripes aligned.
Choose narrower stripes to reduce distortion, tape carefully on angled surfaces, and work from peak to eaves for consistent results.
Common Problems and How to Fix Them
You’ll run into a few common issues when painting ceiling stripes, but you can fix them quickly with the right steps.
Learn how to prevent and seal paint bleed under tape, correct uneven or wavy lines, and troubleshoot color or sheen mismatches.
With the right tools and technique you’ll get crisp, consistent stripes every time.
Paint bleed under tape fixes and prevention
One common frustration when painting stripes on a ceiling is paint bleeding under the tape, but you can prevent and fix it with a few precise steps.
Press tape firmly, sealing edges with a firm tool.
Paint a thin coat of base color over the tape edge, let it dry, then apply stripe color.
If bleed occurs, scrape gently and touch up with a small brush.
Uneven lines or wavy stripes causes and corrections
If your stripes look wavy or uneven, it’s usually down to inconsistent tape placement, a crooked guide line, or rolling pressure that shifts paint at the edges; check and straighten your layout, press tape firmly, and use a steady, light roll from the center toward the tape to keep edges crisp.
Re-tape any misaligned sections, sand minor ridges, and repaint with controlled strokes to correct waviness.
Color mismatch or sheen differences troubleshooting
When adjoining stripes look off because the colors or sheens don’t match, start by confirming you’re using the same paint formula and sheen across all areas—small differences in base, pigment load, or finish make a big visual impact under ceiling light.
If mismatch persists, feather a thin connecting strip, repaint both stripes from a single mixed batch, or apply a uniform topcoat of matching sheen to blend differences.
Best Practices and Professional Tips
Choose a high-quality ceiling paint and a 3/8–1/2″ nap roller for even coverage and minimal texture.
Plan your workflow so you work wet-to-wet and keep a consistent overlap to avoid lap marks.
Use sturdy ladders or scaffolding, secure your footing, and wear eye protection to keep the job safe and steady.
Recommended paint types and roller nap for ceilings
One good rule is to pick a durable, low-sheen ceiling paint and pair it with a 3/8″ to 1/2″ nap roller—this combo hides imperfections, reduces splatter, and gives even coverage for striping work.
Use high-quality acrylic latex for durability and easy touch-ups.
For textured ceilings choose the thicker nap; for smooth surfaces stick with 3/8″.
Match primer sheen to topcoat for best adhesion.
Efficient workflow to minimize lap marks and maintain consistency
Start by planning a clear sequence and stick to it: work from the farthest corner toward the exit, keep a wet edge, and paint each stripe in full before moving on so you don’t have to overlap dried edges.
Use consistent roller pressure, maintain equal paint load, and time each stripe so edges stay wet.
Label stripes, rotate rollers, and inspect lines under good light for uniform coverage.
Safety tips for working on ladders and scaffolding
Before you climb, inspect your ladder or scaffolding for damage, secure footing, and clear the area so you won’t be balancing on uneven ground or slipping on debris.
Use a sturdy ladder rated for your weight, lock hinges, and angle it properly.
Keep three points of contact, avoid overreaching, move the ladder instead, wear nonslip shoes, and don’t work alone when possible.
Cost and Time Estimates
Expect to spend roughly $30–$150 on paint and supplies for an average room and a few hours to a weekend depending on prep and drying time.
If you’re handy and the stripes are simple, you can usually DIY and save money; hire a pro when ceilings are high, patterns are complex, or you need flawless results quickly.
We’ll break down typical costs, time estimates per room, and clear guidance on when to call in a professional.
Typical material costs and time per room
While costs vary with room size and stripe complexity, you can typically budget $50–$150 for materials and 3–6 hours of labor per average bedroom for a two-color stripe job. You’ll need paint, tape, rollers; larger rooms or extra colors raise costs. Plan time for drying between coats and precise taping.
| Item | Typical Cost | Time |
|---|---|---|
| Paint | $30–$80 | 1–2 hrs |
| Tape/Tools | $10–$40 | 0.5–1 hr |
| Prep/Clean | $10–$30 | 1–3 hrs |
When to hire a professional vs. DIY
Decide to hire a pro when the project risks exceed your time, skill, or safety limits—complex patterns, high ceilings, extensive prep, or tight timelines usually justify the extra $100–$400+ for labor and faster completion.
If you’re comfortable with ladders, straight lines, and masking, DIY saves $50–$200 in materials and a weekend.
Factor skill, time, and finish quality.
Before-and-After Examples and Inspiration
You’ll see how stripe width and placement change the feel of small, medium, and large rooms so you can pick a layout that fits your space and style.
Look at before-and-after photos that pair ceiling stripes with complementary or contrasting wall colors to understand real-world impact.
Use those examples to decide whether soft, tonal combos or bold high-contrast palettes will suit your room.
Design ideas for different room sizes and styles
1 simple tweak—striped ceilings—can change how a room feels and reads, whether you’re aiming to make a small powder room feel taller, widen a narrow hallway, or add drama to a master suite.
In compact spaces, thin vertical stripes stretch height; in long rooms, horizontal bands broaden sightlines.
For eclectic or minimalist decor, vary stripe scale and spacing to complement furniture and architectural features.
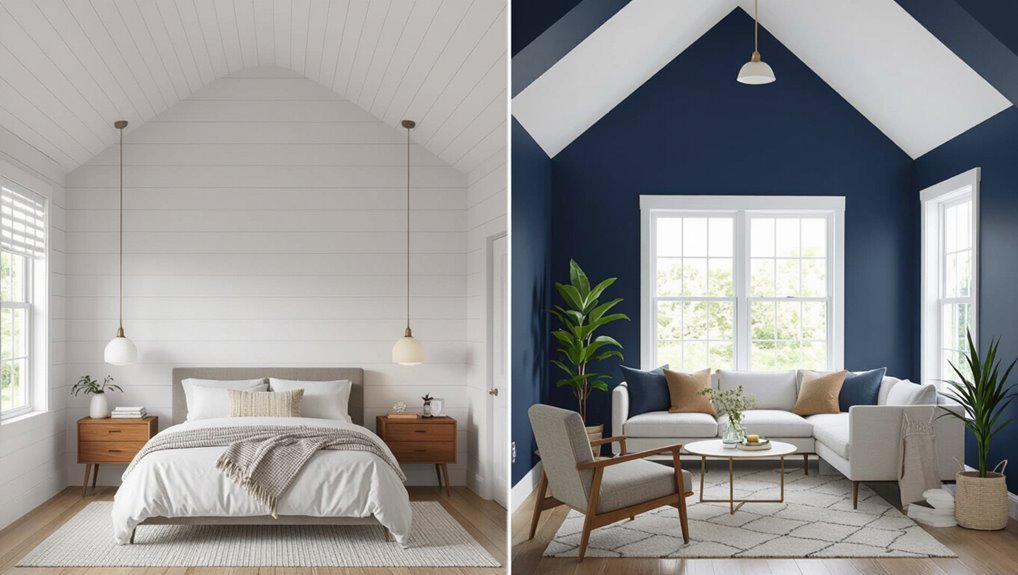
Color pairing suggestions for ceilings and walls
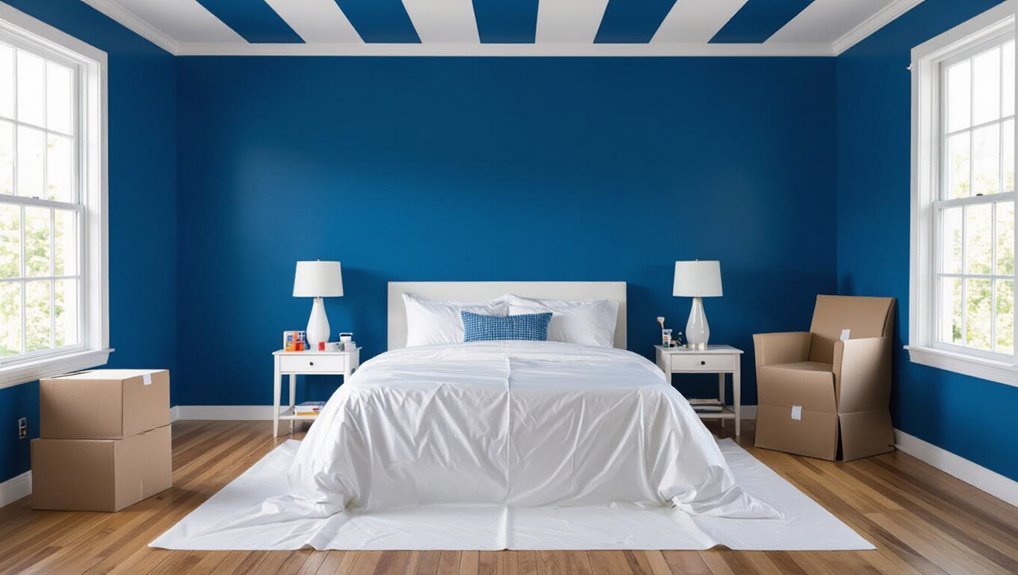
Anyone can transform a room by pairing ceiling stripes with the right wall color—think soft sky blues above crisp whites for airy bedrooms, deep navy ceilings against warm grays for cozy dining rooms, or high-contrast black-and-white bands to add modern drama.
You’ll choose contrasts or tonal matches to set mood; test swatches under lighting before committing.
- Soft blue ceiling / white walls
- Navy ceiling / warm gray walls
- Black-and-white bands / neutral walls
- Pale blush ceiling / cream walls
- Olive ceiling / beige walls
FAQ
You’ll find answers to common stripe questions here, like how wide stripes should be to look proportional and whether wall paint works on a ceiling.
You’ll also learn how to align stripes across rooms or adjoining walls, the safest way to paint around light fixtures, and timing for drying between coats and before reattaching fixtures.
If you’ve got a specific situation, ask and you’ll get tailored tips.
How wide should ceiling stripes be to look proportional?
How wide should ceiling stripes be to look proportional? Aim for stripes that complement room dimensions: in low ceilings use narrower bands (6–8 inches) to avoid overpowering, while higher ceilings can handle wider bands (10–18 inches).
Consider furniture scale, light fixtures, and pattern repeat. Maintain consistent widths and measure carefully so stripes align with architectural features for balanced visual flow.
Can I use wall paint on the ceiling for stripes?
Yes — you can use wall paint on the ceiling for stripes, but pick the right finish and prep well.
Choose a flat or matte sheen to hide imperfections; semi-gloss can highlight flaws and drip more.
Prime any stains and sand gloss surfaces. Use high-quality paint and extend cut lines with painter’s tape.
Test a small patch to confirm coverage and color under ceiling light.
How do I align stripes across multiple rooms or adjoining walls?
Once you’ve settled on paint and taped clean cut lines, plan your stripe layout so they line up across rooms or adjoining walls.
Measure from a fixed reference (corner, door frame) and mark stripe centers on each ceiling. Use a laser level or chalk line to transfer marks, extend tape continuously through openings, and check alignment before painting.
Touch up seams after removing tape.
What’s the best way to paint around ceiling light fixtures?
Preparing to paint around ceiling light fixtures means protecting and working carefully so you get crisp lines without damaging wiring or hardware.
Turn power off, remove shades or bulbs, and cover fixtures with painter’s tape and plastic.
Cut in with a small angled brush close to the base, feathering to the stripe.
Undo tape carefully when paint is tacky, not wet.
How long should I wait between coats and before reattaching fixtures?
After you’ve cut in and removed the tape from fixtures, give the paint proper time to set before adding another coat or reattaching hardware.
Wait the manufacturer’s recommended drying time—usually 2–4 hours between latex coats, longer for oil-based.
For full cure before reinstalling fixtures, allow 24–48 hours to avoid smudging or trapping tacky paint.
Touch-test edges first.