How to Keep Acrylic Paint From Peeling off Plastic (For Good)
You can make acrylic stick to plastic long-term by thoroughly cleaning and scuffing the surface, using a plastic-specific primer or adhesion promoter, and applying thin, flexible coats of acrylic with proper drying times. Degrease and sand lightly, match paint and sealer to the plastic’s flexibility, and finish with a compatible clear topcoat for UV and moisture protection. Follow stable temperature and humidity controls for curing, and keep going to learn practical tips, product picks, and troubleshooting steps.
How to Keep Acrylic Paint from Peeling Off Plastic (Quick Answer & Overview)
The quickest fix is to clean, sand or scuff the plastic, use a plastic-bonding primer, then apply thin coats of acrylic and seal with a compatible clear topcoat.
This approach works for most common plastics (like ABS, polystyrene, and polypropylene with proper primer) and for small to medium craft and décor projects rather than high-wear items.
Below you’ll find a simple visual summary of the steps so you can follow the process at a glance.
Quick direct answer the simplest fix that works
Start by scuffing the plastic with fine sandpaper, then clean it and use a plastic-specific primer before applying acrylic paint—this simple sequence is the single most reliable way to prevent peeling.
To keep acrylic paint from peeling off plastic, you’ll sand, degrease, prime with a plastic primer, paint thin coats, and finish with a compatible clear sealer for durable adhesion.
When this guide applies types of plastic and project scope
Because different plastics react to paint and preparation in distinct ways, this guide applies mainly to common consumer plastics—like polyethylene (HDPE/LDPE), polypropylene (PP), polystyrene (PS), ABS, PVC, and acrylic/plexiglass—and to small- to medium-sized DIY projects such as toys, storage bins, trim pieces, model kits, and outdoor decor; if you’re working with painted or coated plastics, automotive parts, or flexible/silicone materials, you’ll need specialized products or techniques beyond this overview.
You’ll get practical prep, adhesion tips, and sealing steps suited to these materials and project scales, not heavy industrial methods.
Visual summary of the process
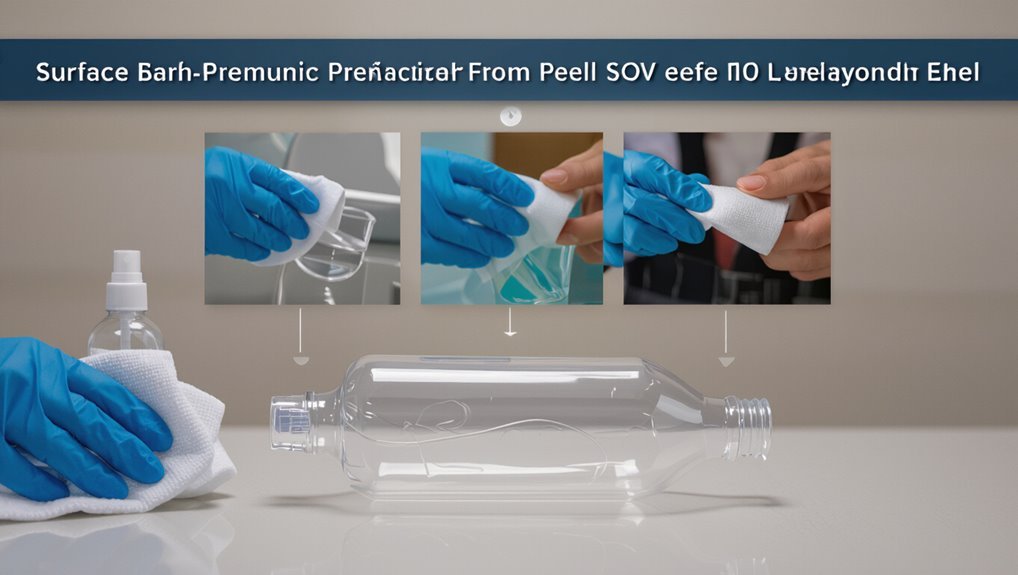
Now that you know which plastics and projects this guide covers, here’s a quick visual summary you can use as a checklist:
Clean surface with soap or alcohol; sand lightly; apply plastic primer; use thin acrylic layers, drying between coats; finish with a compatible clear sealer (spray or brush); cure fully before handling.
Inspect edges and stress points; touch up and reseal if needed.
Basic Understanding Why Acrylic Paint Peels from Plastic
To stop peeling you need to know how acrylic paint and plastic behave differently: acrylics cure into a rigid film while many plastics are smooth, oily, or flexible.
Peeling usually happens because the paint can’t stick (poor adhesion), the surface is contaminated, the paint and plastic flex differently, or environmental stress breaks the bond.
Different plastics—PVC and ABS bond better than low-energy polyethylene and polypropylene—so the type of plastic matters for adhesion and prep.
Properties of acrylic paint vs. plastic surfaces
Acrylic paint bonds differently than it does to porous materials, and that difference explains why it often peels from plastic surfaces.
You’re dealing with flexible, water-based polymers that cure into a film needing mechanical or chemical anchoring. Most plastics are smooth, low-energy, and inert, so paint can’t wet or adhere well.
Knowing these material contrasts helps you choose primers and prep methods.
Common causes of peeling: adhesion, surface contamination, flexibility mismatch, environmental stress
Because plastic surfaces are smooth, nonporous, and chemically inert, paint often fails where it can’t form a strong bond.
You’ll see peeling from poor adhesion, grease or mold release residues, and dust that prevents contact.
Flexibility mismatch causes cracking as plastic flexes differently than cured acrylic.
Environmental stress—UV, heat, moisture—weakens bonds over time, accelerating flaking unless addressed.
How different plastics (PVC, ABS, polyethylene, polypropylene) affect adhesion
When you’re painting plastic, the type of polymer matters because each has different surface energy, chemical makeup, and flexibility that change how well acrylics stick. You should prep PVC and ABS differently than polyethylene or polypropylene; low-energy polyolefins resist paint and need primers or flame treatment to improve adhesion.
| Plastic | Surface Energy | Best Prep |
|---|---|---|
| PVC | Medium | Sand/primer |
| ABS | Medium-high | Degrease/primer |
| PE/PP | Low | Primer/flame |
Step-by-Step Preparation (Essential for Good Adhesion)
Before you paint, you’ll want a clear step-by-step prep routine: clean the plastic with mild soap or isopropyl alcohol (avoid harsh solvents that can damage the surface), sand or abrade with appropriate grits to create mechanical bite, then degrease and let it fully dry.
Use 220–400 grit for light plastics and coarser for harder surfaces, and wipe again after sanding to remove dust.
If the plastic is slick or flexible, apply a compatible plastic primer or adhesion promoter following manufacturer directions for thin, even coats and proper cure times.
Step 1 Clean the plastic thoroughly (what to use and what to avoid)
If you want paint to stick, start by removing every trace of dust, grease, and mold-release agents from the plastic surface.
Use mild dish soap and warm water, isopropyl alcohol for oily residues, and rinse thoroughly.
Avoid harsh solvents that melt plastic or leave residues.
Dry fully before priming.
- Dish soap + warm water
- Isopropyl alcohol (70%+)
- Avoid acetone/strong solvents
Step 2 Sanding and mechanical adhesion methods (grits, techniques)
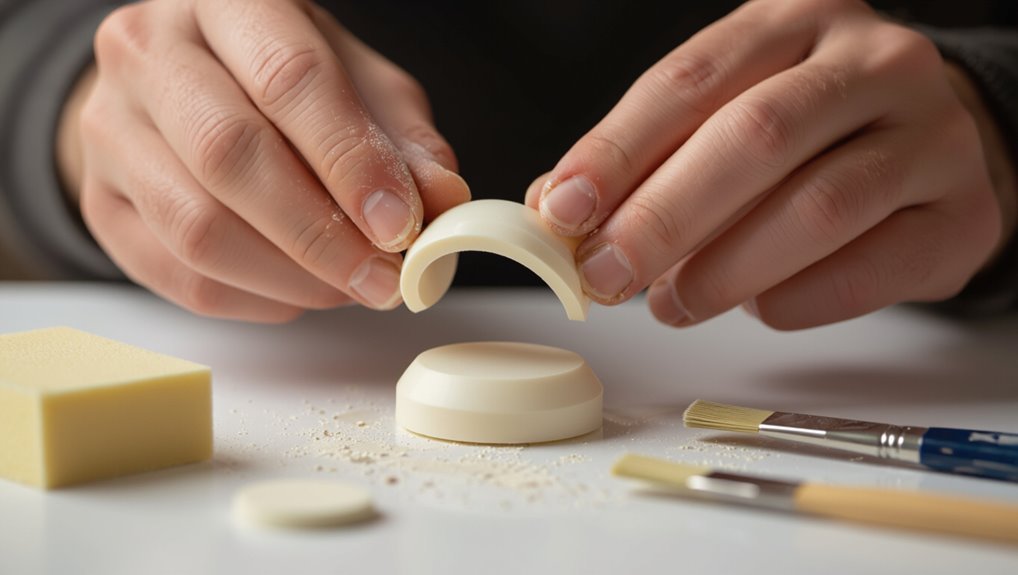
Because paint won’t bond to a smooth, glossy surface, you’ll need to scuff or abrade the plastic to give the primer something to grip; use fine-to-medium sandpaper (220–400 grit for light scuffing, 120–180 grit if the surface is very slick or you need to remove gloss).
Sand in even, overlapping strokes, and wipe away dust before priming. For curves and tight spots, use sanding sticks or a rotary tool on low, then blow or brush debris away.
Step 3 Degreasing and drying protocols (products and drying times)
After sanding, you’ll need to remove oils, dust, and any remaining release agents so primer can bond properly.
Wipe with isopropyl alcohol (70–90%) or a mild degreaser, using lint-free cloths.
Rinse with clean water if using detergent, then blot dry.
Let the plastic air-dry completely—typically 30–60 minutes—or 24 hours in humid conditions before proceeding.
Step 4 When and how to use primers or adhesion promoters (types and application tips)
When you want paint to last on plastic, choosing the right primer or adhesion promoter is the critical next step; these products chemically bridge the low-energy plastic surface and the acrylic, ensuring a strong, durable bond.
Use plastic-specific primers or plastic prep sprays, apply thin even coats, sand between coats if instructed, let recommended cure times pass, then paint.
Painting Process Application Techniques that Prevent Peeling
Pick a flexible, plastic-friendly acrylic and use thinning agents or adhesion additives as recommended so the paint bonds without cracking.
You’ll want to match your application method—brush, aerosol, or spray gun—to the paint’s viscosity and practice consistent strokes or passes to avoid runs and uneven film.
Build thin, even layers with proper flash and curing times in controlled temperature and humidity to guarantee each coat dries fully before the next.
Choosing the right acrylic paint (formulation, flexible vs. rigid)
Because different acrylic formulations cure and flex differently, choosing the right paint is the single best step you can take to prevent peeling on plastic.
Pick flexible acrylics or specialty plastic paints for items that bend; use rigid, high-adhesion acrylics for hard, stable surfaces.
Check manufacturer specs for elongation, flexibility, and adhesion to plastic substrates before you buy or apply.
Thinning, mixing, and additives to improve adhesion
Choosing the right paint sets you up for success, but how you thin, mix, and what additives you use will determine whether that paint actually sticks.
Thin sparingly with water or manufacturer thinner to preserve binder. Stir gently—avoid aeration.
Add a plastic adhesion promoter or acrylic bonding medium per directions. Use primer-compatible flow improvers for smooth coverage, and test on scrap plastic before full application.
Brush, spray, and spray-gun techniques for plastic
Whether you’re working with a brush, rattle can, or spray gun, your application technique determines how well acrylic will bond to plastic and resist peeling.
Use thin, even coats; avoid overloading brushes or spraying close to cause runs. Hold the spray gun 8–12 inches away, maintain steady passes, and keep strokes perpendicular.
Clean tools, use consistent speed, and overlap slightly for uniform coverage.
Layering, curing times, and proper drying conditions
Once your coats are applied evenly, how you layer and let them cure makes the difference between a durable finish and paint that flakes off.
Space thin coats, allow tack-free drying between layers, and finish with a full cure before handling. Control temperature and humidity for consistent curing.
- Thin, even layers
- Tack-free wait times
- Stable temperature/humidity conditions
Sealing and Finishing for Long-Term Durability
After your paint is fully cured, you’ll want to choose a clear coat or varnish made for acrylic on plastic to add UV, scratch, and chemical resistance.
Pick a flexible sealer for bendable items and a hard finish for rigid pieces, and follow manufacturer instructions for coats and flash times.
Apply thin, even layers, allow recommended curing time between coats, and cure fully before heavy use.
Clear coats and varnishes compatible with acrylic on plastic
Although acrylic bonds well to many plastics, choosing the right clear coat is essential to stop chipping, yellowing, and eventual peeling—you’ll want a sealer that’s chemically compatible, flexible, and UV-resistant.
Use water-based acrylic varnishes, polyurethane formulated for plastics, or spray lacquers labeled safe for acrylics.
Test adhesion on scrap, apply thin even coats, and follow manufacturer cure times for durable, non-yellowing protection.
UV, scratch, and chemical resistance options
Because painted plastic will face sunlight, abrasion, and household chemicals, you’ll want finishes that add UV blockers, flexible hardness, and chemical resistance without compromising adhesion.
Choose clear coats labeled UV-stable and chemical-resistant, or topcoats with UV absorbers.
Consider abrasion-resistant formulations and automotive or marine-grade products for tougher use.
Test compatibility on scrap, apply thin even layers, and cure fully before handling.
When to use flexible sealers vs. hard finishes
Sunlight, abrasion, and chemicals will shape which topcoat you pick, but the next question is whether the surface needs to flex or stay rigid.
If the plastic bends, choose a flexible sealer (silicone-modified or polyurethane-elastomer) to prevent cracking.
For stationary parts, a hard finish (acrylic or polycarbonate-compatible varnish) gives better scratch and solvent resistance.
Match flexibility to use.
Application tips and curing times
When you’re ready to seal, work in thin, even coats and allow each layer to flash off until tack-free before applying the next; this prevents runs, traps fewer solvents, and promotes proper adhesion and cure.
Apply two to three coats, keeping temperature and humidity within product specs.
Let the final coat cure fully—often 24–72 hours—before handling; full chemical cure can take up to a week.
Comparison of Methods and Products
You’ll want to weigh primer, adhesion promoter, and skipping primer to see which fits your plastic and project.
I’ll compare budget, mid-range, and professional products for common plastics and list clear pros and cons.
You’ll also get a quick look at when DIY fixes are sensible and when commercial solutions are worth the extra cost.
Primer vs. adhesion promoter vs. no primer
Although plastic can feel smooth and uncooperative, choosing the right surface prep makes all the difference: primers create a bonded layer for paint to grab, adhesion promoters chemically tie acrylic to plastic at a molecular level, and skipping any primer relies entirely on surface cleaning and the paint’s own adhesion. Pick primers for durability, promoters for stubborn plastics, or go bare for quick, low-stress projects.
| Option | When to use |
|---|---|
| Primer | Long-term, high-wear pieces |
| Promoter | Hard-to-bond plastics |
| No primer | Temporary or low-handling items |
| Combine | Primer + promoter for best adhesion |
Best products for common plastics (budget, mid-range, professional)
Now that you’ve picked whether to use a primer, an adhesion promoter, or go bare, it’s time to match products to the plastic you’re working with and your budget.
Choose from these tested options tailored to ABS, PVC, and polyethylene:
- Budget: Krylon Fusion for Plastic — cheap, decent grip after sanding
- Mid-range: Zinsser Smart Prime or PlastX adhesion primer
- Professional: SEM Plastic Adhesion Promoter
Pros and cons of DIY vs. commercial solutions
When deciding between DIY fixes and commercial products, weigh cost, time, and reliability:
DIY methods (sanding, primers, household adhesives) save money and let you customize, but they demand skill and may fail.
Commercial primers and adhesion promoters cost more, offer consistent results, and usually include instructions and warranties.
Choose DIY for small, low-risk projects; pick commercial for durability and ease of use.
Troubleshooting Common Problems and Fixes
If fresh paint starts peeling, act quickly with gentle recoating or spot sanding and a primer to stop further loss.
For flakes after curing, inspect adhesion and either repair small areas with sanding and bonding primer or strip failing layers if widespread.
Bubbling, cracking, or fading usually points to surface contamination, heat exposure, or UV damage—clean, sand, and seal fixes many issues, but when problems are extensive use a safe remover (isopropyl, plastic-safe stripper, or heat gun with caution) and start over.
Fresh paint peeling quick remediation steps
Catch peeling paint quickly to prevent further loss and save time on repairs.
Gently lift loose edges, peel only detached bits, then sand feathered edges with fine grit.
Clean with isopropyl alcohol, let dry, apply a plastic primer, and repaint thin layers.
Cure fully between coats.
Press down any remaining edges with a soft tool to readhere before finishing.
Flaking after curing diagnosis and repair
Although cured paint can look solid, flakes that appear later usually mean adhesion or surface-chemistry issues you can diagnose and fix.
Check for leftover oils, silicone, or release agents; test adhesion with a tape pull.
Sand back to bare plastic, clean with isopropyl alcohol, scuff with fine sandpaper, prime with a plastic-specific primer, then repaint and cure fully before handling.
Bubbling, cracking, or color fade causes and remedies
When paint bubbles, cracks, or fades on plastic, it’s usually because the surface prep, application, or curing didn’t match the material or environment.
You can often fix the problem without starting over. Check adhesion, clean and scuff, apply flexible primer, thin coats, and cure at recommended temperature.
For fading, use UV-resistant sealer; for minor cracks, sand, spot-prime, and repaint.
When to strip and start over (safe removal methods)
How do you know it’s time to strip and start over? If paint peels across large areas, adhesion additives failed, or sanding/spot fixes don’t help, strip it.
Use isopropyl alcohol, mild plastic-safe paint stripper, or acetone sparingly on ABS/acetate; test a hidden spot first.
Gently scrape with a plastic scraper, sand smooth, clean, prime, and repaint using proper primers and adhesion promoters.
Prevention, Maintenance, and Best Practices
To keep paint bonded, you’ll want a simple routine of gentle cleaning, careful handling, and proper storage.
Control temperature, humidity, and UV exposure to minimize stress on the finish.
For outdoor or high-use pieces, use UV-resistant topcoats and reinforce edges or contact points to prevent wear.
Routine care to prevent peeling (cleaning, handling, storage)
Because routine care directly affects adhesion, you should clean, handle, and store painted plastic with simple, consistent habits that reduce stress on the paint layer.
Gently wash with mild soap and water, avoid abrasive scrubbers, and pat dry.
Handle minimally, hold by unpainted edges when possible, and store items flat or cushioned to prevent flexing.
Check periodically and touch up chips promptly.
Environmental controls (temperature, humidity, UV exposure)
While you can’t control every element, managing temperature, humidity, and UV exposure makes the biggest difference in preventing acrylic paint from failing on plastic.
Keep painted pieces in stable, moderate temperatures (avoid extreme heat or cold), maintain low to moderate humidity to prevent adhesion loss, and limit UV by storing away from direct sunlight or using UV-filtering glass or indoor lighting with low UV output.
Tips for painted plastic items used outdoors or under stress
If you’re using painted plastic outdoors or in high-stress situations, plan for extra protection and regular upkeep so the finish lasts.
Clean and dry surfaces before touch-ups, use flexible primer and UV-resistant clear coats, and inspect for chips frequently. Reapply sealant seasonally and store items when possible.
- Use flexible, weatherproof primers and sealers
- Schedule routine inspections and touch-ups
- Store or cover during extreme weather
Common Mistakes to Avoid
Don’t skip prep or reach for just any cleaner — the wrong product leaves oils that stop paint from sticking.
Make sure you use primers and sealers made for plastic and avoid heavy, gloppy coats that won’t cure properly.
Also check the plastic’s type and flexibility, since some plastics need special treatments or flexible paints to prevent cracking and peeling.
Skipping surface prep or using the wrong cleaner
Skipping surface prep or grabbing the wrong cleaner dooms most paint jobs before you start, because acrylic won’t bond to grease, mold release agents, or loose dust.
You should degrease with isopropyl alcohol or a dedicated plastic cleaner, scuff glossy surfaces lightly with fine sandpaper, and rinse thoroughly.
Skip shortcuts and your paint will lift or flake quickly.
Using incompatible primers or sealers
When you slap on the wrong primer or sealer, the paint can fail just as quickly as on an unprepared surface; primers made for wood or metal often won’t bond to plastic and can actually prevent acrylic from sticking.
Always pick a plastic-specific primer or adhesion promoter, follow manufacturer instructions, and test a small area first so your acrylic has a compatible base to grip.
Applying coats too thick or not allowing proper cure
If you pile on thick coats or rush the drying process, the paint won’t cure properly and is far more likely to crack, peel, or stay tacky.
Apply thin, even layers and let each dry fully per manufacturer instructions. Thin coats bond better, flex with the substrate, and build color without compromising adhesion.
Patience prevents failure—wait recommended cure times before handling or sealing.
Ignoring plastic type and flexibility differences
Because different plastics take paint differently, you need to match your materials and methods to the substrate’s type and flexibility.
If you ignore whether a piece is rigid ABS, flexible PVC, or soft polyethylene, paint will crack or peel as the plastic moves.
Test, sand, use appropriate primer or adhesion promoter, and choose flexible paints for bendable parts to prevent failure.
FAQ Quick Answers to Common Questions
You probably have quick questions like whether acrylics will stick to polyethylene or polypropylene and if you really need primer for small crafts.
You’ll also want to know how long paint needs to cure, whether sanding always helps adhesion, and what household products can remove peeling paint.
Below are concise answers to get you painting (or fixing) fast.
Can I paint polyethylene or polypropylene with acrylics?
Wondering whether acrylics will stick to polyethylene or polypropylene? You can paint them, but these plastics resist adhesion because of low surface energy.
Clean thoroughly, scuff with fine sandpaper or a Scotch-Brite pad, and use a solvent wipe to remove oils.
Use acrylics formulated for plastics or apply an adhesion promoter made for polyolefins. Cure fully before handling to reduce peeling.
Do I need a primer for small craft projects?
After prepping plastic—sanding, cleaning, and using an adhesion promoter—you’ll want to decide whether a primer will help your small craft hold up.
For small, handled items or thin paint jobs, primer adds grip and evens coverage.
Skip it for quick, decorative pieces that won’t be handled often, but use a plastic-specific primer when you want durability, smoothness, and fewer paint failures.
How long before I can use a painted plastic item?
How long should you wait before using a painted plastic item?
Wait at least 24 hours for acrylic to dry to the touch, but 72 hours for a more cured finish.
If you applied sealer, allow another 24–48 hours.
Avoid heavy handling or liquids during this period.
Cooler or humid conditions can extend drying times, so err on the longer side.
Will sanding always improve adhesion?
Waiting the proper curing time helps the paint set, but you’ll still want to prepare the plastic surface before painting—sanding is a common step.
Sanding often improves adhesion by creating texture and removing gloss, but it won’t fix incompatible plastics or dirty, oily surfaces.
Use fine to medium grit, clean thoroughly afterward, and combine sanding with a suitable primer for best, long-lasting results.
What household products can remove peeling acrylic from plastic?
You can strip peeling acrylic from plastic with several common household products that are safe and effective when used properly.
Try isopropyl alcohol, acetone (nail polish remover) on tolerant plastics, white vinegar, or a baking soda paste for gentle abrasion.
Test a hidden spot first, work slowly with a cloth or soft brush, and rinse thoroughly afterward to avoid damage.
Helpful Resources and Product Recommendations
You’ll find quick tutorials, step-by-step videos, and manufacturer guides that show prep and application techniques tailored for plastic.
Check recommended primers, adhesion promoters, paints, and sealers across budget, mid-range, and premium brands so you can pick what fits your project.
If you want, I can list specific products and links for each price tier.
Useful tutorials, videos, and manufacturer guides
Looking for step-by-step help? You’ll find clear tutorials, demo videos, and manufacturer care guides that show prepping, priming, painting, and sealing techniques specific to plastics.
Use trusted sources to compare methods and see real results before you try them.
- Manufacturer how-to pages for their primers and sealers
- Short demo videos showing surface prep and adhesion tests
- Step-by-step blog tutorials with photos and tips
Suggested primer, adhesion promoter, paint, and sealer brands for different budgets
If you’re working on a budget or going pro, picking the right primer, adhesion promoter, paint, and sealer can make the difference between a durable finish and peeling paint. Choose: Rust-Oleum or Krylon primer, Plastikote adhesion promoter, Liquitex or FolkArt paints, and Testors or Mod Podge Outdoor sealer for budget to pro levels.
| Budget | Pro |
|---|---|
| Rust-Oleum primer | Krylon primer |
| Mod Podge sealer | Testors clear coat |