How to Fix Ceiling Cracks Before Painting for a Smooth, Lasting Result
You can get a smooth, lasting ceiling by diagnosing the crack type, cleaning and undercutting loose edges, then reinforcing wide or moving cracks with tape or flexible caulk. Fill hairline cracks with quick-dry filler and use joint compound for seams, sanding between coats. Prime patched areas with a stain-blocking primer and finish with high-quality ceiling paint. Use moisture control and proper fasteners to prevent recurrence, and keep going to learn detailed steps, materials, and tips.
Quick Answer Can You Fix Ceiling Cracks Before Painting?
Yes—you can fix most small ceiling cracks yourself with basic patching and paint, and it’s a quick way to refresh the room.
Tackle hairline and non-moving cracks as a DIY weekend project, but call a pro if cracks are wide, recurring, or accompanied by sagging or water damage.
When in doubt, get a professional inspection to avoid masking a bigger structural issue.
Short, Direct Recommendation
You can fix ceiling cracks before painting: clean and widen the crack, apply a suitable filler or joint compound, sand smooth once dry, prime the repair, then paint.
For clear guidance on how to fix ceiling cracks before painting, follow those steps, use quality materials, and let each layer fully cure.
You’ll get a durable, invisible repair with minimal tools and time.
When to DIY vs. Call a Pro
If the crack is hairline or minor and you’re comfortable with basic patching, you can usually handle it yourself with filler, sanding, primer, and paint;
but call a pro if the crack is wide (more than 1/8″), runs along a seam, repeats after repairs, or shows signs of structural movement, water damage, or mold.
Otherwise DIY: patch, sand, prime, paint.
Basic Understanding What Causes Ceiling Cracks and Why They Matter
You’ll want to know what’s causing those ceiling cracks—settlement, moisture, thermal movement, or poor installation each leave different clues.
Notice the type of crack (hairline, spider, long structural, or along joints) because that helps you decide if it’s a cosmetic fix or a structural concern.
Left untreated, cracks compromise paint adhesion and finish, so identifying the cause guides the right repair before you paint.
Common Causes (Settlement, Moisture, Thermal Movement, Poor Installation)
Ceiling cracks usually come from four main forces—settlement, moisture, thermal movement, and poor installation—and knowing which one’s at work helps you pick the right repair.
- Settlement: framing shifts that open gaps.
- Moisture: leaks or humidity weaken joints and plaster.
- Thermal movement: temperature swings expand/contract materials.
- Poor installation: inadequate fasteners, tape, or compound cause failures.
Types of Ceiling Cracks and What They Indicate (Hairline, Spider, Long Structural, Joint Cracks)
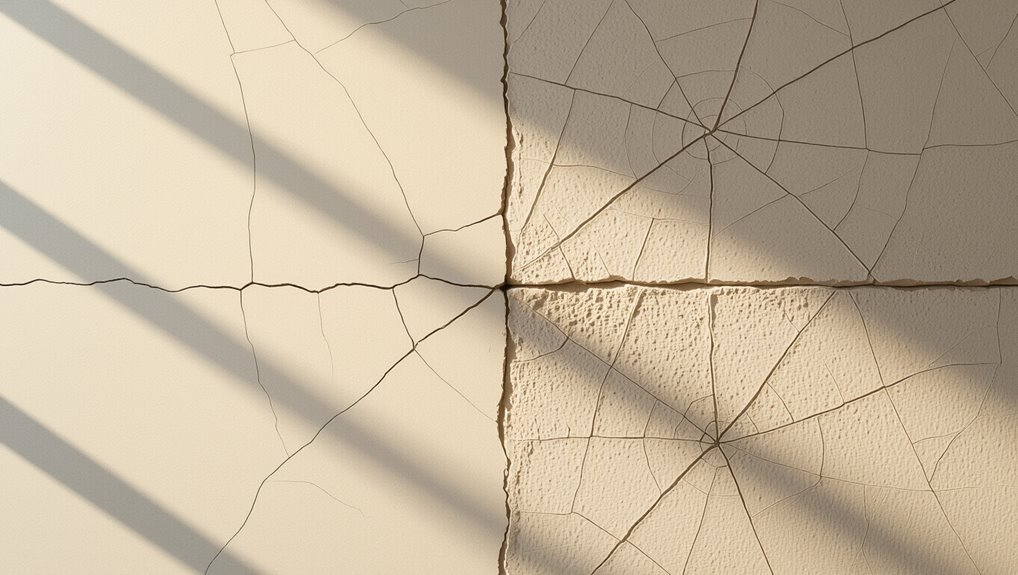
When cracks appear, the pattern tells you a lot about their cause and urgency: hairline cracks are thin, often cosmetic from drying; spider cracks radiate from an impact; long structural cracks run across joists and suggest movement or load issues; joint cracks follow seams between drywall or plaster and may mean poor taping or minor settling.
Inspect patterns to prioritize repairs.
How Cracks Affect Paint Adhesion and Finish
Because paint needs a stable, continuous surface to stick to, cracks compromise both adhesion and the final look of your ceiling.
You’ll see flaking, peeling, and visible seams where paint can’t bridge gaps. Moisture and movement widen defects, causing premature failure even after repainting.
Properly repairing and priming cracks guarantees paint bonds evenly, hides imperfections, and extends the life of your finish.
Preparation Tools, Materials, and Safety Checklist
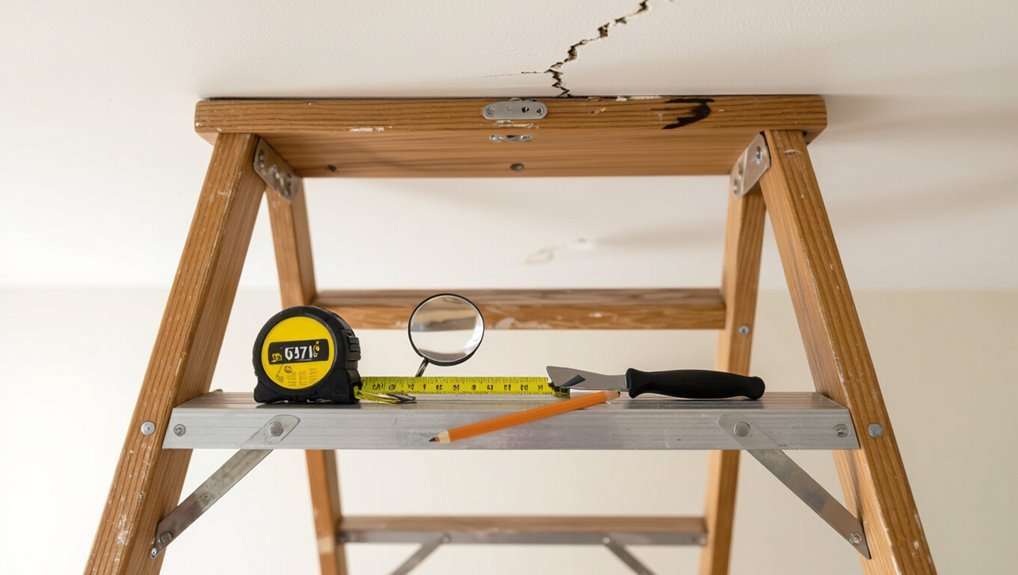
Before you start repairs, gather essential tools and materials—putty knife, joint compound, sandpaper, primer, and a sturdy ladder—so you won’t interrupt the job to hunt for supplies.
Wear proper safety gear like a dust mask, safety glasses, and a hard hat, and watch for ladder hazards, asbestos in older homes, or signs of moisture that need professional attention.
Finally, assess each crack’s severity to decide whether you can patch it yourself or need a contractor.
Essential Tools and Materials
Although the job looks simple, having the right tools and materials makes fixing ceiling cracks faster and gives you a professional finish; gather them before you start.
You’ll need quality patching compound, a flexible putty knife, sanding tools, primer and matching paint. Prepare a drop cloth and cleanup supplies.
- Joint compound or spackling
- 4–6″ flexible putty knife
- Sanding block (fine grit)
- Primer and ceiling paint
Safety Gear and Precautions (dust, ladder safety, asbestos/moisture concerns)
You’ve gathered your tools and materials, so now think about protecting yourself and the room.
Wear a NIOSH-rated dust mask or respirator, safety goggles, gloves, and a hat.
Lay drop cloths and seal vents to control dust.
Use a sturdy ladder, position it on level ground, and don’t overreach.
If you suspect asbestos or moisture damage, stop and get a professional inspection.
Assessing Crack Severity Before Starting
Start by inspecting each crack to judge whether it’s hairline, structural, or a symptom of moisture—this determines the repair method and materials you’ll need.
Check length, width, direction, and any movement. Use a flashlight, magnifier, tape measure, and moisture meter.
Note nearby stains, peeling, or sagging. Record findings, gather appropriate joint compound, patching tape, primer, and safety gear before you begin.
Step-by-Step Repair Process
Now you’ll follow a clear, step-by-step repair process to fix the crack before painting.
Start by cleaning and opening the crack, removing loose material and undercutting for a good bond.
Then add backing tape or fiberglass mesh for wide or moving cracks.
Finish with a first coat of joint compound or patch filler and sand smooth once dry (use about 120–150 grit for initial smoothing, then 220 for final touch-ups).
Step 1 Clean and Open the Crack
Loosen any loose material and widen the crack slightly with a utility knife or scraper so you can see where the damage ends and sound ceiling begins.
Remove dust with a stiff brush or vacuum, then wipe edges with a damp cloth. Let it dry fully.
Check for hairline splits extending outward. Mark the repair zone so you can apply filler evenly in the next step.
Step 2 Remove Loose Material and Undercut for Better Bond
Grab a putty knife and scrape away any remaining loose plaster or paint from the crack.
Then undercut the edges slightly so the filler can key into solid material; you want a clean, slightly V-shaped groove about 1/8–1/4 inch deep to improve adhesion and prevent future popping.
Remove dust with a brush or vacuum, inspect for firmness, and widen any soft spots until only solid substrate remains.
Step 3 Apply Backing Tape or Fiberglass Mesh for Wide or Moving Cracks
Press a strip of backing tape or fiberglass mesh into the prepared V-groove to bridge wide or moving cracks, making sure the tape lies flat and overlaps the edges by about 1 inch on each side.
Smooth out bubbles, cut tape to fit corners, and press firmly so it adheres.
Let the tape seat before applying filler, keeping the repair flush with the ceiling.
Step 4 First Coat: Use Joint Compound or Patch Filler
Now that the tape or mesh is seated and flush, apply your first coat of joint compound or patch filler to embed the reinforcement and fill the groove.
Use a wide drywall knife, feathering edges beyond the crack. Press compound firmly into the mesh, smooth excess, and create a slightly raised ridge.
Let it dry fully before proceeding to the next refinishing step.
Step 5 Sand Smooth Once Dry (grit recommendations)
Let the patched area dry completely, then sand it smooth so the repair blends with the surrounding ceiling; start with 120–150 grit to knock down high spots and finish with 220 grit for a feathered, paint-ready surface.
Use a sanding block or pole sander for even pressure, brush or vacuum dust between grits, and wear a mask and goggles to protect lungs and eyes.
Step 6 Apply Second Coat and Feather Edges
With the surface sanded smooth and dust removed, you’ll apply a second, thinner coat of joint compound to fill remaining low spots and blend the repair into the surrounding ceiling.
Use a broad drywall knife, press compound firmly into low areas, then feather edges outward to feather out thickness.
Let dry fully, then lightly sand just the blended edges until seamless.
Step 7 Prime the Repaired Area with Appropriate Primer
Prime the repaired area to seal the joint compound and secure uniform paint adhesion.
Choose a stain-blocking, high-quality primer suited to your ceiling material.
Apply thin, even coats with a brush for edges and a roller for broad areas.
Let each coat dry fully per manufacturer directions, then lightly sand if needed before final painting to guarantee a smooth, consistent surface.
Step 8 Paint for a Uniform Finish (technique and paint type)
Now that the primer’s dry and any sanding’s been smoothed, you’re ready to paint for a uniform finish.
Use a high-quality flat or matte ceiling paint to hide imperfections.
Cut in edges with a brush, then roll with a short-nap roller in a “W” pattern for even coverage.
Apply two thin coats, letting each fully dry before the next.
When to Use Specific Materials Filler, Compound, Caulk, or Plaster
Now you’ll compare common repair products—filler, joint compound, caulk, and plaster—to see their strengths and limits.
You’ll learn which to use for hairline cracks, which work for drywall joints, and which are meant for structural gaps.
That way you’ll pick the right material for a lasting repair before you paint.
Comparison of Common Repair Products
When you’re choosing a repair material, think about the crack’s size, movement, and the ceiling surface—each product is designed for specific conditions. Use filler for small gaps, joint compound for drywall seams, caulk for flexible joints, and plaster for large, structural repairs.
| Product | Best For | Key Trait |
|---|---|---|
| Filler | Small gaps | Fast-drying |
| Compound | Drywall seams | Sandable |
| Caulk | Moving joints | Flexible |
Which Product for Which Crack Type (hairline vs structural vs drywall joint)
Although it helps to know general categories, pick the repair material based on the crack’s cause and movement:
Use lightweight filler or spackling for hairline, non-moving cracks;
joint compound with tape for drywall seams;
flexible paintable caulk for small moving cracks near trim or drywall junctions;
and gypsum plaster or a professional-grade compound for wider structural cracks after addressing underlying causes.
Troubleshooting Common Repair Problems
If your repairs keep reopening, you’ll want to check for structural movement, moisture, or improper prep and use the right backing and flexible materials to stop it.
When seams still show after painting, feather and sand the edges, apply thin skim coats, and use primer-sealer to even out absorption.
For textured ceilings, match the original pattern—practice the spray or hand technique, adjust material consistency, and blend the new texture into the surrounding area.
Repairs that Keep Reopening Causes and Fixes
Because ceiling cracks often reappear when the underlying cause isn’t addressed, you’ll want to diagnose why the repair keeps failing before redoing the patch.
Check for structural movement, moisture, and improper fasteners. Fix leaks, secure loose joists, and replace damaged drywall if needed.
Use flexible joint compound or tape designed for movement. Monitor the area after repairs to confirm stability.
Visible Seams After Painting How to Blend Better
Once the repair is stable, you’ll often face a new hurdle: visible seams or ridges that stand out after painting.
Blend them by sanding feathered edges, applying a thin skim coat of joint compound, and re-sanding smooth.
Prime the area to equalize absorption, then use even paint strokes and proper overlap.
Inspect under raking light and repeat skim-and-sand until the seam disappears.
Texture Matching for Stippled, Knockdown, or Popcorn Ceilings
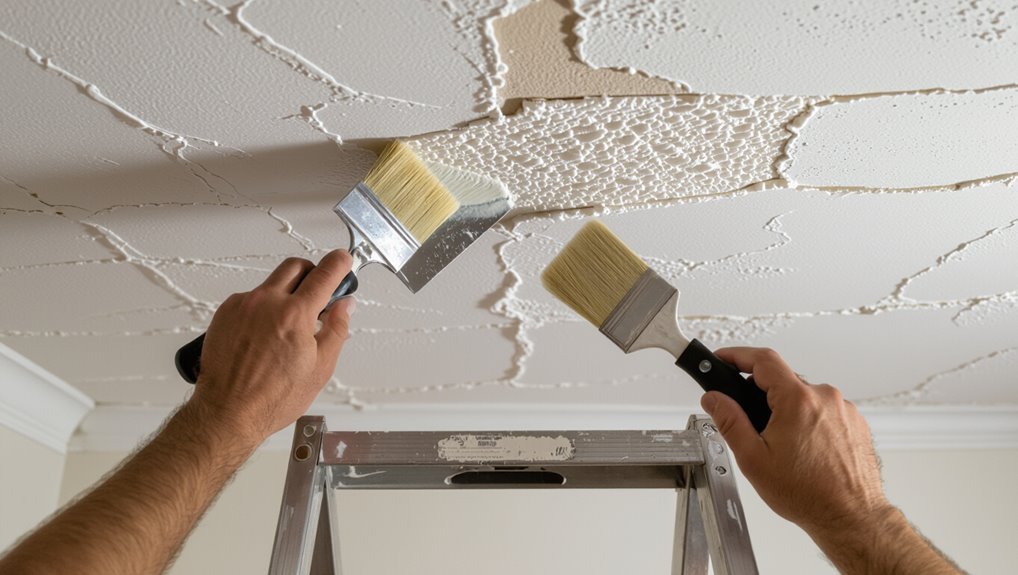
When you’re repairing a stippled, knockdown, or popcorn ceiling, matching the original texture is as important as hiding the crack itself; a perfect patch will still catch the eye if the texture’s off.
Study the pattern, mix compound to the right consistency, practice on scrap, apply with matching tools (brush, roller, knockdown knife), feather edges, sand lightly, then prime before painting for seamless results.
Prevention and Long-Term Best Practices
To keep ceiling cracks from coming back, you’ll want to control moisture by checking the roof and plumbing for leaks.
Make sure joints and drywall are installed and taped correctly, and use proper joint compound and reinforcement.
Set a simple seasonal inspection and do minor touch-ups to catch problems early.
Moisture Control and Roof/Plumbing Checks
If you want ceiling cracks to stay fixed, control moisture and inspect roofing and plumbing regularly; small leaks or poor ventilation will quickly undo any patching you do.
Check attic insulation, vents, and flashing for gaps. Repair roof damage, replace worn pipe seals, and clear gutters.
Install exhaust fans where needed and monitor humidity with a hygrometer to prevent recurrence.
Proper Installation and Joint Treatment Tips
Controlling moisture and fixing leaks lays the groundwork for stable ceilings, but proper installation and joint treatment keep cracks from forming in the first place.
Use correctly spaced fasteners, staggered seams, and full adhesive where recommended.
Tape joints with paper or fiberglass mesh, apply thin coats of joint compound, and sand between layers.
Finish with a flexible primer to absorb movement and reduce future cracking.
Seasonal Inspection Schedule and Minor Maintenance
Regularly inspect your ceilings every season to catch hairline cracks, moisture stains, and small joint separations before they worsen.
You’ll spot issues early, perform touch-ups, and prevent costly repairs. Keep a simple log and address sources like roof leaks or ventilation.
- Note locations and sizes.
- Photograph changes.
- Patch hairline cracks promptly.
- Improve ventilation and fix leaks.
Mistakes to Avoid When Fixing Ceiling Cracks
Don’t skip proper cleaning or undercutting—if you leave loose debris or fail to widen the crack slightly, patching won’t bond.
Don’t use the wrong materials or over-sand, because low-quality fillers and excessive sanding weaken the repair.
And don’t paint without priming, since paint won’t adhere evenly or hide the patch without a suitable primer.
Skipping Proper Cleaning or Undercutting
If you skip cleaning or undercutting the crack before you patch it, the joint compound won’t bond well and the repair will fail sooner than you expect.
Remove loose debris, dust, and old paint, then widen the crack slightly with a utility knife or V-gouge so the compound keys in.
Clean again, then apply patching compound firmly for a durable, long-lasting repair.
Using Wrong Materials or Over-Sanding
Once you’ve cleaned and undercut the crack so compound can grip, pick the right materials and sanding approach—using the wrong products or over-sanding will undo your work.
Use a compatible joint compound or flexible patch for hairline movement, avoid heavy spackle on wide gaps, and sand lightly with a fine-grit block.
Stop when edges blend; don’t strip layers or create depressions.
Painting Without Priming
Because primer bonds patch material to the ceiling and seals stains, skipping it often causes poor adhesion and visible repairs after you paint.
Don’t assume topcoat will suffice. Always prime patched areas to match porosity, block stains, and promote durability.
Use a stain-blocking primer for water marks, feather edges, then repaint. That extra step prevents re-cracking, flaking, and noticeable touch-ups.
Cost, Time, and When to Hire a Professional
You can usually fix small hairline ceiling cracks yourself in a few hours with basic materials that cost under $50.
If cracks are widening, follow a pattern, sag, or show water damage, you’ll want a structural or specialty contractor to assess the problem.
We’ll compare typical DIY time/cost estimates and the warning signs that mean it’s time to call a pro.
Estimated DIY Time and Material Costs
A typical small ceiling crack repair takes 1–3 hours and costs under $30 for materials if you do it yourself, while larger jobs or textured ceilings can stretch to a weekend and $50–$100 in supplies. You’ll save money doing it, but factor in skill and time; hire pros for recurring or complex issues.
| Task | Time | Cost |
|---|---|---|
| Small crack | 1–3 hrs | <$30 |
| Wide crack | 3–6 hrs | $30–$60 |
| Textured repair | Weekend | $50–$100 |
| Prep/paint | 1–4 hrs | $10–$40 |
Signs You Need a Structural or Specialty Contractor
When should you call in a pro?
If cracks are wide, recurring, accompanied by sagging, water stains, or shifting walls, you need a structural or specialty contractor.
Expect higher costs and longer timelines for inspections, permits, and repairs like joist reinforcement or roof fixes.
Hire a licensed pro when safety, hidden damage, or repeated failures exceed your DIY skills and tools.
FAQ Common Questions About Ceiling Crack Repair
You probably have a few quick questions before you start, like how long to wait between compound coats and whether you can paint over cracks without fixing them.
You’ll also want to know if caulk will stop cracks permanently, how to spot a structural crack, and whether humidity can make repaired cracks reappear.
I’ll answer each one simply so you can make the right repair and paint decisions.
How long should I wait between compound coats?
Plan on waiting about 24 hours between compound coats so each layer fully dries and you avoid trapping moisture that causes cracking or poor adhesion.
In dry, warm conditions you might sand and recoat sooner, but always confirm dryness by touch and firmness.
Thicker fills may need 48 hours.
Rushing leads to shrinkage, weak bonds, and visible imperfections when you paint.
Can I paint over cracks without repairing them?
Letting compound fully cure helps, but painting over visible cracks without repairing them isn’t a good idea.
If you skip repair, cracks will show through, worsen, or reappear as paint settles. For a lasting finish, clean, fill, sand, prime, then paint.
Quick paint-only fixes look fine briefly but won’t prevent future gaps or peeling, wasting time and money.
Will caulk stop ceiling cracks permanently?
Will caulk stop ceiling cracks permanently? Caulk can seal hairline, nonmoving cracks and prevent moisture entry, but it won’t fix underlying movement or structural issues.
Use flexible paintable acrylic or silicone-latex caulk for small gaps, then prime and paint.
For recurring or widening cracks, diagnose and address framing, drywall joints, or settling rather than relying solely on caulk.
How to tell if a crack is structural?
How can you tell if a ceiling crack is structural?
Look for wide (over 1/8 inch), long, or recurring cracks, cracks that follow a straight line or appear near beams, doors, or windows, and any stair-step patterns in plaster or brick.
Watch for sagging, shifting, or new gaps.
If you see these signs, get a structural inspection promptly.
Can humidity cause previously fixed cracks to return?
Because moisture affects both the materials and the bond of your repair, high humidity can definitely make previously fixed ceiling cracks reopen or reappear.
If humidity cycles cause swelling, shrinkage, or mold, your patch may lose adhesion.
To prevent recurrence, control humidity, use moisture-resistant joint compound or sealant, guarantee full curing, and repaint with a breathable, mildew-resistant finish so repairs stay intact.