How to Paint a Blue Wall White Without the Color Bleeding Through
You can reliably turn a blue wall white without bleed-through by prepping, priming, and topcoating correctly. Clean, sand, and repair the surface, then apply a high-hide, stain-blocking or bonding primer (gray-tinted if available) and let it dry fully. Use two thin coats of high-quality white paint, working wet edges and feathering seams for even coverage. Control temperature and humidity, and inspect under good light; keep going for more tips and step-by-step techniques to finish like a pro.
How to Paint a Blue Wall White Without the Color Bleeding Through (Quick Answer and Hook)
Quick answer: prime the blue wall with a stain-blocking primer, apply two coats of high-quality white paint, and feather edges for a clean finish.
This method works whether the blue is latex or oil-based, on drywall, plaster, or previously painted wood, and for common issues like dark pigments bleeding or patchy coverage.
If your blue is very deep or stained, you’ll need a heavier-duty primer and extra coats to fully hide it.
Quick Answer Short step summary
Start by sealing and priming the blue wall so the darker color doesn’t bleed through the new white paint.
Clean and sand, patch imperfections, then apply a high-quality stain-blocking primer.
Roll two thin coats of white paint after priming, letting proper dry time.
Use crisp edging and inspect for touch-ups.
This concise plan shows how to paint a blue wall white without bleed-through.
When this guide applies (types of blue paints, surfaces, and common challenges)
Although painting a blue wall white follows the same basic steps, this guide applies best when you’re dealing with common interior paints—latex or oil-based blues, satin to flat sheens—and typical wall surfaces like drywall, plaster, or primed wood.
You’ll also find it useful for stained or mildly glossy finishes, but not for unsealed raw wood, heavy pigments, watercolors, or severe stains that need specialty primers or stripping.
Basic Understanding Why Blue Bleeds Through and What Affects Coverage
When you cover blue with white, pigments and the contrast between colors make the darker dye want to show through.
The type of surface and existing coatings—glossy vs. matte, latex vs. oil, or stained wood—change how much the blue bleeds and how well paint adheres.
That’s why primer, a high-opacity white, and proper application technique matter for full coverage.
How paint pigments and color contrast affect bleed-through
Because pigments have different tinting strengths and light-absorbing properties, darker and highly saturated colors—especially blues—tend to show through white paint more readily.
So you’ll need to account for that when planning coverage. You’ll want to use higher-hide whites, multiple thin coats, or a pigmented primer.
Complementary contrasts (blue vs. warm white) increase visibility, so expect more layers for full concealment.
Role of surface type and previous coatings (gloss, latex, oil, stains)
If your wall has a glossy finish, oil-based paint, heavy stains, or porous drywall, each surface condition will change how much the underlying blue shows through and how many coats you’ll need.
Smooth glossy or oil-based surfaces resist new paint, while rough, porous, or stained areas soak color and reveal it.
Assess and address these conditions before painting.
Importance of primer, paint opacity (hiding power), and technique
Although blue can peek through even fresh white paint, you can control that by choosing the right primer, a high-opacity paint, and proper technique.
Use a stain-blocking or tinted primer to neutralize blue, then apply high-hiding white paint rated for few coats.
Roll evenly, maintain wet edges, and back-roll brushed areas.
Multiple thin coats beat one thick coat for consistent coverage.
Materials and Tools You’ll Need
Before you start, gather the right primers—stain-blocking, bonding, shellac, or oil-based—so you can stop bleed-through and improve adhesion.
Pick a white paint with appropriate tinting limits or a high-hide formula to avoid needing extra coats.
Round out your kit with a concise tools checklist: rollers, brushes, tape, drop cloths, sanding sponges, and a good tray.
Recommended primers and their types (stain-blocking, bonding, shellac, oil-based)
When you’re prepping a wall to go white, choosing the right primer makes the job easier and the finish more durable—stain-blocking, bonding, shellac, and oil-based primers each solve different problems, so pick one that matches your surface and the stains or adhesion issues you expect.
Use stain-blocking for tannins or marker, bonding for slick finishes, shellac for severe stains, and oil-based for tough adhesion on glossy or repaired areas.
Recommended white paints (tinting limits, high-hide options)
Pick a white paint that fits the surface and coverage you need: check the tinting limits (how much colorant a base can accept without shifting the undertone) and opt for a high-hide formula if you want fewer coats. Choose interior acrylic or enamel whites with labeled hide ratings. Compare brands, sheen, and VOCs below:
| Feature | Why it matters |
|---|---|
| Tinting limit | Prevents undertone shift |
| Hide rating | Fewer coats needed |
| Sheen/VOC | Durability and air quality |
Tools and supplies checklist ()
Gather the right tools and materials so you’ll work efficiently and get a clean, professional finish. You’ll need primer, high-hide white paint, and tools to block blue bleed.
Prep thoroughly and follow manufacturer directions for best coverage and adhesion.
- High-hide primer (stain-blocking)
- High-quality white paint
- 3–4″ angled brush
- 9″ roller and nap cover
- Painter’s tape, drop cloths, sandpaper
Step-by-Step Process to Paint Blue Walls White
Start by inspecting and preparing the blue wall—clean, sand, and repair any damage so the primer and paint adhere properly.
Pick a high-quality stain-blocking primer and apply it with the right tools, following recommended drying times and coats.
Then choose a white paint and sheen for coverage and apply the first coat carefully to prevent bleed-through.
Step 1 Inspect and prepare the surface (cleaning, sanding, repair)
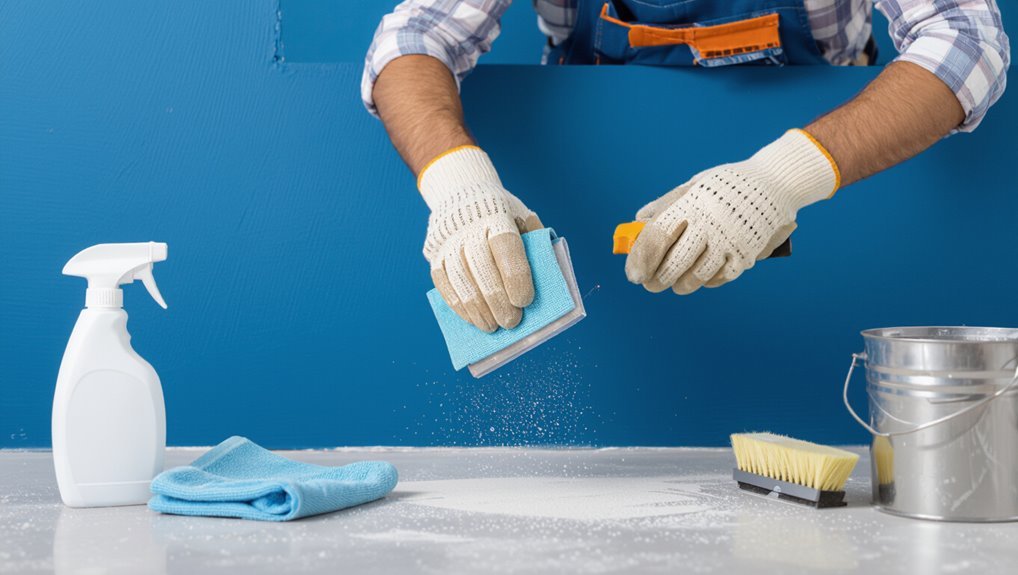
Inspect the wall closely to find dirt, peeling paint, cracks, or nail holes before you do anything else; addressing these issues now makes the white finish look smooth and even.
Clean grease and dust with mild detergent, rinse, and let dry.
Sand rough edges, scrape loose paint, fill holes and cracks with spackling, then sand smooth.
Wipe away residue before painting.
Step 2 Choose and apply the right primer (product selection, application tips)
Before you paint white over blue, pick a primer formulated for high-coverage and stain-blocking so the dark color won’t bleed through; an oil-based or high-hide latex primer usually works best for drastic color changes.
You’ll want a product labeled “hide” or “stain-block.” Apply evenly, follow manufacturer instructions, and verify compatibility with your chosen topcoat to prevent adhesion or sheen issues.
Step 3 Proper priming techniques (roller vs brush, drying times, number of coats)
A good primer job makes the difference between a crisp white finish and a patchy one, so choose your tools and timing deliberately:
Use a brush for edges and corners, a medium-nap roller for flats.
Apply one full coat, inspect for bleed-through, then add a second if needed.
Respect manufacturer drying times between coats and sand lightly for a smooth topcoat surface.
Step 4 Selecting the right white paint and sheen for best coverage
Since you’re covering blue walls, pick a white that masks color rather than one that merely brightens—opt for a high-quality, high-hide white paint (often labeled “tintable” or “mid/hi-hide”) and choose a sheen that suits the room’s use:
matte or eggshell for living areas to hide imperfections, satin for kitchens and bathrooms where wipeability matters, and semi-gloss for trim and doors.
Test samples on primered areas to confirm coverage and undertone before buying enough gallons.
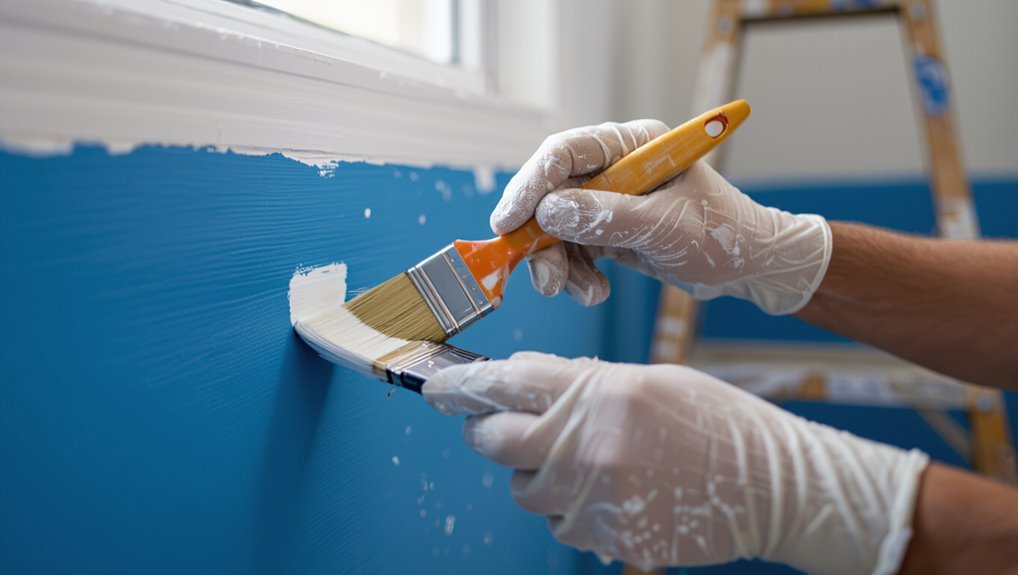
Step 5 First coat application strategies to prevent bleed-through
Although the primer should block most of the blue, you’ll still want a careful first coat technique to avoid bleed-through: load your brush or roller modestly, cut in edges with steady strokes, and feather into primed areas.
Work wet edges, avoid overworking, and keep a light, even film. Inspect as you go so you catch any faint blue and address it promptly.
Step 6 When and how to apply additional coats for full coverage
If you still see faint blue or uneven opacity after the first coat dries, plan for at least one more coat and be ready to add a third in high-contrast areas; wait the paint manufacturer’s recommended dry time, inspect under good light, and touch up any thin spots with a modestly loaded roller or brush, blending each pass into surrounding wet edges for a smooth, consistent finish.
Allow full cure between coats.
Step 7 Edge work, cutting in, and touch-ups for seamless finish
Step 7 focuses on clean edge work, cutting in, and targeted touch-ups so your new white paint looks crisp against trim and ceilings; use a quality angled brush to cut tight lines, keep a steady hand, and pull the brush toward the painted area.
Inspect for missed spots, feather edges with a damp brush, and apply small touch-ups with thin coats until coverage is flawless.
Alternative Methods and Quick Fixes
If the blue underneath is stubborn, try a tinted primer or color-correcting undercoat to neutralize it before you topcoat.
Pick shellac or oil-based primers for severe stains or tannin bleed, and use high-hide latex when coverage and low odor matter.
For short-term fixes, consider washable cover-ups or temporary coatings to brighten the wall until you can repaint.
Using tinted primers and color-correcting undercoats
A tinted primer or color-correcting undercoat can save you time and coats when you’re covering strong colors or stains, because these products neutralize underlying hues and let the white topcoat perform more evenly.
Choose a primer shade opposite the blue (warm beige or peach), apply one even coat, sand lightly if needed, then finish with your white paint for consistent coverage and fewer touch-ups.
When to use shellac or oil-based primers vs high-hide latex primers
Once you’ve neutralized strong hues with a tinted primer, pick the primer type based on what’s beneath the surface and the problem you’re solving: shellac or oil-based primers block heavy stains, nicotine, water damage, and odors better than latex, while high-hide latex primers are faster, lower-odor, and work well for regular color changes or slightly darker walls.
Choose shellac/oil for severe staining; use high-hide latex for routine repainting.
Temporary options: cover-ups and washable coatings
Sometimes you’ll want a quick, nonpermanent fix instead of a full repaint; removable wallpapers, peel-and-stick panels, and washable wall coatings let you cover flaws, tame strong colors, or protect high-traffic areas without committing to new paint.
You can apply a washable clear coat to reduce bleed, use opaque stick-on panels for bold coverage, or layer temporary fabric hangings for instant change.
Common Mistakes and How to Avoid Them
Don’t skip primer or grab the wrong type, because poor adhesion and blotchy coverage start there.
Take your time with full, even coats and clean the surface of grease, dust, or texture differences before you paint.
And avoid over-tinting white—too much pigment kills hiding power and forces extra coats.
Skipping primer or using the wrong primer
If you skip primer or pick the wrong type, your white paint may look uneven, require extra coats, or peel sooner than it should.
Use a high-coverage, stain-blocking primer designed for color changes—preferably one labeled for hiding deep hues.
Apply it evenly, let it fully dry, and choose oil- or shellac-based primer for tough bleeds. That prevents blue showing through.
Applying paint too thin or rushing coats
When you apply paint too thin or rush the drying between coats, the finish will look streaky, require extra layers, and won’t properly bond to the wall.
Work in even, full-bodied coats, maintain manufacturer-recommended drying times, and use proper tools—quality roller and brush.
Test a small area before proceeding. You’ll save time and get full coverage without color bleed-through.
Ignoring surface contamination and texture differences
Because even tiny dust, grease, or texture mismatches change how paint sticks and looks, you should clean and assess the wall before you open a can.
Wipe with degreaser, sand glossy spots, and fill holes. Match texture with skim coat or use a roller nap that mirrors the existing finish.
Prime stained or uneven areas so white lays down uniformly.
Over-tinting white paint and causing poor hiding power
Though tints can help you match a specific shade, over-tinting white paint weakens its hiding power and leaves walls looking patchy or translucent.
Don’t add extra color unless necessary; use factory-matched whites or professional tinting.
Prime first with a high-hide primer, apply proper coverage coats, and test a small area.
You’ll preserve opacity and avoid blue bleed-through.
Best Practices and Pro Tips for Professional Results
To get a truly professional white finish, you’ll want to control temperature, humidity, and ventilation and know the ideal wait times between primer and paint coats.
Pick and care for the right brushes and rollers to guarantee smooth coverage, and learn how to estimate paint needs so you’re not overbuying or skimping on coats.
With those basics dialed in, you’ll save time and money while achieving consistent, durable results.
Ideal environmental conditions (temperature, humidity, ventilation)
When you paint, aim for steady conditions: keep the temperature between 50–85°F (10–29°C), relative humidity around 40–60%, and guarantee good cross-ventilation so paint cures evenly and odors clear quickly.
Work when conditions are stable; avoid painting during rain, extreme heat, or high humidity.
Use fans or fresh-air intake to maintain airflow, and monitor a hygrometer and thermometer for consistent results.
Timing between primer and paint coats
If you want a smooth, durable finish, let the primer fully cure before applying paint—wet primer can trap solvents and cause peeling, while overcured primer may absorb paint unevenly.
Check manufacturer cure times (usually 1–24 hours), test tackiness, and work in recommended temperature/humidity.
Apply paint within the window, sanding glossy spots lightly. Rushing or waiting too long risks adhesion and finish problems.
Brush and roller selection and maintenance
Tools matter: choose high-quality brushes and rollers matched to your paint and surface, and keep them clean and stored properly so you get a smooth, even white finish every time.
Use synthetic bristles for latex, natural for oil, and nap length suited to texture. Clean immediately after use, reshape bristles, spin rollers dry, and store flat or hanging to prevent damage.
Estimating quantities and cost-saving tips without sacrificing coverage
After you’ve picked and cared for your brushes and rollers, it’s time to figure out how much paint you actually need and where you can save without losing coverage.
Measure walls, subtract doors/windows, and use manufacturer coverage rates to compute gallons.
Buy quality primer to reduce topcoat layers, shop mid-season sales, combine partial cans for touch-ups, and avoid thin coats—saving money while keeping professional results.
Troubleshooting If Blue Still Shows Through
If blue still peeks through, first figure out whether the primer failed, the white paint is low quality, or the application missed spots.
You can sand glossy areas, re-prime with a high-hide primer, and apply one or more solid cover coats until the blue is gone.
If the stain persists or you’re unsure of the fix, call a professional to avoid wasting time and materials.
Assessing cause: primer failure, paint quality, or application error
When blue keeps bleeding through, you’ll need to pinpoint whether the primer didn’t bond, the white paint lacks hiding power, or the application missed a step—each cause calls for a different fix.
Inspect adhesion, look for peeling or powdery primer, check the paint’s sheen and labeled coverage, and review your technique: coat thickness, drying times, and whether you mixed or thinned paint correctly.
Fix steps: sanding, re-priming, using cover coats
Start by sanding the problem areas smooth so primer and paint can bond properly: use 120–150 grit to remove gloss or loose primer, feather the edges into surrounding paint, and wipe away dust with a tack cloth.
Spot-prime with a high-hide bonding primer, allow full cure, then apply two thin white cover coats, sanding lightly between coats for uniform opacity and adhesion.
When to call a professional
You’ve already done the sanding, spot-priming, and two cover coats, but sometimes stubborn blue still peeks through despite your best efforts.
Call a professional if seepage persists after high-hide primer, stains reappear, or you spot moisture or adhesion issues.
Pros diagnose underlying stains, recommend specialty primers or stain blockers, and guarantee proper drywall repair and ventilation to prevent recurrence.
FAQ
You’ll want answers to a few common questions before you start, like how many primer coats block dark blue and whether a tinted white will hide the old color.
We’ll also cover if shellac primer is necessary, how long to wait before recoating, and whether trim and edges need a different approach than flat walls.
Read on for concise, practical guidance.
How many coats of primer do I need to block dark blue?
Wondering how many coats of primer it takes to block dark blue? Usually two coats of a high-hide stain-blocking primer suffice: one to seal and one to build opacity.
For very saturated or deep blues, apply a third coat or switch to a gray-tinted primer for better coverage.
Let each coat dry fully and sand lightly before topcoating for a smooth, bleed-free finish.
Can I use white paint with a tinting base to cover blue walls?
Can white paint with a tinting base cover blue walls effectively? You can, but tinted white reduces hiding power.
If the tint leans warm or gray it may mask blue better than pure bright white, yet you’ll probably need extra coats or a stain-blocking primer first.
For best results, test a small area and evaluate coverage before committing to full repainting.
Is shellac primer necessary or overkill for interior walls?
Is shellac primer really necessary for interior walls, or is it overkill for most jobs? You don’t always need it.
Use shellac when stains, heavy tannin bleed, strong odors, or glossy surfaces resist other primers.
For routine blue-to-white repainting, a quality acrylic or stain-blocking latex primer usually suffices.
Save shellac for tough spots or when rapid, reliable sealing is essential.
How long should I wait before recoating primer with paint?
Although drying times vary by primer type and conditions, you should usually wait 1–4 hours before recoating with latex paint and 24 hours for oil- or shellac-based primers.
Check the primer can for the manufacturer’s minimum dry time and make sure the surface is dry to the touch and no longer tacky before applying your topcoat.
If humidity’s high or temperatures are low, extend wait times to prevent adhesion or finish issues.
Will painting trim and edges differ from flat wall surfaces?
Once your primer has fully dried, you’ll notice trim and edges behave differently than flat wall surfaces and require a slightly different approach.
Use angled brushes for control, cut in slowly, and apply thinner coats to avoid drips.
Sand lightly between coats on trim for a smooth finish.
Mask adjacent walls if needed, and let each coat dry thoroughly before touching up.