
Do You Need to Sand a Ceiling Before Painting? The Answer Might Surprise You
You don’t always need to sand a ceiling before painting—if it’s clean, sound, and not glossy you can often skip heavy sanding by scuffing or using a high‑adhesion primer or liquid deglosser. Sand when surfaces are glossy, peeling, patched, or uneven to guarantee bond and smoothness. Use proper grit, a pole sander, and dust control for best results, and wear respiratory protection. Keep going for tips on materials, primers, and when to hire a pro.
How to Use This Guide
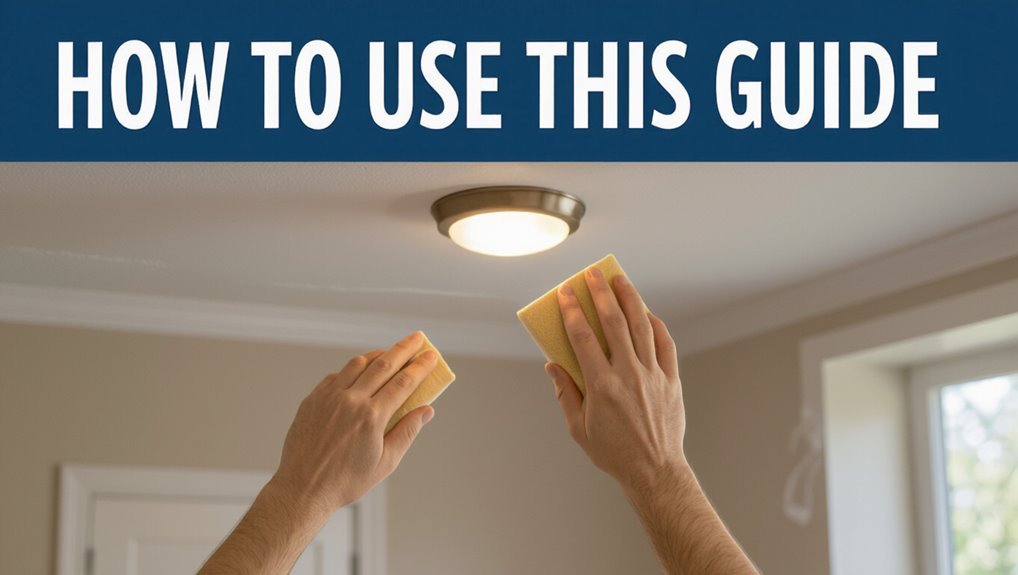
Before you start, skim the headings to find the steps and tips that match your ceiling type and condition. You’ll get guide benefits like time savings and fewer mistakes.
Follow preparation tips for masking, inspection, and dust control before tackling repairs or primer.
Use the checklist to decide if sanding’s necessary, pick tools, and schedule work so you finish efficiently and safely.
Short Answer: When You Must Sand a Ceiling
When do you have to sand a ceiling? You must sand when surfaces are glossy, peeling, patched, or uneven; sanding techniques remove sheen, feather patch edges, and smooth texture changes.
If ceiling finishes vary or old paint fails to adhere, sanding guarantees primer and new paint bond properly. Use appropriate grit and a pole sander to avoid gouging and achieve consistent surface readiness.
When You Can Skip Sanding and Still Get Good Results
Wondering if you can skip sanding and still get a smooth ceiling? You can when the surface is sound, clean, and previously painted with gloss or semi-gloss.
Use sanding alternatives like deglossers, high-adhesion primers, or cleaning plus scuffing with a nonabrasive pad.
Good ceiling preparation—patching, dust removal, and primer—lets paint adhere without full sanding.
How Ceiling Material Affects Sanding: Drywall, Plaster, Popcorn, Wood
Different ceiling materials change how you should sand before painting.
For drywall you’ll want light sanding to smooth joints and feather edges, while plaster may need more careful spot-sanding to avoid damage.
With popcorn ceilings you should avoid aggressive sanding since it can create a huge mess and release old contaminants.
Drywall: Light Sanding Recommended
If your ceiling’s made of drywall, plan on only light sanding to knock down joint compound ridges and smooth tape seams without over-thinning the paper surface.
You’ll use fine-grit sandpaper and gentle sanding techniques, working flashlight angles to spot imperfections. This cautious approach preserves drywall integrity, reduces dust spread, and makes future ceiling maintenance easier while ensuring paint adheres evenly.
Popcorn Ceilings: Avoid Aggressive Sanding
Because popcorn ceilings are fragile and often contain loose texture, you should avoid aggressive sanding that can ruin the finish or create a huge dust problem.
Instead, focus on gentle cleaning, spot-scraping loose bits, and using a light primer designed for popcorn ceiling maintenance.
That helps with ceiling texture preservation and reduces risk of damage, keeping texture intact for repainting or repair.
How Old Paint (Latex, Oil, Enamel) Changes the Approach
When you’re dealing with an older ceiling, the type of existing paint—latex, oil, or enamel—directly affects how you prep and whether you need to sand.
You’ll assess paint types and adhesion differences: latex usually bonds well to latex, oil or enamel may need deglossing or a primer to promote adhesion.
Light sanding scuffs glossy oil/enamel; use a bonding primer when in doubt.
When Peeling, Flaking, or Blistering Require Sanding First
If paint is peeling or flaking, you’ll need to scrape away loose sections before anything else so new paint will adhere.
For blistered areas, sand or level them until the surface is smooth and the edges are feathered.
Skipping these steps risks visible defects and poor adhesion after you paint.
Remove Loose Paint
Scrape away any loose, peeling, or blistering paint before you sand—the goal is to create a sound surface rather than sanding unstable flakes into dust.
Use a putty knife or scraper, work gently to avoid gouging, and vacuum debris. Removing loose paint improves paint adhesion and is a key step in ceiling maintenance.
Don’t skip this prep if you want a durable finish.
Smooth Blistered Areas
Although you’ve removed loose paint, you’ll still need to sand blistered spots to blend edges and restore a smooth surface before priming and repainting.
You’ll sand until feathered, treat raw areas with appropriate primer, and address underlying moisture issues to prevent recurrence.
Proper blister repair is essential for long-term ceiling maintenance, ensuring the new finish adheres evenly and lasts without peeling.
Texture Choices: Smooth Ceiling vs. Preserving Texture
Sometimes you’ll face a choice between smoothing a ceiling or keeping its texture, and that decision shapes prep time, tools, and the final look.
You’ll weigh texture maintenance against updated simplicity: smoothing hides flaws and modernizes, while preserving texture preserves character and hides imperfections.
Consider your aesthetic preferences, budget, and willingness to repair or touch up textured surfaces before committing to either approach.
Scuffing vs Sanding: Which Prep Method Should You Use?
You’ll usually start by scuffing to remove gloss and give new paint something to grip, since it’s faster and gentler on textured ceilings.
If you’re dealing with shiny, peeling, or patched areas, sanding those spots smooth will help the paint adhere and hide imperfections.
Choose scuffing for routine refreshes and targeted sanding when the surface needs real smoothing.
Scuffing Vs Sanding
When deciding between scuffing and sanding, think about the surface condition and the finish you want: you’ll use scuffing techniques for light adhesion issues and sanding tools for heavier imperfections. Compare quickly:
| Scuffing | Sanding |
|---|---|
| Light prep | Aggressive prep |
| Less dust | More dust |
| Fast | Slower |
| Paint-ready | Needs smoothing |
When Sanding Helps
If scuffing handles light adhesion problems, sanding steps in for tougher jobs where the surface needs shaping or major smoothing.
You’ll use sanding techniques to remove texture, level joints, or strip old paint so new coats bond. For damaged or glossy ceiling finishes, sanding creates the proper profile.
Choose grit and method for the material, then clean thoroughly before priming and painting.
What Grit and Tools to Use for Each Ceiling Job
Because ceiling surfaces and their conditions vary, choosing the right sandpaper grit and tools matters for efficiency and finish quality.
Because ceilings differ, pick sandpaper grit and tools that match the surface for efficient, high-quality results
You’ll match abrasiveness to damage and ceiling finishes, using proper sanding techniques for smooth results.
Consider:
- 120–150 grit for light scuffs
- 80–100 grit for rough patches
- Fine 220 for final smoothing
- Pole sander for reach
- Hand block for detail
Sanding a Ceiling Safely (Low-Dust Approach)
Now that you’ve picked grits and tools, focus on minimizing dust while sanding the ceiling so cleanup and indoor air quality stay manageable.
Use low dust techniques: attach a vacuum to the sander, work slowly, and mist minimally if appropriate.
Wear a respirator, goggles, and a disposable suit.
Follow sanding precautions: seal vents, cover furniture, and ventilate the room during and after sanding.
Pole Sander, Hand Sanding, or Sanding Sponge: When to Use Each
If your ceiling’s high or you want to cover more area quickly, you’ll reach for a pole sander because it gives reach and consistent pressure without a ladder.
For small spots, edges, or texture-sensitive areas you’ll do better with hand sanding to feel the surface and avoid gouges.
A sanding sponge can bridge the two—flexible for contours and gentle on finished surfaces.
Pole Sander Benefits
When you’re tackling ceilings, a pole sander lets you cover large areas faster and with less strain than hand sanding or using a sponge.
You’ll appreciate pole sander advantages and simple pole sander techniques for even finish and speed.
- Reach high spots safely
- Maintain consistent pressure
- Swap grits quickly
- Reduce fatigue
- Cut sanding time dramatically
Hand Sanding Tips
Decide which sanding method fits the job before you start — each tool shines in different situations and will save you time and effort when used correctly.
For hand sanding, follow technique tips: use a sanding sponge for corners, sandpaper for blemishes, and a pole for broad areas.
Prioritize ceiling preparation, dust management, safety measures, finishing touches, and practical effective methods to tackle common challenges and improve your sanding experience.
Skip Sanding? Deglossers, Chemical Strippers, and Primers
Wondering whether you can skip sanding? You can often avoid abrasive work by using deglossing techniques, careful chemical applications, or the right primer—each has pros and limits.
Consider:
- Use liquid deglosser for glossy paint
- Test chemical stripper in a small area
- Clean thoroughly after treatment
- Guarantee good ventilation and PPE
- Spot-prime treated areas before repainting
Picking a Primer That Avoids Sanding
1 smart primer can save you hours of sanding by bonding to glossy, stained, or chalky surfaces and giving new paint a reliable base.
Choose primer options labeled “bonding,” “stain-blocking,” or “adhesion” for ceilings. You’ll skip aggressive prep when you follow manufacturer directions, use appropriate nap rollers, and spot-treat problem areas.
These sanding alternatives streamline work and improve finish durability.
Quick Tests to See If Your Ceiling Needs Sanding
Curious whether your ceiling really needs sanding or if you can skip it?
Do a quick ceiling inspection and try simple checks to decide if sanding alternatives will work:
- Rub a white cloth over paint for residue.
- Press lightly for soft spots.
- Use a flashlight to spot bumps.
- Scratch an inconspicuous area for adhesion.
- Tap for hollow sounds indicating loose plaster.
Fixing Common Ceiling Defects Before Painting
Before you start painting, fix any common ceiling defects so the finish will look smooth and last longer.
Inspect for cracks, water stains, and texture damage, noting ceiling imperfections.
Check the ceiling for cracks, water stains, and texture damage, and note all imperfections before repairing.
You’ll patch cracks with flexible filler, sand lightly, treat stains with stain-blocking primer, and replace damaged drywall or texture.
Use appropriate repair techniques and allow drying time before priming and painting for durable results.
Best Paints for Ceilings You Didn’t Sand
If you skipped sanding, pick paints that hide imperfections and stick well to existing surfaces.
Choose a quality ceiling paint with good coverage and a forgiving paint finish.
Consider these options to minimize prep and maximize results:
- High-hide flat ceiling paint
- Thick, high-build formulations
- Primer-and-paint combos for ceilings
- Stain-blocking ceiling paints
- Low-splash, roll-friendly formulas
How Sanding Affects Adhesion and Durability
When you sand a ceiling you create a slightly rough surface profile that helps paint grip better.
That improved profile directly boosts paint bond longevity, cutting down on peeling and flaking over time.
Even light sanding can make a noticeable difference in how long your finish lasts.
Surface Profile Importance
Because paint needs something to grip, the ceiling’s surface profile directly controls adhesion and long-term durability.
You’ll focus on surface preparation to create the right texture so paint adhesion isn’t compromised. Sanding adjusts roughness, removes gloss, and evens surfaces.
Consider these actions:
- scuff glossy areas
- smooth bumps
- remove loose material
- blend repairs
- clean dust before painting
Paint Bond Longevity
Although often overlooked, sanding directly governs how long paint stays bonded to your ceiling; by removing glossy finishes, roughening smooth surfaces, and eliminating loose material you give paint the microscopic tooth it needs to grip. You’ll improve paint adhesion and durability with proper surface preparation.
| Step | Effect | Result |
|---|---|---|
| Sand | Removes gloss | Better grip |
| Clean | Removes dust | Longer bond |
| Prime | Seals | Durability |
| Paint | Finish | Lasting coat |
Time, Cost, and Effort: Sand Now or Touch Up Later?
Wondering whether to sand the ceiling now or just touch up problem spots later? You’ll weigh time management and cost analysis: sanding upfront saves recurring touch-ups, but it takes more labor.
Consider these factors:
- upfront labor vs future fixes
- material costs now or later
- disruption length
- quality and finish consistency
- likelihood of recurring problems
Choose based on budget, time, and patience.
DIY Checklist: Step-by-Step Ceiling Prep and Paint
If you decide to sand now rather than patch later, follow a clear step-by-step checklist to get your ceiling ready and paint it right the first time. You’ll prep, repair, prime, and use proper painting techniques to protect finish and guarantee ceiling maintenance. Be methodical, work top-down, and check coverage.
| Prep | Repair | Paint |
|---|---|---|
| Dust | Fill | Prime |
| Sand | Smooth | Roll |
Respiratory Protection and Cleanup Tips
How will you protect your lungs while sanding and cleaning up ceiling dust?
Wear proper respiratory masks, work ventilated, and contain the area. Follow these concise tips:
- Use N95 or P100 respiratory masks
- Turn on fans and open windows
- Hang plastic sheeting to isolate dust
- Vacuum with HEPA filter
- Wet-wipe surfaces for final dust cleanup
When to Call a Pro for Sanding or Repairs
If you spot sagging, cracks through the drywall, or signs of water damage, you should get a pro to assess structural issues before sanding.
Likewise, when the ceiling’s texture is badly crumbling or you need a full texture match, a contractor can handle the extensive restoration.
Calling a pro early can save time and prevent costly mistakes.
Structural Damage Assessment
When you spot large cracks, sagging areas, or water stains that keep returning, don’t assume sanding and paint will fix them; these signs often point to underlying structural or moisture problems that need a pro’s eye.
You should assess ceiling integrity and note damage signs.
Consider calling a contractor when you see:
- spreading cracks
- persistent stains
- bulging plaster
- visible mold
- squeaking joists
Extensive Texture Restoration
Texture matters: extensive ceiling texture damage—peeling knockdown, crumbling popcorn, or uneven skim coats—usually calls for a pro, since they’ll know when to sand, reskim, or replace sections to avoid hollow spots and visible repairs.
You’ll want an expert for texture repair and advanced restoration techniques; they’ll assess substrate integrity, match patterns, and prevent recurring failures so your repaint holds and looks seamless.
Common Mistakes People Make When Sanding Ceilings
Sanding a ceiling seems simple, but a handful of common mistakes can ruin your results and waste time.
You need solid sanding techniques and proper ceiling preparation to avoid problems. Watch for these errors:
- Skipping dust containment
- Using the wrong grit
- Applying uneven pressure
- Ignoring fixtures and edges
- Not testing adhesion first
Fixing these keeps your paint job smooth and lasting.
Quick Decision Guide: Should You Sand Your Ceiling Today?
Want to know if you should sand your ceiling today? Check surface condition: flaking, gloss, or uneven patches mean sand.
If it’s clean, matte, and well-adhered, you can skip sanding.
Consider ceiling aesthetics versus effort—sanding smooths texture and improves paint longevity.
For repairs, skim and sand; for simple refreshes, use a bonding primer instead of full sanding.
Frequently Asked Questions
Can I Paint a Ceiling Immediately After Water Stain Removal?
You can’t paint immediately after water stain removal; you’ll need to let the area fully dry, treat stains with a primer, then proceed with ceiling paint application so the finish adheres and stains won’t bleed through later.
Will Sanding Disturb Asbestos in Older Ceilings?
Measure twice, cut once: yes, sanding can disturb asbestos in older ceilings. You should get asbestos testing first, avoid DIY sanding, and prioritize ceiling safety by hiring certified pros who contain and remove hazardous dust safely.
How Long Should Primer Dry Before Repainting the Ceiling?
You should wait about 1–4 hours after primer application before repainting the ceiling; depending on humidity and product, some primers need up to 24 hours. Guarantee proper ceiling preparation and follow the primer’s instructions for best results.
Can Ceiling Fans Be Left in Place During Sanding and Painting?
Yes — you can leave ceiling fans in place, but you’ll want fan removal if you’re serious: tape and drape like your fan’s a fragile spaceship, use gentle sanding techniques, and protect blades and motor from dust.
Are Odor-Eliminating Paints Safe for Bedrooms With Poor Ventilation?
Yes—you can use odor-eliminating paints in poorly ventilated bedrooms, but you’ll want products with low VOCs and tested odor absorption; follow label instructions, air out when possible, and consider an air purifier for added paint safety.
