
How to Paint Foam Ceiling Tiles Without Ruining Them
You can paint foam ceiling tiles safely by choosing foam‑safe primers and low‑VOC water‑based acrylic or enamel paints, testing on a spare tile first, and avoiding solvents like acetone or xylene that melt foam. Clean gently, patch dents, seal edges, and apply thin even coats with a roller or foam‑safe spray from 8–12″ away, allowing full cure between coats. Wear a NIOSH respirator, gloves, and ventilate well — keep going to get step‑by‑step prep, primer choices, and troubleshooting tips.
Do You Need to Paint Foam Ceiling Tiles? Pros and Alternatives
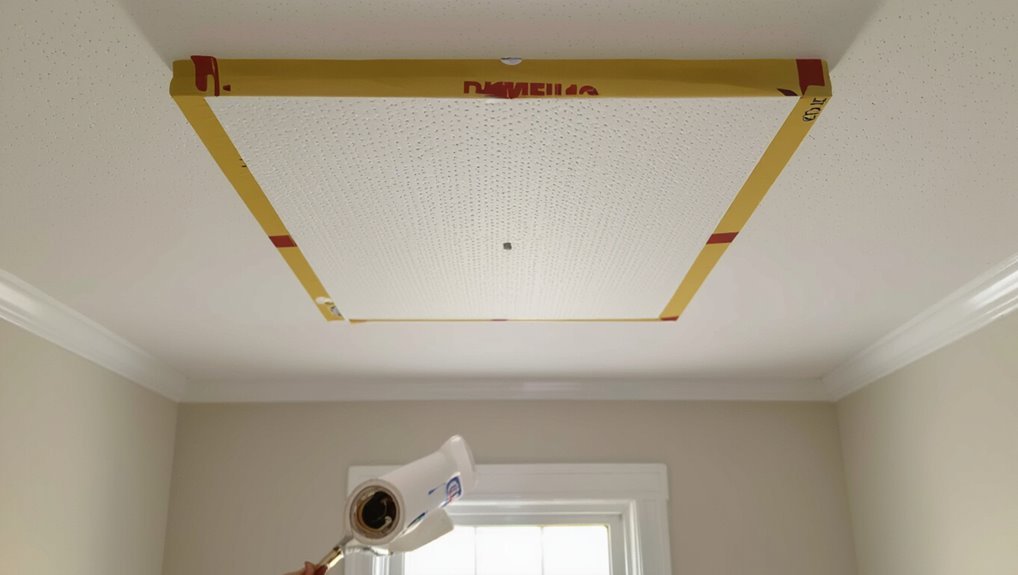
Painting foam ceiling tiles isn’t strictly necessary, but it can solve problems and improve appearance quickly—especially if your tiles are discolored, stained, or you want a uniform look.
You’ll weigh cost comparison between painting, replacing, or covering tiles, consider installation logistics like access and drying space, and choose paint or peel-and-stick alternatives that match durability needs without unnecessary expense or hassle.
What Can Go Wrong If You Paint Foam Tiles the Wrong Way?
If you rush the prep or pick the wrong products, you’ll end up with bubbling, peeling, or a finish that soaks into the foam and looks uneven.
You can also trigger chemical reactions that dissolve or discolor the tiles, weaken adhesives, or release odors.
Poor coating choices and heavy layers may cause structural failure, sagging, or flaking, forcing costly replacement instead of a simple refresh.
Which Foam Ceiling Tiles Can Be Painted (How to Tell)
Start by checking the tile’s material and surface—expanded polystyrene (EPS) and polyurethane foam are usually paintable, while some closed-cell foams or tiles with factory coatings won’t take paint well. Look for Material labels and inspect Edge profiles.
Check the tile material and finish first—EPS and polyurethane usually accept paint; factory-coated or closed-cell foams may not.
Then:
- Test a hidden corner with primer.
- Sand lightly if textured.
- Avoid solvent paints unless specified.
Essential Tools and Safety Gear for Painting Foam Tiles
Before you start painting foam ceiling tiles, make sure you’ve got the right protective gear—gloves, eye protection, and a respirator for solvent or spray fumes.
You’ll also need basic painting tools like brushes, rollers, and drop cloths suited to delicate foam.
Finally, set up good ventilation in your workspace to prevent fume buildup and keep the tiles drying properly.
Protective Gear Basics
Usually you’ll want to gear up before you touch paint: protective equipment isn’t optional when working with foam ceiling tiles because it keeps you safe from fumes, dust, and accidental contact.
Choose respirator selection carefully and pick appropriate glove materials.
Wear eye protection and coveralls. Consider:
- NIOSH-rated respirator
- Nitrile gloves (thin, chemical-resistant)
- Safety glasses and disposable coveralls
Essential Painting Tools
When you’re ready to paint foam ceiling tiles, gather a compact kit of tools that’ll keep the job clean, efficient, and safe: a NIOSH-rated respirator and safety glasses for protection; nitrile gloves and disposable coveralls to prevent contact; a high-quality foam or high-density roller and a small synthetic-bristle brush for even coverage; a paint tray and low-nap roller covers to minimize texture pickup; and fine-grit sanding sponge, tack cloths, and painter’s tape for prep and tidy edges.
Choose brush selection that won’t shed, label cans, and plan paint storage to avoid contamination.
Workspace Ventilation Needs
You’ve got the right safety gear and tools, but proper airflow makes them work better—good ventilation clears fumes, controls overspray, and keeps dust from settling on wet paint.
- Open windows and use fans to guarantee steady air exchange.
- Use a suitable respirator selection for solvent or spray paints.
- Position exhaust toward outdoors and avoid blowing dust onto tiles.
Which Primers Are Safe for Foam : And Which to Avoid
Before you prime foam ceiling tiles, know that some primers will dissolve or warp the material while others create a safe, long-lasting base—so pick products labeled safe for polystyrene or polyurethane and avoid solvent-based primers and any that list acetone, toluene, or xylene.
Use solvent free primers and adhesion promoters formulated for foam; test a small piece first and skip heavy-duty automotive or epoxy primers.
Best Paint Types for Foam Ceiling Tiles: Latex, Acrylic, Spray
Choose paint that protects the foam and gives the finish you want: water-based latex and acrylic paints are the safest everyday options for polystyrene and polyurethane tiles, while spray paints—when labeled foam-safe—offer fast, even coverage and easier detailing.
- Use low VOC acrylic for indoor safety and flexibility.
- Pick waterbased enamel for tougher, washable surfaces.
- Choose foam-safe spray for texture and tight areas.
How to Test Primer and Paint on a Hidden Tile
Pick a hidden or spare tile in a corner or attic stash to test primer and paint before you tackle the whole ceiling.
Apply your chosen primer and paint, then check adhesion by gently fingernail-scratching and confirm drying time matches the product label.
If the finish stays intact and dries as expected, you can proceed with confidence.
Choose A Hidden Tile
Find a tile that’s out of sight—behind a light fixture, in a closet, or above a cabinet—and test your primer and paint there first. Pick a hidden tile or stash tile for lighting tests and an odor check.
Try this quick list:
- Clean spot
- Apply primer
- Paint sample
Observe color, sheen, and scent before proceeding.
Conduct Adhesion And Drying
Start by checking how well the primer and paint actually stick and how they dry on your hidden tile—this tells you whether the coatings will hold up across the ceiling.
Do adhesion testing: tape or score and pull after curing to confirm no peeling.
Note the drying environment—temperature, humidity, airflow affect cure time.
Adjust product or conditions before painting visible tiles.
How to Prep Foam Tiles Without Tearing or Denting Them
Before you touch a brush, handle each foam tile gently and plan your workspace so you don’t tear or dent them. You’ll use gentle handling, light foam scoring for edges, and padding workspace; reduce static to prevent clinging.
Steps:
- Lay soft padding and anti-slip mat.
- Lightly score only where necessary.
- Use an ionizer or dryer’s cool air for static reduction.
Cleaning Foam Tiles: Dust, Grease, and Stain Removal
Often you’ll need to clean foam ceiling tiles gently yet effectively, because dust, grease, and stains behave differently and require different approaches.
You’ll start with light dust removal using a soft brush or vacuum on low.
For grease elimination, dab with a mild detergent solution and blot; avoid soaking.
For stubborn marks, test a mild cleaner on an inconspicuous spot first.
How to Repair Dents, Tears, and Stains Before Painting
When you find dents, tears, or persistent stains on foam ceiling tiles, repair them first so paint adheres evenly and looks professional.
Repair dents, tears, and stains on foam ceiling tiles first so paint adheres smoothly and looks professional.
Follow these concise steps:
- Use gentle dent patching with foam-safe filler; press and smooth.
- Mend tears with thin adhesive backing and trim excess.
- Apply stain priming to sealed spots so paint covers uniformly and prevents bleed-through.
Step‑by‑Step: How to Prime Foam Ceiling Tiles
Before you prime, make sure the tiles are clean and free of dust, grease, or loose debris so the primer bonds properly.
Pick a primer labeled for foam or low-VOC acrylic that won’t dissolve the material and provides good adhesion.
I’ll walk you through the quick surface prep and the best application techniques.
Surface Cleaning
Start by wiping each foam tile with a dry microfiber cloth to remove dust and loose particles so primer will adhere evenly.
Then clean gently to avoid damage:
- Use gentle vacuuming with a brush attachment for grooves.
- Spot-treat stains with a damp cloth and mild soap.
- Avoid steam cleaning directly on thin foam; if needed, use low heat and test a scrap tile first.
Primer Selection
Choosing the right primer is essential because it locks in paint adhesion and prevents discoloration. You’ll pick foam friendly primers formulated for porous, lightweight tiles; they won’t dissolve texture.
Test a small area, then apply thin, even coats. If you’re sensitive or worried about fumes, choose solvent free alternatives that still bond well. Allow full cure before painting.
Brush and Roller Technique for Painting Foam Tiles
Grab a good-quality synthetic brush and a mini-roller to tackle foam ceiling tiles efficiently, since each tool handles different surface features: the brush gets into creases and embossed patterns, while the roller covers flat areas quickly and lays down an even base.
Grab a quality synthetic brush and mini-roller—brush creases, roller cover flats for a quick, even finish.
Use Feathering strokes and Cross hatching, mind Roller nap, and finish with Back rolling.
- Prep
- Paint
- Smooth
Spray Paint and HVLP: How to Avoid Melting Foam
Before you spray your foam tiles, test the paint on a scrap piece to make sure it won’t eat into the material.
Choose low-solvent or water-based paints formulated for foam to minimize chemical reaction.
Keep the nozzle at a steady distance and continuous motion so the spray doesn’t puddle or soften the tile.
Test Spray On Scrap
Always test-spray a scrap piece of foam before committing to a whole tile: solvent-based sprays and even some HVLP setups can soften or melt foam, and a quick trial shows whether your chosen paint and settings are safe. Check spray compatibility and smart scrap selection. Then:
- Spray at distance.
- Wait full cure.
- Inspect for tackiness or distortion.
Use Low-Solvent Paints
Frequently, the safest way to paint foam tiles is to choose low-solvent paints and adjust your spray method so the foam doesn’t soften or melt.
You should prefer waterborne enamel or odorless acrylic options labeled low solvent. Test on scrap, thin coats, and allow full drying between passes.
These products cut fumes and chemical attack, letting you get durable coverage without damaging delicate foam.
Maintain Distance And Motion
When spraying foam ceiling tiles, keep the nozzle back and keep moving — too close or lingering in one spot will soften or melt the foam. You’ll use steady arm motion and distance control to protect texture.
Follow these steps:
- Keep a consistent 8–12″ distance.
- Use smooth, overlapping passes.
- Never hover; keep spray moving.
How Many Coats You Need and Drying Times
You’ll usually need two thin coats of paint for foam ceiling tiles: the first to seal and the second to build even coverage and color. Keep coat count minimal to avoid saturation.
Allow manufacturer-recommended Drying schedule—typically 30–60 minutes between coats for water-based paints, longer for oil-based. Check touch-dry, then recoat; full cure can take 24–72 hours depending on humidity and temperature.
How to Prevent Sagging, Bubbling, and Texture Loss
Start by cleaning and sanding the tiles so paint will stick without lifting.
Choose low-odor, water-based paints formulated for foam to avoid chemical softening and bubbling.
Apply several thin coats rather than one thick one to preserve texture and prevent sagging.
Proper Surface Preparation
Because foam ceiling tiles are lightweight and porous, you’ll need to prepare them carefully to avoid sagging, bubbling, or losing their texture once painted. Clean, dry, and test a small area first.
Then:
- Use gentle cleaning and allow full drying.
- Apply foam primering thinly to seal pores.
- Perform edge sealing and avoid heavy coats that add weight.
Use Low-Odor Paints
After sealing and priming, pick a low-odor, water-based paint formulated for foam so you won’t add solvents that can soften or warp the tiles.
You should choose eco friendly, low odor products and avoid solvent-heavy enamels; aromatic solvent alternatives like waterborne acrylics prevent sagging, bubbling, and texture loss.
Test a small tile first, and make sure good ventilation while you paint.
Apply Thin Multiple Coats
Work in thin, even layers so each coat dries quickly and won’t weigh down or dissolve the foam’s texture.
You’ll avoid sagging, bubbling, and texture loss by applying multiple thin coats instead of one heavy one.
Tips:
- Use thin layers with a light roller or brush.
- Wait between coats; slow dries need patience.
- Sand very lightly if needed before next coat.
Painting Tiles on the Ground vs. on the Ceiling: Pros and Cons
When deciding whether to paint foam ceiling tiles on the ground or after they’re installed, consider trade-offs in control, finish quality, and convenience; painting on the ground gives you better access and fewer drips, while painting overhead saves handling and avoids reinstallation.
You’ll control finish and use proper ceiling staging for batches, or prioritize ladder ergonomics and faster install when painting in place.
Optional: Decorative Patterns, Metallics, and Faux Finishes
If you want more than a single solid color, decorative patterns, metallics, and faux finishes can turn plain foam tiles into a focal point.
Try these techniques to customize tiles without damage:
- Use metallic stenciling with light, flexible acrylics for crisp, raised motifs.
- Layer glaze washes to create a subtle faux patina.
- Highlight edges with dry-brushed metallics for depth and realism.
Maintenance and Touch‑Up Tips After Painting
Regularly check your painted foam tiles for scuffs, chips, or peeling so you can address small issues before they spread.
Perform routine inspections monthly, gently cleaning with a soft cloth and mild detergent.
Keep a basic touch up kit—matching paint, small brush, and sealant—for quick fixes.
Spot-repair minor blemishes promptly to preserve finish and prevent moisture damage.
When Replacement Is a Better Option Than Painting
Even with prompt touch-ups, some foam tiles reach a point where painting won’t restore function or appearance, and you’ll want to replace them instead. Consider Replace vs.Repair and a clear Cost Threshold when deciding.
When painting no longer fixes damage, weigh Replace vs. Repair—set a clear cost threshold before replacing.
Evaluate:
- Severe structural damage or crumbling.
- Persistent stains or odor that painting won’t mask.
- Replacement cost near or below repair plus repeat maintenance.
Troubleshooting: Peeling, Discoloration, and Warping Fixes
When tiles start peeling, discoloring, or warping, tackle each issue quickly to prevent further damage and avoid costly replacement.
For peel diagnosis, gently test edges, reseal with compatible primer and flexible paint, and replace badly bonded tiles.
For discoloration, clean stains and use stain-blocking primer.
For warping, control humidity mitigation with ventilation or dehumidifiers, and reattach or replace compromised tiles.
Frequently Asked Questions
Can Painted Foam Tiles Affect Indoor Air Quality or Emit VOCS?
Yes — painted foam tiles can emit VOCs, so you should expect VOCs concerns; choose low‑VOC paints, let coatings cure fully, and guarantee good indoor ventilation to minimize odors and potential air quality impact.
Will Paint on Foam Tiles Impact Home Insurance or Building Codes?
Generally, you won’t void insurance simply by painting foam tiles, but you should check insurance implications and code compliance first; improper materials or altered fire ratings could affect claims, inspections, or violate local building codes.
How Long Does Painted Foam Tile Color Reliably Last Before Fading?
You’ll see painted foam tile color longevity typically last 3–10 years before noticeable fading; UV resistance, quality paint, and proper priming extend that span, like a sun-worn fresco slowly softening under steady daylight exposure.
Can I Paint Foam Tiles That Have Existing Adhesive or Wallpaper Residue?
Yes — you can, but you’ll need proper cleaning methods and adhesive removal first. You’ll scrape gently, use mild solvent or warm soapy water, rinse and dry thoroughly, then prime with compatible primer before repainting to avoid damage.
Are There Eco-Friendly or Low-Waste Disposal Options for Painted Foam Tiles?
Yes—you can choose greener routes: treat painted tiles like weathered leaves, drop them at recycling centers if accepted, seek compostable alternatives for future tiles, or donate, repurpose, and upcycle to cut landfill waste.
