
How to Protect Your Ceiling When Painting Walls (Without Taping Everything)
You can keep your ceiling clean without taping everything by preparing the room, using low‑splatter paint, and cutting in with an angled sash brush or an edger tool. Hold a paint shield or trim guard as you work, use corner guards and temporary plastic sheeting for fixtures, and roll with a consistent technique to avoid splatter. Protect furniture and vents, clean small smudges promptly, and follow pro habits for crisp lines—scroll on to pick up specific tools and tips.
Why Protecting the Ceiling Matters Before You Paint Walls
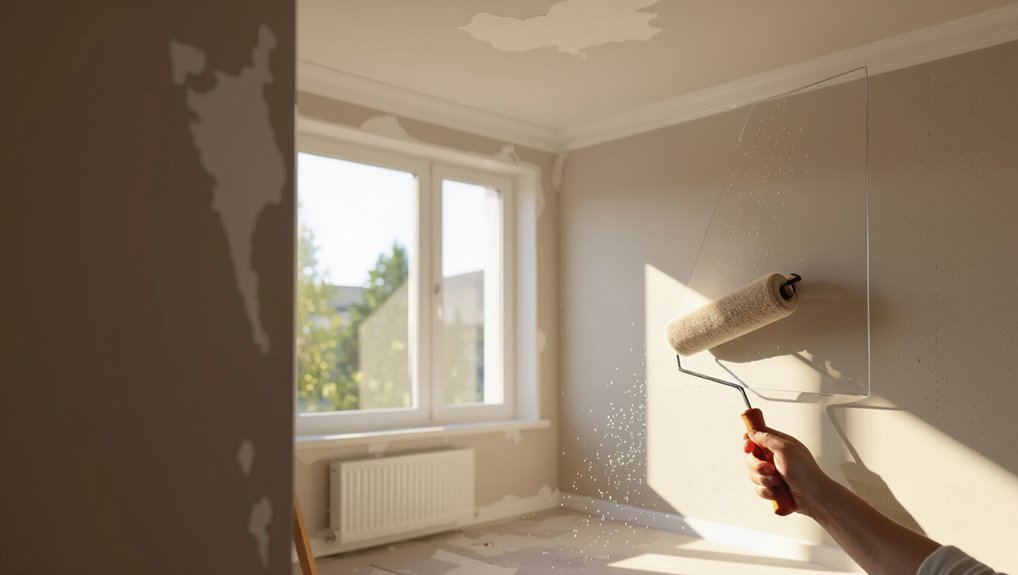
Because paint splatter and rollers can easily reach the ceiling, protecting it before you start saves time and prevents noticeable mistakes.
You’ll keep ceiling aesthetics crisp, avoiding uneven edges or accidental color bleed that ruin the overall look.
Preserving that clean line enhances wall contrast and makes touchups simpler.
A crisp edge boosts wall contrast and makes future touchups quick and nearly invisible.
You’ll work faster, with fewer fixes and a more professional finish.
Quick Checklist: Prep a Room for Tape‑Free Painting
Now that you’ve protected the ceiling, get the room ready for tape‑free painting with a short, focused checklist.
Clear furniture away or center and cover it, remove switch plates and outlet covers, clean walls and baseboards, lay drop cloths, secure edges with weight or clips, check lighting, and gather quality rollers and angled brushes.
Reduce paint splatter by using proper tools and steady technique.
When You Can Skip Taping the Ceiling Safely
If you pick a low-splatter paint, have steady hands and the right tools, and your ceiling is in good shape, you can often skip taping without risking mess.
You’ll want to assess paint type, your experience with a steady brush or angled edger, and whether the ceiling has cracks or texture that will catch stray paint.
Make those checks before you decide to go tape-free.
Low-Splatter Paint Choice
Pick a low-splatter paint when you want to skip taping the ceiling without risking a mess: these formulations are thicker, have fewer airborne droplets, and lay down more cleanly from a roller or brush, so you’ll get crisper edges and less need for touch-ups.
Choose low splatter options with good paint durability, test on a scrap, and use a dense nap roller for controlled coverage.
Skill And Tool Level
When you’ve got steady hands and the right tools, you can skip taping the ceiling without inviting drips or ragged edges. Focus on skill improvement and smart tool selection: practice cutting in, use an angled brush, and pick a good edger or shield. Assess confidence before skipping tape.
| Skill | Tool |
|---|---|
| Cutting-in | Angled brush |
| Confidence | Paint edger |
| Practice | Shield |
| Speed | Roller with guard |
Existing Ceiling Condition
Because a ceiling’s texture, color, and condition determine how forgiving it is, you should only skip taping if the surface is smooth, light-colored, and free of stains or flaking paint.
Do a quick ceiling inspection and surface assessment before deciding.
Consider these factors:
- Smoothness
- Light tone
- No stains
- No loose paint
Tools That Replace Full‑Edge Masking Tape
You don’t always need full‑edge masking tape to keep paint off the ceiling; several specialized tools let you work faster and cleaner. Use masking putty alternatives and removable caulk techniques with push-on shields, edging tools, and corner guards to protect seams. Choose reusable guards for trims and a trim roller with a shield for long runs.
| Tool | Best use |
|---|---|
| Paint shield | Straight edges |
| Corner guard | Inside corners |
| Trim roller | Long walls |
| Putty strips | Small gaps |
| Removable caulk | Sealing edges |
Use an Angled Sash Brush for Clean Ceiling Lines
One angled sash brush can make the difference between a sloppy ceiling edge and a crisp one, so pick a 2–2.5 inch brush with stiff, tapered bristles and a comfortable handle.
You’ll use angled brush techniques for smooth, steady strokes and precision cutting along the joint.
Tips:
- Load sparingly.
- Anchor bristles to ceiling.
- Stroke away from tape.
- Feather into wall.
Use an Edger Tool to Cut In Without Tape
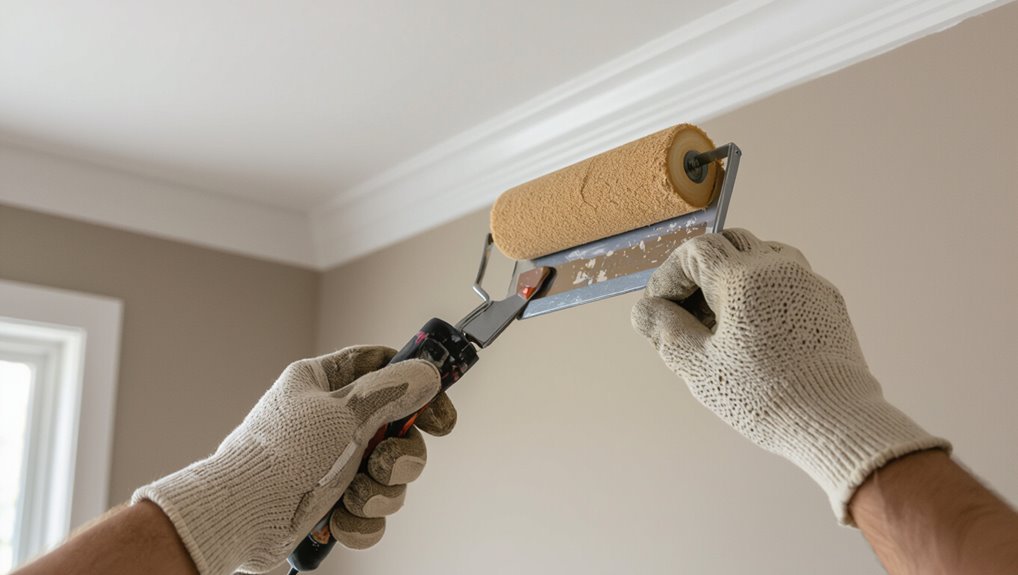
When you want crisp ceiling lines without the fuss of tape, an edger tool lets you cut in quickly and cleanly by guiding paint along the joint with a built-in shield; pick a quality edger with a comfortable handle and replaceable pads so you get consistent coverage and minimal bleed.
Use steady pressure, overlap short strokes, and change pads often — edger tool benefits and cutting technique tips combined.
How a Paint Shield or Trim Guard Prevents Splatter
A paint shield or trim guard catches stray drips and flicks as you roll or cut in, so you can work closer to the ceiling without worrying about splatter; hold the guard flush against the wall and move it steadily while brushing or rolling to prevent gaps that let paint through.
You’ll notice paint shield benefits and trim guard effectiveness immediately.
- Blocks flicks
- Speeds edging
- Reduces cleanup
- Fits contours
Roller Technique That Keeps Paint Off the Ceiling
Pick a dense, low-nap roller to control splatter and lay down even coverage near the ceiling.
Keep the roller at a steady, slight angle so paint stays on the wall and not the overhead edge.
With the right roller and consistent angle, you’ll cut down on touch-ups and protect the ceiling.
Choose The Right Roller
One simple way to keep paint off the ceiling is to choose a roller with the right nap and size for your wall texture and reach.
Pick roller types and roller materials that suit smooth, semi-rough, or textured walls. Use a slim edge or trim roller near corners and a short nap for control.
- Smooth walls: short nap
- Textured: longer nap
- Trim roller: narrow
- Quality materials: lint-free
Maintain A Consistent Angle
When you keep the roller at a steady, slight angle—about 10–15 degrees away from the ceiling—you’ll have better control over where the paint lands.
Hold the pole so the nap brushes wall, not ceiling; practice angle maintenance by rolling with smooth, even strokes.
Use a consistent technique across the wall, reload sparingly, and back-roll edges to prevent splatter and unwanted ceiling marks.
Adjusting Roller Nap to Protect the Ceiling
Although it’s tempting to grab the thickest roller and go, matching your roller nap to the paint and wall texture is the quickest way to keep paint off the ceiling.
You’ll reduce splatter and overlap into ceiling protection zones by choosing the right pile and loading technique.
- Pick nap for texture
- Load sparingly
- Use a thinner edge nap
- Roll away from ceiling
How to Hold and Move the Brush for Straighter Edges
Start by gripping the brush like a pencil—hold it near the ferrule for control and keep your wrist steady so you can guide precise strokes along the ceiling line. Move with short, deliberate brush strokes, angling bristles to maintain edge control. Keep a light touch and pause to wipe excess paint.
| Tip | Action | Result |
|---|---|---|
| Grip | Near ferrule | Control |
| Motion | Short strokes | Straight edge |
| Pressure | Light | No drips |
| Angle | Slight tilt | Seal line |
| Pause | Wipe excess | Clean finish |
How to Use an Extension Pole Without Hitting the Ceiling
After you’ve nailed steady brushwork along the ceiling line, switch to an extension pole to cover larger wall areas without grazing the ceiling.
Use extension pole techniques that keep the roller low and angled away from trim. Rely on ceiling protection tips like light pressure and short strokes.
- Adjust pole length
- Keep roller horizontal
- Use light pressure
- Pause at edges
How to Control Paint Load and Avoid Drips on the Ceiling
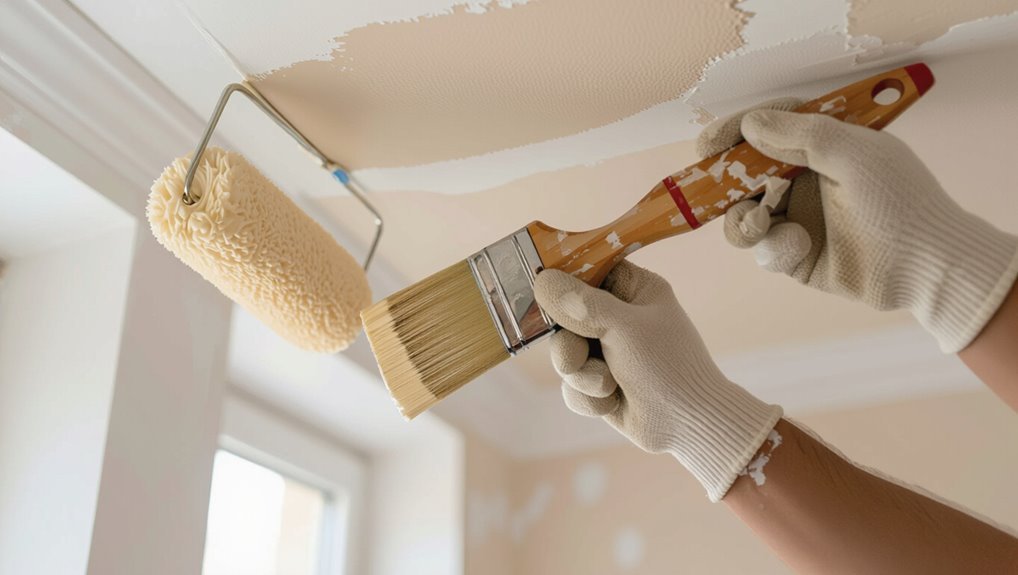
Control the paint load on your roller and brush so you don’t drip onto the ceiling: dip lightly, roll or tap off excess, and reload more often rather than over-saturating. Monitor paint consistency and follow basic ceiling preparation. Use controlled strokes, keep a clean edge, and work in small sections.
| Tool | Tip | Frequency |
|---|---|---|
| Roller | Tap off | Often |
| Brush | Dip lightly | Regularly |
| Tray | Wipe lip | Every refill |
Create a Temporary Ceiling Barrier With Plastic Sheeting
Once you’ve kept paint load in check to prevent drips, protect the ceiling further by installing a temporary barrier of plastic sheeting.
You’ll hang it along the wall-ceiling seam, securing with low-tack tape or clips to avoid damage. This provides quick ceiling protection and catches splatter without full taping.
- Measure
- Cut
- Secure
- Remove gently
Use Painter’s Fleece and Drop Cloths at Wall Intersections
When walls meet, use painter’s fleece to cushion corners and keep paint from sneaking onto the ceiling.
Lay drop cloths with overlapping seams and secure them so dust and drips can’t migrate.
Tape the fleece to trim for a snug seal that’s easy to remove when you’re done.
Protecting Corners With Fleece
If you’re painting near corners, fit painter’s fleece into the junction and weigh it down with a drop cloth to stop paint splatter and drips from seeping onto the ceiling or adjacent wall.
You’ll enjoy fleece benefits like absorbency and easy removal for precise corner coverage. Use this quick routine to keep edges clean.
- Tuck fleece tightly
- Smooth seams
- Secure with weight
- Replace when soaked
Securing Drop Cloth Seams
After tucking and weighting fleece into corners, turn your attention to the seams where drop cloths meet at wall intersections—these junctions are where paint can sneak through gaps or run along overlaps.
You’ll position drop cloths placement so edges overlap slightly, then use seam securing techniques like small binder clips, clothespins, or weighted stones to hold overlaps flat.
Check and adjust as you paint.
Taping Fleece To Trim
Tear strips of painter’s fleece to fit trim lengths and press them firmly against baseboards, window casings, and door frames.
Then run low-tack painter’s tape along the edge so the fleece stays snug without lifting paint or damaging finishes.
Use these taping techniques for reliable trim protection:
- Align fleece flush with trim.
- Overlap seams slightly.
- Use low-tack tape only.
- Replace fleece if soaked.
How to Cover Crown Molding Quickly Without Tape
A few simple tools can let you cover crown molding quickly without tape so you can paint walls cleanly and move on.
Use drop cloths, a contoured foam pad, and a thin trim shield to follow profiles.
Employ crown molding techniques like angled shields and magnetic clips for quick coverage methods.
Hold steady, move as you paint, and wipe drips immediately.
Protect Textured Ceilings From Paint Smears
Once you’ve protected crown molding, shift focus to keeping textured ceilings spotless—those nubs and ridges catch drips and smears fast.
Once crown molding is covered, protect textured ceilings too—the nubs trap drips and smears fast.
Use ceiling protection techniques and paint prevention strategies so you don’t spend hours cleaning.
- Work with a trim roller
- Use a shielded brush
- Keep a damp sponge nearby
- Catch drips with lightweight drop cloths
How to Protect Popcorn Ceilings During Wall Painting
Popcorn ceilings are especially fragile, so protect them before you roll or cut in—cover the texture with lightweight plastic sheeting taped gently to the wall line, use painter’s tape that won’t pull the finish, and work with a low-splatter roller and shielded brush to keep drips from lodging in the nubs.
For popcorn ceiling protection, practice careful painting techniques: move slowly, remove excess paint, and inspect edges frequently.
Paint Around Recessed Lighting Without Making a Ceiling Mess
If you protected textured ceilings carefully, you’ve already got the habit of working slowly near delicate surfaces—use that same care around recessed lighting.
Use recessed lighting techniques that limit splatter and protect trim.
Use recessed-lighting techniques to minimize splatter and safeguard trim during painting projects.
Quick steps:
- Turn off power and remove trims.
- Cover cans with painter’s bags.
- Use angled sash brush for edges.
- Wipe drips immediately—solid ceiling protection tips.
Protect Ceiling Vents and Fans While Painting Walls
1 simple step can save you a lot of cleanup: cover vents and fan blades before you start painting the walls.
Use lightweight plastic or paper secured with painter’s putty for vent protection, and wrap fan blades with soft cloth or plastic using clips for fan shielding.
Turn off power, remove loose dust first, and avoid adhesive on painted surfaces to prevent damage.
Handle Paint Near Beams and Ceiling Trim Without Tape
When you’re painting near beams and ceiling trim without tape, work deliberately with thin, controlled strokes and keep the brush nearly vertical so you can follow the edge precisely; this lets you cut a clean line while minimizing the risk of paint seeping onto the ceiling.
Use steady hands and proper angle for beams painting and trim techniques.
- Choose a small angled brush
- Load sparingly
- Use steady wrist motion
- Wipe edge excess
How to Avoid Paint Splatter With the Right Brush Strokes
Since stray drops usually come from too much paint or aggressive strokes, focus on light, controlled brushwork and keep the brush load minimal.
Use short, even strokes, feathering the edges to blend without flicking. Change direction only when necessary, tap off excess paint, and practice steady wrist motion.
These brush techniques cut airborne droplets and improve splatter prevention for cleaner ceilings.
Cutting‑In: Small Rooms Versus Large Open Spaces
After you’ve mastered gentler brushwork to minimize splatter, cutting‑in becomes the next skill to protect ceilings—yet the approach changes with room size.
Once brush splatter’s tamed, cutting‑in is your next move—adjust technique for small rooms or wide open spaces.
You’ll adapt cutting in techniques: in small rooms work methodically along whole walls; in large open spaces section and use longer reach tools.
- Plan sections
- Use angled brush
- Control paint load
- Feather edges
How to Work Around High Ceilings Safely and Cleanly
High ceilings demand a different approach, so set up safe access and containment before you load a brush or roller.
Use a sturdy ladder or platform, secure footing, and a spotter for high ceiling safety. Attach an angled brush or extension pole to maintain control.
Protect the ceiling with minimal masking and drop cloths, and employ clean painting techniques to avoid splatter and drips.
Use Solvent‑Free Cleanup to Remove Ceiling Smudges
If you spot smudges on the ceiling while painting the walls, reach for solvent-free cleaners to lift marks without risking paint damage or strong fumes.
If you notice ceiling smudges while painting, use solvent-free cleaners to remove marks safely and avoid fumes.
You’ll avoid odors and soften dried smears safely. Try gentle products and test a hidden spot first.
Useful solvent alternatives and cleanup methods include:
- Microfiber cloth with water
- Mild dish soap solution
- Vinegar dilute spray
- Commercial solvent-free cleaner
Quick Ceiling Touch‑Up Tricks After Accidental Paint Marks
If you get accidental paint on the ceiling, you can fix it fast with a few simple tricks.
Start by spot sanding the blemish smooth. Then match paint tone quickly by testing a small dab nearby.
Finish by feathering the edges with a light brush or roller to blend the repair into the surrounding texture.
Spot Sanding Tips
A quick, gentle sanding can erase small paint smudges on your ceiling without damaging the surrounding finish.
You’ll use spot sanding techniques with effective sanding tools to blend marks smoothly. Work lightly, test first, and clean dust.
- Use fine-grit sandpaper
- Sand with the grain of texture
- Hold a soft pad to avoid gouges
- Vacuum and wipe residue
Quick Paint Matching
When you need to disguise an accidental paint mark on the ceiling, matching color and sheen quickly makes the repair vanish; start by comparing the wet paint to the ceiling under the same light so you know exactly what you’re chasing. Use color matching with paint swatches, test tiny spots, and wipe excess.
| Step | Tool | Result |
|---|---|---|
| 1 | swatch | match |
| 2 | small brush | blend |
| 3 | wipe | tidy |
Feathering Blend Techniques
After you’ve matched color and sheen, you can focus on feathering to make that ceiling spot disappear.
Use small amounts of paint, damp brush edges, and light strokes to avoid ridges.
Practice feathering techniques to soften shifts and guarantee even coverage.
Concentrate on blending edges where ceiling and wall meet for an invisible repair.
- Light strokes
- Thin paint
- Damp brush
- Feather out
When to Use Touch‑Up Paint Versus Repainting the Ceiling
Wondering whether to spot‑fix scuffs or give the whole ceiling a fresh coat? Decide based on damage extent, age, and sheen.
Use touch up techniques for isolated marks when the ceiling finish matches and texture’s intact.
Touch up isolated marks when the ceiling’s finish and texture match for seamless, nearly invisible repairs.
Repaint the whole ceiling if discoloration, widespread stains, or sheen mismatch appear.
For best results, blend quickly and match paint batch or record tint details.
Choose Wall Paint Finishes That Reduce Ceiling Mistakes
Pick wall paint finishes that make stray splatters and brush marks less likely to show, because the right sheen and formulation cut down on visible mistakes along the ceiling line.
You’ll prefer matt or low‑sheen for hiding flaws, durable formulations for fewer drips, and matching ceiling finishes subtly.
- Matte hides texture
- Low‑sheen balances washability
- Durable formulas reduce drips
- Consider paint textures for blend
How Lighting Affects Your Ability to Spot Ceiling Mistakes
Because light reveals every edge and stain, the type and placement of your lighting will determine how easily you spot stray brushmarks or splatters along the ceiling line.
Use angled, portable lamps or a bright work light to cast shadows that expose flaws.
Try different lighting techniques to overcome visibility challenges, inspect from multiple angles, and correct mistakes before paint dries.
Steady Your Hand for Cutting‑In: Posture and Bracing Tips
Good lighting helps you spot flaws, but steady hands keep the paint where it belongs.
You’ll improve hand stability and brush control by adjusting posture and bracing against surfaces. Keep shoulders relaxed, feet staggered, and elbow anchored to your body for steadiness.
- Stand balanced
- Tuck elbow to ribs
- Rest forearm on ladder or wall
- Use short, controlled strokes
Practice Cutting‑In Before You Start on the Real Wall
Practice the cut‑in on a scrap of drywall, cardboard, or an inconspicuous corner before you touch the real wall so you can get the feel of brush angle, paint load, and pressure without risking mistakes. You’ll refine cutting in techniques through short practice sessions, reducing drips and ceiling smudges. Use this quick checklist:
| Tip | Focus | Time |
|---|---|---|
| Angle | Brush tilt | 5 min |
| Load | Paint amount | 5 min |
| Pressure | Control | 5 min |
Plan Painting Order for Minimal Ceiling Contact
When you plan the painting sequence, start with the ceiling‑adjacent edges and work outward so you’re less likely to bump wet paint with your brush or roller; painting trim and corners first gives you clear boundaries to follow and reduces accidental ceiling smudges.
Use proper painting techniques and basic ceiling preparation to minimize contact.
- Cut in edges first
- Paint trim next
- Roll walls outward
- Inspect for touchups
Protect Ceilings When Using Paint Sprayers
If you’re using a paint sprayer, shield the ceiling before you spray so overspray and mist don’t settle on it.
Use lightweight plastic sheeting or disposable drop cloths hung with clips, and create a barrier with a temporary track if needed.
Employ paint sprayer techniques like low pressure, controlled passes, and angled spraying to minimize drift—these ceiling protection methods save cleanup time.
Use Masking Putty and Removable Caulk Instead of Tape
Before you start, prep surfaces by cleaning and drying the ceiling edge so putty and caulk will stick.
Apply masking putty along the trim to block splatter and press it smooth for a crisp line.
Use removable caulk in any gaps between wall and ceiling to seal seams and peel it away cleanly when the paint’s dry.
Prep Surfaces Carefully
Prep the edges with masking putty and removable caulk to keep paint off the ceiling without the risk of peeling fresh paint when you pull tape down.
You’ll focus on surface preparation and cleaning techniques so putty and caulk adhere.
Do these steps:
- Clean grime and dust.
- Degrease trim joints.
- Dry thoroughly.
- Inspect for gaps and repair.
Apply Masking Putty
When you want crisp, ceiling-safe edges without the risk of peeling paint, apply masking putty and removable caulk instead of relying on tape.
Press a thin bead of putty along the junction, smooth it with a damp finger, and seal gaps.
These masking techniques create a temporary barrier so your paint application stays neat, minimizing touch-ups and protecting trim during wall painting.
Use Removable Caulk
If you want crisp lines at the ceiling without risking ripped paint, use removable caulk to seal the gap between wall and trim.
It masks irregular edges, peels cleanly, and speeds work—removable caulk benefits are real. Learn simple application techniques to press, smooth, paint over, then peel when dry.
- Prep surface
- Apply bead
- Smooth seam
- Peel gently
Protect Tall Trim and Crown Molding Without Tape
Because tall trim and crown molding sit so close to the wall, you’ll want a method that shields them without relying on tape that can lift paint or leave residue.
Using a thin, flexible shield and a steady cutting-in brush lets you protect those surfaces cleanly and quickly.
Position the shield tight to the profile, use short controlled strokes, and practice crown molding protection and trim safeguarding for crisp, paint-free edges.
Clean and Maintain Your Tools for Sharper Edges
Keep your brushes and shields clean and well-maintained so they give you the crisp, controlled edges you’re aiming for; dried paint, frayed bristles, or sticky rollers will wreck even the steadiest hand.
You’ll practice tool maintenance and simple edge sharpening to keep cuts sharp.
- Rinse and comb brushes after each use.
- Spin-dry rollers and store upright.
- Trim stray bristles with scissors.
- Inspect shields for paint buildup.
Fix Common Cutting‑In Mistakes on Ceilings
When you nick the ceiling or get a ragged line, don’t panic — most cutting‑in mistakes are fixable with a few quick moves that save time and paint.
Use a damp sponge to soften wet drips, feather edges with a small angled brush, and apply a thin touch‑up coat after drying.
These cutting in techniques protect finish and guarantee ceiling preservation without tape.
Protect Ceilings When Multiple Painters Are Working
When multiple painters are working, you should assign clear zone responsibilities so everyone knows who protects which section of ceiling.
Make sure teams lay continuous drop cloths across adjoining areas to prevent gaps where drips can sneak through.
Agree on overlap points and a simple handoff routine to keep coverage consistent.
Clear Zone Responsibilities
Although multiple painters may be working side-by-side, you’re responsible for establishing a clear zone above and around each workstation so ceilings stay protected from drips, splatter, and ladder damage.
Define clear boundaries and assign shared tasks to prevent overlap.
Follow this checklist:
- Mark overhead zones.
- Assign ladder spots.
- Coordinate paint schedules.
- Inspect before shifts.
Continuous Drop Cloths
1 simple, continuous drop cloth running the length of the workspace keeps paint splatter, dust, and ladder scuffs off ceilings when multiple painters are working together; lay it flat, tape seams securely, and overlap toward each station so nobody leaves gaps.
You’ll guarantee continuous coverage and effective draping by anchoring edges, smoothing wrinkles, and assigning stations to check seams regularly to prevent trips and ceiling damage.
Balance Speed vs. Precision: When to Freehand and When to Tape
If you’re working on a bright, straight-edged room and want to finish quickly, freehand cutting in with a steady brush can save a lot of time; but for textured ceilings, complex trim, or color contrasts that’ll show every imperfection, tape and careful masking are worth the extra minutes.
Use freehand techniques and tape alternatives wisely:
Use freehand cutting and smart masking choices—know when to trust your brush and when to tape.
- Assess surface texture.
- Check paint contrast.
- Practice steady strokes.
- Reserve tape for detail.
Cost‑Effective Alternatives to Full Taping
You can save time and money by using a few targeted tricks instead of full taping: tuck the ceiling edge under a drop cloth, cut in with a good angled brush, or run a temporary ceiling guard strip.
Each method gives cleaner edges with less setup than full tape. Try one or combine two to see which works best for your room and skill level.
Use Drop Cloth Edges
A simple drop cloth folded to create a neat edge can protect your ceiling without the time and expense of full taping; lay it along the wall-ceiling seam, anchor it with a light amount of painter’s tape or a few weights, and you’ll catch most splatters while keeping cleanup quick.
- Fold for crisp edge protection.
- Use weights, not heavy tape.
- Choose reusable drop cloths benefits.
- Replace as needed to avoid drips.
Paint With Angled Brush
After laying a drop cloth edge to catch most splatters, grab an angled sash brush to cut in clean lines at the ceiling without full taping.
You’ll steady the brush, work in short strokes, and feather paint away from the edge.
Practice angled brush techniques for cutting in mastery, keep moderate paint load, and pause to smooth any tiny snags before they dry.
Apply Ceiling Guard Strip
If you’re skipping full taping, try a ceiling guard strip to catch errant strokes and drips along the edge.
You’ll press it flush, paint up to it, then remove before paint skins. The ceiling guard saves time and pairs well with precise painting techniques.
- Choose flexible strip
- Press tight seam
- Paint in short passes
- Remove while tacky
Choose Which Walls to Tape and Which to Freehand
When you’re deciding whether to tape or freehand a wall, consider the paint contrast, the complexity of the ceiling line, and your comfort with a steady hand; tape the sections where color difference is high or the edge is irregular, and freehand where the ceiling line is simple and you can maintain a clean stroke.
For wall painting, prioritize ceiling protection on focal walls and trim, freehand quieter walls.
When to Hire a Pro for Tricky Ceilings
Because tricky ceilings can eat time and lead to costly mistakes, call a pro when access is limited, the surface is damaged, or the line between wall and ceiling is unusually complex; you’ll save money and stress by hiring someone with scaffolding, steady technique, and experience matching textures and finishes.
- High, vaulted ceiling types
- Delicate molding detail
- Water‑stained or crumbling surfaces
- Complex painting techniques required
Pro‑Level Habits to Keep Ceilings Paint‑Free Every Time
Hiring a pro makes sense for the toughest ceilings, but you can still adopt the same habits they use to keep paint off your ceiling every time.
Work with steady, controlled paint application strategies: load the brush sparingly, angle it away from the edge, and use short strokes.
Combine that with simple ceiling protection techniques—drop cloth overlap and a slim 2–3″ shield—to prevent splatter.
Frequently Asked Questions
Can Ceiling Texture Show Through Wall Paint Edges Over Time?
Yes — you’ll sometimes see ceiling texture show through wall paint edges over time if paint adhesion weakens. You’ll need proper surface prep and compatible paint to prevent texture telegraphing and guarantee clean, lasting edges.
Will Humidity or Temperature Affect Tape‑Free Edge Adhesion?
Yes — humidity and temperature change adhesion; you’ll need adhesion techniques that account for surface moisture and thermal expansion, or edge finishes can fail. Plan work in stable conditions, use primers or flexible sealants to improve hold.
Can Color Contrast Between Wall and Ceiling Hide Imperfect Lines?
Yes — if you use subtle contrast, you’ll hide imperfect lines; color psychology and current design trends favor soft shifts and tonal pairings, so choose hues that visually blend while still creating intentional separation for a polished look.
Are There Quick Fixes for Paint Bleeding Into Textured Ceilings?
Yes — you can stop it fast: use targeted paintbrush techniques, scrape excess drips, blot with a damp sponge, and apply ceiling protection like temporary foam trim. You’ll catch bleeds quickly and touch up textured spots neatly.
How Do Pets or Kids Increase Ceiling Paint Mishaps Risk?
They raise mishap risk because pet behavior and messy play spread drips, while poor kid supervision and creative distractions cause splatters; choose washable paint, limit access, use drop cloths and other protective measures to prevent ceiling damage.
