
How to Fix Paint Bleed on a Wall for a Sharp, Clean Edge
If paint has bled under your tape, act fast: blot fresh seepage with a damp cloth, score the fuzzy edge with a razor held low, then gently scrape and fine-sand dried ridges. Seal future tape with primer or paintable caulk, use quality tape, and apply thin coats to avoid seepage. Touch up with a tiny brush and matching paint, feathering into the wall for a seamless blend, and keep going to learn pro tips and a step-by-step repair workflow.
Quick Fix: Restore a Sharp Paint Edge in 10–30 Minutes
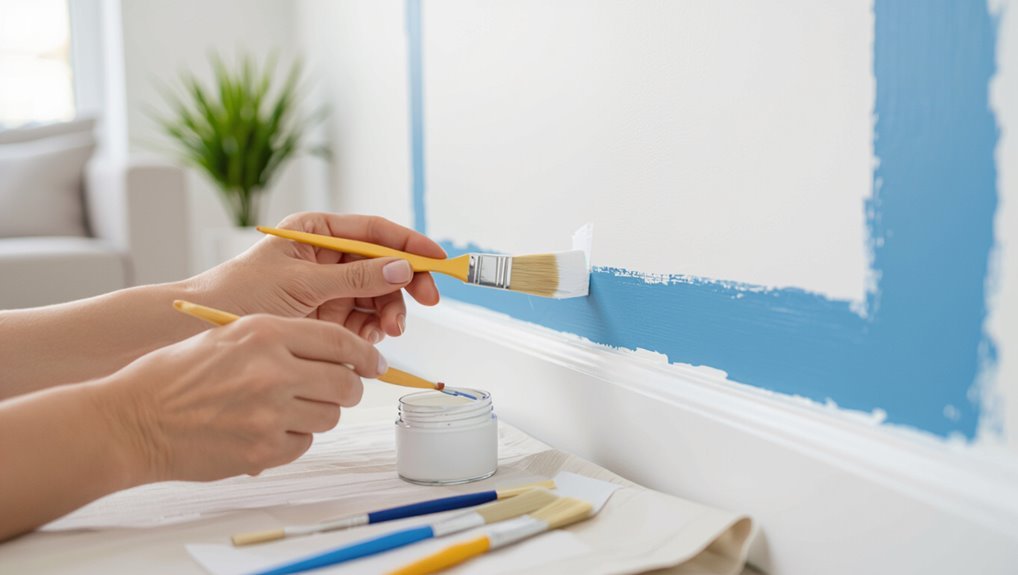
If you need a fast fix, grab a utility knife, a small angled brush, and matching paint—you’ll have a crisp edge back in 10–30 minutes.
You’ll focus on paint preparation, check tape application and edge alignment, and match paint consistency to wall texture.
Use a steady brush technique to touch up contrasting color contrast lines, working mindful of drying conditions for a clean, quick result.
What Paint Bleed Is and Why It Ruins Clean Lines
Paint bleed happens when liquid paint seeps under masking or along an edge, leaving fuzzy, uneven lines instead of a crisp change. It occurs because paint follows tiny gaps, surface texture, or overly wet application and then dries with those irregular edges.
You’ll notice paint bleed causes jagged borders that undermine the clean line importance—making trims look sloppy and reducing overall finish quality unless you correct it.
Common Causes of Paint Bleeding Under Tape
Because tape only works when it seals tightly, a few common mistakes let paint seep underneath and create those fuzzy edges you hate.
Low tape quality, rough surface texture, and high paint viscosity let pigment push through gaps.
Poor adhesion from dust or uneven primer, plus environmental factors like humidity and temperature shifts, make seals fail — so prep, choose materials, and control conditions.
How to Assess Paint-Bleed Severity on Your Wall
When you inspect a taped edge, look for three clear indicators of severity: how far the bleed extends from the line, whether the edge is soft or feathered, and if the bleed shows through multiple coats.
Assess paint texture and color variations, then prioritize repair based on extent and visibility.
- distance from line
- edge softness/feathering
- coat breakthrough
- visual impact on finish
Tools and Materials to Stop and Fix Paint Bleed

Now that you know how to judge bleed severity, gather the right tools and materials to stop it and repair the finish.
You’ll need quality painter’s tape alternatives, durable tape types, a sharp utility knife, fine-grit sandpaper, a small angled brush, spackling or caulk, primer, and matching paint.
Check paint brands for touch-up samples and fast-drying formulas to minimize repeat bleed.
Choose the Right Painter’s Tape for Razor-Sharp Lines
Pick a tape with the right adhesion strength for your surface so it sticks without peeling paint.
Match the tape’s edge compatibility—sharp edges for smooth surfaces, flexible edges for textured walls—to get clean lines.
Remove the tape at the recommended time and angle to prevent lifting or tearing.
Tape Adhesion Strength
Because the tape’s grip determines whether paint stays put or seeps under the edge, choosing the right adhesion strength is essential for razor-sharp lines.
You’ll weigh tape types and tape quality, match adhesion methods to surface preparation, and consider environmental factors and tape lifespan.
Apply precise application techniques and gentle removal strategies to prevent bleed and damage.
- Clean surface
- Test small area
- Firm press
- Timely removal
Edge Compatibility Types
When you want razor-sharp lines, matching tape edge compatibility to your surface and paint type matters: sharp-edged tapes suit smooth, cured surfaces and water-based paints, while thicker, rounded-edge tapes handle textured walls, glossy finishes, or oil-based products that might lift or seep.
Choose tape types by evaluating wall surfaces, paint finishes and adhesion levels; consider texture matching, color contrasts, and simple repair techniques.
Removal Timing Tips
1 key rule you’ll want to follow is removing painter’s tape at the right moment—too soon and uncured paint will smear, too late and the tape can pull cured paint or leave jagged edges.
You’ll learn removal timing and effective techniques to avoid tears and bleeds:
- Remove at paint’s tacky, not wet state
- Pull tape low and back on itself
- Use consistent, slow motion
- Score stubborn edges first
Prep Steps to Prevent Paint Bleed Before You Paint
Before you lay a drop cloth or open a can of paint, take a few targeted prep steps that stop bleed before it starts.
Choose tape selection suited to your surface—low-tack for fresh drywall, stronger for textured walls. Clean and dry the surface, repair dents or loose texture, and sand glossy areas.
Proper wall preparation guarantees crisp lines and reduces bleed risk before you paint.
Seal Tape Edges With Primer or Paintable Caulk
Before you paint, press the tape edges firmly and smooth any gaps so you get a clean seal.
If you spot gaps, run a thin bead of paintable caulk along the seam and tool it flush with your finger or a putty knife.
Once dry, prime over the tape seam to lock the surface and stop bleed-through.
Prep Tape Edges First
Start by sealing the tape edges so paint can’t sneak underneath — you can do this with a quick coat of primer or a bead of paintable caulk pressed into the seam.
Then focus on tape application and tape positioning: guarantee tape alignment, proper tape pressure, and good tape quality for strong tape adhesion.
Use careful tape techniques to ease tape removal.
Use Paintable Caulk
If you’re sealing tape edges with primer, you can also use a paintable caulk for a faster, more foolproof alternative.
Apply a thin bead along the tape seam, smooth with a damp finger or tool, and remove excess. Proper caulk application fills gaps and blocks bleed.
Once cured, it creates a uniform surface that improves paint adhesion and yields a crisp, clean line.
Prime Over Tape Seam
When you seal the tape edge with a quick coat of primer, you create a barrier that stops paint from bleeding under the tape and helps the topcoat grab evenly.
You’ll want to focus on tape application and primer selection to guarantee a crisp line.
Tips:
- Press tape firmly along the seam
- Use a compatible primer
- Thin coat over the edge
- Let primer dry fully before topcoat
Paint Technique Tips That Avoid Pushing Paint Under Tape
A few careful techniques can keep paint from being forced under tape: press the tape edges firmly, load your brush or roller sparingly, and apply paint with strokes that move away from the edge rather than toward it.
For proper tape application, check alignment and seal edges. Adjust paint consistency so it’s not too runny.
Work in thin layers, feathering away from the tape for crisp lines.
When to Remove Tape for the Cleanest Edge
For the sharpest line, pull the tape off while the paint is still wet so it lifts cleanly instead of tearing.
If the paint’s already started to form a skin, wait until it’s just tacky and score the edge with a utility knife before removing the tape.
You’ll get the cleanest edge by timing the peel to the paint’s drying stage.
Remove Tape While Wet
Pull the tape off while the paint’s still tacky to get the sharpest possible line—waiting until it’s fully dry risks pulling paint chips or leaving a jagged edge.
You’ll use different tape types and removal techniques depending on paint consistency and adhesive properties. Quick solutions focus on timing strategies and edge methods after solid surface preparation:
- Peel slowly at a 45° angle
- Score glued edges first
- Pull toward the painted area
- Work in short sections
Wait For Paint Skin
If you don’t remove tape while paint is tacky, aim to wait until the paint forms a thin “skin” before lifting the edge; that slight drying lets the paint hold together so the tape peels away cleanly without tugging wet film or flakes.
Check paint consistency; it should resist smudging but still be flexible.
Peel slowly at a 45° angle, considering your tape application technique.
Quick Fixes for Fresh, Minor Paint Bleed
When you spot fresh, minor paint bleed, act quickly to prevent it from staining adjacent surfaces and drying into a stubborn mark.
Act quickly when you notice fresh paint bleed to prevent staining nearby surfaces and stubborn marks.
You’ll want quick repairs using damp cloths, gentle blotting, and proper paint preparation to avoid spreading.
Try these steps:
- Blot excess with a damp microfiber
- Use a mild detergent solution
- Rinse and blot dry
- Reapply touch-up paint sparingly
Scrape and Sand Dried Bleed Without Damaging the Finish
Start by evaluating the paint thickness around the stained area so you know whether you need to feather the edges or remove a thicker ridge.
Use a flat razor or putty knife with light, controlled strokes to gently scrape away loose or raised paint without cutting into the substrate.
Finish with fine-grit sanding, wipe off dust, and inspect the surface before priming or repainting.
Assess Paint Thickness
Before you remove any dried bleed, take a close look and feel for how thick the paint buildup is so you can choose the right scraping and sanding approach.
Check paint viscosity and recent paint application to judge layers.
Consider:
- Light haze: minimal sanding
- Thin layer: gentle scraping
- Thick build: heavier sanding
- Edge buildup: feather sanding only
Gentle Scraping Techniques
Grip a plastic or flexible putty knife and work lightly across the dried bleed, angling the blade to lift only the raised paint without gouging the surrounding finish.
Use gentle scraping with short, controlled strokes, keeping the knife almost flat. Test pressure on an inconspicuous spot, remove flakes gradually, and wipe debris away as you go.
These effective techniques preserve the underlying paint.
Fine Sanding And Cleanup
Carefully sand the dried bleed with fine-grit paper to blend the repaired area into the surrounding finish without removing too much paint.
You’ll use gentle sanding techniques, check edges, and follow cleanup methods to keep paint lines crisp.
- Use 220–320 grit for light blending.
- Sand with the grain or vertical strokes.
- Wipe dust with a damp microfiber.
- Vacuum before touching up.
Use a Razor Blade to Restore a Crisp Paint Line
If paint has bled under your tape, score the edge with a sharp razor blade and scrape away the excess to reveal a clean line.
You’ll hold the blade at a low angle, use steady razor techniques, and work slowly to avoid gouging. Wipe flakes as you go.
This precise edge restoration restores a sharp border without repainting adjacent areas.
Touch Up Bleed With a Thin Brush and Steady Hand
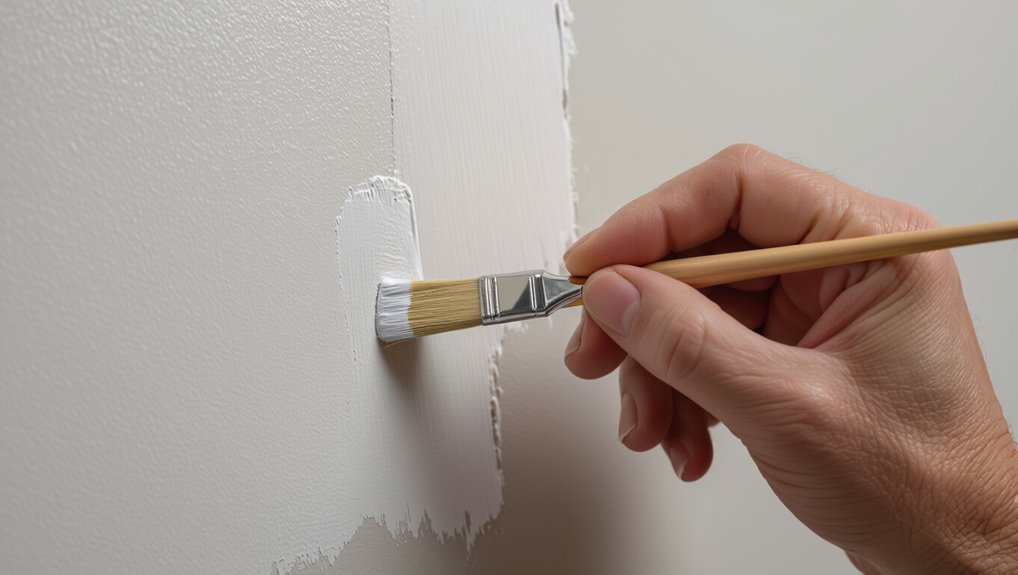
When you spot a thin line of bleed beyond the tape, reach for a fine-tipped brush and a small amount of matching paint to gently retouch the edge.
Working in short, controlled strokes will let you blend the fix without disturbing the surrounding finish. Use a steady hand and precise brush technique:
- Load minimal paint
- Work from the wall into the line
- Keep strokes short
- Wipe excess promptly
Color-Matching Tips for Seamless Touch-Ups
When matching paint, pay attention to the existing undertones rather than just the visible shade so your touch-up won’t stand out.
Test the color on a small, inconspicuous area and let it dry to see the true result.
If needed, blend edges with a light glaze to feather the repair into the surrounding wall.
Match Existing Undertones
A few small missteps in paint matching come from overlooking undertones, so you’ll want to compare the wall and the sample in different lights before you buy more paint.
Use these quick checks to verify color undertones align with wall aesthetics and maintain paint harmony for precise shade matching:
- View in natural light
- Check against trim and fixtures
- Compare large swatches
- Note warm vs cool hints
Test Small Areas
Start by testing a few small, inconspicuous patches to see how the new paint dries and blends with the existing finish—you’ll catch differences in sheen, undertone, and coverage before you commit to a full touch-up.
Use a discreet test area, note drying time, and check paint adhesion. If the sample matches, proceed; if not, adjust color or finish and retest until seamless.
Blend With Glazing
If your test patches match in color but still read as touch-ups because of slight sheen or undertone differences, blend them with a glaze to mask the edges and even out tone.
Use glazing techniques and careful color blending to feather shifts.
Tips:
- Mix glaze with original paint ratio
- Thin layers, build slowly
- Work wet edges
- Match sheen of surrounding wall
Use Glaze or Translucent Paint to Blur Jagged Edges
Blend a translucent glaze over the jagged paint line to soften and visually blend the bleed into the surrounding wall.
You’ll use careful glaze application and translucent techniques with a soft brush or sponge, feathering outward until the edge disappears.
Work in thin layers, letting each dry, and step back often to confirm color balance and a seamless shift without adding texture.
Repair Textured Walls Affected by Paint Bleed
First check the textured area to see how deep the paint bleed damaged the finish and whether any texture material came loose.
Then match the original texture by testing sprays or compounds on a scrap piece until the finish blends.
Finally, feather your repair into the surrounding wall so the edges disappear before repainting.
Assess Texture Damage
Start by closely inspecting the affected area to see how deep the paint bleed went and whether the texture itself is damaged or just discolored.
Do a focused texture assessment and damage evaluation to plan repairs.
Consider these checks:
- Peel test for flaking paint
- Light rubbing to test stain depth
- Compare texture to adjacent areas
- Note areas needing patching or cleaning
Match Texture Finish
Match the texture finish to the surrounding wall by closely observing the pattern, scale, and paint sheen so your repair disappears into the surface.
You’ll pick appropriate texture matching methods and test finish types on scrap.
Consider wall materials and repair compound compatibility, then try diluted paint formulas to mimic sheen.
Work small, compare results, and adjust compound grain or paint ratio until the patch reads consistent.
Feather And Blend Edges
Work the patch edges so they fade seamlessly into the surrounding texture, using light sanding and thin layers of compound to feather the repair until it disappears from sight.
You’ll use feather techniques and blend methods to make joins invisible.
Try these steps:
- Feather compound thinly outward
- Sand gently between coats
- Texture-match before paint
- Blend paint edge with a dry brush
Fix Bleed on Trim, Baseboards, and Ceilings
When paint bleeds onto trim, baseboards, or ceilings, you’ll want to address it before repainting to get crisp lines and a professional finish; assess edge evaluation, tape testing, trim techniques, baseboard basics, ceiling care, texture assessment, color contrast, and finish differences, then clean, sand, seal, and repaint carefully.
| Task | Tip |
|---|---|
| Clean | Mild solvent |
| Sand | Fine grit |
| Tape | Press firmly |
| Seal | Primer first |
Fix Bleed at Finish Transitions (Eggshell vs Semi-Gloss)
Because eggshell and semi-gloss reflect light so differently, paint can appear to bleed at the change even when the edge is clean.
So you’ll need to treat the joint with more than just tape and paint to get a sharp, lasting line.
Use these Transition techniques to manage Eggshell sheen vs Semi gloss finish and Color contrast:
- Clean and sand joint
- Use thin caulk seam
- Feather with fine brush
- Block-sand and retouch
When to Repaint a Whole Stripe or Wall Instead of Spot-Fixing
If a repaired stripe or patch still stands out after blending and drying, you should consider repainting the entire stripe or wall to confirm uniform sheen and color. Spot-fixing only makes sense when the surrounding finish matches closely and lighting won’t reveal subtle differences.
Repainting strategies should weigh scope, time and cost. You’ll also review color selection, test samples, and match sheen to guarantee a seamless, consistent result.
Preventive Habits to Keep Future Paint Lines Sharp
To keep paint lines crisp over time, build a few simple habits into your prep and painting routine:
- Prioritize wall preparation and color selection so surfaces accept pigment evenly.
- Use proper tape techniques and masking strategies for straight edges.
- Practice controlled paint application and thin coats to prevent seepage.
- Seal edges promptly (edge sealing) and inspect for touchups to maintain clean finishes.
Cost-Effective Materials vs Pro-Grade Options
1 clear choice you’ll make when prepping for crisp paint lines is whether to buy budget-friendly materials or invest in pro-grade products.
You’ll find cost effective solutions like quality painter’s tape and sealants that work for DIY jobs, but pro grade benefits—better adhesion, durability, and precision tools—save time and reduce rework on complex edges.
Choose based on scope and budget.
Troubleshooting Uncommon Paint-Bleed Causes
Although common fixes handle most problems, some paint bleed stems from less obvious sources you’ll want to check before re-taping; moisture behind drywall, incompatible previous coatings (like oil over latex), or unusually porous patches can all undermine tape adhesion and allow paint to wick under the edge.
- Check damp conditions and drying time.
- Match tape type to wall texture.
- Adjust paint viscosity and application.
- Consider environmental factors and color contrast.
Masking Checklist: 8 Steps Before You Start Taping
Before you put any tape down, run through these eight quick checks so you don’t lock in a problem:
inspect surface preparation for dust, grease, or peeling paint;
test adhesion on a hidden spot;
choose appropriate tape types for finish and cure time;
guarantee edges are straight;
press tape firmly;
protect nearby trim;
allow primer to dry;
keep tools ready.
Step-by-Step Repair Workflow You Can Follow Today
Start by gathering the tools and materials you’ll need—putty knife, fine-grit sandpaper, caulk or spackle, painter’s tape, primer, and matching paint—so you can work without interruptions.
Start by gathering putty knife, sandpaper, caulk, tape, primer, and matching paint—be prepared and uninterrupted.
Follow this workflow for paint preservation and edge maintenance:
- Clean and sand bleed spots
- Fill gaps with spackle or caulk
- Tape and prime edges
- Paint carefully, remove tape while wet
Frequently Asked Questions
Can Paint Bleed Occur With Wallpapers or Wallcoverings Instead of Paint?
Yes — paint bleed can occur with wallpapers or wallcoverings if wallpaper adhesion’s poor or seams aren’t sealed; you’ll prevent bleed by ensuring proper adhesion, using seam sealers, primer, and bleed prevention techniques before painting.
Will Humidity After Painting Cause Previously Sealed Tape Edges to Fail?
Yes—you’ll see tape adhesion fail if humidity levels rise after painting; expanding moisture can loosen adhesive, letting paint bleed. You should wait for stable, lower humidity and guarantee surfaces are dry before taping again.
Can Oil-Based Paints Bleed Through Modern Low-Voc Primers?
Yes — oil based paint can bleed through modern low VOC primer if the primer’s solvent resistance or adhesion’s inadequate. You’ll want a quality bonding or oil-blocking low VOC primer to prevent migration and guarantee a clean finish.
Is There a Safe Solvent to Remove Bleed From Wallpapered or Vinyl Surfaces?
Like a whisper, you can try rubbing alcohol or Goo Gone; they’re mild solvent options that’ll lift dye without wrecking vinyl, but test first. For bleed prevention, seal edges with a compatible primer or clear coat.
How Do Sunlight and UV Exposure Affect Visible Bleed Over Time?
Sunlight accelerates paint durability loss and worsens visible bleed over time; you’ll see colors fade and stains spread as UV impact breaks binders, so you’ll need protective coatings or UV-resistant paints to slow deterioration.
