
How to Spackle a Wall Before Painting for a Perfectly Smooth Surface
Inspect your wall closely for chips, nail holes, cracks, and any peeling or moisture. Clean and dry the surface, then remove loose paint and debris. Widen gaps slightly, square edges, and sand high spots. Use patch spackle for small holes and fill spackle for deeper gaps. Apply thin layers, press firmly, and feather the edges. Let it fully cure, sand smooth (120–150 then 220 grit), vacuum, and wipe dust off before priming—keep going to get truly flawless results.
Inspect Wall Damage Before You Spackle
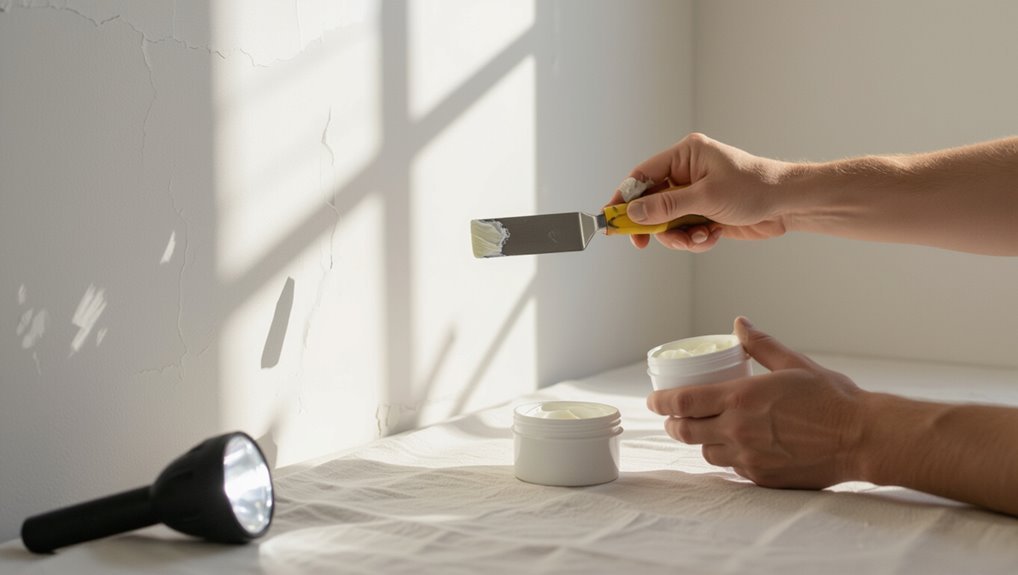
Before you even open a spackle tub, you need to inspect the wall damage so you know what you’re fixing.
Do a wall inspection up close, then step back to check lighting conditions that expose shadows, cracks, and uneven spots.
Inspect up close, then step back—use different lighting to spot shadows, cracks, and uneven spots before you start repairing.
Perform a damage assessment: note chips, nail holes, bubbling, or peeling, and decide which repair techniques fit.
If you spot moisture issues, stop and address the source before patching, or paint adhesion will fail.
Focus on surface preparation by removing loose paint and debris, then plan texture matching so patches disappear.
Only after that will your spackle hold and blend.
Gather Tools: Knives, Tape, Sanding, Dust Control
Gather the right tools first so your spackle work stays smooth and your patch blends in. For tool selection, grab a putty knife set: a narrow knife for small chips and a wider one for feathering edges.
Use painter’s tape to protect trim and mark boundaries, supporting consistent finish quality.
For surface preparation, choose dust control—vacuum, damp cloth, and a mask—so sanding debris doesn’t cling.
Plan sanding methods: sand with a fine-grit block, then wipe clean.
Match spackle types to repairs, since applying techniques affect paint adhesion and repair techniques.
Pick the Right Spackle Type (Patch vs. Fill)
Pick patch spackle for small holes where you only need to fill a spot cleanly.
Use fill spackle for wide gaps so the compound stays supported across the opening.
Match the type to the depth of the damage, since deeper areas may require product meant for thicker application.
Patch For Small Holes
Choosing the right spackle type makes small-hole repairs faster and smoother. For a small hole, pick patch spackle designed to build and adhere in shallow spots.
Clean the area, scrape loose paint, then dust it off. Press spackle into the crater with a putty knife, slightly overfilling so you can level it flush.
Use tight, controlled repair techniques: scrape across the surface in one direction, then let it dry fully. Once cured, sand lightly until the spot blends with the wall.
Wipe clean, then prime before painting.
Fill For Wide Gaps
For wide gaps, you need fill spackle—not patch spackle—to build up thickness without shrinking or cracking.
You should choose a fill product when the missing area is broad, so the material can level across the void instead of simply covering edges.
Apply it in smooth layers, pressing firmly to seat it. Use a putty knife to feather the perimeter so paint blends seamlessly.
This approach gives reliable wide gap solutions and helps you avoid pinholes and ridges.
If you’re comparing options, treat fill spackle as one of your best spackle alternatives for larger repairs.
Choose Based On Depth
Depth determines which spackle type you need—patch spackle works best for shallow dents, while fill spackle handles deeper voids because it’s designed to build up thickness.
Start with a quick depth assessment: press a straightedge, then measure how far the surface drops. For repair techniques that hold up, choose what matches the cavity size.
- Patch spackle: small chips, shallow scratches
- Fill spackle: holes, gouges, wider depressions
Apply in layers if needed, then sand flush.
You’ll get smoother paint when you match depth to the right spackle.
Choose the Putty Knife Size for Your Patch
Picking the right putty knife size makes your patch easier to apply and smoother to feather. For a small patch size—like nail holes or minor dents—use a narrow putty knife, around 2 to 4 inches.
For medium divots and seams, choose 5 to 6 inches so you can spread spackle in a controlled layer.
For wider repairs, a 10-inch putty knife helps you bridge edges without gouging.
Test on scrap first: if the blade flexes or drags, switch sizes. A snug fit makes cleanup faster and results more even.
Prep the Wall: Clean, Dry, and Ready to Patch
Before you spackle, wipe the area clean so dust and grease don’t block adhesion.
Let the wall dry completely after any cleaning or repairs.
Once it’s dry and smooth, you’re ready to patch.
Clean Surface For Adhesion
Once the wall looks solid, you still need to prep it properly so the spackle actually bonds. Start with thorough surface preparation: wipe away dust, grease, and sanding residue using a damp cloth, then dry it fast so moisture doesn’t interfere with adhesive properties.
Check corners and outlet areas where grime hides, and scrape any loose paint.
- Vacuum or brush off fine particles before wiping
- Use a mild degreaser for oily spots, then rinse
- Let the surface feel clean, not slick
A clean surface gives spackle better grip and smoother results.
Let Wall Dry Completely
Let the wall dry completely after you clean it, because spackle won’t adhere well to damp surfaces.
After washing, you must check wall conditions before patching. Use drying techniques like air circulation with a fan, opening windows, and wiping lingering moisture along baseboards and corners.
If the wall feels cool or looks glossy, give it more time. Aim for a consistent dry texture, with no beads of water or damp spots.
Wait until the area is fully dry to the touch and stable, then proceed with your spackle. This prevents cracks and peeling later.
Remove Loose Paint and Square Off Edges
Start by scraping off any loose, peeling, or flaking paint with a putty knife or paint scraper, working until the surface feels solid and doesn’t shed. You’ll prevent loose paint from telegraphing through your spackle and paint later.
Then square off each damaged edge so your patch has crisp borders for clean edge finishing. Use the blade to define the perimeter, removing feathered, unstable sections.
Square damaged edges for crisp borders—use the blade to remove feathered, unstable sections so your patch blends cleanly.
- Clear all failing paint and dust
- Taper back only the loose areas to stop lifting
- Cut corners straight so patches blend tightly
Sand High Spots First: Don’t Fight the Bump
Sand any high spots first, so your wall stays flat before you add more material. Grab a sanding block and lightly press over the glossy or raised areas; you’re doing bump removal, not carving valleys. Check with your palm and a raking light, then repeat until the surface feels even. This is essential surface preparation—spackle sticks better and won’t telegraph lumps.
| What you feel | What you do |
|---|---|
| Raised ridge | Sand lightly |
| Rough patch | Blend outward |
| High edge | Flatten with block |
| Dull, even look | Stop and wipe dust |
Fill Nail Holes and Small Dents Cleanly
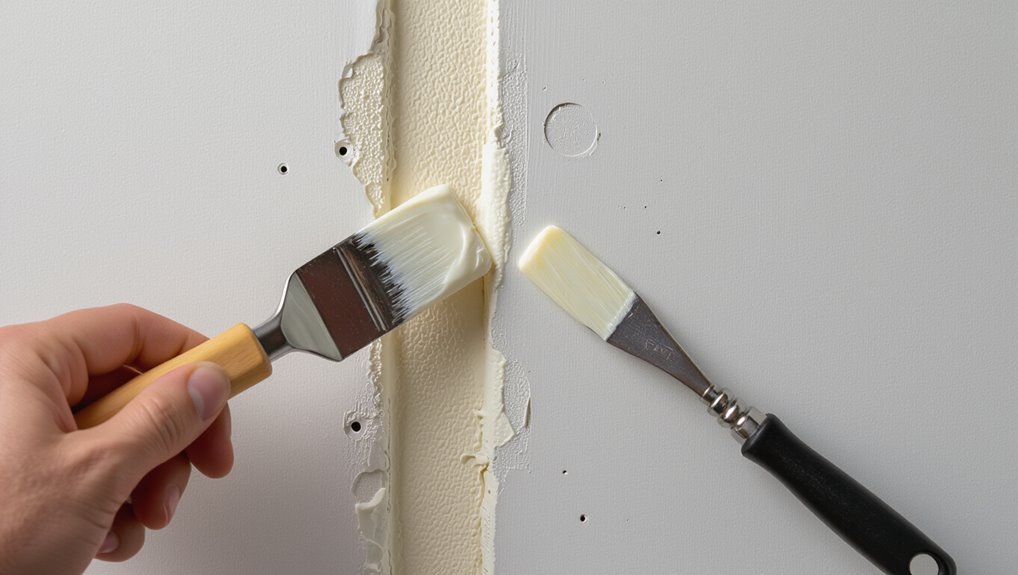
Fill nail holes and small dents right away so you don’t waste spackle smoothing over deeper damage.
Start with wall inspection: press a putty knife to confirm edges are solid, then scrape loose paint.
For nail hole repair, force spackle application into the divot, overfill slightly, and pull tight. Let it dry fully, then sand flush with feathered edges for surface preparation.
Use proper repair techniques for dent filling—thin layers prevent shrink and pinholes.
Check texture matching against surrounding drywall, then wipe dust for paint adhesion.
- Press spackle firmly
- Feather and sand evenly
- Recheck texture before priming
Repair Cracks: Spackle Technique That Holds
Once you find a crack, you need to treat it before it spreads—spackle won’t bridge major movement, but it can lock down hairline damage when you apply it correctly.
Start with crack assessment: check width, length, and whether the crack changes after a day. Clean out dust and loose paint, then widen lightly with a scraper so spackle can grip.
Use your putty knife to press spackle application firmly into the gap, filling flush, not mounded. Let it dry fully, sand smooth, and wipe clean.
Repeat thin layers until you can’t catch a fingernail on edges.
Patch Around Switches, Outlets, and Vents
After you’ve locked down the crack, you can focus on the spots that always get bumped—switch plates, outlets, and vents.
Remove switch covers, outlet plates, and vent grilles. Lightly score loose paint, then press filler into gaps with tight patch techniques.
Remove switch covers, outlet plates, and vent grilles; lightly score loose paint, then press filler into gaps with tight patch techniques.
Choose the right spackle types: a setting compound for deeper bites and lightweight spackle for shallow chips. Use a putty knife to feather until you get smooth finishes, then practice edge blending around outlet edges and vent areas.
For best texture matching, remember:
- Apply thin layers, drying between coats
- Feather edges outward, not inward
- Clean tools for crisp, flat transitions
Fix Peeling Paint Spots Before Any Fill Work
Before you spread any filler, you need to deal with peeling paint first—otherwise the patch won’t hold. Inspect the wall for peeling paint, bubbles, and loose edges. Scrape away every failing layer until you reach solid paint or bare drywall.
Feather the perimeter so the changeover is smooth. For stubborn spots, sand the area lightly and wipe off dust. Apply a bonding primer over exposed substrate to prevent future lifting.
Then use drywall spackle or joint compound only after the surface is stable. Choose repair techniques that match the damage so the finish stays even.
Use Caulk When the Crack Can Move
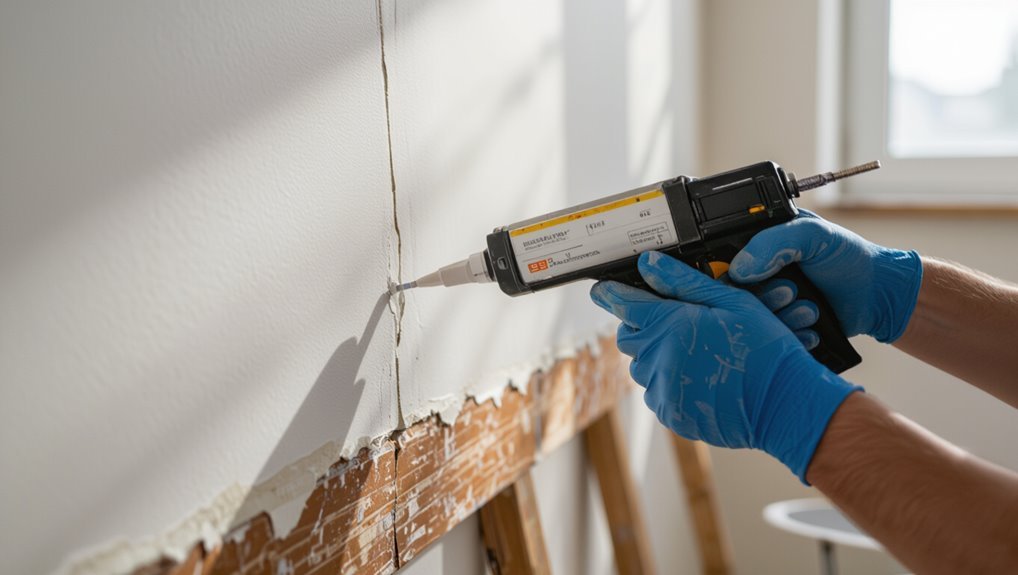
When you find a crack that can open and close—around door frames, near corners, or in areas that flex as the house settles—use caulk instead of rigid spackle.
Choose the right caulk types for the job, then apply it with solid caulking techniques. You’re sealing, not filling; you’re allowing movement considerations so the repair won’t split later.
Choose the right caulk, then apply solid caulking techniques—seal seams for movement, not rigid filling that can split later.
Focus on seam sealing where two surfaces meet, and keep flexible applications in mind.
- Select caulk types matched to paint and gaps
- Apply with steady pressure along the crack
- Tool smooth to lock the bead and improve crack prevention
Apply Spackle in Thin Layers, Not Lumps
Spread your spackle in thin coats instead of trying to fill everything at once.
Let each layer dry fully, then add another thin coat until the surface is smooth and level.
Keep your knife movements light and controlled so you avoid lumps and low spots.
Spread Spackle Thin Coats
Apply a thin layer of spackle across the damaged area, then resist the urge to mound it on. You’ll get better results with proper spackle consistency and clean application technique.
Use a putty knife held nearly flat, and spread compound outward just beyond the crack or hole. If you see ridges, stop and smooth them while the spackle is workable.
- Keep the knife edge light to avoid gouging.
- Feather every pass into the surrounding drywall.
- Rework skim spots immediately before it skins over.
Build Layers, Avoid Lumps
After your first thin coat goes on smoothly, your goal shifts to building up the repair without adding bulk.
Let each pass dry fully, then apply the next thin layer using steady pressure and clean, overlapping strokes. Keep your putty knife nearly flat to maintain even layer techniques and to control thickness.
If you see ridges, you didn’t blend enough—scrape them down before adding more. For lump prevention, resist piling spackle; instead, make several light coats until the surface matches surrounding drywall.
Sand between coats, then stop when it feels flawless under your fingertips.
Feather the Edges So Repairs Disappear
Once your patch compound covers the damaged spot, you can feather the edges so the repair blends into the surrounding wall.
Use a feathering technique with a wide putty knife, dragging lightly outward so the thickness tapers. Reload your knife sparingly and repeat until the changeover disappears.
Use a wide putty knife, drag lightly outward to taper thickness, and repeat sparingly until the repair blends seamlessly.
Focus on edge blending, not filling from the center—thin coats win. Let each layer dry, then skim again for clarity.
When you sand, blend in circles and stop when the sheen matches.
- Taper the compound wider each pass
- Keep pressure light at the perimeter
- Sand after full curing for invisibility
Reinforce Wider Cracks With Mesh Tape
Inspect the wider crack edges and square up any loose material so the repair has solid boundaries.
Press self-adhesive mesh tape firmly over the crack, smoothing it out without bubbles or gaps.
Then feather the tape with spackle, building thin passes until the surface blends cleanly with the wall.
Identify Wider Crack Edges
When a crack is wider than a hairline, you need to spot its full edges before you reinforce it. Start wider crack identification by running a putty knife along the crack; you’ll feel where it disappears into the drywall or plaster.
Perform crack assessment with a flashlight at an angle—shadow gaps reveal the real spread. Clear loose bits with light scraping, then test firmness with fingertip pressure. Mark the boundary with pencil so you know what to clean and feather.
- Check for steps or lifting at each side
- Locate where the crack stops moving
- Verify depth by gently flexing nearby drywall
Apply Self-Adhesive Mesh Tape
Next, apply self-adhesive mesh tape directly over the marked crack, centering it so the adhesive covers the full width of the damaged area. Press firmly along both sides, using your fingers or a plastic spreader to eliminate bubbles and guarantee tight contact. This mesh tape application helps reinforce wider cracks and supports your later smoothing work. Use these repair techniques to stay consistent:
| Area | Action | Check |
|---|---|---|
| Crack center | Align tape | No gaps |
| Length | Smooth as you go | Flat contact |
| Edges | Press perimeter | Clean adhesion |
| Corners | Trim gently | Snug fit |
Feather Tape With Spackle
After you’ve pressed the mesh tape down firmly, load your putty knife with spackle and apply it over the tape in thin layers.
Use feathering techniques to spread spackle wider each pass, smoothing edges until the patch blends. Keep pressure steady so the tape stays buried, not raised.
For better results, focus on tape application and full coverage:
- Press spackle from center outward to avoid ridges
- Let each layer dry, then sand lightly before the next
- Feather to at least 2–3 inches beyond the crack to prevent show-through.
Build Uneven Areas With Multiple Thin Passes
To build uneven areas, you’ll get the best results by applying compound in multiple thin passes instead of trying to “catch up” with one thick layer.
Use thin layer techniques: spread a skim coat over low spots, then stop at feathered edges. Adjust your spackle consistency so it flows without sagging; aim for a smooth, spreadable paste.
After each pass, let the surface stay workable and correct any ridges while they’re still fresh. Build up gradually, checking from different angles and lightly smoothing between layers with your putty knife.
Let Spackle Dry Fully Before Sanding
You’ll get a smoother finish when you let the spackle dry completely before you sand.
Give it full curing time so it doesn’t gum up or smear under the sandpaper.
Once it’s fully cured, sand lightly to level the patch and blend it into the surrounding wall.
Allow Full Drying Time
Once you finish filling the dents and nail holes, let the spackle dry completely before you sand. Don’t rush; spackle firms up as moisture leaves, so your timing matters.
Use drying techniques that respect ideal conditions, like steady room temperature and good airflow. If humidity is high or the room is cool, you’ll need longer than usual—plan for it.
Check the surface: it should look matte, feel firm, and show no cool damp spots.
- Drying time prevents crumbling edges
- Airflow helps moisture escape evenly
- Consistent temperature reduces rework
Sand After Complete Cure
Sand only after the spackle fully cures—usually once it turns uniformly matte and feels hard, with no soft or cool spots.
When it’s ready, you’ll want careful sanding techniques: use a sanding block or pole sander for flat areas, and fold sandpaper for corners.
Start with 120–150 grit to level ridges, then switch to 220 grit for a smoother blend. Keep light, even pressure so you don’t dish the surface.
For dust management, vacuum as you sand, then wipe with a damp cloth or tack cloth before painting.
Sand Until Flat: Paint-Ready Smoothness
After the spackle dries, sand the surface until it feels uniformly smooth—no ridges, pinholes, or tool marks.
Use consistent sanding techniques: start with 120–150 grit, then progress to 220 grit for smooth finishes. Keep a light, even pressure so you don’t dig into surrounding drywall. Wipe away dust often, because leftover grit can telegraph through paint.
- Check with a flashlight at an angle to spot dull patches
- Feel with your fingertips to catch pinholes early
- Refill tiny divots, then sand again for a flat, paint-ready surface
Avoid Ridges, Grooves, and “Wavy” Sand Patterns
While you sand, keep your pressure even so you don’t create raised ridges that telegraph through paint.
Focus on feathering your edges and blending each patch so groove lines fade instead of staying visible.
If your surface starts to look wavy, pause, flatten with light passes, then check with your hand for a smooth, seamless finish.
Prevent Raised Ridges
To prevent raised ridges when you spackle, apply the compound in thin layers and keep your trowel flat.
Use a preventing texture mindset: you’re building a smooth base, not a mound. After each pass, lightly feather the edges so the surface disappears into surrounding drywall.
Don’t overload or chase perfection in one go; that’s how bumps form and you’ll fight them during smoothing techniques.
- Press just enough for full contact, then lift cleanly
- Let layers dry before sanding or you’ll drag ridges back up
- Sand with gentle pressure, checking across the wall and corners
Minimize Groove Lines
Minimize groove lines by sanding with a light, consistent touch and moving your sander in smooth, controlled passes—not in tight circles that create “wavy” tracks.
Press just enough to level the spackle, not enough to dig new channels. Change paper sooner when it loads or clogs; dull grit increases drag and leaves streaks.
Keep edges flatter by using a sanding block rather than fingertips for corners. Focus on groove prevention: skim the surface evenly and feather out every shift with smooth application.
After sanding, wipe dust thoroughly so you can spot remaining lines before you apply another thin coat.
Achieve Smooth Sand Blend
Create a smooth sand blend by keeping your sander flat and your strokes even, so you level high spots without carving new channels.
You’ll get better results when you focus on smooth blending across patch edges, not just spots. Use light, consistent pressure; let the paper do the work. When you feel ridges, stop and re-skim with fresh compound, then sand again.
- Blend each patch outward in wide passes
- Practice edge feathering where compound meets wall
- Stop often, wipe dust, and check with a light at an angle
Remove All Dust Before Prime
Before you prime, remove every trace of dust from the spackled wall—fine particles can weaken adhesion and cause primer to flake.
Use reliable dust removal techniques: vacuum the surface with a brush attachment, then wipe with a tack cloth or microfiber dampened slightly with clean water.
Next, rinse the sponge often so you don’t smear grit back across repairs.
For corners and edges, use a soft paintbrush to lift dust, then follow with vacuum and a final wipe.
Let the wall dry fully before priming using ideal cleaning methods.
Check Repairs Under Bright Angled Light
How can you be sure your spackle patch is truly smooth? Before you prime, position a bright angled light—like a desk lamp—so it skims across the wall.
Watch closely for shadows that reveal ridges and pinholes; that’s your light reflection testing repair visibility. Move the lamp slowly up, down, and across each patch, because surface flaws shift as the angle changes.
You should:
- Scan the whole patched area, not just the center
- Recheck edges where feathering meets wall
- Stop if you spot stubborn lines or dents, then fix now
Rebuild Low Spots With Thin Skim Passes
Spot the low areas with a bright light, then mark them so you know exactly where to build up.
Apply thin skim layers, let each layer dry fully, and repeat until the surface is even.
Once dry, sand smooth, checking your progress with the light as you go.
Assess Low Spots With Light
Once you’ve marked the dips, you can confirm which spots truly need filling by shining a bright light at a shallow angle across the wall—what looks flat in normal room lighting often shows up as a shadowed low area.
Use this light assessment to guide your wall evaluation before you rebuild. Hold the light close and move it slowly; shadows reveal where spackle won’t sit flush. Mark only the areas that cast clear, consistent lines.
- Keep the bulb low and angled
- Watch for drifting, widening shadows
- Recheck corners and seams under different angles
Apply Thin Skim Layers
After you’ve confirmed the low spots with your light check, apply the spackle in thin skim layers so it levels without cracking or shrinking.
You want a skim coat that feathers out past each dip. Use your putty knife to press firmly, then make smooth passes to spread material evenly. Scrape excess back onto the blade so you don’t build ridges.
Let each layer set until firm, then add another thin skim pass only where needed. Keep checking for texture uniformity as you go; stop once the wall looks continuous and flat.
Sand Smooth After Drying
Let the spackle dry completely, then sand it smooth with a sanding block or pole sander using 120–220 grit.
After it hardens, you’ll rebuild low spots with thin skim passes, then blend edges so the patch disappears. Use steady, light pressure and change directions to catch ridges.
Check often with a flashlight held low across the wall; shadows reveal bumps.
- Keep passes thin to avoid shrinking dips.
- Feather the perimeter for smooth finishes.
- Follow good sanding techniques to level without gouging.
Skim Coat vs. Spot Patch: When to Choose Which
When you’re fixing a wall, you have two common options—skim coating or spot patching—and choosing the right one saves both time and finish quality.
Use skim coat benefits when you need overall flatness: apply a thin layer across wider areas to correct waves, then sand smooth for uniform texture considerations.
Use skim coating for overall flatness—apply a thin layer across wider waves, then sand smooth for a uniform finish.
Choose spot patching techniques for small dents, holes, or isolated cracks, using application differences like feathering just the damaged spots.
For repair strategies, keep layers light, follow manufacturer drying times, and reassess under raking light.
If edges still telegraph after drying, you’ll need another pass.
Prime Patched Areas for Better Adhesion
Once your patchwork is dry and sanded smooth, prime the repaired areas so the next coat bonds evenly. You don’t want dry spackle application to drink paint or flash unevenly.
Choose a stain-blocking drywall primer if you spot discoloration, and use a bonding primer for slick or chalky spots. Apply with a brush or small roller, feathering edges so the patch fades into the wall. Then let it dry fully before painting.
- Seals porous spackle and reduces pinholes
- Improves adhesion for a uniform finish
- Guides your primer selection based on patch size
Match Primer Sheen to Your Finish Paint
Match your primer sheen to the finish paint so the wall looks even. You’ll get better finish compatibility when you choose primer types that match how your topcoat reflects light. If you’re painting a flat or matte finish, use a flat primer to minimize glare. For eggshell or satin, select a primer with a slight sheen so patches blend in. For semi-gloss or gloss, opt for a higher-sheen primer to prevent dull spots.
| Finish paint | Primer sheen target | Coverage notes |
|---|---|---|
| Flat/matte | Flat | Low reflection |
| Eggshell/satin | Low sheen | Fewer shadows |
| Semi-gloss | Medium sheen | Smooth shifts |
| Gloss | Higher sheen | Match highlights |
Prevent Flashing by Managing Dry Time and Coats
To prevent flashing, you need to control both dry time and how many coats you apply. You can’t rush spackle, or the patch will cure unevenly and telegraph later.
Use reliable dry time strategies: wait until each section feels fully set, not just skin-dry, then sand lightly.
Wait for each patch to fully set, not just skin-dry, then sand lightly before moving on.
Apply paint with tight coat management—thin, even passes, and don’t “touch up” areas that start drying. Keep your work consistent from corner to corner.
Consider:
- Check dryness by touch and timing
- Maintain uniform coat thickness
- Blend edges before the next coat sets
Paint Like a Pro: Roll Direction and Blend Tips
Rolling the paint correctly keeps your patch from showing—so pay attention to direction and blending from the start.
Use the roll technique: keep your strokes in one direction, slightly overlapping each pass, then feather the wet edge for smooth application.
Choose the right roller type for the texture you’re painting, and maintain proper paint consistency so the nap doesn’t spatter.
Watch your paint sheen; match it across the wall.
For edge blending, roll out from corners and seams with light pressure.
If you need touch up methods, stop blending before it dries, and do color matching immediately.
Common Spackling Mistakes That Show Through
Even if your spackling work looks fine at first, a few common mistakes will make the patch stand out once the paint dries. You’ll see repair visibility failures when spackle consistency is wrong or you rush wall preparation.
Even if your spackling looks fine, rush preparation or wrong consistency can make patches stand out once paint fully dries.
Use the right common tools, and respect drying time before sanding or painting. If you skip proper patching techniques, the surface texture won’t blend, hurting paint adhesion.
Watch for these issues:
- Overfilled seams that shrink and leave a dip
- Uneven feathering that creates ridges in sunlight
- Painting before full cure, trapping moisture
Double-check everything so your wall stays smooth.
Fix Bulges, Pinholes, and Shrinkage Fast
Spot bulges by pressing them down, then patch them with spackle so the wall flattens fast.
For pinholes, fill them right away and smooth with your putty knife for a seamless finish.
If you see shrinkage spots, recoat quickly to lock in the surface before it sets.
Patch Bulges With Spackle
Once you spot a bulge, you can fix it fast with spackle if you prep the spot correctly. First, scrape away loose paint or drywall paper, then smooth edges so feathering works.
You’re patching bulges, not covering dirt, so address bulge causes like loose backing or nail pops by pressing firmly and testing movement.
Use spackle techniques: press it in hard, overfill slightly, and skim thin layers as it dries. Avoid sanding until it fully sets. Check progress by running a light at an angle.
- Label spots after testing movement
- Apply spackle in tight layers
- Feather edges to blend smoothly
Fill Pinholes For Smoothness
After you’ve patched the bulge and made sure the backing holds tight, you can improve the surface by filling pinholes.
Scan the wall under angled light and mark every tiny crater. Use a small taping knife to apply spackle or lightweight filler directly into each pinhole. Press firmly so material reaches the hole, then scrape level with the surrounding drywall.
Let it dry completely, then sand the spots smooth, using a fine-grit block. Repeat if any dimples remain.
This pinhole repair boosts your surface preparation so paint lays evenly and looks crisp.
Correct Shrinkage Spots Quickly
Shrinkage spots happen when fresh drywall compound or patch filler pulls back as it cures, leaving shallow dips around your repaired areas. You need shrinkage solutions fast to keep your paint from telegraphing imperfections.
First, scrape the hollow spot edges lightly, then wipe dust. Feather on a thin skim coat, pressing firmly so it locks in. Let it set, then sand smooth with a block.
- Fix bulges by shaving high edges before re-filling
- Fill pinholes with a tight, minimal layer
- Use quick fixes: thin coats, quick dry, repeat once
Prime, then re-check lighting.
Patch Textured Walls Without Destroying the Pattern
Before you smear spackle across a textured wall, take a close look at how the existing pattern repeats so you can match it instead of erasing it.
Use textured wall techniques to feather edges tightly into surrounding ridges. Press spackle into the void with a putty knife, then lightly skim, keeping the tool moving with the texture’s direction.
For pattern preservation, practice on scrap drywall first, then tap or stipple with a sponge, brush, or knockdown knife to recreate the peaks and valleys.
Stop once it blends. Let the surface hold its contour before priming.
Plan Drying and Sanding Time Between Coats
Plan on giving the spackle time to dry fully between coats, and resist rushing to keep the texture from cracking or shrinking.
Give spackle time to dry fully between coats—rushing can cause cracking or shrinking, so sand only after it feels firm.
You’ll get smoother results when you follow reliable drying techniques and timing, then switch to careful sanding methods once the surface feels firm.
- Let each coat cure completely before adding the next; check edges for softness.
- Use light pressure and a consistent grit so you don’t gouge repaired spots.
- Wipe away dust after sanding so the next coat bonds cleanly.
Achieve a Perfect Finish After Final Paint
Once your last spackle coat has dried and you’ve sanded it smooth, you can focus on the finish after final paint. Vacuum dust, then wipe with a damp cloth and let it dry fully. Spot any pinholes, feather them, and sand again until flat. Choose finish techniques that match the wall texture: smooth roller for minimal lines, brush only for edges. Confirm paint compatibility by using the same brand or system for primer and topcoat; otherwise, adhesion and sheen can fail. Use this checklist:
| Step | Goal |
|---|---|
| Inspect | Catch defects |
| Tape seams | Prevent bleed |
| Prime | Seal spackle |
| Final coat | Even sheen |
Frequently Asked Questions
How Long Should Spackle Dry Before Sanding or Applying Another Coat?
Wait 1–2 hours for thin spackle layers, up to 24 hours for thicker fills, before sanding. Test hardness; if it feels firm and dry, use light sanding techniques with 120–220 grit, then apply your next coat.
Can I Use Spackle on Drywall Joints and Hairline Cracks?
Yes—you can use spackle on drywall joints and hairline cracks, but choose the right spackle types. Apply in thin layers with proper application techniques, feather edges, let it dry fully, then sand smooth. For wider cracks, use mesh tape first.
What if Spackle Shrinks After Drying—Do I Need a Second Layer?
If your spackle shrinks after drying, you’ll likely need a second layer. Let it cure fully, then spot-check. Choose the right spackle types, apply thin repair techniques, sand smooth, and repaint—otherwise you’ll feel every bump.
Should I Cover Spackle Repairs With Primer Before Painting?
Yes—cover spackle repairs with primer before painting. After sanding smooth, apply a stain-blocking or bonding primer; primer benefits include uniform absorption and improved paint adhesion, preventing flashing. Choose spackle types matched to the crack size for best results.
How Do I Blend Patched Areas so Seams Don’T Show?
Blend patched areas by feathering spackle edges outward with a putty knife, using patch blending techniques and seamless repair methods. Let it dry, sand progressively fine (120→220 grit), then wipe dust, apply spot primer, and lightly sand again before painting.
Conclusion
Once you’ve inspected the wall, picked the right spackle, and done your sanding like a pro, you’ll be tempted to declare victory early. Don’t. Let the coats dry, sand between layers, and dust everything off—because “mostly smooth” is how perfectly good paint gets blamed. With careful patching and patience, you’ll end up with that crisp, even surface you wanted. Ironically, the smoothest finish comes from doing less guessing and more prep.
