
Does Paint Look Patchy When Drying? What’s Normal and What’s Not
You can definitely see patchiness while paint dries, and that’s often normal. Uneven absorption, rushed application, dry edges, and sunlight or drafts can make spots look darker, lighter, or different in sheen before they level. Color can shift too as pigments settle. If patchy areas remain after full curing, you likely have poor prep, thin primer/topcoat coverage, or inconsistent coat thickness. Fix by sanding, spot-priming, and reapplying thin, even coats—then check in angled light to confirm, so you’ll know exactly what to do next.
Why Paint Looks Patchy While Drying (Patchy Paint)
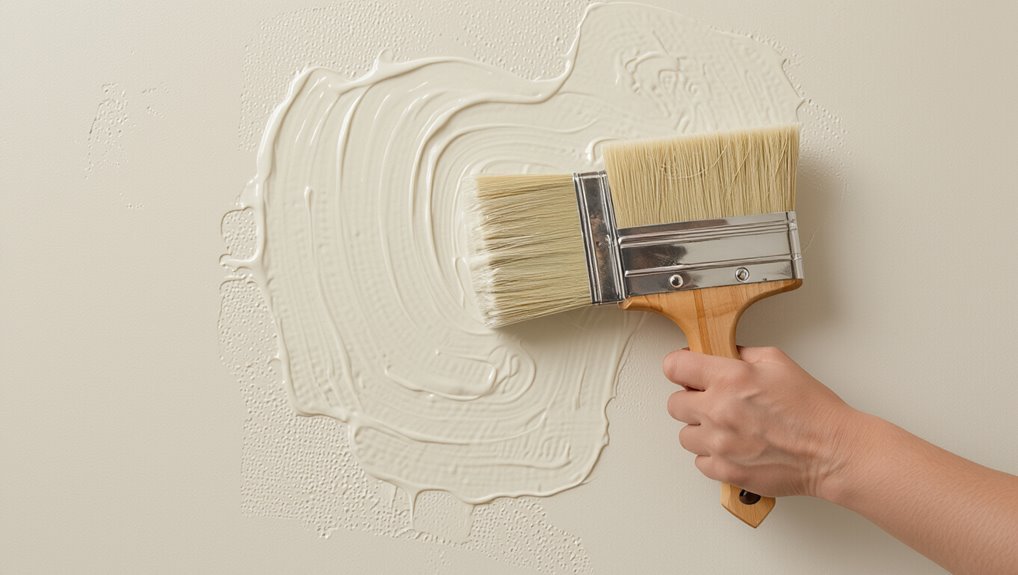
As the paint dries, you might notice patchy areas because the coating can’t level out evenly—especially if the surface absorbs unevenly or you apply too much product in one spot.
You’ll see weak color consistency when primer coverage varies, old paint remains slick, or dust interrupts bonding.
During paint application, rushed cutting-in, uneven roller pressure, or skipping back-brushing leaves dry edges that darken or lighten.
Temperature, humidity, and airflow also speed drying unevenly, pulling pigment together in some regions.
Fix patchiness by leveling the surface, thinning or mixing properly, and applying thin, even coats.
How Wet-to-Dry Color Shifts Affect Coverage
As you apply paint, wet-to-dry color shifts can change the way the surface reflects light, so coverage can look uneven at first.
You may notice darker or lighter patches forming even when the coat thickness is consistent.
As it dries fully, the tone evens out and the overall coverage looks more uniform.
Wet-to-Dry Color Shifts
When your paint goes from wet to dry, pigment particles settle and bind more tightly, so the color often shifts and the finish can look lighter or darker than it did at first.
During the drying process, pay attention to your color consistency and how it changes as the surface cures. Your wet paint can appear richer right after application, then level off once it dries.
- Check color after it fully dries, not just after flashing.
- Use consistent application techniques to reduce sudden tone changes.
- Stir and match batches to keep color consistency steady.
Coverage Appears Uneven Initially
Even though wet paint may look even right after you apply it, wet-to-dry color shifts can make coverage seem uneven once the surface cures. As the coat loses moisture, pigments settle slightly and reflect light differently, so darker and lighter areas appear where none seemed to exist.
You may also notice changes in paint texture: edges can look more pronounced while smoother patches fade. Check your color consistency across the wall before you judge coverage.
If the unevenness disappears after a second coat, it’s usually normal. If it stays, you may need better prep or thicker application.
Drying Evens Out Tone
Once your first coat starts drying, wet-to-dry color shifts often smooth out the “uneven” look you noticed earlier.
During the drying process, pigment settles and water evaporates, so the sheen fades and the color evens across the wall. If patchiness still shows, check your paint consistency—too thin can streak before it levels.
- Let each section dry fully before judging coverage.
- Watch for halos shrinking as the surface dulls.
- Recoat if color variation stays after drying.
What Patchy Spots Usually Mean on Walls
Patchy spots on freshly painted walls usually signal an uneven bond between the coating and the surface, so you end up with areas that look lighter, darker, or slightly mottled.
You often see it when wall texture and surface compatibility fight your paint types. Review paint quality, surface preparation, and preparation methods, because dust, chalky drywall, or glossy residue breaks coverage consistency.
Your application techniques matter too: wrong roller types, brush techniques, and inconsistent coat thickness cause uneven color theory and sheen effects.
Check drying conditions, humidity levels, drying times, and environmental factors. Also consider paint finish and light effects.
Use compatible primer types and adjust drying time.
When Patchy Paint Is Normal With Water-Based Paint
With water-based paint, you can sometimes see patchiness that’s normal during the first drying stage—especially right after you roll or brush a section.
Don’t panic; you often see it because the wet film thins unevenly. Use good paint application habits and water based techniques to help it level out as moisture evaporates.
- You applied multiple light coats, not one heavy layer
- Roller nap or brush marks create temporary streaks
- Drying drafts cause uneven surface tension
Once the coat cures, the sheen evens.
Let it dry fully before judging the finish.
When Patchy Paint Is Normal With Oil-Based Paint
If you notice uneven sheen or faint streaks while your oil-based coat is drying, that can be normal during the early stages.
You may see a slight patchy appearance as the solvent flashes off and the drying texture sets. Good surface preparation helps even out absorption and reduces early mottling.
You also control results with your application technique—avoid overworking and apply a consistent, moderate film thickness.
Drying conditions matter: stable temperature, airflow, and humidity prevent streaks. Environmental factors like dust can exaggerate unevenness.
Finally, paint quality influences flow and leveling; choose reputable oil paint for smoother final appearance.
How Primer Coverage Changes the Final Dry Look
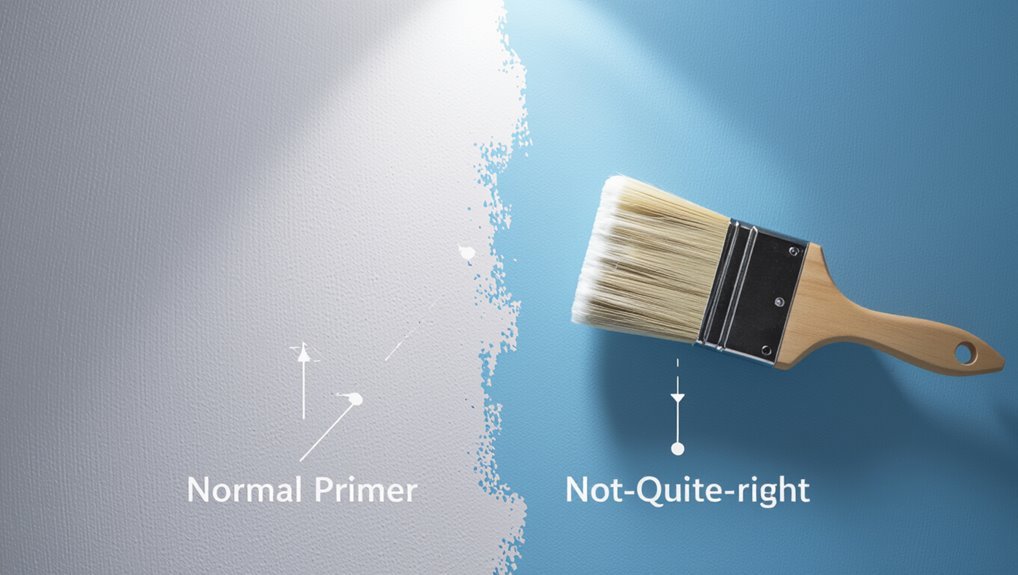
When your primer coverage is uneven, your final dry color can shift, because thin areas absorb more and reflect less light.
If you leave thin spots, they often show through the topcoat once everything dries.
You’ll get the clean, consistent dry look you want by applying primer evenly and letting it cure fully before painting.
Primer Coverage Affects Dry Color
Primer coverage directly shapes how your paint dries, because it controls how much color you actually “build” on the surface.
During primer application, you’re setting the base value, so your topcoat’s dry tone reflects what’s underneath, not just what you spray. Different primer types absorb and reflect light differently, making some finishes look richer or flatter as they cure.
To control the final dry color, you should:
- apply even primer coats across the whole area
- match primer type to the topcoat sheen you want
- verify coverage under good lighting before painting
Thin Spots Show Through Primer
Even with the right primer type, inconsistent coverage can sabotage the way your topcoat cures. If you spot thin spots, your primer may not fully block stains, old paint, or substrate texture.
That’s where thin spot causes show up: the topcoat dries with darker halos, dull patches, or visible grain. You might think you applied enough paint, but primer interaction changes everything—uneven primer absorbency pulls solvents differently and alters gloss.
To fix it, inspect after priming, let it fully cure, then apply light, even topcoat coats, sanding only between coats if needed.
Choose the Right Sheen to Prevent Blotchy Paint
Choosing the right paint sheen helps you control how light reflects and how evenly the surface holds paint, which directly reduces blotchy-looking patches.
Choosing the right paint sheen controls light reflection and paint leveling, helping prevent blotchy patches and create a more even finish.
As you pick sheen types, remember that different sheen effects change coverage perception as the coating dries. You’ll get the most even look when you match sheen across walls and tools, then keep your application consistent.
- Choose flat for hides, but expect more texture.
- Use eggshell or satin for smoother, easier touch-ups.
- Stick to the same sheen on ceilings, too.
Before you start, test a small area to confirm the final sheen effects look uniform to you.
How Lighting Can Make Paint Look Patchier
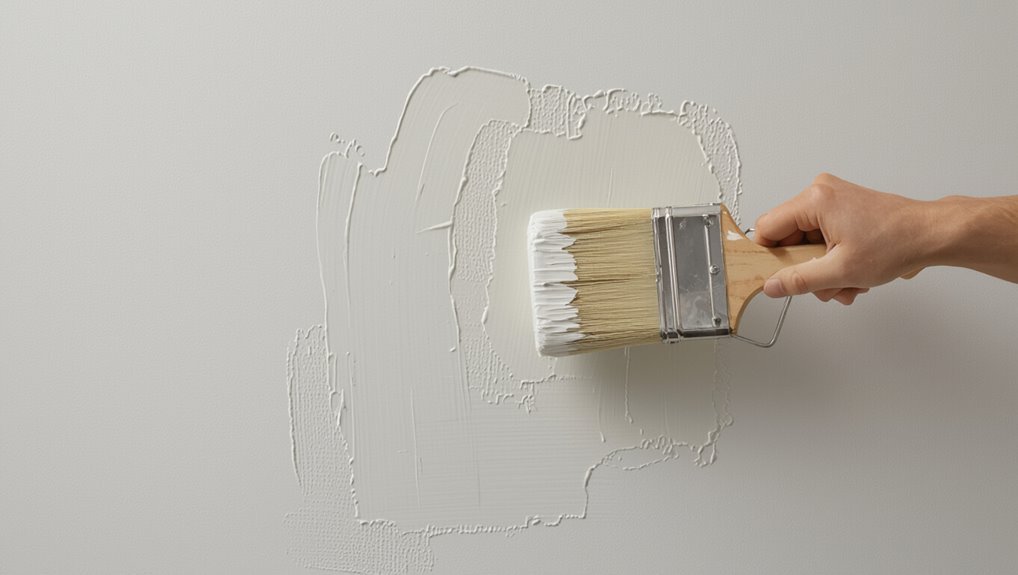
When light hits your wall at an angle, it can exaggerate small inconsistencies and make paint look patchier than it really is. You notice lighting effects most along edges, corners, and ceiling lines where shadows grow. Even if the coat is uniform, glare can reveal uneven paint texture, especially on glossy or heavily smoothed surfaces.
| What you see | Why it happens |
|---|---|
| Dark specks | Shadow pooling |
| Uneven sheen | Light reflection differences |
| Blotchy bands | Directional glare |
| Bright halos | Drying ridges catching light |
Step back, change positions, and view in softer, diffused light to confirm what’s truly patchy.
How Roller Nap Affects Patchy Coverage Patterns
Roller nap length plays a big role in whether your paint lays down evenly or shows patchy coverage patterns. If your roller nap is mismatched, you’ll struggle with coverage consistency, and your paint texture will look uneven.
Adjust your application technique and roller type to control paint absorption and surface interaction:
- Use a shorter roller nap for smooth walls to keep finish quality consistent.
- Match longer nap to textured surfaces, so paint reaches highs without starving lows.
- Maintain steady pressure and even passes to stabilize coverage consistency.
Brush Marks vs True Patchy Paint Coverage
Brush marks can look like “patchy coverage,” but the causes differ. When you see streaks, they often come from brush strokes overlapping unevenly before the film levels. Your paint consistency matters: too thick holds ridges; too thin runs and thins highlights. True patchiness usually shows real gaps after drying, not just directional texture. Use this quick guide:
| Sign | Likely cause | What to do |
|---|---|---|
| Streaks | brush strokes | back-brush lightly |
| Ridges | thick paint | thin slightly |
| Flashes | fast pull | keep a wet edge |
| Spots | pigment lift | stir well |
| Even sheen | leveling | normal drying |
How Applying Too Little Paint Creates Dry Patches
Applying too little paint leaves exposed areas that dry before the surrounding film can merge, so you get real dry patches instead of a uniform coat.
When you rush paint application or stretch coverage, the paint thickness drops and the surface can’t level out while it cures. You’ll notice dull spots, a rough feel, or slight color changes where the binder didn’t build.
Rushing paint thins the film, preventing self-leveling as it cures—dull spots, rough texture, or color changes may appear.
To fix it, focus on consistent coverage and reload your tool when needed:
- Apply enough paint to wet out fully
- Watch paint thickness across the whole area
- Avoid repeated light passes that miss spots
How Heavy Coats Lead to Uneven Drying
When you apply a heavy coat, you slow evaporation, so the surface can’t dry at the same pace as the layers below.
As a result, drying becomes uneven across the film, with some areas setting while others lag. Those thick spots often stay tacky much longer than thinner sections.
Heavy Coats Slow Evaporation
Even though you might think extra thickness speeds the job, heavy coats trap solvent and slow evaporation from the surface to the lower layers. You notice this during the drying process: the top film can skin over while moisture still works its way out underneath.
As paint thickness increases, diffusion slows, and your schedule stretches. Watch for these signs as the heavy coats hold onto volatiles:
- Longer tack-free times
- Stronger odor lingering
- Soft or rubbery feel near edges
When you keep coats lighter and allow proper flash time, slow evaporation becomes more even.
Uneven Drying Across Layers
Heavy coats don’t just slow evaporation—they also create uneven drying across the paint film. When you use thick layer thickness, top surfaces dry first while deeper zones stay wetter, so you see patchiness even when the coat eventually levels.
Your paint types matter, but your application techniques matter more: apply in even passes, maintain consistent pressure, and avoid overloading corners.
Start with solid surface preparation so adhesion stays uniform. Then control environmental factors like humidity and airflow, and match drying conditions to the product.
Good paint quality supports steady texture uniformity; poor batches amplify irregular cure.
Thick Spots Stay Tackier
Thick spots stay tackier because heavy coats trap moisture and slow evaporation from the bottom of the paint film. If you use a thick application, you risk soft, sticky patches that don’t level out.
You might notice them around edges, overlaps, or where you reloaded the brush too often. To prevent this, check your drying conditions and adjust your pace:
- Apply thinner coats and spread evenly.
- Allow full cure before recoating.
- Improve airflow and temperature consistency.
Spacing, Overlap, and Back-Rolling Tips
To prevent uneven sheen and avoid missed spots, keep your paint spacing consistent by overlapping each roller pass about 1/2 to 1 inch, and don’t let edges dry between strokes.
Keep paint spacing consistent—overlap roller passes 1/2 to 1 inch and avoid letting edges dry between strokes for even sheen.
Use solid Spacing Techniques and follow clear Overlap Guidelines so Coverage Strategies stay even across the wall.
Maintain steady Application Patterns: roll W, then fill gaps with light, uniform pressure.
Try Back Rolling Methods right after rolling to level ridges, especially near corners.
Blend roller work with controlled Brush Techniques at edges and seams.
Before you start, focus Surface Preparation and match Sheen Selection to reduce flashing.
Drying Time: Where Patchy Paint Shows Up
Once paint starts to flash or set, patchy areas often show up where drying happens unevenly. You’ll notice it right after your paint application, especially in edges, rolled seams, and spots that stayed thicker.
As the surface firms, dry-to-tacky shifts can leave lighter islands or darker bands. Use solid drying techniques and adjust your workflow before the coat locks up:
- Keep a consistent wet edge while you work
- Avoid overloading the roller or brush
- Back off and blend quickly, then stop touching
If patchiness appears too soon, your drying time was too short or your coat too heavy.
Temperature and Humidity Effects on Patchy Paint
Temperature and humidity can speed up or slow down drying, and patchy paint often follows that mismatch. You need temperature control and steady humidity levels, or your drying conditions swing and affect how each coat cures.
You should match paint application timing to the weather; if you rush drying time in heat, solvent can flash unevenly. Poor surface preparation magnifies environmental factors: dust or damp spots let the film shrink differently.
Check paint quality and follow the label’s drying time. Also note substrate differences—dry drywall vs aged wood reacts differently.
Fix Patchiness From Airflow and Drafts
Even small drafts can make patchy paint worse, because moving air cools the surface unevenly and dries one area faster than the next. To fix this, check airflow effects around your work zone and eliminate common draft sources before you repaint. You’ll get more even cure when you control conditions.
- Close windows and turn off fans that blow across the wall.
- Move plastic sheeting and floor fans away from the surface.
- Use a gentle, indirect ventilation path, not direct air jets.
If patchy spots appear mid-dry, stop disturbing the area, let it level, then touch up only after it fully dries.
Direct Sun: Why It Dries Paint Unevenly
When you paint in direct sun, the surface warms unevenly and starts curing at different rates.
Those hot spots dry faster than cooler areas, leaving visible patchiness and dull streaks.
You’ll get the most even finish by blocking direct beams and keeping temperatures consistent across the whole surface.
Sunlight Causes Uneven Drying
Direct sunlight often dries paint unevenly because the brightest spots get heat and airflow first, forming a surface film before the rest of the coat can level out.
You can prevent this by tuning sunlight intensity and coordinating drying techniques with your process and paint types. Start with solid surface preparation, then keep conditions steady using temperature control, humidity levels, and airflow management.
Use consistent application methods; don’t rework after skin forms.
- Shade the work area, then let it dry uniformly
- Use proper primer selection and avoid weak spots
- Follow rollering tips to maintain even film thickness
Hot Spots Create Patchiness
Hot spots from direct sun create patchiness because they heat only part of the surface first, driving faster skinning while the surrounding paint still levels. You end up with a mottled look as cooler areas remain workable longer. Watch where hot spots form around edges, vents, and shiny spots—then adjust your drying techniques to break up uneven heating. Check conditions, cover reflective surfaces, and move or shade freshly painted sections.
| Spot | What you see |
|---|---|
| Center blast | Dry, dull patches |
| Edge glare | Ringed texture |
| Near hardware | Blotchy halos |
| Cool corners | Still glossy |
| Windside | Crinkled finish |
Recoat Timing Mistakes That Cause Patchy Walls
If you recoat too soon or wait too long, you’ll end up with patchy walls—often because the first coat hasn’t cured evenly.
Your recoat timing controls how the next layer bonds, and your paint application controls how smoothly it spreads.
Watch for these recoat mistakes:
- You trap solvent by adding the second coat early, so the surface dries unevenly.
- You wait past the recommended window, and you get weak adhesion and dry drag.
- You don’t keep edges wet during rolling, leaving lap marks that show through.
Stick to label cure times and apply evenly, thinly, and consistently.
What Paint “Flashing” Is (And How to Stop It)
Paint flashing happens when moisture or solvents in the first coat rise up through the new coat and briefly break its surface sheen, leaving uneven color, a blotchy look, or shiny “waves.”
You usually trigger it during paint application when the prior layer isn’t fully settled, or when drying factors like heat, airflow, and humidity pull solvents upward.
To stop it, keep recoat timing consistent, follow thinning directions, and apply even coats at the right thickness.
Reduce fans or direct sun, and avoid overworking the wet surface.
If you see flash, let it cure, then sand lightly and repaint smoothly.
Trapped Contamination: Spotting the Cause Under Paint
Even when you stop flashing, you can still get spots that look like specks, tiny bubbles, or rough dots—often because contamination gets trapped under the new coat.
You may notice surface contamination left in seams, roller nap, or dusted corners, and it disrupts paint adhesion as the film cures.
Spot the cause by watching where specks appear repeatedly after each pass, then correct your prep so debris can’t seal under paint.
Try these checks:
- Wipe and tack-rag between coats
- Clean tools and change worn covers
- Lightly sand and vacuum before repainting
Chalky, Dusty, or Glossy Surfaces That Cause Patchiness
Sometimes your surface comes ready for trouble: chalky residue, dust, or a lingering gloss from prior coats can block bonding and leave your new paint to cure unevenly.
If you paint over chalky surfaces, the top layer powders and interrupts adhesion, creating texture differences and dull dry spots.
On dusty textures, grit prevents wetting, so you see patchiness with inconsistent color intensity.
If prior layers left glossy finishes, paint can’t grip, causing sheen variations and drag marks as it dries.
Fix by cleaning, sanding to dull, and wiping residue before you prime and repaint.
Old Layers Bleeding Through and Looking Patchy
If old coatings or stains weren’t fully sealed, they can migrate upward and show through as discoloration or uneven blotches while your new paint dries.
You’ll notice old paint seams, tinted halos, or dull patches that look like surface imperfections. This is often color bleeding from stains, watermarks, or prior colors pulling through.
- Verify your primer blocks stains, not just hides.
- Address moisture or contaminants before painting.
- Use consistent application techniques to avoid thin spots.
Let it dry fully, but if the blotches keep growing, you may need spot-sealing and a recoat with the right primer.
Caulk Lines and Repairs That Create Mottling
When you patch with caulk and filler, uneven material thickness and shrinkage can telegraph through the wet paint and show up as mottling or cloudy streaks while it dries. You’ll notice it most when caulk application creates ridges or gaps, then poor surface preparation traps dust and weakens paint adhesion. Use repair techniques that feather edges thin, and let each coat cure fully before you repaint. Check color consistency across blends, because different sheen and absorption exaggerate patchy textures.
| Issue | Why it mottles |
|---|---|
| Thick caulk | Shrinkage pulls light |
| Tool marks | Highlights streak |
| Unfeathered edges | Hard lines show |
| Dirty surface | Paint adhesion fails |
How Uneven Sanding Creates Patchy Topcoats
Uneven sanding can leave highs and lows in your patched area, and those surface differences make your topcoat apply and dry unevenly. You might notice dry paint looking blotchy where the repair was feathered poorly. To prevent this, focus on correct sanding techniques and solid surface preparation before you topcoat.
- Over-sanded spots drink more product, then dry lighter
- High ridges shed paint, then dry darker or glossy
- Dust trapped in grooves creates pinholes and dull patches
If you keep your sanding consistent, check flatness with your hand, and remove grit fully, your topcoat should level out as it dries.
How Multiple Coats Can Look Patchy on Purpose
When you layer multiple coats, you can build deeper color while letting slight variations show through for intentional patchiness.
You time and control how each coat sits so the next layer blends where you want, not everywhere.
Then you keep drying consistent—right temperature, airflow, and cure time—so the final finish looks uniform instead of accidentally blotchy.
Layering For Deeper Color
Layering multiple coats can give you deeper, richer color—but it also gives you control over where the paint looks patchy in a good way.
You’ll boost color depth by planning your coverage, not just adding more paint. Try these layering techniques as you go:
- Apply thin coats, letting each one grip before the next.
- Vary sheen slightly to make light catch deeper.
- Spot-cover only after you see the undercoat’s tone.
When you build gradually, micro-unevenness becomes texture, not a mistake.
You control richness by timing, thickness, and consistent direction.
Controlled Patchiness Between Coats
You can use 2–3 thin coats to create controlled patchiness between layers that looks intentional, not sloppy.
Use controlled application: load your brush or roller lightly, then work small sections with overlapping strokes so edges don’t flood. Let each coat reach touch-dry before the next, keeping the finish slightly varied where you want depth.
For ideal layering, alternate direction—horizontal on the first, vertical on the next—so any faint mottling reads like texture, not missed coverage.
If a patch stands out too much, feather it immediately with a lightly loaded tool.
Drying Triggers Uniform Finish
Even if you want a uniform finish, drying behavior can help you control intentional patchiness across multiple coats. You can start by letting each coat reach the right drying consistency, so it levels instead of tacking up.
Then you build texture where you want it, while still ending on uniform texture. Use this rhythm to guide how patches show before they blend:
- Apply thinner coats to encourage leveling
- Keep edges wet when you feather out overlaps
- Respect full cure times between coats for consistent sheen
When you manage drying triggers, the finish looks deliberate, not accidental.
How to Tell Humidity Spots From Coverage Problems
Not sure whether you’re seeing humidity spots or a coverage problem? Check your fresh coat under strong light. Humidity indicators usually look like soft, irregular blooms that spread as the surface dries, often along cooler areas, edges, or near windows. Coverage problems stay sharper: you see thin “holidays” where primer or paint didn’t fully lay down. Do a quick coverage assessment by comparing roll direction overlap marks. Use this guide:
| Sign | Humidity spots | Coverage issue |
|---|---|---|
| Pattern | Blotchy, feathered | Straight, thin |
| Edge effect | Near drafts | Random misses |
| Drying change | Expands or clears | Holds size |
When Patchiness Points to Paint Quality Issues
If you see patchiness, check whether your coverage is too thin, because that’s often what creates uneven drying and dry-looking spots.
You’ll also get patchy results when poor surface prep leaves residue, loose paint, or uneven texture, so the finish can’t lay out smoothly.
And if the primer doesn’t match the substrate or product, you may end up with mottling that shows up as irregular blotches.
Thin Coverage Causes Patchiness
When your paint goes on too thin, you often get patchy spots that look more like uneven coverage than a problem with your roller or brush. You’re usually dealing with poor paint consistency and mismatched coverage techniques.
Even good paint can fail when environmental factors and drying conditions work against you. Focus on how you apply it with the right application tools and the right layering methods.
- Check paint consistency before you start.
- Apply uniform coats; don’t chase thin spots.
- Adjust primer selection and sheen choices to match absorption.
Thin layers also magnify gaps in paint quality, especially on glossy or unevenly sealed surfaces.
Poor Surface Prep Triggers Unevenness
Patchiness often starts before you ever roll the first coat, because poor surface prep leaves behind dust, chalky residue, or uneven porosity that paint can’t bridge.
When you skip cleaning or sanding, the surface texture stays inconsistent, and paint absorption varies from spot to spot. You’ll see dull islands where the substrate drinks in more coating, and glossy patches where it seals too quickly.
Even “good” paint can’t level out defects like loose debris or partially adhered material. If it dries uneven, inspect the prep, not just the product.
Wrong Primer Results In Mottling
Using the wrong primer can quickly turn a smooth wall into a mottled finish, because it won’t bond and seal the surface the way your topcoat needs. When you grab the wrong primer types—like skipping stain-blocking or using paint meant for bare wood—you set yourself up for patchy drying and weak adhesion.
Pay attention to your primer application, because uneven coverage traps air and changes sheen. You’ll notice mottling especially on repairs, glossy spots, and damp areas.
- Skipped primer after cleaning leaves contamination
- Wrong product for the substrate causes flashing
- Thin or rushed primer application creates dry islands
How to Check Coverage After the Full Cure
How can you confirm you truly have full coverage after the paint reaches full cure? Start by waiting the full curing process time listed on your can, then inspect in bright, angled light.
Walk the surface slowly and look for color shifts, sheen changes, or missed spots that sunlight reveals. Next, run coverage testing by wiping a clean, dry cloth over the area; any lightening or streak transfer can signal thin spots.
If you can, measure thickness with a gauge at several points—corners, edges, and transitions matter most. Finally, compare to your original coverage plan and touch up only confirmed gaps.
Quick Tests to Find the Exact Patchy Cause
Start by watching the dry time patterns: note where paint dries slower or faster, since that often points to contamination or improper mixing.
Then inspect the surface preparation closely—look for chalky residue, dust, glossy spots, or old peeling paint that can block bonding.
Finally, compare these findings across patches so you can pinpoint the exact prep step or product issue causing the patchy finish.
Check Dry Time Patterns
When your paint dries in patches, you can usually spot the culprit by tracking how fast the surface changes.
Before you blame the coat, watch the clock: patchy areas may skin over sooner, stay tacky longer, or dry hard while neighbors remain soft.
Compare early, mid, and later stages under the same light, using a cloth touch at edges only.
Try quick drying techniques that don’t disturb the film, and check paint consistency for thick spots that trap moisture.
- Touch-test at 10 minutes
- Watch sheen shift at 30 minutes
- Recheck after full cure
Inspect Surface Preparation Issues
Surface prep issues often create patchy drying, so inspect the base before you judge the paint. Run these quick tests: press tape on suspect spots—if it lifts dusty film or gritty residue, you’ve got surface flaws. Wipe with a damp cloth; shiny streaks suggest grease. Pour water on bare wood—beading means you missed sanding, and blotches appear as primer types didn’t seal evenly. Compare areas after sanding: does one wall look rougher? Then match your primer choice to that condition.
| Quick check | Patchy cause |
|---|---|
| Tape test | Loose dust |
| Water bead | Poor adhesion |
| Wipe residue | Grease/oil |
How to Fix Minor Patchiness on Walls
Fix minor patchiness on your walls by addressing the cause—usually uneven drying, missed prep, or patch material that doesn’t match the surrounding paint.
First, sand the repaired area lightly until it feathers smoothly; wipe dust, then apply spot-primer if needed.
Use wall paint remedies: thin your topcoat slightly and apply two light coats instead of one heavy pass.
Try these patchy repair techniques:
- Blend edges with a small foam roller
- Recoat after full cure, not while tacky
- Match sheen and tint, then feather outward
How to Fix Patchy Paint on Trim and Doors
After you’ve corrected minor patchiness on walls, the same careful prep and matching approach helps you handle patchy paint on trim and doors.
First, sand any ridges or dry spray spots until smooth, then wipe with a tack cloth and degrease handles and edges.
Spot-prime bare or stained areas with matching stain-blocking primer, let it cure fully.
Use thin, even coats with a quality brush or mini roller, applying in the same direction for clean coverage.
For best results, follow solid trim painting techniques, including feathering edges.
Finally, use door finishing tips: avoid touching until fully dry, and lightly sand between coats.
Recoat Strategy When Paint Dries Mottled
When your paint dries mottled, you should first assess the drying pattern to see where coverage failed.
Then you wait for the full cure time so the coat stabilizes and you don’t trap moisture or solvents.
Finally, you recoat with light, even passes, building coverage gradually instead of piling on thick layers.
Assess Mottled Drying Patterns
How can you tell whether mottling means your paint needs a simple recoat or a deeper correction? First, inspect the mottled appearance under oblique light; shadows reveal uneven leveling.
Then run careful drying techniques: keep airflow steady, avoid direct heat, and don’t overwork the surface. You can decide fast by matching the pattern to these signs:
- Fine, uniform speckling that smooths after a recoat
- Larger blotches that reappear in the same spots
- Ring-like marks where you feathered or brushed back
If the blotches persist, you’ll likely need surface prep, not just another layer.
Wait For Full Cure Time
Once you spot mottling, don’t recoat immediately—wait for the paint to reach its full cure time before judging the final finish.
Drying only tells you the surface feels set; paint curing continues deeper. Your timeline depends on drying conditions like temperature, humidity, and airflow, so follow the label’s recoat and cure guidance.
If you recoat during early cure, you can trap solvents or disturb weakly formed film layers, making patches worse.
Give the coat uninterrupted time, then inspect under steady lighting. After full cure, you can decide whether touch-ups are actually needed.
Recoat Using Light Even Passes
Start your recoat with light, even passes instead of another heavy layer. If the surface looks mottled, you’ll fix it by using careful application techniques rather than loading more paint.
Work from one edge to the other, keeping your stroke pattern consistent and slightly overlapping. Before you start, check your roller nap and roller selection so you match the coating and avoid dragging.
Then follow this rhythm:
- Apply a thin first pass
- Let it tack up briefly, not fully cure
- Reapply one more even coat, then stop
When you see uniform sheen, you’re done; resist extra retouching.
When to Strip Back and Repaint for Patchiness
If your paint looks patchy after it cures, you can’t rely on “drying out” to fix it.
Start with surface inspection: check edges, overlaps, and any glossy or dull islands.
If patchiness persists after a full cure window and you can feel texture with a fingertip, plan to strip back.
If patchiness remains after full cure and you can feel texture, it’s time to strip back and prep the surface properly before repainting.
You should sand to sound, clean substrate, then remove dust thoroughly.
Use repaint techniques that match the sheen—prime bare spots, then apply even coats.
If only minor specks exist, spot-sanding and recoat may work, but stop if boundaries keep reappearing.
Patchy-Paint Prevention Checklist Before You Start
Before you mix, pour, and brush, run a quick patchiness-prevention check so you don’t end up stripping and repainting later. Start with surface preparation: clean, sand, and fully dry so paint application bonds evenly.
Confirm color consistency by stirring thoroughly and matching wet-batch tones. Then review drying techniques, environmental factors, and tool selection to protect finish quality.
- Inspect substrate porosity and repair flaws before paint types go on.
- Choose compatible layering strategies and avoid overworking while it flashes.
- Verify environmental factors: temperature, humidity, airflow.
Follow these maintenance tips and your patchy risk drops fast.
Frequently Asked Questions
Can Patchy Paint Dry Patchy Permanently, or Will It Level Out Later?
Yes, patchy areas can stay patchy permanently, especially if paint thickness dries unevenly. If you fix drying conditions—proper ventilation, humidity, and cure time—it often levels as it fully cures. But repeat coats may be needed if texture persists.
What Causes Paint to Blister or Pucker During Drying, Not Just Patchiness?
Blistering and puckering happen when moisture gets trapped, paint shrinks unevenly, or contamination breaks paint adhesion; you must improve surface preparation, control humidity effects, watch temperature influence, and apply pucker prevention to stop blister causes.
Should I Sand Patchy Areas Immediately, or Wait for Full Cure?
Sand patchy areas only after the paint fully cures, unless you must fix loose ridges. Wait for hardness. Use gentle sanding techniques with fine grit, then spot-prime matching paint types. Avoid sanding wet, which can smear and worsen texture.
Will Changing From Roller to Brush Fix Patchy Sheen or Coverage Issues?
Yes—sometimes switching from roller to brush helps. Use brush techniques to cut corners and even glossy sheen, while roller advantages still help large areas. But patchiness often comes from coverage, drying time, or uneven coats.
How Long Should I Wait Before Deciding the Patchy Problem Is Unfixable?
Wait at least 24 hours for paint drying, then inspect in daylight. “Measure twice, cut once.” If you still see patchiness causes after a full cure (about 72 hours), it’s probably unfixable and needs sanding, priming, or recoat.
Conclusion
If your paint looks patchy while it dries, don’t panic—many cases are normal and simply come from wet-to-dry color shift or uneven absorption. About 1 in 4 homeowners report visible patchiness during drying, which makes it a common, fixable issue. However, if patches expand, stay rough, or don’t blend after full cure, you likely need re-sanding, proper primer, and a smarter recoat plan. You’ve got this—watch the cure time before judging.
