
How to Paint a Wall for the First Time: A Beginner’s Complete Guide
To paint your first wall, start by cleaning it, then vacuum and wipe with warm, mild detergent. Repair cracks or holes with spackle, sand smooth, and prime stained or bare drywall. Choose matte for low-sheen areas or eggshell for easier cleaning, then pick a 3/8 in roller nap for smooth drywall. Tape edges, “cut in” with a brush, and roll in steady W-pattern sections. Let each coat dry fully, then touch up and remove tape while paint’s slightly tacky—stick with it so you’ll master the details.
Choose the Right Paint Finish (Matte vs Eggshell)
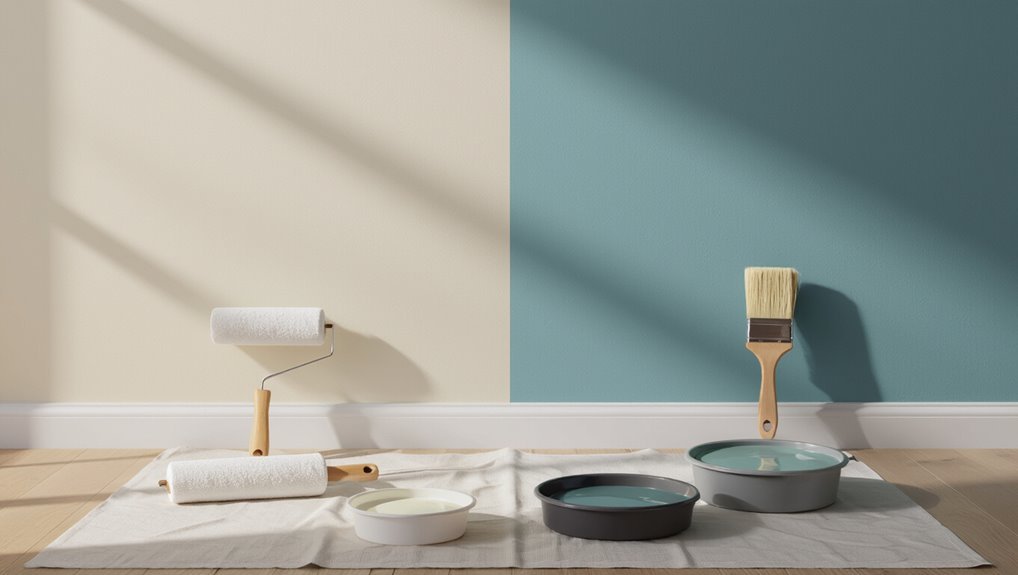
Choosing the right paint finish can make or break your results, so start by thinking about what the wall needs.
If you want matte benefits, pick matte paint for low-sheen coverage that helps hide minor flaws and reduces glare. You’ll like it most in bedrooms, ceilings, and adult spaces where marks won’t constantly get scrubbed.
If you need eggshell advantages, choose eggshell for a soft, subtle sheen that resists scuffs better and wipes clean with less worry. You’ll get durable color with a smoother look for hallways, living rooms, and trim-adjacent walls.
Pick the Best Interior Paint for Your Room
Choose a finish level that fits your space: flat hides flaws, eggshell and satin handle everyday life better.
Match the paint to how you use the room—kitchens and hallways need tougher, more scrubbable coatings than bedrooms.
Pay attention to sheen and durability so your walls stay looking great with less fading, scuffing, and wear.
Choose The Right Finish Level
What finish level fits your space best? Start by deciding how much glare and how much scrubbability you want, since finish types range from matte to high-gloss.
For quiet areas like bedrooms and ceilings, pick a low-sheen or matte coat to hide minor wall flaws. If you paint a hallway or family room, you’ll usually prefer eggshell or satin for an easier wipe-down without loud shine.
In kitchens or bathrooms, higher sheen can resist moisture and stains better. Match your sheen preferences to your lighting: brighter rooms can handle more gloss.
Match Paint To Room Use
Match your paint to how the room gets used, not just how it looks. When you pick interior paint, think about daily traffic, moisture, and how you want people to feel.
Use color psychology to guide choices: calming tones help bedrooms and quiet nooks, while energizing shades suit kitchens or home offices.
Also consider room ambiance—light color and undertones can make spaces feel warmer or cooler. For best results, match paint to function:
- Sleep areas: choose softer, lower-contrast colors.
- Cooking/baths: favor finishes designed for humidity.
- Living rooms: balance bold accents with neutral walls.
Consider Sheen And Durability
Once you’ve lined up the right color with how you live in each space, turn to sheen and durability to keep that look fresh. Pick sheen types: matte hides flaws, eggshell resists scuffs in low-traffic rooms, satin handles kitchens and halls, and semi-gloss wipes clean in trim and bathrooms. Match durability factors to your daily life: ventilation, wall prep, and how often you clean. Use these quick checks before you buy:
| Area | Best sheen | Why |
|---|---|---|
| Bedroom | Eggshell | Soft finish |
| Hallway | Satin | Tougher wear |
| Bathroom | Semi-gloss | Moisture friendly |
| Kitchen | Satin/Gloss | Easy cleaning |
Select Roller Nap and Brush Size for Walls
Picking the right roller nap and brush size helps you get smooth coverage without extra coats.
Before you start, use smart roller nap options and make real brush size selection choices. Match the tools to your wall texture:
- For smooth drywall, choose a short 3/8 in roller nap; for light texture, use 1/2 in.
- For rough plaster or heavy texture, go 3/4 in to reach recesses.
- Use a 2–3 in angled brush for edges and a 1–1 1/2 in brush for tight spots.
How to Apply Painter’s Tape Without Peeling Trim
After you’ve chosen the right roller nap and brush size, you can keep trim sharp by applying painter’s tape the right way. Clean trim first, so tape sticks firmly. Press along the edge with a putty knife or your fingernail, using careful tape application techniques. Don’t stretch the tape; it can lift corners. When you roll, keep paint off the tape edge and cut in lightly. Apply a second thin coat only after the first dries to help preventing paint bleed. Remove tape while paint is still slightly tacky, pulling back at a low angle.
| Step | Action | Result |
|---|---|---|
| 1 | Wipe trim | No dust |
| 2 | Press seam | Better seal |
| 3 | Keep paint off edge | Crisp line |
| 4 | Pull low angle | Less tearing |
Gather Your Wall-Painting Supplies First
Before you open a can, gather your wall-painting supplies in one spot: high-quality paint, primer if needed, painter’s tape, drop cloths, a roller frame and the right roller nap, angled sash brush, paint tray, stir stick, and microfiber rags.
You’ll move faster and paint cleaner. Use this supplies checklist before you start:
- Cover surfaces with drop cloths and protect edges with tape.
- Stage roller frame, tray, and stir stick for smooth, repeatable coats.
- Keep microfiber rags handy for quick drips and smudges.
These essential tools help you prep confidently—so you don’t pause mid-project.
Measure Your Wall Area to Buy the Right Paint
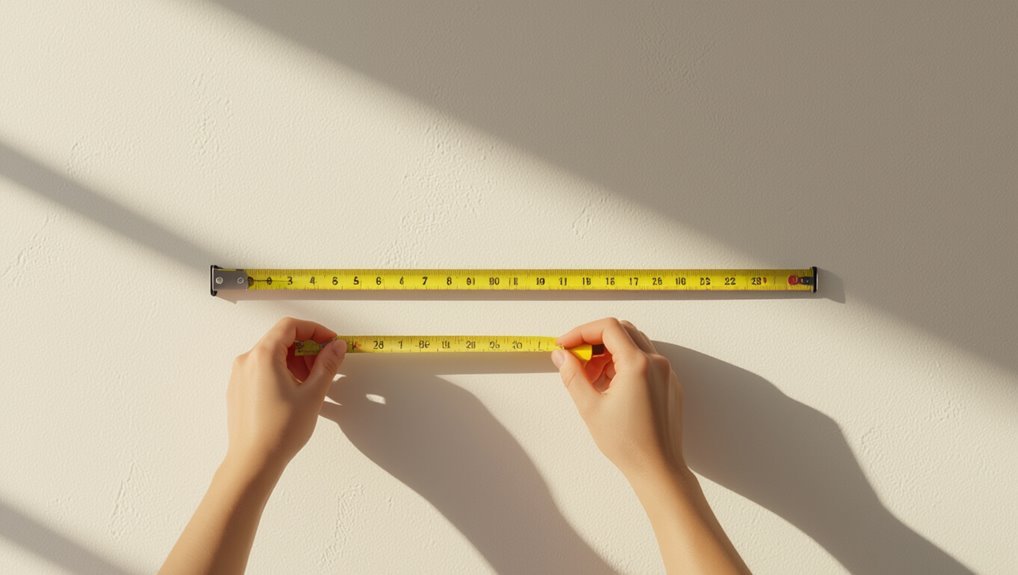
Once your supplies are staged and you’ve protected floors and edges, you can move on to figuring out how much paint to buy.
Measure your wall dimensions: grab a tape, then note the wall height and width in feet. If the wall is a rectangle, multiply height by width to get square feet.
If you have multiple sections, measure each section separately and add the totals. For doors and windows, you can still measure their height and width so your paint calculator can subtract their area.
Write everything down clearly, then round to the nearest whole square foot.
Calculate Coverage and Plan 10–15% Extra
Next, estimate how much area one can covers so you can buy the right amount. Use a paint calculator to convert your measurements into gallons, then factor in extra coverage because most walls need two coats.
First, check the can’s stated coverage per gallon for your roller and paint type. Then, multiply by wall area, divide by coverage, and round up.
First, check the can’s stated coverage per gallon for your roller and paint type, then use it to plan your amount.
Finally, add 10–15% extra for drips, touch-ups, and uneven spots.
- Coverage per gallon (per coat)
- Total coats planned (usually 2)
- Add 10–15% extra coverage
Protect Floors, Furniture, and Baseboards
Before you start rolling paint, cover your floors with drop cloths and move furniture out of the way if you can.
Use painter’s tape to mask baseboards, and shield any remaining furniture with plastic or cloth covers.
Take a few minutes to protect these areas now so you don’t have to scrub dried drips later.
Cover Floors With Drop Cloths
Lay down drop cloths across the entire work zone before you paint so you don’t scatter drips onto floors, furniture, or baseboards.
Choose drop cloth types that match your paint: canvas for durability, plastic for heavy spills, or paper for quick cleanup.
Do floor protection the right way by tucking edges under chairs and smoothing wrinkles that can catch paint.
Then follow these steps:
- Cover the entire floor area plus a wide border.
- Tape or pin cloth seams so they can’t shift while you move.
- Keep a rag handy to blot accidental splatters immediately.
Mask Baseboards And Furniture
Masking baseboards and nearby furniture saves you from painstaking touch-ups. Start by wiping surfaces clean, then plan your tape application along the baseboard edges and around window trim.
Use painter’s tape, pressing firmly with your fingers or a plastic tool so paint can’t creep underneath. For floors, keep drop cloths in place and add extra paper if splashes reach the edges.
Cover nearby furniture with plastic sheets or drop cloths, then secure them with tape without pulling fabric.
When you finish, remove the tape while paint is still slightly tacky for crisp lines and solid baseboard protection.
Cover Outlets, Vents, and Hardware Before Painting
Now that you’re ready to start painting, cover outlets, vents, and hardware so you don’t trap drips in tight spaces or clog openings with dried paint.
Do outlet safety by pulling any switch plates and turning off power if you’ll paint near cords. Use vent protection with painter’s tape and plastic to keep airflow openings clear.
Apply hardware masking around knobs, hinges, and trim using tape edges that meet tightly. Before you brush or roll, check your surface preparation by pressing coverings flat and removing loose debris.
Then follow:
- Tape seams tight
- Protect screws and slots
- Cover completely, not loosely
Clean the Wall to Remove Dust and Grease
Before you paint, clean the wall thoroughly to remove dust, dirt, and grease that can stop paint from sticking.
Start by vacuuming loose debris, then wipe the surface with warm water and a mild detergent using a sponge. For greasy spots, use a degreasing cleaner and rinse with clean water.
Employ wall cleaning techniques like working from top to bottom and changing water when it turns cloudy.
After cleaning, let the wall dry fully, then check it by running a dry hand across—no grit or residue should remain.
Follow these surface preparation tips for best adhesion.
Repair Holes and Cracks With Proper Filler
When you find holes and cracks, pick the right filler for the surface and damage size so the patch bonds well.
Apply it in thin layers, then smooth the area and feather the edges to blend with the surrounding wall.
Let it dry fully, and sand until it’s flat before you prime or paint.
Choose Correct Filler Type
Which filler matches the damage you’re fixing? Start by choosing fillers based on size and movement: small pinholes need lightweight spackle, while deeper holes require a fast-setting patch or wood filler.
For hairline cracks, use a flexible crack filler so it won’t pop back during settling.
Use these selecting fillers checks before filler application:
- Measure the depth and width of the damage.
- Decide if the area flexes or stays rigid.
- Match the wall material: drywall, plaster, or masonry.
Pick the right filler types, then apply exactly as directed for a solid repair base.
Smooth And Feather Edges
Once you’ve chosen the right filler, focus on smoothing the surface and feathering the edges so the repair disappears under paint. Press filler into holes or cracks, then let it set until firm.
Scrape off excess with a putty knife at a shallow angle. Sand the patch lightly, using fine-grit paper, until it’s flush with the wall.
For edge blending, feather the perimeter outward with each sanding pass so borders fade. Wipe away dust with a damp cloth.
Use a second thin coat only if needed, then repeat feathering technique and sand smooth before priming and painting.
Sand Rough Spots for Smooth, Even Adhesion
Sand rough spots before you paint so the surface accepts primer and paint evenly. You need strong adhesion tips: start with medium-grit sandpaper and work in small sections, using steady pressure.
Switch to fine grit to level scratches and leave a consistent sheen. Focus on bumps, drips, and patch edges; blend them so they disappear to the touch.
Use these steps:
- Lightly test texture with fingertips.
- Sand with even strokes, following the wall grain if visible.
- Vacuum dust, then wipe with a damp cloth.
Good sanding techniques prevent flaky spots before primer goes on.
Remove Peeling Paint and Loose Texture
After you’ve smoothed rough spots for better adhesion, turn to areas where the old coating won’t hold.
Check the wall for peeling paint and loose texture by dragging a putty knife across it. Scrape off anything that lifts, working back until the surface feels firm.
If paint flakes keep coming, lightly mist the area, wait, and scrape again. Use a stiff brush to remove dust and chips.
Vacuum the bare spots, then wipe with a damp cloth and let everything dry completely before you patch.
Caulk Gaps for Crisp, Professional Edges
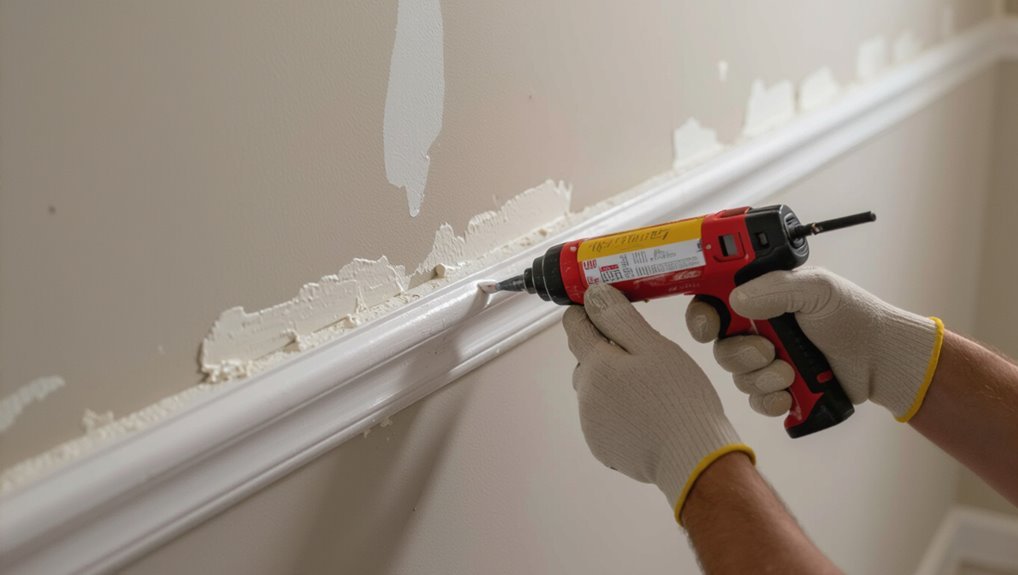
Take a careful look along the trim, baseboards, and corners, because even small gaps can telegraph through your new paint and ruin those crisp lines.
Choose the right caulk types for each surface, then do clean caulk application. For best results:
- Cut the nozzle small and load a steady bead.
- Press into gaps with firm, continuous pressure; tool it smooth.
- Wipe excess immediately with a damp rag and let it cure fully.
Work methodically so edges stay sharp, and don’t overfill—just fill, smooth, and move on.
Prime Stained Areas to Stop Bleed-Through
First, you identify any stained areas—water spots, smoke marks, or tannin bleed—before you start painting.
Then you prime those spots with a stain-blocking primer so discoloration doesn’t bleed through your topcoat.
After it dries, you can paint over smoothly and keep the finish looking even.
Identify Stained Areas First
You can save a lot of rework by spotting stains before you roll on paint. During your wall prep, do stain identification across the entire surface, not just the obvious spots. Move a bright flashlight at an angle; damp or glossy patches catch light differently. Circle any discoloration with painter’s tape, then check it once more after it dries.
- Look for rust, water rings, smoke, and tannin bleed.
- Feel for softness or peeling around the stain edges.
- Note nearby repairs, knots, and old patch areas.
If the stain shows through while dry, plan to treat it before finishing.
Prime To Prevent Bleed-Through
Once you’ve marked the stained spots and confirmed they show through when dry, prime those areas before you roll on finish paint. For bleed through prevention, choose primer types that seal: stain-blocking shellac, bonding stain-blocking latex, or oil-based primer for stubborn watermarks. Apply with a small brush first, then feather edges so the patch disappears. Wait the full dry time on the can, not your guess. Watching stains return is heartbreaking—so protect yourself now:
| Area | What you apply |
|---|---|
| Water stains | shellac sealer |
| Rust spots | stain-blocking primer |
| Tannins | bonding latex primer |
| Smoke marks | oil-based primer |
Prime Bare Drywall for Better Bonding
Before you paint, prime bare, dry drywall so the paint can bond tightly and evenly. Choose primer types made for new gypsum surfaces, then apply with steady application techniques to seal porous paper.
Start by vacuuming dust and filling seams or dents; let spackle cure. Pour primer into a tray, use a roller for broad areas, and cut in edges with a brush.
For best results, follow:
- Apply one full coat, evenly, without runs.
- Let it dry per label before topcoating.
- Lightly sand raised grain, then wipe clean.
You’ll get smoother coverage and better adhesion.
When to Skip Primer (and Still Get Great Results)
Sometimes you can skip primer and still get solid paint adhesion—especially when the surface and existing finish are already stable, clean, and non-porous.
If the wall is freshly painted, well-adhered, and you don’t spot peeling, chalking, or heavy stains, skipping primer can work.
You should also avoid skipping primer on porous drywall, bare wood, patched areas, or glossy surfaces that resist paint.
For these cases, use primer alternatives like stain-blocking sealers or bonding primers on problem spots, then paint.
Test a small area, let it dry, and check for rubbing or flaking before you commit.
Set Up a Paint Tray System to Cut Mess
Choose a two-tier paint tray so you can roll off excess and keep your work area cleaner.
Line the tray to make cleanup fast, then load your roller evenly without overfilling.
As you paint, minimize drips by rolling with light pressure and wiping off extra each time you reload.
Choose A Two-Tier Tray
A two-tier tray keeps your brush work clean and organized, so you can load paint without dragging it across the whole surface.
Choose a tray that holds enough for your first section and fits your roller or brush. Compare two tier tray options by material, tray size, and grip for steady handling.
Then commit to what matches your workflow:
- Small tray for narrow walls and edges
- Medium tray for standard sections
- Large tray for quick coverage
After you finish, you can reuse the tray for creative display ideas, like holding craft supplies while you plan the next coat.
Use Liners For Easy Cleanup
Set up a simple paint-tray system with liners so cleanup takes minutes instead of hours.
Line your paint tray with disposable liners before you pour anything. They catch drips, splatter, and excess paint, so you don’t scrub the plastic tray afterward—one of the liners benefits for first-timers.
Pour paint onto the liner carefully, keeping a steady edge. When you finish a coat, pull the liner out while paint is still manageable.
Then discard it and wipe any stray spots on the tray. Follow these cleanup tips to stay mess-free and ready for the next session.
Load Roller, Minimize Drips
Load your roller directly over the lined paint tray, so you can control how much paint you pick up. Use a steady roller technique: start at the tray edge, roll forward, then back to distribute evenly. Avoid overloading—too much paint equals runs.
For cleaner drip control, follow this quick routine:
- Line the tray insert before you start.
- Tap the roller on the ramp twice, not five times.
- Keep your pressure light and consistent.
When you begin rolling the wall, overlap wet bands slightly, and lift the roller off the surface cleanly to prevent drips.
Cut In Edges Like a Beginner (Step-By-Step)
Cutting in edges helps you get clean lines where a roller can’t reach—around trim, corners, ceilings, and doors. Dip your angled brush lightly, wipe excess, then paint a thin “rail” about 2–3 inches wide. Hold a steady grip, keep the tip in contact, and stop at seams. Work from dry areas toward wet so you blend smoothly. Use these beginner checks to avoid beginner mistakes and nail cutting techniques:
| Do | Don’t |
|---|---|
| Use light pressure | Overload paint |
| Keep a wet edge | Scrub the wall |
| Cut in short sections | Rush long lines |
Cut Neatly Around Trim and Corners
Once you’ve cut a clean edge, you need to tackle trim and corners with the same control. Keep your brush lightly loaded, then use your tip to trace along baseboards, window casings, and door frames.
For corners, slow down and pivot from your wrist instead of dragging. Use these cutting techniques and corner strategies:
1) Angle the bristles, then press gently for crisp lines.
2) Feather paint into the wall at the corner to avoid ridges.
3) Re-cut with a second pass once the edge starts to tack.
Check the perimeter for gaps before you stop.
Roll Walls With the Right Technique
Pick the right roller nap for your wall texture, then load the roller evenly so paint distributes without streaks.
Keep a steady hand to avoid drips, and roll in consistent W-shaped sections from top to bottom. Overlap each section slightly to blend the edges and keep the finish uniform.
Choose The Correct Roller Nap
Choosing the right roller nap helps you get a smooth, even finish without extra coats.
Match nap height to wall texture: for smooth drywall, use a short nap; for slight texture, go medium. You’ll also choose the right roller material types—nylon/polyester for most paints, and natural fibers for certain stains.
Pick roller size options that fit your workspace so you control edges and overlap consistently.
- 1) Smooth wall: 1/4 in nap
- 2) Medium texture: 3/8 in nap
- 3) Rough surfaces: 1/2–3/4 in nap.
Test a small section first. Then roll fast and steady.
Load Paint Evenly, Avoid Drips
Load your roller with paint evenly so you don’t flood the wall. Dip it, then roll it on the tray’s ridges until the nap looks saturated but not dripping.
When you start, press lightly and keep a steady pace to load paint without pooling. Work in short sections, reloading often, and maintain consistency by watching the sheen—matte spots need more paint.
Keep an eye on edges and corners; they grab extra paint fast. If you see runs, stop, wipe the roller edge on the tray, and use technique to smooth them out.
Roll In Consistent W Sections
Roll the wall in steady W sections, letting the roller travel up and down in a smooth pattern. Use your roller technique to keep coverage even and prevent lap marks. Maintain paint consistency: thin paint runs, thick paint skips. Work one section at a time, overlapping slightly while the surface stays wet.
- Start near the corner, pressing lightly, then glide into a W.
- Keep the same pressure and speed for every pass.
- Re-roll each W edge to blend, not to scrub.
When you finish, step back and spot any missed streaks.
Roll in Sections to Avoid Lap Marks
To prevent lap marks, roll the wall in manageable sections, working from one edge to the other without stopping.
Use a steady rolling technique: reload your roller, then overlap each new pass slightly while the paint stays wet.
Start at the ceiling line or corner, roll down, then back across to even out coverage.
Keep your section size consistent so you finish before it starts to tack.
If you must pause, stop at a natural break, like an adjacent edge.
This lap mark prevention method keeps the sheen uniform.
Keep Paint Thickness Consistent to Prevent Drips
After you’ve rolled each section smoothly to avoid lap marks, focus on paint thickness so it doesn’t start running. Keep a steady load on your roller and re-dip only when needed.
Use paint consistency tips: stir thoroughly, don’t overwater, and test on scrap first. If edges start to sag, stop and spread it out immediately.
Follow these steps to nail uniform coverage and avoid paint drips:
1) Maintain the same roller pressure across the wall.
2) Keep wet edges while you roll.
3) Watch for sagging at ceilings and corners.
How to Avoid Streaks When Rolling Paint
Streaks usually show up when you leave the roller too dry or when your strokes overlap inconsistently, so you need to manage both coverage and timing.
For streak prevention, load the roller evenly, then roll off extra paint on the tray before you start each section.
Use a steady roller technique: apply light, uniform pressure and keep a wet edge as you move.
Work in manageable rectangles, rolling top to bottom, then back across lightly to even out.
Don’t stop mid-wall; if you pause, reload and blend quickly.
Finally, watch for dry spots and re-roll promptly.
Use a “W” Pattern to Blend Roller Marks
Use a “W” pattern to blend roller marks and keep your coverage even. Load your roller, then press lightly as you move in overlapping “W” shapes across the wall. You’ll smooth seams because each pass lands slightly on the last.
Apply these blending tips:
1) Keep a steady pressure so the nap leaves a uniform film.
2) Work one “W” width at a time to prevent gaps.
3) Re-roll only the edges of visible lines, using the same roller technique.
After each section, step back and correct thin spots immediately.
Stagger Coats and Keep a Wet Edge
To keep your finish smooth, you need to stagger your coats and maintain a wet edge as you work.
Plan your staggered application so each new roller pass overlaps the last while paint is still workable.
Use the wet edge technique: don’t stop mid-wall; work from one corner toward the next, keeping a slightly damp boundary ahead of your roller.
If the section behind starts to tack up, stop and feather it lightly with a clean, barely loaded roller.
Apply evenly, reload quickly, and maintain consistent pressure for a uniform sheen.
How Many Coats of Paint Do You Need?
After you stagger your coats and keep a wet edge, you’ll need the right number of coats to get full, even coverage. Most walls need 2 coats, but your paint coverage depends on color depth, surface porosity, and whether you’re changing shades.
Stagger coats, keep a wet edge, and plan coverage—most walls take two coats, depending on color depth, porosity, and shade changes.
Use paint application to guide your decisions: apply evenly, don’t chase missed spots with thick layers. Check the can’s coverage range, then adjust if your primer was thin.
Plan for:
1) 1 coat for similar colors over sealed, smooth surfaces
2) 2 coats for most walls and noticeable color changes
3) 3 coats when using dark-to-light or patchy drywall
Let Each Coat Dry Before Adding the Next
Before you add another coat, wait for the first one to dry completely.
Then check the surface for dryness—if it still feels tacky or cool, hold off on recoating.
Once it’s dry and ready, you can apply the next coat for a smooth, even finish.
Wait For Coat To Dry
Once you finish applying the first coat, give it time to dry completely before you add the next one.
You control results by respecting drying time and watching humidity factors, since moisture slows paint curing.
Don’t rush the process—wet paint blends, streaks, and can lift as you roll again.
To manage this step:
- Check the room conditions and keep air moving with fans.
- Follow the can’s listed drying window, then add extra margin if it’s cool or damp.
- Keep coats light and even so solvent and water can escape.
Wait, and your finish stays smooth.
Check Dryness Before Recoat
Checking dryness keeps your finish smooth and prevents the layers from mixing.
Before you recoat, you need to verify the first coat has fully set; otherwise, you’ll smear edges and trap tacky spots.
Press a fingertip lightly on an inconspicuous area. If paint feels cool, tacky, or transfers, wait. If it’s dry to the touch and looks even, you can proceed.
Remember that paint drying depends on temperature and airflow, and humidity effects can slow the process dramatically.
Follow the can’s recoat time, but always do a quick test first.
How Long Does Paint Take to Cure?
Even though paint often feels dry within a few hours, it typically takes days to weeks to fully cure, depending on the type of paint and conditions like temperature and humidity.
Your cure time hinges on environmental factors you control: airflow, moisture, and how warm the room stays. Don’t rush traffic or washing just because it looks set.
Your cure time hinges on airflow, moisture, and room warmth—don’t rush traffic or washing just because it looks set.
To judge readiness, focus on:
- Manufacturer cure guidance on the can.
- Steady, moderate temperatures and low humidity.
- Avoiding heavy touch until fully hard.
Late curing means dents and marks can still form.
Fix Scuffs and Small Dings in High-Traffic Areas
First, you clean the spot well and assess the damage so you know what you’re fixing.
Next, you patch the scuffs or dings, then sand smooth and blend the edges into the surrounding paint.
Finally, you wipe off dust and spot-prime if needed so the new coat won’t stand out.
Clean And Assess Damage
Before you touch up anything, clean the wall so you can see the damage clearly—wipe high-traffic areas with a mild detergent and warm water, then let them dry completely.
Now do your wall inspection: look for scuffs, dents, and tiny holes in corners, doorways, and near outlets. Walk closer and check under bright light to spot dull spots, chipped paint, or rust stains.
Your damage assessment should guide what you fix without overworking the surface.
Use this checklist:
- Note size and location
- Test if edges catch a fingertip
- Watch for peeling or stains
Patch, Sand, And Blend
Once the wall dries, you can start repairing the small imperfections you spotted. In high-traffic spots, press spackle or filler into scuffs and dings, then feather the edges with a putty knife using solid patch techniques. Let it cure, then sand with 120–220 grit until smooth and flush. Wipe dust, then blend a thin coat of primer or paint, feathering outward so the repair disappears.
| Area | Action | Goal |
|---|---|---|
| Corner ding | Fill, feather | Flat surface |
| Nicks | Spot spackle | Tight edges |
| Scuffed base | Prime first | Same sheen |
| Wall seam | Light skim | Invisible line |
Touch Up Missed Spots Before the Paint Dries
Spot missed areas as you go—don’t wait until the wall fully cures. While paint drying still feels tacky, you can use touch up techniques to erase thin streaks and bare patches.
Spot missed areas as you paint—touch up while the coat is tacky to erase thin streaks and bare patches seamlessly.
Keep a small angled brush or roller handy, then blend edges into the surrounding coat. Work in short sections so you don’t overfill spots.
Use these steps:
- Lightly feather the paint over the missed area.
- Match your roller direction for a seamless texture.
- Wipe excess on scrap until the spot disappears.
After you finish, step back and check under steady light before the next coat.
Remove Tape at the Right Time for Sharp Lines
When the paint stops looking wet and still feels slightly tacky, you should remove the tape to keep those edges razor-sharp. Use this tape removal timing so the film won’t smear or peel.
Start at one corner, hold the tape back low at a sharp angle, and pull it fast in a single motion. Don’t pause mid-strip, because any stop can drag paint.
If you notice ridges, stop and press the edge lightly, then continue. This sharp edge technique takes practice, but timing makes the biggest difference.
Clean Brushes and Rollers Right After Use
After you finish a section, you should clean your brush right away so paint doesn’t harden in the bristles.
Rinse your roller before it dries, then spin it out so the sleeve stays smooth.
Once they’re fully dry, you store your tools properly so they’re ready for your next coat.
Clean Brushes Immediately After Use
Clean your brushes and rollers as soon as you finish using them. That quick habit keeps paint from hardening and makes brush care easier later.
Use the right cleaning techniques for the paint type: water-based with warm soapy water, oil-based with mineral spirits, then soap to finish. Work the bristles with your fingers to loosen residue, then rinse until the water runs clear.
Don’t let tools sit in a bucket. Instead, follow this order:
- Scrape excess paint off
- Wash thoroughly with cleaner
- Reshape bristles and dry flat
Rinse Rollers Before They Dry
A quick habit right after you finish is rinsing your rollers before the paint dries, because dried paint turns cleanup into a chore and can ruin the nap.
Keep your roller maintenance simple: remove excess paint by rolling it against the tray edge, then rinse under warm water until it runs clear. If you use latex, wash with mild soap; for oil-based, use the right solvent.
Don’t stop midstream—switching or taking breaks can start drying on the roller.
Use effective drying techniques: spin or shake out water, then set the roller upright or on a rack.
Store Tools After Drying Thoroughly
Once you’re done for the day, clean your brushes and rollers right away, not later—paint hardens fast and it’s harder to remove from the bristles or the nap.
Then let everything dry fully before you store it to prevent mildew and sticky buildup. After cleaning brushes, squeeze out excess water or solvent, rinse until clear, and blot dry.
Finally, you’ll nail organizing supplies by doing this:
- Wrap brushes in breathable paper or hang them.
- Stand rollers upright or cover them tightly.
- Label cans and store tools in a cool, dry spot.
Store Leftover Paint for Future Repairs
Label each leftover can and seal it tightly before you set it aside for future touch-ups. Write the room, paint color, sheen, and date on the lid with a waterproof marker.
For best paint storage, pour leftovers into their original containers only if the lids match and the paint stays sealed; otherwise, keep them in clean, labeled jars. Remove dried drips from rims, then wipe the threads clean so the cap seats properly.
Store cans upright in a cool, dry closet, away from sunlight and freezing. When you need future touch-ups, shake well and test on scrap.
Prevent Roller Texture on Smooth Walls
After you’ve saved leftovers for touch-ups, you’ll want to keep your next coat looking smooth. To prevent roller texture on smooth walls, focus on good wall preparation and disciplined roller techniques.
First, use a high-quality nap roller designed for flat surfaces; press lightly so you don’t trap bubbles.
Second, load paint evenly, then roll in consistent W patterns, keeping a wet edge.
Third, after each section, do a light “top pass” in one direction to level ridges.
Let the coat self-level before you add more, and avoid re-rolling dry spots.
Cover Stains Evenly (Without Patchy Sheen)
Before you paint, treat stains first—clean, dry, and patch them so they don’t bleed through.
Then use an even primer coat across the whole area, not just the spots, so the sheen stays consistent.
When it’s fully dry, you can apply your topcoat for a smooth, uniform finish.
Treat Stains Before Painting
Treating stains first is what keeps your finish smooth and uniform—start by cleaning the affected area and letting it dry completely.
You’ll get better stain identification when you spot moisture, grease, or rust, then plan stain removal accordingly. Scrub with a detergent for grime, degrease for oils, and sand lightly to lift chalky residue.
Afterward, apply the right stain-blocking treatment only where needed; don’t spread it too far. Then follow with targeted spot-caulking if cracks widened.
- Clean, dry, and inspect.
- Treat the specific stain type.
- Block, feather edges, and wait.
Use Even Primer Coats
Once your stains are cleaned, removed, and dry, focus on your primer. Use even primer coats so you cover stains evenly, without patchy sheen. Stir primer well, then apply with steady pressure and overlapping strokes. Start at edges, then roll the field in a consistent pattern, keeping a wet edge. If the wall looks uneven, apply a second thin coat rather than one thick layer. Match primer color selection to your finish color: darker primers help block strong discoloration. Follow these primer application techniques:
| Area | Tool | Tip |
|---|---|---|
| Trim | Brush | Feather edges |
| Walls | Roller | Maintain wet edge |
| Corners | Angle brush | Prime corners fully |
| Spots | Small roller | Cover completely |
Deal With Bubbles, Bumps, and Blisters Fast
Spot and fix bubbles, bumps, and blisters as soon as the paint shows them so the problem doesn’t keep spreading.
Stop, scrape immediately, and don’t sand through primer. Dry the spot fast, then use proper bubble removal techniques to flatten raised areas.
Stop scraping immediately—don’t sand through primer. Dry fast, then use bubble-removal techniques to flatten raised areas.
For prevention, follow blister prevention tips: control humidity, cool-to-warm curing, and avoid painting over damp walls.
Do this:
- Cut out loose paint with a putty knife.
- Sand smooth, then wipe dust clean.
- Reprime and recoat thinly, feathering edges.
Let everything cure fully before you judge the finish.
Fix Patchy Coverage and Uneven Sheen
After the wall dries, check for patchy coverage and uneven sheen under bright light, because these issues usually come from thin coats, uneven roller nap, or dry edges that you can’t “paint out” later.
Lightly sand glossy or rough areas with fine-grit paper until they feel uniform, then wipe dust.
Spot-prime any sanded patches to prevent flashing.
Cut in edges again if they look dull or streaky.
Apply a smooth second coat using consistent pressure and a full, even load on the roller.
Work wet-edge fast; blend overlaps while paint stays glossy.
Common Wall-Painting Mistakes (and Quick Fixes)
Wall-painting mistakes usually show up fast—thin coverage, visible roller marks, and streaky cut-in lines—so catch them while you still have time to correct them.
You’ll face common pitfalls like skipping primer, overloading the roller, or painting before patches cure. Use these quick remedies:
- Roll marks: lightly re-roll with a dry roller in the same direction before paint sets.
- Streaky cut-in: feather the edge with a damp brush, then blend 2–3 inches into the wall.
- Peeling or bubbles: sand smooth, spot-prime, and repaint only the affected area.
Clean tools between coats so your finish stays even.
A Simple 1–2 Day Painting Schedule for Beginners
If you want a smooth finish without getting overwhelmed, follow this simple 1–2 day schedule that works for most rooms and beginner setups.
Day 1: prep well—clean, patch holes, sand, caulk, and tape edges. Prime if you’re covering stains or bare drywall.
Stir paint thoroughly, then cut in corners and trim first. Use simple painting techniques: load your brush lightly, keep a steady W pattern, and don’t overwork wet areas. Let it dry fully.
Day 2: roll walls with even pressure, feather seams, and apply a second coat only if needed.
Trust color psychology to guide your final shade choice.
Frequently Asked Questions
Can I Paint Over Wallpaper Without Removing It First?
Yes, you can sometimes paint over existing wallpaper without removing it, but only if the wallpaper types are firmly adhered and clean. Scrape loose edges, sand glossy surfaces for paint adhesion, and prime with a bonding primer first. Otherwise, remove it.
What’s the Best Way to Deal With Heavy Wall Stains Like Water Damage?
Like a leak hidden in plaster, heavy water-damage stains need strong stain removal: dry the area, sand loose spots, clean with mildew-killing cleaner, prime with a stain-blocking primer, then seal and paint; you’ll stop bleed-through fast.
How Do I Prevent Paint From Drying Too Fast While Cutting In?
To prevent paint from drying too fast while cutting in, work in small sections and use steady brush techniques. Keep a damp rag nearby, re-wet edges lightly, and consider paint additives like retarder to extend drying time.
Can I Paint in Cold or Humid Weather, and What’s the Safe Range?
Yes—you can paint in cold or humid weather, but watch temperature effects and humidity impact. Keep walls above 50°F (10°C) and under 85% humidity. Can you risk trapping moisture? If surfaces feel damp, wait or use ventilation.
Should I Stir Paint Thoroughly Before Using, Even if It’s New?
Yes—stir new paint thoroughly before using. You should remix settled pigments to guarantee proper paint consistency. Use stirring methods like a drill-paddle, scrape the sides, and mix for 2–3 minutes, then check thickness before applying.
Conclusion
You’ll finish your first wall paint job with confidence by following each step, from prep to clean-up. Remember: choose the right finish, gather supplies, tape carefully, and tackle imperfections fast so they don’t set up. If coverage looks patchy, spot-fix and blend while it’s still wet. Treat your first attempt like learning a new song—messy at first, then smoother every time you practice.
