
How to Paint 20-Foot Ceilings Without Losing Your Mind
You can tackle a 20-foot ceiling without losing your mind by planning zones, using scaffolding or a boom lift, and securing a harness for safety; prep thoroughly by clearing and covering the area, cleaning stains, and masking fixtures; cut edges with angled brushes, then use pole rollers and a sprayer to work top-down while keeping a wet edge; control paint load to avoid drips and clean tools immediately, and keep a helper on hand — keep going and you’ll pick up pro tips and shortcuts.
Quick Plan: Safe, 3-Step Approach for 20-Ft Ceilings

Tackling a 20-foot ceiling? You’ll follow a clear, safe 3-step plan: inspect and prep the area, set up secure access and safety precautions, then paint in controlled sections.
You’ll schedule tasks on a tight project timeline, allotting time for priming, drying, and touch-ups.
Stay focused, use the right gear, and don’t rush any step for best results.
Should You DIY a 20-Ft Ceiling or Hire a Pro?
Deciding whether to DIY a 20-foot ceiling or hire a pro comes down to your comfort with heights, access to proper equipment, and the value you place on time and flawless results.
Weigh cost comparison: tools, rentals, and potential fixes versus a pro’s fee.
Consider time investment—prep, painting, cleanup—and your tolerance for risk.
If you need efficiency and guaranteed finish, hire help.
Who Should Tackle This : Skill and Risk Checklist
If you’re comfortable on ladders, have experience with large surfaces, and can rent or buy a sturdy boom lift or scaffold, you can consider painting a high ceiling yourself; otherwise, hire a pro to avoid safety risks, costly mistakes, and wasted time.
- Skill assessment: steady balance, painting technique.
- Risk evaluation: fall, equipment, and project scope.
- Time and patience.
- Budget for mistakes or pro help.
Essential Tools and Materials for 20-Ft Ceilings
Equipment matters: for a 20-foot ceiling you’ll need industrial-grade access (boom lift or rolling scaffold), long-reach rollers and extension poles, a heavy-duty drop cloth system, high-capacity paint sprayer or multi-gallon rollers, plus safety gear like a harness, hard hat, and nonslip footwear.
You’ll also want reliable paint sprayers, ladders, high reach tools, texture-compatible primers, spare rollers, brushes, and test swatches for color selection and different ceiling textures.
Choosing the Right Paint for High Ceilings

Choose paint that balances coverage, sheen, and durability for high ceilings, since you’ll want fewer coats and less maintenance up high.
You should prioritize stain-blocking formulas and mid- to high-hide paints.
Consider how natural light alters color selection and pick washable paint finishes for easy upkeep.
- Coverage
- Sheen choice
- Durability
- Light impact
Best Primers for Older Plaster and Drywall
Before you start, make sure you’ll repair cracks, remove loose plaster, and sand or dust the surface so primer can bond properly.
You’ll compare oil-based, latex, and shellac primers for stain blocking, adhesion, and breathability.
Then pick the right roller, brush, or sprayer and follow thin, even coats for best results.
Surface Prep Essentials
Because older plaster and aged drywall soak up paint unevenly, you’ll want a primer that seals and evens the surface before you roll or brush.
Address surface imperfections and preserve ceiling texture.
Prep steps to follow:
- Clean dust and cobwebs.
- Patch cracks and nail pops.
- Sand glossy spots lightly.
- Apply stain-blocking primer evenly, working top-down.
Primer Types Compared
Now that the surface is cleaned and primed for repair, pick a primer that matches the needs of older plaster and drywall.
You’ll weigh primer types in a clear primer comparison: water-based vs oil-based.
Consider primer benefits and primer drawbacks, primer finishes, and trusted primer brands.
Your primer selection hinges on adhesion, stain blocking, and compatibility with primer application and final paint.
Application Tips And Tools
Start with the right tools: a high-quality roller with a thick nap for textured plaster, an angled sash brush for corners and trim, and a 3–4-inch foam brush or small roller for tight spots so you can lay primer evenly without overworking the surface.
- Use proper roller techniques for smooth paint application.
- Master edge cutting and primer application.
- Mind ladder safety and zone painting.
- Control paint consistency and monitor paint drying.
Scaffolding vs. Extension Ladder: Pick the Right Platform
Choosing between scaffolding and an extension ladder comes down to the job’s height, duration, and how much mobility or workspace you need.
You’ll weigh scaffolding benefits like platform stability, workspace organization, and easier equipment transportation against ladder safety, quick setup, and improved surface reach.
For steady paint application over long stretches, choose scaffolding; for short, nimble jobs, pick a properly secured extension ladder.
Renting Equipment: What to Get and What to Skip
When you’re renting for high ceilings, prioritize a scissor lift for stability and reach—you’ll want sturdy guardrails and a platform wide enough for paint and supplies.
Skip renting specialty tools you rarely use, like electric pole sanders, and bring simple hand tools instead.
Think about what you’ll actually use on the job and avoid paying for extra gear that just takes up space.
Scissor Lift Essentials
Renting a scissor lift can save hours of ladder juggling and keep you safer while painting high ceilings.
So focus on the features that matter and skip the extras that add cost without benefit. You’ll prioritize scissor lift safety and clear lift operation instructions.
Choose stable platform size, battery life, weight capacity, and easy controls.
- Platform size
- Battery life
- Weight capacity
- Easy controls
Tools You Can Skip
3 things you can skip: paint sprayers for small rooms, bulky extension poles with cheap heads, and fancy trim tools that duplicate what a good brush does.
Focus on painting tools that aid paint application and ladder safety, account for ceiling textures, choose paint finishes and color selection wisely, prioritize wall preparation, follow drying times, use proper paint storage, and follow efficient cleanup tips.
Safety Gear You Must Wear When Working at Height
Working at height puts you at greater risk, so wear protective gear that prevents falls and reduces injury if one occurs.
You should use fall protection and a safety harness, hard hats, eye protection, non slip footwear, a respiratory mask, high visibility clothing, gloves, knee pads, and keep first aid nearby.
- Anchor and harness
- Head, eye, respiratory protection
- Grip, knee, hand protection
- Visible clothing, kit nearby
How to Recruit a Helper and Assign Safe Roles
After you’ve suited up and secured fall protection, bring on a helper so you don’t have to handle everything at height alone.
Ask someone reliable when recruiting friends, explain risks, and confirm they’re comfortable.
Assigning tasks: one person steadies ladder or manages extension poles, another preps paint and hands tools from the ground.
Review signals and emergency steps before you start.
Inspecting the Ceiling: A Quick Pre-Paint Checklist
Wondering what to look for before you prime or paint? Check ceiling condition and surfaces that affect paint adhesion.
Inspect for dust, stains, loose texture, and moisture.
- Dust and cobwebs
- Stains or discoloration
- Loose or flaking material
- Current moisture or leaks
Address issues you find to guarantee smooth, lasting adhesion before painting.
Repairing Cracks, Holes, and Popcorn Texture
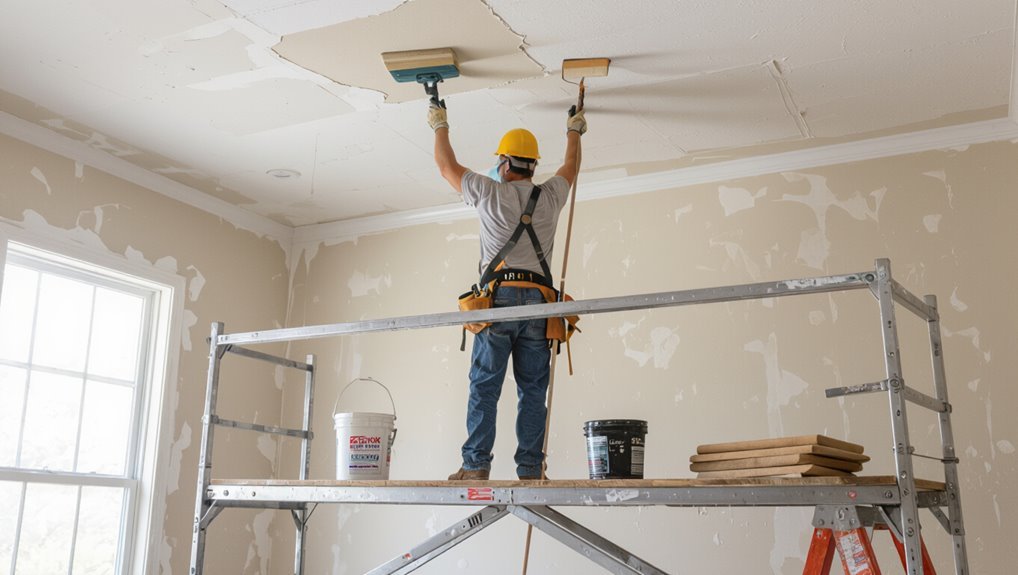
Before you paint, carefully assess any cracks, holes, or damaged popcorn texture so you know what needs fixing.
Patch holes efficiently with the right filler and a clean sanding job to create a smooth surface.
For popcorn ceilings, either smooth the texture or remove it where necessary so your paint will adhere evenly.
Assess Damage Carefully
Start by giving the ceiling a close inspection with a bright light—look for hairline cracks, larger gaps, water stains, and any loose or crumbling popcorn texture.
You’ll perform a damage assessment and ceiling inspection, noting severity and location.
Prioritize safety, document spots, then plan repairs.
- Note cracks
- Mark stains
- Test texture
- Record measurements
Patch Holes Efficiently
Now you’ll patch holes, cracks, and any loose popcorn texture so your ceiling’s surface is smooth and sound before priming and painting.
Inspect from your lift, remove loose debris, then use efficient materials—lightweight joint compound, mesh tape, and a quality putty knife.
Apply thin layers, feather edges, sand between coats, and spot-prime repairs.
These patching techniques save time and create a durable, paint-ready finish.
Smooth Or Remove Texture
With holes filled and loose material removed, it’s time to smooth or remove remaining texture so your ceiling will accept primer and paint evenly.
You’ll prep, scrape popcorn gently, sand seams, and feather joint compound for smooth finishes.
Consider skim-coating for heavy texture. Use dust control, respirator, and test patches for texture removal.
- Prep
- Scrape
- Sand
- Skim-coat
Cleaning Soot, Stains, and Cobwebs Effectively
Before you pick up a ladder, make sure the room is well-ventilated and the power’s off so you can safely remove soot, stains, and cobwebs from high ceilings.
You’ll work faster and cleaner if you tackle loose debris with a long-handled duster, then treat stains with the right cleaner for the surface.
Start with surface inspection for soot removal, cobweb cleaning, and targeted stain treatment using appropriate cleaners.
Fast Ways to Protect Floors, Furniture, and Fixtures
Start by clearing a workable area and covering the floor with heavy-duty drop cloths or contractor plastic, securing edges with painter’s tape so they won’t shift as you move.
Use these fast floor protection methods and furniture covering techniques:
- Tape seams and corners.
- Wrap furniture in plastic.
- Use rosin paper for walkways.
- Cover fixtures and vents tightly.
Plan the Painting Sequence for a 20-Ft Ceiling
You’ll want to start at the highest point and work your way down so drips and overspray don’t ruin freshly painted areas.
Break the 20-foot ceiling into manageable zones and finish one zone at a time to keep edges clean and maintain consistent coverage.
With a clear top-down, zone-by-zone plan you’ll move faster and avoid rework.
Work From Top Down
When you tackle a 20-foot ceiling, work from the top down so dust and drips fall onto areas you haven’t finished yet, not onto fresh paint below.
Use a top down strategy with proven painting techniques to stay efficient. Follow this sequence:
- Prep high surfaces
- Cut edges first
- Roll ceilings next
- Inspect and touch up
Divide Into Zones
Because a 20-foot ceiling is too large to tackle all at once, divide the space into manageable zones so you can work methodically, keep equipment in safe positions, and avoid reworking painted areas.
Plan zones by sightlines, color scheme, and accent walls to preserve visual balance.
Consider texture choice, paint finish, and light reflection relative to ceiling height to guarantee room cohesion.
Cutting in Edges From the Ground: Step-by-Step
Start by positioning yourself about three feet from the wall so you can reach the ceiling edge with a steady arm and a steady brush.
Use brush techniques and edge precision, mind ladder safety and paint consistency to manage height challenges and vision strategies.
Maintain color selection and edge control as you work.
- Steady stance
- Short strokes
- Feather edges
- Clean overlaps
Using an Extension Pole Like a Pro
1 good extension pole changes ceiling painting from a chore into a controlled, efficient process you can manage from the floor. You’ll use extension pole techniques to steady strokes, maintain effective reach, and reduce strain. Adjust length, lock securely, and practice smooth wrist pivots. Focus on consistent pressure and overlap for even coverage; avoid jerky motions to keep control.
| Grip | Action |
|---|---|
| Lock | Secure |
| Angle | Tilt |
| Stroke | Smooth |
| Pace | Steady |
| Check | Adjust |
Roller Types and Nap for 20-Ft Ceilings
Pick a roller material that matches your paint and ceiling texture—polyamide or microfiber for smooth finishes, and a thicker wool blend for textured surfaces.
For 20-ft ceilings you’ll want a longer nap (3/4″ to 1″) to hold more paint and reach into texture without leaving streaks.
Test a small area to confirm coverage and reduce drips before committing to the whole job.
Roller Material Choice
Choosing the right roller material matters more on a 20-foot ceiling than on a standard wall because reach, texture, and paint absorption all change how the roller performs.
You’ll weigh roller material options and a clear roller performance comparison to match paint and surface.
Consider:
- Synthetic blend — durable, low lint
- Natural fiber — holds more paint
- Microfiber — smooth finish
- Foam — for gloss coatings
Nap Length Selection
When you’re working on a 20-foot ceiling, nap length becomes a key decision because it determines how much paint the roller holds, how well it covers texture, and how many passes you’ll need from your extension pole.
Choose a longer nap for heavy texture to boost nap effectiveness and reduce strokes; shorter naps suit smooth surfaces.
Consider nap duration between coats to avoid lap marks and maintain even coverage.
When to Choose Spray Paint for High Ceilings
If you’re tackling a tall ceiling and want fast, even coverage with minimal ladder work, spray paint is worth considering.
You’ll appreciate spray paint advantages when covering large areas, textured surfaces, or tight corners. Learn basic spray paint techniques, prep thoroughly, and control overspray.
- Speed
- Consistency
- Texture coverage
- Reduced ladder time
Blend Spray and Roll: Overlap Technique
Although spray paint gets you broad, even coverage, you’ll get the smoothest finish by overlapping sprayed sections with a short-nap roller.
The roller evens out fine mist and feather-blends edges so the ceiling reads uniform at normal viewing distance. You’ll spray in controlled passes, then follow immediately with roller overlap using light pressure.
This spray technique minimizes texture and joins.
Maintain a Wet Edge to Avoid Lap Marks
Because paint dries quickly on ceilings, keep a wet edge so each new stroke blends seamlessly into the previous one.
You’ll use wet edge techniques and steady pace to prevent overlapping ridges, avoiding lap marks.
Follow this concise plan:
- Work in small sections.
- Load roller evenly.
- Feather edges while wet.
- Maintain consistent speed and pressure.
How Many Coats You’ll Really Need and Why
Most ceilings need two coats of paint to get even coverage and hide previous color or imperfections.
You’ll assess coats comparison by testing a small area: primer plus one topcoat can suffice, but deep colors or porous surfaces need extra layers.
Consider coverage factors—paint quality, sheen, and lighting—then plan one full coat, evaluate, and apply only what’s necessary to finish cleanly.
Minimize Drips and Splatter at Height
Working from a stable platform and controlling your load will cut splatter and drips when you’re painting high ceilings.
You’ll focus on drip control and splatter prevention by refining technique and steady paint application.
Follow practical steps:
- Use a well-loaded roller, not overloaded.
- Work in small sections.
- Keep a consistent stroke speed.
- Wipe edges and tools promptly to avoid runs.
Keep Paint Consistency: Tinting and Thinning Tips
If you tint or thin paint for a high ceiling, aim for a consistent viscosity so your roller lays down an even coat without sagging or splattering.
Use measured mixing techniques: stir thoroughly, add tint in small increments, and test on a scrap.
Measure and mix carefully: stir well, add tint slowly, and always test your blend on a scrap.
Thin only with the manufacturer’s recommended solvent, checking flow and coverage.
Keep a record of ratios so you can replicate results.
Painting Around Light Fixtures, Beams, and Vents
Now that you’ve got paint consistency nailed, protect and prep fixtures before you load the roller: turn off power at the breaker, remove bulbs and shades, and mask switches, vents, and exposed wiring with painter’s tape and lightweight paper.
Use light fixture preparation and beam painting techniques to avoid drips and missed spots.
- Tape thoroughly
- Use extension tools
- Cut in carefully
- Clean up promptly
Working With Vaulted, Tray, and Cathedral Ceilings
When you tackle vaulted, tray, or cathedral ceilings, start by gearing up with a hard hat, safety glasses, and a secure harness or stable ladder to prevent slips.
Use an angled brush and telescoping pole to follow sharp angles and shifts without straining your neck.
Work in small sections, keeping steady lighting so you can see edges and maintain clean lines.
Safety Gear Essentials
Working on vaulted, tray, or cathedral ceilings means you’ll need the right safety gear before you climb—hard hat, goggles, slip-resistant shoes, and a sturdy harness for steep pitches.
You should pick certified safety harnesses and fall protection, eye protection and respirator masks for fumes, and non slip shoes and hard hats for impact.
- Inspect gear
- Fit test
- Secure anchors
- Replace worn items
Technique For Angles
After you’ve checked and secured your safety gear, focus on how angles change your approach: vaulted, tray, and cathedral ceilings force you to paint on a tilt and often from awkward positions, so plan each cut and roll with the slope in mind.
Use careful angle preparation: mark lines, pick extension poles, brace ladders.
Adjust paint application—light coats, consistent strokes, and overlap—to avoid drips.
Avoid Vertical Streaks and Roller Patterning
Start by loading your roller evenly and keeping a wet edge as you paint across the ceiling; this prevents vertical streaks and the telltale roller pattern that shows when paint starts to dry before you blend.
You’ll use proper roller techniques, streak prevention, paint application, and surface preparation:
- Work in manageable sections.
- Maintain consistent pressure.
- Overlap passes lightly.
- Keep paint wet for blending.
Troubleshooting Common Mid-Job Problems
If paint starts to sag, dry unevenly, or show lap marks as you go, don’t panic—you can usually fix these issues without redoing the whole ceiling.
Check ladder stability, adjust technique for ceiling textures, and blend edges to hide paint streaks and surface imperfections.
Control drying times, ventilate to reduce paint fumes, consider paint finish and color selection, and test lighting effects for room acoustics.
Estimate Time and Budget for a 20-Ft Ceiling
Fixing mid-job issues gives you a clearer picture of what’s left, so now let’s estimate time and budget for a 20-foot ceiling.
You’ll plan tasks, allocate crew hours, and list costs with time management and a clear budget breakdown.
- Prep: 4–6 hours
- Scaffolding rental: daily rate
- Painting: 6–10 hours
- Cleanup: 2 hours
Ventilation and Drying Schedule for Safety
While you’re working on a 20-foot ceiling, make sure you’ve planned for continuous fresh-air flow and staged drying times so fumes stay away and coatings cure properly.
You’ll position fans, open high windows, use exhaust and intake ventilation methods, and stagger coats to match manufacturer drying times.
Monitor humidity, keep people out until safe, and label reentry times clearly.
Spot Touch-Ups After Furniture Returns
When your furniture goes back in place, check high-traffic areas like doorways and corners for scuffs or missed spots.
Keep a small container of the original ceiling paint and test it on a hidden area to guarantee a seamless match.
Use a fine brush or small roller to feather the edges so repairs blend with the surrounding finish.
Inspect High-Traffic Areas
Wondering where to start with touch-ups now that the furniture’s back?
Do a high traffic inspection focusing on scuffs, stains, and ceiling condition near vents and lights.
Then prioritize repairs:
- Note visible scuffs on walls.
- Check baseboards and corners.
- Inspect light fixtures and vents.
- Flag ceiling spots for later repainting.
Act quickly to prevent stains from setting.
Match Paint Seamlessly
Now that you’ve flagged spots during your inspection, it’s time to match paint seamlessly so repairs disappear once furniture is back in place.
You’ll test color matching with small swatches, let them dry, and compare under room lighting.
Use thin layers, feather edges, and replicate texture blending with roller nap or stippling brush.
Reassess after furniture returns and touch up as needed.
Clean and Maintain Tools Used on High Ceilings
Start by wiping down brushes, rollers, and extension poles immediately after the job so paint doesn’t harden and ruin their performance; use warm soapy water for latex paints and the appropriate solvent for oil-based products.
Then reshape bristles and hang tools to dry.
- Sort and label for tool organization
- Inspect for wear
- Store dry, dust-free
- Follow a weekly maintenance routine
Safely Upgrade Lighting and Trim While Painting
Before you start painting, turn off power and secure or remove light fixtures so you won’t drip paint on wiring or glass.
You’ll want to mask off or take down trim to protect it, and when it’s back up you can touch up or refresh the finish for a clean, professional look.
Taking these steps saves time and prevents damage while you work on high ceilings.
Secure Lighting Before Painting
Turn off the power at the breaker and remove or secure any light fixtures and ceiling-mounted hardware before you paint—it’s safer and makes the job neater.
You’ll check lighting placement, label wiring, and prepare secure fixtures for reinstallation.
Follow these steps:
- Turn off power and test.
- Remove bulbs and shades.
- Support fixtures if not removed.
- Label and tape wires for reinstall.
Protect And Refresh Trim
With lighting secured, move on to protecting and revitalizing trim so your freshly painted ceiling gets a clean, finished look.
You’ll tape edges, cover baseboards, and use low-tack paper for trim protection.
Sand and clean before applying quick-dry primer, then use small brushes or fingertip rollers for neat lines.
Employ simple refresh techniques to restore sheen without delaying ceiling work.
Hiring a Pro: Questions to Ask and Red Flags
Thinking about hiring a pro for your high ceilings? Ask clear questions: cost considerations, timeline expectations, painter credentials, project guarantees.
Verify past work and client testimonials, check insurance verification, and note communication styles.
Watch red flags: vague estimates, no references, missing insurance, or poor responsiveness.
Trust professionals who explain scope, risks, and cleanup clearly before you commit.
Document the Job for Future Maintenance
After the job, note the paint type and batch so you can match color and finish later.
Take clear photos of prep work and any trouble spots for reference.
Keep a simple maintenance schedule log with dates for touch-ups and inspections.
Paint Type And Batch
Record the paint type, finish, and batch number so you’ll have exact details when touch-ups are needed.
Note paint selection tips and batch mixing techniques, then log them clearly.
- Brand and color code
- Finish (e.g., matte, eggshell)
- Batch number and date
- Mixing ratios and tint notes
Keep this record with the job file for quick future matching.
Surface Prep Photographs
Photograph the ceiling and surrounding surfaces before you start priming so you’ll have a clear visual record for future maintenance; include wide shots showing the whole room and close-ups of problem areas like cracks, stains, or uneven texture.
You’ll document surface texture, ceiling stains, paint adhesion issues, repair techniques, primer application, cleaning methods, surface inspection, prep tools, safety precautions, and paint selection for accurate future reference.
Maintenance Schedule Log
When you finish the job, create a maintenance schedule log that lists dates, tasks performed, materials used, and any issues you found so future touch-ups are quick and accurate.
Keep concise log entries and set maintenance reminders so you’ll know when to recoat or touch damaged spots. Prioritize accessibility and clarity.
- Inspection dates
- Tasks done
- Materials used
- Issues noted
Sanity-Saving Shortcuts That Don’t Cut Quality
Although you’ll still need the right tools and prep, a few smart shortcuts can shave hours off painting high ceilings without sacrificing a professional finish.
Use sanity strategies like sectioning the ceiling, working with a buddy, and using extension rollers plus a pole-mounted edger.
Prioritize time management: prep once thoroughly, tackle broad areas first, and clean as you go to avoid rework and fatigue.
Final Checklist to Finish a 20-Ft Ceiling Like a Pro
1 clear checklist will keep you efficient and safe as you finish a 20-ft ceiling: confirm stable access (scaffold or aerial lift), stock extra rollers, brushes, and touch-up paint, double-check lighting and ventilation, mark completed sections, and set regular breaks with your partner to inspect seams and edges before packing up.
- Verify scaffold, harnesses, lift
- Confirm color selection and swatches
- Do final touches and touch-ups
- Clean tools, document issues, log photos
Frequently Asked Questions
Can I Paint a 20-Foot Ceiling Alone if I’M Petite or Have Limited Strength?
You can, but you shouldn’t do it solo if you’re petite or have limited strength; prioritize ladder safety, use proper paint selection like roller extensions and lightweight paint, and get help for setup, spotting, and fatigue management.
How Do I Handle Paint Fumes Around Infants, Pregnant People, or Pets Long-Term?
Use fume free options like zero-VOC paints, and guarantee safe ventilation with exhaust fans and open windows; keep infants, pregnant people, and pets away until cured, monitor air quality, and use HEPA filters for ongoing protection.
Will Warranty or Homeowner’s Insurance Cover Ceiling Damage From DIY Scaffolding?
Usually no, you shouldn’t expect coverage: warranties and insurance policies often exclude DIY scaffold damage, and you’ll be responsible for repairs. Check your insurance policies, confirm scaffold safety, document work, and consider contractor or liability coverage.
Can Textured Ceilings Be Safely Painted With a Sprayer Without Removing Texture?
Yes — you can spray textured ceilings if you use textured ceiling techniques and sprayer safety tips: mask nearby surfaces, test spray pattern, adjust pressure, thin paint appropriately, wear respirator and eye protection, and work in well-ventilated sections.
How Do I Match Newly Painted Ceiling Color to Aged Walls and Trim Precisely?
You’ll use color matching techniques: take paint sample swatches to compare under the room’s light, test small patches on aged walls and trim, adjust tint ratios, and let samples cure before finalizing the matched ceiling paint.
