
Do Painters Sand Walls Before Painting? What Pros Actually Do
Yes, you should sand walls before painting when the surface is glossy, flaking, or rough. Pros sand to boost adhesion, smooth bumps, and remove old drips, then they leave the area dull for paint to grip. You can often skip heavy sanding if you clean well and scuff lightly on new drywall or between coats. If paint peels, you scrape loose spots, feather edges, prime, and sand again. Want the exact “pro” grit and dust-control steps?
Do Painters Sand Walls Before Painting? (Yes: Sometimes)
Yes—often, you should sand walls before painting, but not always. When you see peeling paint, rough patches, or old drips, you use sanding techniques to knock down those edges and smooth the surface.
You do wall preparation by cleaning first, then lightly scuffing with medium-grit paper so the new coat bonds more evenly.
If the wall is already smooth, firmly adhered, and clean, you can skip sanding and move straight to priming or painting.
You should also avoid sanding through thin coatings or decorative textures.
When Sanding Is Required for Paint to Stick
You need to sand when you want better adhesion—especially on glossy spots that resist bonding or on areas where old paint is flaking.
Walk the surface and look for shine, peeling edges, or loose patches, then address those problem zones first.
Use the right grit: go coarser for rough, peeling areas and switch to a finer grit to smooth for strong paint-to-surface contact.
When To Sand For Adhesion
Before you paint, you need to decide whether sanding will help your new coat grip the wall, because paint won’t bond well to glossy, dusty, or chalky surfaces.
Use sanding techniques to scuff glossy finish, knock down rough edges, and level minor bumps. Sand when the wall feels slick, when old paint looks powdery, or when previous coats feel weak.
Focus on adhesion factors: clean first, then lightly abrade, then vacuum and wipe so fresh paint can key in.
Don’t sand bare plaster aggressively; you want a consistent, dull surface, not gouges.
Identify Glossy Or Flaking Areas
Start by inspecting the wall under bright, angled light, because shiny patches usually signal a barrier that new paint won’t bond to. You’re looking for glossy finishes and uneven wall texture, plus any flaking paint along edges, corners, or prior repairs.
Run your hand over the surface: bumps, loose skins, or chalky spots point to adhesion issues and poor surface preparation. Check for paint durability problems by pressing a fingertip into suspect areas; if it comes away, plan repair techniques like scraping to sound coating and patching, then repeat surface inspection.
Spotting these areas early prevents future paint failure.
Use Proper Grit For Bonding
Choose sanding grit based on what you need paint to bond to: smooth, glossy, or lightly sealed areas require finer scuffing, while peeling, rough repairs, or chalky surfaces need coarser grit to expose a sound layer.
Use 120–150 grit on glossy paint to create tooth, then vacuum dust thoroughly. For repairs and edges, step up to 80–100 grit, feathering until shifts vanish.
On chalky coatings, start coarser, then finish with a medium grit so the surface feels uniform. Your grit selection should support bonding techniques: clean, dull, and consistent.
When You Can Skip Sanding After Cleaning
After you clean the wall, you should do a dry surface check to confirm it’s fully dry and free of residue.
If the surface feels smooth and uniform—no bumps, peeling edges, or shiny spots—you can skip sanding.
That way, you save time while still helping your new paint bond properly.
Dry Surface Check After Cleaning
Can you skip sanding after cleaning? Yes, if your dry surface check proves the wall is ready. After you finish cleaning, use solid drying techniques, then do moisture inspection before you grab a roller. If the wall feels uniformly dry and no residue remains, you can often skip sanding.
- Wait until the surface isn’t cool or damp
- Wipe a small area with a clean cloth
- Look for sheen, streaks, or powder transfer
- Use a fan or dehumidifier to speed curing
- Check corners and patch edges carefully
If anything still feels tacky or shows stains, sand lightly and repaint.
Smooth Areas No Need Sanding
Once the dry surface check confirms the wall is clean and fully cured, you can often skip sanding—especially on smooth, uniform areas.
If you’ve done solid surface preparation, removed dust and grease, and your paint bonds fine, sanding won’t add much. You should still use a light hand to knock down any glossy spots, runs, or tiny nubs you feel with your palm.
For smooth finishes, skip sanding to reduce dust, time, and risk of rounding edges. Just spot-check in daylight, then prime only if the coating fails adhesion.
How to Spot Glossy Spots That Need Sanding
When you run your hand over a finished wall, glossy spots usually jump out because the surface feels slick and reflects light more sharply than the surrounding paint. Use gloss detection to find them before you start sanding techniques. Move a bright flashlight across the wall at a low angle; shiny halos reveal higher sheen, often from uneven roller marks or skipped primer.
Check corners last, since they hide starts and drips.
- Pass your palm lightly—slick areas feel different
- Look for sharp light reflections
- Spot uneven sheen bands near cut-in edges
- Scan around outlets and trims carefully
- Recheck after any touch-up dries
What to Do With Peeling Paint and Failed Patches
Start by addressing peeling paint fast, because loose layers keep spreading under new coatings. Scrape every flake until you reach solid, tight paint or clean substrate. Feather the edges so you don’t leave a hard ridge.
If the area shows bare wood, prime it with a stain-blocking primer to stop bleed-through. For failed patches, remove anything that’s cracking or lifting, then apply patch repair techniques: fill with the right compound, let it cure fully, and sand only the patch junctions smooth.
Use peeling paint solutions like a bonding primer over properly cleaned surfaces, then paint with your finish coat.
Sanding New Drywall: Smooth or Just Scuff?
When you’re painting new drywall, you don’t always need to sand it smooth—light scuffing is often enough to help paint grab.
If you’ve got a clean, well-finished surface, you can sometimes skip sanding and just wipe away any powder so primer bonds properly.
Just be mindful: drywall dust sticks and can leave a tacky mess if you don’t clean it up.
Light Scuff For Adhesion
New drywall comes smooth, but you shouldn’t treat that sheen like ready-to-paint “perfect.” Light scuff sanding gives paint a little grip by knocking down dust, minor paper fuzz, and high spots left from joint work, so your primer and topcoat bond better.
Use these light scuffing techniques as adhesion improvement strategies:
- Wipe the wall first, then scuff lightly
- Use a fine sponge or 220-grit screen
- Sand only until it feels uniformly dull
- Focus on joints, corners, and repaired spots
- Vacuum and tack cloth after sanding
If you skip this, primer can seal over loose fuzz and paint may fail.
Smooth Finish Without Sanding
You can keep sanding light or even skip it if your new drywall already feels truly smooth and clean—think “uniformly dull only if you see shine,” not “rough enough to grab.”
After you wipe the wall to remove dust and joint residue, run your hand over the surface; if it feels even, with no raised paper fuzz, then a light scuff with a fine screen can be optional and your primer can still key in well.
Use alternative techniques: apply a thin skim coat where seams feel proud, then spot-prime.
Choose smooth finishes by controlling mud thickness and letting it cure fully before inspection.
Drywall Dust And Tack
Even if you skip heavy sanding, drywall dust and tack can make paint look patchy or peel later, so you still need to manage the surface after you finish the joints.
You can sand lightly, then wipe—this is where drywall dust control matters. Use a tack cloth to pick up the fine grit you can’t see, and don’t press too hard.
- Brush off seams, don’t leave powder
- Vacuum with a HEPA shop vac
- Lightly scuff high ridges only
- Wipe with tack cloth, change it often
- Prime promptly after cleanup
Sanding Spackle: Level It Without Dish Soap
Once your spackle dries, you can level it cleanly by sanding—no dish soap required. You’ll use proper sanding techniques: start with a firm light touch, then switch to finer paper only after the ridges disappear. For good spackle application, fill low spots flush, let it set fully, and don’t overwork the patch. Use a vacuum or tack cloth after sanding to remove grit.
| Action | Goal |
|---|---|
| First pass | Knock down high spots |
| Second pass | Feather edges |
| Final dusting | Prep for coating |
Leveling Primer: Light Sand for a Smooth Coat
After the primer goes on, you lightly sand it to help the next coat grip well.
Focus on any raised areas and knock down high spots gently so you don’t chew through the primer.
Keep checking the surface by feel and with a light—smooth is your goal before you move on.
Light Sanding For Primer Hold
Light sanding helps your primer grip and levels out tiny bumps so your finish coat looks smooth.
After you choose primer types for your wall conditions, you lightly sand once the primer skins over. You’re not chasing perfection; you’re creating a slightly rough, uniform surface.
Use a fine-grit sponge or block, then wipe dust thoroughly so adhesion stays strong. Focus on scuffs, drips, and brush texture, keeping edges crisp.
- Light-grit 180–220 for most primers
- Sand in small sections, steady pressure
- Remove all dust with a tack cloth
- Recoat only if you spot glossy slick areas
- Let primer fully dry before sanding
Knock Down High Spots Gently
Carefully knock down high spots with light, even pressure so your primer levels instead of telegraphing ridges.
When wall preparation demands it, you use sanding techniques like a sponge sanding block or fine-grit paper, typically 120–180, to feather connections.
Work in small sections, keeping the stroke gentle and consistent; don’t dig into low areas or chase every flaw.
Wipe dust often with a damp cloth or tack cloth so primer grabs cleanly.
After you knock down the high points, check the surface under side lighting, then prime for a smooth, uniform coat.
Avoid Gouges: Pro Techniques to Protect Walls
Protecting your walls starts with preventing gouges before they happen. Focus on protection techniques during wall preparation so tools never bite into fresh drywall or old plaster.
Use painter’s tape to mask edges and outlets, then keep a firm grip and light pressure when scraping or patching. Protect corners with edge guards, and set drop cloths so ladders and buckets can’t scrape surfaces.
- Cover trim with tape and plastic
- Use a wide putty knife, not a narrow one
- Keep blades clean and sharp
- Feather patches with controlled strokes
- Recheck for loose grit before you continue
Best Grit Sandpaper by Wall Surface (Quick Chart)
Once you’ve already blocked gouges and masked edges, you can choose sanding grit that matches what you’re working on.
For smooth drywall, start around 120–150 grit for feathering and scuffing, then finish with 180–220 for paint-ready bite.
For plaster and patch compounds, use 80–100 grit to level, then step up to 150–180 to erase scratches.
For painted walls with minor imperfections, go 180–220; if glossy, bump to 150–180 for better adhesion.
For raw wood trim, use 120 then 180.
Practice grit selection across surface types.
Wet vs Dry Sanding: What Pros Choose and Why
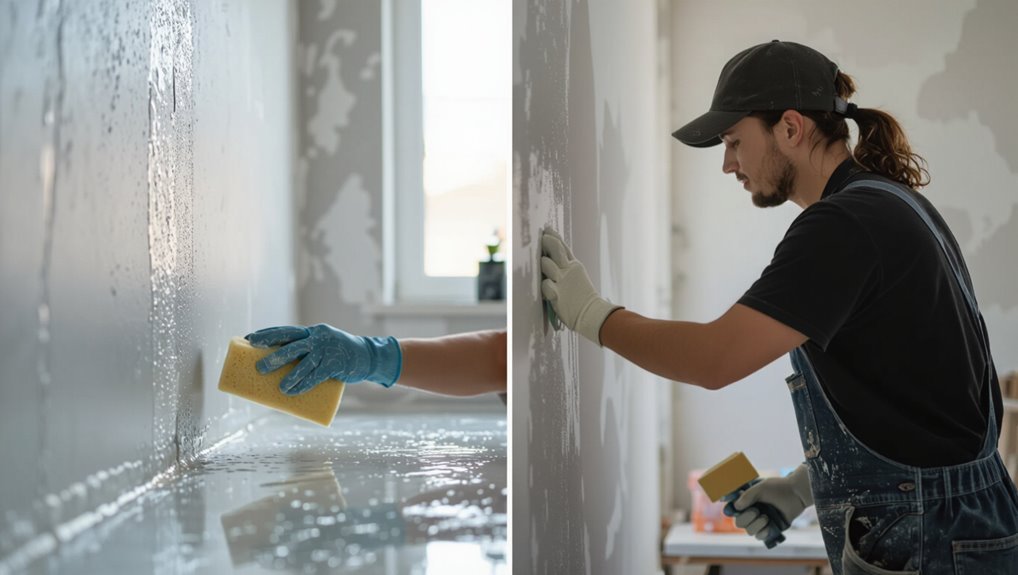
When you want an extra-smooth finish, you’ll usually reach for wet sanding to control dust and refine the surface.
If you’re trying to move fast, dry sanding helps you get through prep quicker with less hassle.
Pros often pick based on the finish they’re aiming for—smooth perfection with wet, speed with dry.
Wet Sanding For Smoother Finish
Wet sanding can give you a noticeably smoother wall finish because it lets you level imperfections without grinding loose grit into the surface like dry sanding sometimes does.
You’ll get real wet sanding benefits when you keep the surface lubricated and control the slurry. Use these wet sanding techniques to improve sheen and texture:
- Light, even pressure
- Fine-grit paper for finish passes
- Frequent rinsing to clear debris
- Wipe dry to inspect defects
- Feather edges for flawless blending
After you smooth, let the wall fully dry before priming or painting for a cleaner topcoat bond.
Dry Sanding For Faster Prep
After you’ve leveled the surface with wet sanding and you’ve confirmed it’s dry, dry sanding becomes the faster way to prep for paint. You keep airflow and movement going, so dust control and timing stay tight.
Pros choose dry when they need speed on cured drywall patches, old paint edges, or minor texture knockdown. Use fine-grit paper and light pressure, then vacuum immediately to avoid gritty buildup.
Start with a scuff, check with your hand, and repeat only where you feel flaws. These dry sanding techniques deliver efficient prep and help your primer grip better.
Feather Repair Edges So They Disappear
To make a feathered repair disappear, you need to blend the patch into the surrounding wall, not leave a hard ridge behind.
You use feathering techniques to taper the edges until the repair feels like part of the wall. Don’t chase perfection with brute sanding—work methodically and verify smoothness by touch and light.
- Apply joint compound wider than the damaged spot
- Feather outward in thin layers, letting each dry
- Sand progressively with finer grits for edge blending
- Wipe dust off and spot-check with a flashlight
- Prime and re-check before paint
Dust Control Steps Painters Never Skip
Before you start sanding, cover the floors with plastic so mess stays contained.
After you sand, vacuum thoroughly and then tack-wipe everything to pick up the fine dust you can’t see.
You’ll get better adhesion and a cleaner finish because you didn’t skip dust control.
Cover Floors With Plastic
Covering your floors with plastic is one of the fastest ways to stop dust from turning into a permanent mess. You want solid floor protection before you start sanding, scraping, or dry prep.
Lay plastic sheeting across the whole work area, then tape seams tight so nothing slips under. Press edges at doorways and baseboards, and remove shoes or use clean boot covers to avoid tracking grit.
- Roll out plastic flat, no wrinkles
- Overlap seams 6 inches and tape
- Cover vents and floor registers
- Secure corners with painter’s tape
- Plan for cleanup before paint hits
Vacuum And Tack Wipe Dust
Vacuum the entire work area thoroughly, then tack-wipe to lift the fine dust that a regular cleaning misses. You do dust removal before paint so surface preparation stays solid.
First, run a shop vac with a brush attachment along baseboards, corners, and seams where sanding grit settles. Then, use a tack cloth, lightly pressing and wiping in one direction.
Fold to a clean side often so you don’t smear residue back onto the wall. Focus on edges and glossy surfaces; dust hides there.
When the tack cloth comes away clean, you’re ready to prime or paint without gritty defects.
Vacuum First, Then Tack Cloth (Common Order)
Vacuuming first removes loose dust and grit that can make paint look rough or cause poor adhesion. You want a solid vacuum technique to pull debris from edges, outlets, and corners, then you follow up with a tack cloth to catch what’s left. Don’t skip either step. Use this order so the tack cloth isn’t fighting heavy particles.
Vacuum away loose dust first, then tack cloth remaining grit—so paint adheres smoothly and looks crisp. Don’t skip either step.
- Vacuum walls thoroughly, not just the floor area
- Work top-to-bottom with steady passes
- Focus on trim, cracks, and sanding residue
- Lightly wipe with the tack cloth once, straight
- Replace the tack cloth when it loads up
After that, you can start painting confidently.
After Sanding: When to Re-Prime or Spot-Prime
Once you’ve finished sanding, you need to decide whether to re-prime or spot-prime based on what the sanding exposed.
If you sand through old paint to bare drywall, you’ll have re-prime necessity: coat the exposed substrate so you stop uneven absorption.
If you only roughen the surface and no spots show through, you can often skip full coverage and use spot-prime techniques to seal tiny scratches, nicks, or rusted patches.
After priming, re-check for sheen differences and wipe dust again.
Match primer type to your finish paint for lasting adhesion.
How Long to Wait Before Painting After Prep
After you finish sanding and priming (if needed), you should let the surface dry completely before you paint—usually at least a few hours, but often longer if humidity runs high or you used a cleaner/degreaser.
Your waiting period affects adhesion, so don’t rush. For painting readiness, check the wall: it should feel dry, firm, and dust-free.
Pros commonly wait overnight after heavy prep, especially indoors with poor airflow.
Use this checklist to time it right:
- Touch-test for no tack
- Smell for solvent/cleaner
- Inspect for dust residue
- Confirm primer has cured
- Ventilate to speed drying
What Happens If You Don’t Sand at All
Skipping sanding doesn’t just make your paint job look rough—it can actively sabotage adhesion.
If you skip sanding entirely, you leave chalky dust, glossy spots, and tiny imperfections in place. Paint then can’t grab evenly, so it may peel, blister, or flake after it cures.
Uneven texture also shows through, especially with satin or sheen paints, making drips and lap marks stand out. You lose sanding benefits like smoothing and improving mechanical grip.
Without proper surface preparation, even good primer can struggle, and touch-ups won’t blend because the underlying surface never becomes consistent.
Sanding vs Scuffing vs Deglossing vs Bonding Primer
Not sanding at all leaves you with the wrong surface for paint to grip, but you still have options that get you there more precisely.
For solid surface preparation, you choose the right method, then you use practical sanding techniques. Sanding reshapes glossy edges and evens out irregularities. Scuffing lightly dulls existing finishes without heavy abrasion. Deglossing uses chemical strippers to remove sheen for better bonding.
If the surface is chalky or unknown, you use bonding primer to lock it down. Pick what matches your wall condition:
- Scuff glossy paint
- Sand flaky spots
- Degloss oily areas
- Spot-prime stains
- Prime with bonding primer
How Pros Test Adhesion Before You Paint
How do pros know paint will actually stick before they open a can? They start with careful surface preparation, then do adhesion testing.
You press painter’s tape onto a cleaned spot, press firmly, and rip it off. If paint lifts or dust transfers heavily, you’ve got weak bonding and need more preparation.
Next, you do a wet rag rub test: if residue smears or the surface feels chalky, you treat it as a contamination issue, not a painting problem.
Finally, pros spot-check with a small test patch and proper drying time, then reassess for peeling or bubbling.
Common Sanding Mistakes That Ruin the Finish
Even if you plan to paint a “ready” wall, a few sanding missteps can wreck adhesion and leave you with a rough, blotchy finish.
You’ll notice it fast if you skip prep or chase the wrong sanding techniques. Watch for these common errors:
- You sand too aggressively, cutting into drywall paper.
- You sand too lightly, leaving glossy or chalky spots.
- You don’t feather edges, so old texture telegraphs through.
- You leave dust in seams and corners.
- You switch grits randomly without aiming for a smooth, consistent profile.
Tools Pros Use: Pole Sanders and Sanding Sponges
Pro painters rely on two go-to tools—pole sanders and sanding sponges—to prep walls fast and evenly.
You’ll start with pole sanders for broad, flat areas, using ergonomic design so you keep pressure consistent while reaching ceilings and corners.
Next, you use sanding sponges to smooth edges, switch plates, and texture spots, where flats tools can’t reach.
Pros focus on grit selection to match the wall condition, then they complete surface preparation by wiping grit and managing dust control with vacuum attachments or careful cleanup.
Afterward, you follow painting techniques and do tool maintenance: clean pads, check hooks, and store gear dry.
Paint Choice After Sanding vs No-Sanding Prep
Once you’ve sanded, your paint choice needs to match the surface you created. If you sand to remove gloss and blend patches, you can go with a smoother, higher-build primer and then topcoat for better finish quality.
No-sanding prep works only when the surface still has solid adhesion—choose bonding primer to prevent peeling. Pros think regarding paint durability first, then sheen.
- Use bonding primer when you skip sanding
- Choose smooth primer after proper sanding
- Pick topcoat sheen for room lighting
- Avoid slick paint over dusty spots
- Let primers cure before coats
Frequently Asked Questions
Can I Wipe Walls With Deglosser Instead of Sanding?
Yes, you can wipe with deglosser instead of sanding, but deglosser effectiveness depends on your surface. For best results, clean thoroughly, let it dry fully, and use alternative methods like scuff-sanding glossy spots before priming.
Should I Sand Between Primer Coats or Only Before Primer?
Yes—sand between primer coats only when needed: if you see drips, bumps, or dust nibs, use light sanding techniques (220–320 grit), then wipe clean and repeat primer application. If surfaces look smooth, you skip it.
What’s the Best Way to Sand Around Trim and Outlets Without Scuffing?
You’ll sand around trim and outlets carefully: use painter’s tape plus plastic outlet covers for protection tips, then feather edges with a sanding sponge, not paper. Keep pressure light, sand diagonally, wipe dust, and touch up missed spots.
How Do Pros Handle Sanding Dust on Finished Floors and Furniture?
You handle sanding dust by vacuuming often with a HEPA shop vac, using dust containment methods like plastic sheeting, and running a tack cloth. You apply floor protection techniques, like drop cloths and painter’s tape edges, before moving tools.
Is Sanding Necessary After Removing Wallpaper Adhesive Residue?
Yes, you usually should sand lightly after adhesive residue removal: pros aim for a uniform surface, since even 1/16-inch bumps can show through paint. Use adhesive removal techniques, then wall surface preparation with fine-grit sanding.
Conclusion
Yes—pros sand some walls, not all. You sand when the surface feels slick, chalky, uneven, or when paint is peeling, because paint won’t grip well on gloss or loose layers. If you just clean and the wall already feels dull and solid, you can often skip sanding. Worried you’ll waste time? Think of sanding as a quick insurance step—better adhesion now prevents bubbling and failed patches later.
