
Can Interior Paint Be Used on Exterior Surfaces? The Real Answer
You can use interior paint outdoors only in very sheltered, low-moisture areas like porch ceilings or interior trim. Still, it usually won’t hold up because it lacks UV, heat, and moisture resistance. Without the right binders and exterior-grade barriers, you’re more likely to see peeling, blistering, fading, or mold—especially with sun, humidity, or temperature swings. If you prep properly with cleaning, repairs, and primer, it buys time, but true exterior paint lasts longer—keep going to learn how to choose it.
Can Interior Paint Be Used Outside?
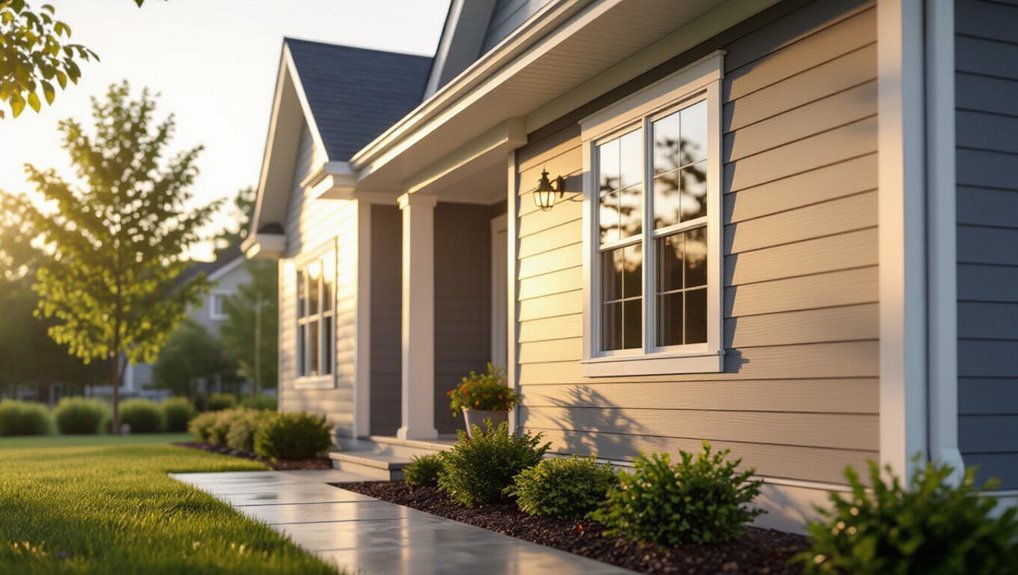
Can you use interior paint outside? You can, but only in limited, sheltered conditions where moisture, sun, and temperature swings stay mild.
Interior formulas don’t handle ultraviolet light well, so they chalk, fade, and peel faster than exterior coatings. If you choose it, you must focus on indoor outdoor compatibility by covering a protected porch ceiling or interior-facing trim, not exposed siding.
Prep matters: clean, dry, and prime appropriately to support paint longevity. Even then, expect shorter service life than an exterior paint system.
For best results, use exterior-rated products outdoors.
When Interior Paint Fails Most Often
Interior paint fails most often when you use it in places it can’t tolerate—especially where it gets direct sun, frequent moisture, or big temperature swings. You notice interior paint failures as peeling, blistering, and dull chalking. Most of the time, it’s not “bad paint”—it’s common mistakes: skipping primer, painting over grime, or rushing dry times. Use this checklist to spot risk zones:
| Area | What happens | Typical trigger |
|---|---|---|
| South wall | Peels | Direct sun |
| Bathroom | Blisters | Moisture |
| Garage trim | Cracks | Temperature swings |
| Window sills | Stains | Condensation |
| Basement steps | Flakes | Poor surface prep |
What Interior Paint Formula Lacks Outdoors?
Even though interior paint looks fine at first, it usually lacks the outdoor-specific chemistry that helps coatings stay bonded through heat, moisture, and UV.
You need different paint composition differences than indoors. Interior formulas often use weaker binders and fewer corrosion-resistant pigments, so they don’t expand and contract well when temperatures swing.
Moisture also penetrates faster because the film forms less durable barriers. Without exterior-ready resin systems and additives, weather resistance factors like humidity cycling, wind-driven rain, and freeze-thaw stress can break adhesion and cause peeling, chalking, and flaking.
You’ll notice it sooner on siding, trim, and exposed walls.
How UV Light Fades Interior Paint?
When sunlight hits your interior paint, UV radiation breaks down pigments and causes noticeable color fading.
Over time, the binder starts to degrade, weakening the film and speeding up deterioration.
You’ll also see gloss loss and chalkiness as the surface breaks down further.
UV Causes Color Fading
UV light breaks down the pigments and binder in interior paint over time, so the colors start to look dull. You’ll notice this most near sunny windows, where UV energy oxidizes dyes and lightens darker tones first. To maintain appearance, use UV protection strategies like window film, sheer curtains, and reflective blinds. Apply Color preservation techniques: choose paints labeled “UV resistant,” limit direct sun exposure, and rotate or re-cover furnishings that block glare.
| Exposure | Visible change | What to do |
|---|---|---|
| Low | slight dulling | curtains |
| Medium | faded tones | window film |
| High | rapid lightening | UV-resistant paint |
| Direct sun | uneven fading | rearrange furniture |
| Seasonal swings | patchy loss | maintain coverage |
Binder Breakdown Over Time
Over time, UV light doesn’t just fade the surface—it also breaks down the binder that holds interior paint together.
When you expose an interior coating to sunlight, the binder lifespan shortens as polymer chains degrade. That degradation weakens the paint film, so it can’t grip the substrate as effectively.
You may notice subtle cracking, powdery residue, or peeling earlier than expected. As the binder weakens, performance degradation accelerates: adhesion drops, cohesion fails, and the paint becomes more water-susceptible.
Even if the color still looks acceptable at first, the structure behind it keeps failing.
Gloss Loss And Chalkiness
Step-by-step, UV exposure robs interior paint of its sheen: as the binder and surface pigments degrade, the finish can’t reflect light as evenly as it used to.
You notice this first as reduced gloss retention, then as a chalky finish that powders under a light touch. To understand why, watch for these effects:
- Sun-driven pigment fade
- Binder hardening and cracking
- Surface oxidation and roughening
- Moisture swelling that amplifies wear
- Fines migrating to the surface
If you want lasting appearance, keep the paint inside or switch to an exterior system rated for UV.
Why Temperature Swings Cause Peeling?
Temperature swings cause peeling because expansion and contraction stress the paint film and the surface underneath.
When temperature fluctuations hit your exterior, materials expand and contract at different rates. That mismatch forces the coating to flex, loosening its bond and widening microcracks.
Over time, the peeling mechanisms accelerate: the trapped stresses build at edges, joints, and thin spots, then lift the top coat.
If you use an interior paint, it often lacks exterior flexibility, so it can’t accommodate movement.
You’ll notice curling, flaking, and eventual sheet peeling after repeated cycles.
How Moisture Causes Indoor Paint to Bubble?
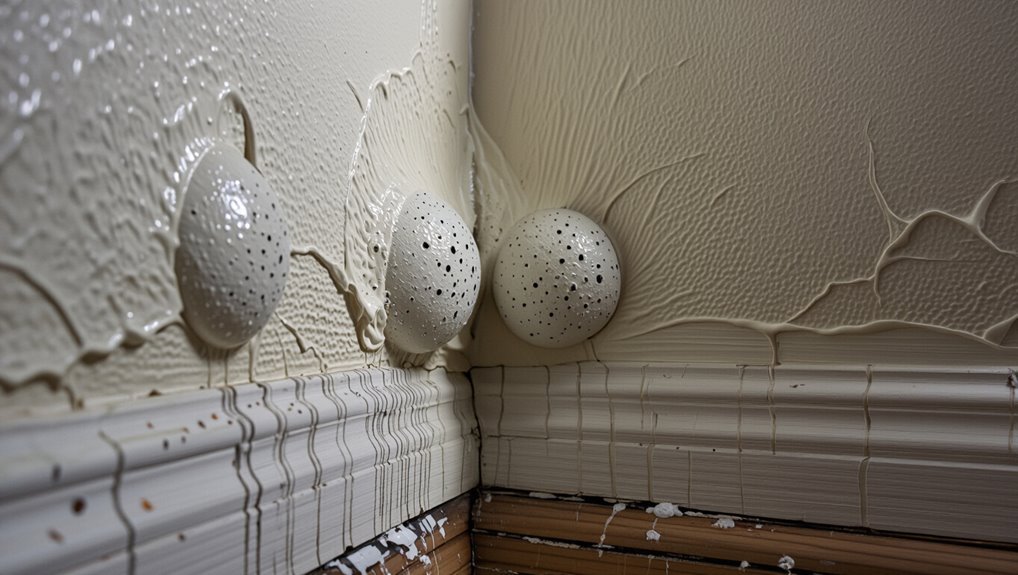
When moisture seeps behind the indoor paint film, it forces trapped water vapor to push its way upward. As the vapor expands, it lifts paint from the wall and creates paint bubbles.
You notice blistering first, then the finish weakens as adhesion breaks and edges curl.
To understand the moisture effects, check these common triggers:
- Leaks from plumbing or roofs
- Condensation in humid rooms
- Poorly sealed cracks
- Damp drywall or plaster
- High indoor humidity with low ventilation
Mildew Resistance: Outdoor Reality Check?
When you take “mildew-resistant” paint outside, you still face real mildew risks from humidity, rain, and shady spots.
You can prevent problems by prepping the surface thoroughly—scrape off any growth, dry it completely, and fix moisture leaks before you paint.
If you control moisture with proper ventilation, drainage, and drying time between coats, you’ll give the coating a much better chance to stay mildew-free.
Mildew Resistance In Outdoor Conditions
Even if a paint label promises mildew resistance, outdoor conditions test that claim fast—shade, trapped moisture, and poor airflow let spores take hold.
You need to treat mildew resistance as a starting point, not a guarantee. Use mildew prevention techniques and choose outdoor surface treatments that can tolerate wetting and drying cycles.
- Favor breathable coatings to reduce moisture buildup
- Watch for persistent damp corners and overhangs
- Recoat on a schedule after heavy rain seasons
- Improve drainage so water doesn’t sit on walls
- Use mold-inhibiting additives where allowed
If you ignore these realities, mildew can still bloom quickly.
Surface Prep And Moisture Control
Surface prep and moisture control decide whether your mildew-resistant paint actually holds up outdoors.
Before you roll anything on, you must do thorough surface cleaning: scrub algae, dust, chalky residue, and mildew stains, then rinse and let everything dry fully. If you paint over damp wood, masonry, or siding, you trap moisture and kill adhesion.
Fix cracks, caulk gaps, and remove loose coating so the substrate stays stable. Prime bare or stained areas to seal them, then keep rain and sprinklers off the surface while curing.
When moisture can’t creep in, paint adhesion stays strong.
How Condensation Challenges Exterior Paint?
Condensation challenges exterior paint because moisture forms where warm, humid air meets cooler wall surfaces, then gets trapped behind the coating.
You’ll see condensation effects show up as bubbling, peeling, or staining, especially after nights that cool the substrate.
Exterior challenges worsen when the paint film can’t breathe, so water lingers at the interface and undermines adhesion.
To reduce trouble, you should:
- Check temperature swings and humidity levels
- Use breathable, exterior-rated systems
- Seal penetrations that invite moist air
- Improve drainage and keep grade away from walls
- Allow full cure before weather shifts
Sheen and Gloss Problems Outside?
When you use exterior paint with the wrong sheen, you risk a noticeable mismatch as surfaces reflect light differently.
Glossy finishes also tend to hold onto dirt and grime more easily, so the house can look dull faster.
And because sunlight changes how coatings cure and fade, you may see coverage and sheen shift over time.
Exterior Sheen Mismatch Risks
Even if you get the right color on an exterior wall, sheen mismatch can still ruin the look—especially if you roll on interior paint outside.
You’ll notice uneven reflections, because interior formulas rarely match exterior sheen consistency and can create gloss variation across panels.
Here’s what to watch for:
- Patchy shine from different coats and tools
- Flashing where wet edges dry at different rates
- Sunlit hotspots that reveal texture differences
- Tacky-looking sheen near repairs
- Faster weather-wear that amplifies inconsistencies
When you mix products, you lock in these exterior sheen risks.
Gloss Holds Dirt More
Glossy exterior paints trap more grime because their smooth finish reflects light more sharply and makes dirt and pollutants cling on the surface. If you choose high sheen to “look clean,” you’ll often face higher dirt accumulation, especially near roads, trees, and wind-driven dust.
Matte and eggshell textures break up the sheen, so grime can’t latch on as easily, and you usually get better wear between washings. High gloss can also show smudges in the light, making you notice streaks sooner.
Even with good gloss durability, expect more frequent cleaning than with lower-sheen coatings.
Coverage Changes With Sunlight
Outside, sunlight can change how well your interior paint “reads” and performs—especially at higher sheens.
You’ll often think coverage is fine in shade, then notice streaks once sunlight exposure hits. With UV degradation, film weakens and color shifts, so previously “covered” spots start looking patchy.
You can prevent sheen surprises by checking how light bounces after drying, not just at application.
Pay attention to:
- Brush/roller nap texture
- Dry-to-touch vs fully cured
- Temperature and wind drying speed
- Sheen level and glare visibility
- Base color and primer uniformity
What Happens When Interior Paint Gets Wet?
When you get interior paint wet, it often softens and loses its bond to the surface, because most interior formulations aren’t designed to handle sustained moisture or changing temperatures.
You’ll see blistering, dull spots, and peeling as the film swells, then dries unevenly. This moisture impact can also weaken interior paint durability by slowing cure and increasing shrinkage cracks.
If water sits long enough, stains bleed through and mildew can take hold on porous layers. You may need to scrape back to solid, dry material and repaint, since the original adhesion won’t fully recover.
When Interior Paint Might Temporarily Work?
In some situations, interior paint can hold up for a short time on exterior surfaces—especially if the area stays dry, out of direct sun, and gets little temperature swing.
You can treat it as a stopgap, using temporary solutions for small scuffs or brief weatherproofing until you switch to proper exterior coating.
Keep in mind these practical applications:
- Paint only when humidity is low
- Apply to stable, clean, dry surfaces
- Limit sun exposure and heat buildup
- Watch for peeling at edges and seams
- Plan a quick repaint before moisture returns
Best Use Case: Covered, Dry Areas
Covered, dry areas are the best place to try interior paint as a temporary fix. If you’re painting something like an enclosed porch interior, an indoor entryway, or a protected hallway wall, you’ll get the most consistent results.
You need ideal conditions: stable temperatures, low humidity, and no direct sun or rain exposure. Prime bare or stained spots first so the finish bonds well.
When you choose the right sheen and apply even coats, you improve paint durability for the time you need. Still, you should monitor for peeling or bubbling, since it’s not true exterior protection.
Worst Choices: Soffits, Siding, Trim
You should avoid using interior paint on soffits, because it can trap moisture and lead to peeling and bubbling.
On siding and trim, interior paint often fails to bond well, creating adhesion problems that cause flaking over time.
If you want long-lasting coverage outside, pick exterior-rated coatings instead.
Soffits: Moisture Traps And Peeling
Soffits often turn into moisture traps because they sit under the roofline, where humid air gets pulled in and can’t dry out fast enough.
When you ignore soffit maintenance, trapped water soaks wood or compacts dust, then paint fails and you see peeling.
Focus on moisture prevention and smart peeling solutions so your coating lasts longer.
You should:
- Check vents for blockages
- Seal tiny gaps that let air in
- Improve airflow with baffles
- Spot soft spots early
- Use breathable exterior-grade systems
Siding And Trim: Adhesion Risks
Moisture and airflow problems that make soffits peel also undermine adhesion on siding and trim, where coatings face sun, rain, and freeze-thaw cycles.
If you brush on interior paint, you fight adhesion challenges from flexible substrates, chalky old paint, and glossy factory finishes. You also risk poor surface compatibility: wood tannins, vinyl’s smooth nonporous skin, and metal’s oxide layer all block bonding.
Cold mornings can thicken paint, trapping solvents and weakening the film. Fixing this takes abrasion, priming made for exterior use, and thorough moisture management.
Don’t assume it’ll “stick long-term.” It won’t.
Prep Steps for Any Exterior Paint Job
Solid prep makes or breaks any exterior paint job, so start by inspecting the surface for peeling paint, loose caulk, mildew, and cracks.
Next, you’ll do surface cleaning: scrape loose material, power-wash grime, and let everything dry.
Then you’ll patch, sand smooth, and replace failing caulk to boost paint adhesion.
Choose the right tool selection for corners and edges, and plan weather considerations to avoid rain and dew.
Follow safety precautions, then match color matching and pick finish types.
Track your project timeline, and think about environmental impact.
- Remove mildew with a cleaner
- Repair cracks and gaps
- Sand glossy areas
- Caulk joints after drying
- Wipe dust before painting
Should You Prime Before Using Interior Paint?
After you’ve prepped the surface for exterior paint—cleaned, scraped, patched, sanded, and re-caulked—you’ll still need to think about primer before you use any interior paint outside.
Primer seals porous areas, boosts adhesion, and evens out uneven substrates on exterior surfaces. If you skip it, you’ll often see peeling, blistering, or quick fading because interior paint wasn’t built for outdoor moisture and temperature swings.
Apply primer as directed, let it dry fully, and then roll or brush your interior paint. This step makes the finish look cleaner longer and reduces callbacks.
Pick a Primer to Stop Staining
To stop stains from bleeding through, you need the right stain-blocking primer—not just a thicker coat of paint. You’ll see better results when you choose primer types based on what’s causing the marks.
Start by sealing knots, smoke damage, water rings, and tannin bleed with the correct stain blocking product, then coat with your finish paint.
Consider these cues:
- Shellac-based for tough tannins
- Oil-based for heavy nicotine and water spots
- Latex stain-blocking for everyday indoor-to-exterior issues
- Mold-resistant primers for damp areas
- Fast-dry options to reduce recoat time
Pick carefully, and you stop stains before they ruin the surface.
Test Interior Paint on a Small Spot
Before you commit, test your interior paint on a small, hidden spot so you can see how it bonds, dries, and looks in real conditions. Pick an inconspicuous corner, clean it, and let it dry fully. Apply one thin, even coat, then note any flashing, streaking, or lifting when it cures. Check the test surface in daylight and after touching lightly—do you get rub-off? This quick check shows paint performance before you risk a whole wall.
| What you watch | What it tells you |
|---|---|
| Bond strength | Adhesion quality |
| Dry finish | Final sheen accuracy |
| Color shift | Underlying stain bleed |
Dry Time vs Weather for Exterior Coats?
Dry time for exterior coats depends heavily on the weather, so you need to plan around temperature, humidity, wind, and rain.
If you ignore dry time considerations, your finish can stay tacky, attract dirt, or fail to cure.
Watch for these factors:
- Cooler temps slow evaporation
- Higher humidity extends drying
- Wind can speed skin-over but risks uneven curing
- Rain before cure can cause streaking
- Sun can flash-dry edges, trapping moisture
Track forecasts and coat when conditions stay stable for the full cure window.
You’ll minimize weather impact and get a tougher, more consistent exterior finish.
Ideal Painting Temperature and Humidity?
You’ll get the best results when you paint within the ideal temperature and humidity range, because those factors control how quickly the coating flows, levels, and cures.
Aim for moderate weather: temperatures around 50–85°F typically work well, and humidity should stay low to moderate.
Aim for moderate weather—around 50–85°F with low to moderate humidity—to help paint flow, level, and cure properly.
If the air is too cold, paint may thicken and cure slowly; if it’s too hot, it can flash off before it levels.
You should check ideal conditions using a thermometer and hygrometer, and schedule around rain, dew, or direct sun exposure.
How to Avoid Lap Marks With Interior Paint?
To avoid lap marks with interior paint, plan your workflow so every stroke “joins” wet paint—start at a natural edge (corner, trim line, or cut-in area) and work in consistent sections that you can finish before the paint begins to skin over.
Use lap mark prevention by keeping a wet edge, loading your roller or brush evenly, and maintaining steady pressure. Coordinate helpers so sections stay uninterrupted.
Apply in thin, even coats instead of chasing coverage. Use these painting techniques to stay seamless:
- Cut in only what you’ll roll immediately
- Keep a wet edge across each panel
- Back-roll lightly while paint is fresh
- Use consistent nap and paint viscosity
- Avoid overworking dried edges
Roll vs Brush for a Smoother Outdoor Finish?
Even if you’ve mastered a wet-edge workflow to prevent lap marks with interior paint, outdoor results come down to how you apply each coat—especially whether you roll, brush, or combine both.
Use roller advantages to cover large areas fast with even thickness and fewer visible seams. Then use brush techniques to cut in corners, edges, and textured spots where the roller can’t reach.
For the smoothest finish, apply paint with the roller first, lightly back-brush only to level ridges, and keep a consistent pressure.
Don’t overload either tool, or you’ll invite streaks.
How Many Coats Will Actually Hold Up?
You need to match your coats to the exterior exposure level—direct sun, rain, and humidity can strip coverage fast.
Start with the right primer base coat so the finish can bond well and resist peeling.
If you want it to actually hold up, plan on two to three coats instead of trusting a single application.
Determine Exterior Exposure Levels
Exterior exposure levels determine how long your paint system holds up, because sun intensity, wind-driven rain, and temperature swings change how coatings cure and bond.
If you ignore exterior elements and weather exposure, you’ll misjudge durability and end up re-coating sooner than expected. You need to assess exposure before deciding how many coats to apply.
Consider:
- Direct sun hours per day
- Wind-driven rain exposure and splash zones
- Freeze-thaw frequency and temperature swings
- Surface porosity and moisture retention
- Historical mildew or chalking patterns
Then tailor your coat count to the harshest conditions you’ll actually face.
Use Proper Primer Base Coat
A proper primer base coat is what lets your paint system actually bond, seal, and resist peeling when conditions turn tough.
You should start with proper surface preparation: clean off dirt, chalk, grease, and peeling areas, then sand and spot-prime bare spots.
Prime the whole surface you plan to finish, not just patches, so moisture can’t creep under later coats.
Choose ideal primer types matched to your substrate—stain-blocking primer for interior/exterior contaminants, masonry primer for porous walls, and bonding primer on chalky or glossy paint.
You’ll get better adhesion and longer-lasting performance.
Plan For Two To Three Coats
Even when you start with the right primer, interior paint can still fail outdoors unless you plan the finish in layers—usually two to three coats.
You’ll get better hold-up by using proven paint application techniques and by thinking through durability comparisons before you roll or brush. Aim for full coverage, consistent film thickness, and proper drying time between coats.
- Apply the first coat thin, then let it cure fully
- Lightly sand after coat one for adhesion
- Use overlapping strokes to avoid lap marks
- Follow manufacturer recoat windows, not guesswork
- Do a final coat for weather resistance
Fix Peeling, Flaking, and Bubbles Fast
Stop ignoring bubbles, flaking, and peeling—address them now before moisture spreads and the damage locks in.
Scrape off every loose edge, then sand until the surface feels solid.
For fixing bubbles, cut out blisters to remove trapped water, wipe clean, and let everything dry completely.
For flaking repair, prime with a bonding exterior primer to stop chalking and improve adhesion.
Use peeling solutions like a stain-blocking primer when old paint bleeds.
Spot-seal cracks with caulk, then apply fast fixes: a thin patch coat, sand smooth, and recoat only after curing.
Can You Recoat Over Failed Interior Paint?
Can you really recoat over failed interior paint and expect it to hold? You can’t just slap on new coats—first you must fix the root cause.
Scrape off loose paint, sand glossy spots, and dry the surface completely to prevent new peeling. If the failed area is stained or chalky, use spot primers to seal it, or you’ll keep fighting the same issue.
- Identify why it failed (moisture, adhesion, surface dust)
- Remove all flaking paint to bare edges
- Prime with bonding or stain-blocking primer
- Recoat only when fully dry
- Consider interior paint alternatives if damage is deep
How to Match Color After Outdoor Fading?
To match a color after outdoor fading, you first identify the original shade and undertone so your new coat won’t look “off.”
Next, you use paint samples from the exact area (or test spots) to compare undertones in daylight before committing.
Once you see the sample next to the faded paint, you pick the closest match and apply it consistently.
Identify Original Shade Undertone
Why does your outdoor wall look “off” after fading? Sun, moisture, and dirt shift the original undertone, so your new coats won’t align with the real color.
Start by inspecting multiple spots: different shade variations can appear across sun and shade lines, even on the same wall. Pay attention to color perception—compare against nearby trim that’s less exposed. Use natural light, not lamps, because undertones change how you read reds, yellows, and blues.
- Check north vs. south sections
- Look for yellowing or greying
- Compare edges and corners
- Photograph in daylight
- Test paint chips against dry areas
Use Samples For Exact Match
After you spot the original undertone, use samples to lock in the color after outdoor fading. Gather multiple paint sample swatches from the same brand and sheen.
Compare them in sun and shade, because outdoor fading shifts temperature and brightness. Do color matching by painting test patches on primed scrap or hidden areas, then let them cure for at least 48 hours.
Perform sample testing along the same wall section where weathering occurred, not on bare siding. If the faded area looks warmer or cooler, adjust with small tint increments and recheck.
Once it matches, record your formulas.
Will Interior Paint Crack on Wood or Stucco?
If you use interior paint on wood or stucco outdoors, it can crack—especially as temperatures swing and moisture cycles through the surface.
You may notice hairline splits, peeling edges, and fading because interior durability isn’t built for UV, wind-driven rain, or expansion. For wood, movement from humidity stresses the film; for stucco, repeated wetting and drying weakens bonds.
Avoid guessing: compare exterior compatibility to the label and use a product rated for outside.
Watch for these warning signs:
- visible cracking in corners
- peeling near joints
- blistering after wet spells
- chalky residue on stucco
- rapid re-spotting requirements
Is Interior Paint Safe on Brick and Masonry?
Interior paint usually isn’t a good choice for brick and other masonry, because it’s formulated for stable indoor conditions rather than outdoor moisture and alkalinity.
You should treat interior paint as risky for brick safety: masonry absorbs water, and when it dries, salts and pH shifts can break down coatings.
That means paint adhesion often weakens, so peeling or flaking becomes likely, especially on damp facades or areas with runoff.
If you still consider it, test a small section first and address moisture sources; otherwise, masonry concerns will win out over time.
Interior Paint vs Exterior Paint: Real Durability
Exterior paint usually outlasts interior paint on outdoor walls because it’s built to handle UV exposure, temperature swings, and driving moisture.
Exterior paint outlasts interior paint outdoors because it’s formulated for UV exposure, temperature swings, and moisture.
When you do a durability comparison, you’ll see interior coatings soften, chalk, or peel faster outside, shortening paint longevity.
Exterior paint resists cracking and fading, while indoor paint lacks binders and mildewcide for wet, sunlit conditions.
You’ll also notice better film flexibility outdoors, helping it survive expansion and contraction.
Consider:
- Higher UV stability
- Moisture and mildew resistance
- Stronger adhesion outdoors
- Better freeze-thaw tolerance
- Longer service life under exposure
Cost Savings vs Repainting Too Soon?
Choosing interior paint to save money can feel smart at first, but you’ll often pay for it sooner once the coating starts failing in the elements. In your cost analysis, look past the can price and include prep time, labor, and early repainting. A quick repaint cycle crushes your budget and kills your longevity comparison.
| Situation | Upfront cost | Repaint risk |
|---|---|---|
| Sheltered porch | Low | Medium |
| Garage door | Medium | High |
| Shaded siding | Medium | Medium |
| Wind-driven rain | Low | Very high |
| Sun-exposed wall | Low | Very high |
When Should You Switch to True Exterior Paint?
Before you keep using interior paint, check temperature and moisture ratings so the coating can handle heat, humidity, and rain.
You’ll also need solid surface prep and the right primer—otherwise adhesion fails and peeling starts.
Finally, set your durability expectations: true exterior paint resists fading, cracking, and mildew longer than interior options.
Temperature And Moisture Ratings
Even if interior paint looks fine on a sunny day, it usually can’t handle the temperature swings and moisture loads that true exterior coatings are built for.
You should read temperature and moisture ratings before painting, because temperature extremes can make film crack, while moisture absorption can soften and blister it.
Switch to exterior paint when forecasts show freezing nights, hot afternoons, or coastal humidity.
Check that the product tolerates wet/dry cycles and resists mildew growth.
- Look for weatherproofing specs
- Confirm rated service temperature range
- Verify exterior-grade permeability
- Match sheen to climate
- Follow minimum/maximum humidity limits
Surface Prep And Primers
After you’ve checked temperature and moisture ratings, surface prep becomes the next make-or-break step—and it’s where you should decide whether to stay with interior paint or switch to true exterior coatings. You must clean, scrape, and repair before you prime. Use consistent surface preparation techniques: wash off chalky residue, sand glossy spots, caulk cracks, and remove loose paint. If you spot stains, seal them with the right primer types instead of hoping topcoats cover them.
| Problem | What to do |
|---|---|
| Peeling | Scrape, sand, feather |
| Mold | Treat, dry fully |
| Rust | Prime with anti-rust |
| Chalky paint | Wash, then spot prime |
| Cracks | Caulk, then prime |
Paint Durability Expectations
Once you’ve prepped and primed properly, the real question becomes how long the coating will hold up outdoors.
You should switch to true exterior paint when your project needs longer paint longevity than interior formulas can provide.
Check these durability factors before you commit:
- UV exposure and fading resistance
- Moisture resistance and mildew resistance
- Temperature swings and expansion/contraction
- Surface wear from rain splash and wind-driven debris
- Flexibility over cracks and siding movement
If you notice chalking, peeling, or softening within a season, that’s your cue.
Exterior coatings typically maintain better paint longevity and consistent durability factors.
How To Choose the Right Exterior Paint Type?
Choosing the right exterior paint type starts with matching the coating to your climate, surface, and expected wear. Check your temperature swings, humidity, and sun exposure before you pick paint types.
Then identify your surface materials—wood, stucco, brick, siding, or metal—because each needs a compatible binder and texture. For weather-prone areas, choose a mildew-resistant acrylic or elastomeric paint that flexes with expansion and contraction.
On bare masonry, use masonry-specific paint. For trim and doors, select a durable exterior enamel and consider primer rated for that substrate.
Final Checklist Before You Paint Outside?
Before you roll the first coat, run a quick final checklist to avoid peeling, bubbling, or patchy coverage. You should confirm your paint materials match the job and that your surface types are prepped for adhesion.
Then, verify conditions and finish details so your exterior work holds up through weather.
- Check moisture with a simple test; dry surfaces only
- Scrape loose paint, then spot-prime bare areas
- Caulk cracks and seal gaps around trim
- Stir paint thoroughly; strain if needed
- Confirm temperature and humidity stay within label limits
Frequently Asked Questions
Can Interior Paint Handle Freeze-Thaw Cycles on Exterior Walls?
You shouldn’t rely on interior paint for freeze-thaw cycles on exterior walls. It lacks proper freeze thaw resistance and can’t limit moisture absorption, so it may blister, crack, and peel. Use exterior-rated paint instead.
Will Interior Paint Blister When Exposed to Direct Sun and Heat?
Yes—interior paint can blister like crazy under direct sun and heat. You’ll see blistering effects as heat traps moisture under the film. Even quick sun exposure can soften and pop it, especially if the surface isn’t properly sealed.
Can I Tint Interior Paint to Match Exterior Paint Colors Reliably?
Yes—you can tint interior paint to match exterior colors, but you can’t guarantee reliable color matching or paint performance outdoors. Interior pigments fade, chalk, and resist poorly to UV and moisture. Use exterior-rated tinted base instead.
What’s the Minimum Surface Prep Required Before Painting Outdoors?
Minimum outdoor prep means you clean thoroughly using proper surface cleaning techniques, scrape loose paint, sand glossy spots, patch cracks, and prime bare areas. You also wait for dry weather, avoid windy/rainy days, and check temperature/humidity for good adhesion.
Does Interior Paint Protect Wood, Stucco, or Masonry From Water Damage?
Interior paint won’t reliably protect wood, stucco, or masonry from water. You’ll see poor moisture resistance, and cracks, stains, or peeling. Choose exterior-grade products instead, because they boost paint longevity and help seal surfaces against persistent dampness.
Conclusion
So, can you use interior paint outside? You *can*, but you usually shouldn’t. Interior paint lacks the durability, UV resistance, and flexibility true exterior paint needs, so it fails faster—often through fading, peeling, and cracking. If you want a finish that lasts through heat, rain, and temperature swings, switch to exterior paint. Still tempted to gamble on cost savings—why repaint sooner than necessary?
