
Should You Paint the Ceiling When Painting a Room? Here’s the Right Call
You should usually paint the ceiling when you paint the room, since it helps the space feel cohesive and hides issues wall paint can’t. Start by checking for cracks, flaking, or water spots. Prime stains first with a stain-sealing primer, then patch and feather repairs so the texture stays even. Use a flat or matte ceiling paint to minimize glare, and apply two coats with careful cut-ins and smooth rolling. Skip these steps and you’ll invite uneven sheen—keep going to get the full right call.
Decide: Paint the Ceiling or Leave It?
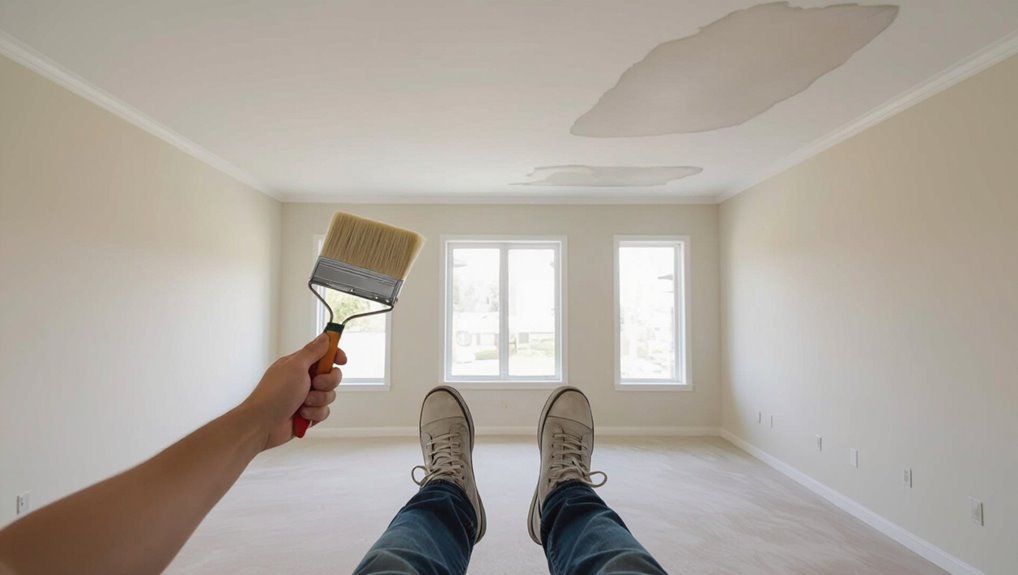
So, should you paint the ceiling or leave it alone? Decide by weighing your ceiling color against your room ambiance and style preference.
So, should you paint the ceiling or leave it alone? Weigh your ceiling’s color against your room’s ambiance and design goals.
If you want a cohesive look, match it for design consistency with walls and trim, supporting an aesthetic balance.
For rooms that feel cramped, a lighter ceiling boosts visual height and improves light reflection, strengthening your mood setting.
If you love architectural features like beams or crown molding, you can highlight them with a complementary tone.
Choose paint durability carefully; ceilings take hits from humidity and cleaning.
When the current finish is sound, leaving it can preserve architectural character.
Ceiling Condition: What Changes the Plan?
Before you commit to painting, check the ceiling’s condition—because the surface you start with decides how the project plays out.
If your ceiling texture is rough, warped, or peeling, you’ll need different coverage and tools. Don’t guess: inspect for cracks, flaking, or water spotting, then plan repair techniques that stabilize the surface.
Next, test how the lighting impact changes what you see; flat ceilings hide flaws, while bright overhead light reveals every ripple.
Finally, consider color psychology—dark ceilings can feel lower, but pristine ones look intentional.
Address issues early so your finish stays even.
Prime Stains First (Not Just Ceiling Paint)
Before you paint anything, you should prime stains first so they don’t bleed through later.
Use a stain-sealing primer coat on water marks, rust spots, or smoke stains, not just ceiling paint.
Once the primer cures, you can apply your finish coat with confidence.
Prime Stains Before Any Painting
Treat stained areas first, not as an afterthought. Before any paint application, inspect the ceiling and walls; you should spot water rings, rust bleed, smoke marks, and greasy patches. Scrape loose material, then clean with a degreaser or appropriate cleaner so the surface accepts primer. Let it dry completely. Lightly sand any rough spots, dust off, and prime the stains using a dedicated stain-prevention primer, not standard ceiling paint.
| Area | Clean method | Prime focus |
|---|---|---|
| Rust | Scrape + treat | Seal bleed |
| Water ring | Dry + sand | Block migration |
| Smoke | TSP wipe | Cover discoloration |
| Grease | Degrease | Prevent re-bleed |
Use Stain-Sealing Primer Coats
Once you’ve cleaned and prepped the stained areas, you need to seal them with a stain-blocking primer coat rather than relying on ceiling paint to do the job.
You should identify likely stain types—water, smoke, rust, or grease—and choose a primer matched to them.
Apply the stain-sealing primer in a smooth, even layer, covering every halo and drip line. This approach locks in contaminants, prevents bleed-through, and stops discoloration from resurfacing after you finish.
You’ll also get better topcoat adhesion and more uniform color.
Use primer benefits to your advantage: cleaner coverage, longer-lasting results.
Fix Cracks and Texture Before Painting
Start by inspecting the ceiling closely for cracks, nail pops, and uneven texture.
You’ll need crack repair before any paint touches down, or the blemishes will reappear. Press a putty knife into small fissures, then fill with a joint compound or patch material.
For nail pops, drive the fastener slightly deeper, remove loose edges, and spackle the divot. Let everything dry fully, then check for ridges and bumps.
You can achieve texture improvement by skimming high spots thin and feathering connections, keeping the surface as smooth as possible.
Scrape, Sand, and Feather Peeling Areas
As you prep the ceiling, scrape off all loose paint until the surface is solid.
Then sand the area smooth and feather the edges so the shift disappears under new paint.
After that, wipe away the dust so your primer and paint can grip properly.
Scrape Loose Paint Thoroughly
Scrape away every bit of peeling paint you can find, working down to firm, well-adhered layers.
Use the right paint removal techniques: a scraper with sharp blades, steady pressure, and small sections so you don’t gouge the ceiling.
Remove loose flakes until the surface feels solid under your fingertips.
Vacuum thoroughly, then wipe with a damp cloth to pick up dust and grit.
For surface preparation, check for remaining bubbles or edges that lift; scrape them too.
If you find bare spots, clean the junction area so patching and priming can bond evenly.
Sand And Feather Edges
After you’ve removed the loose flakes, sand the remaining peeling edges so they blend smoothly into the surrounding ceiling.
Use a sanding block or pole sander, and keep pressure light so you don’t gouge drywall. Check connections against a light at an angle; stop when the edge disappears and surrounding ceiling textures look consistent.
Then feather the repair: switch to finer grit and sand outward beyond the bare spot, using feathering techniques that taper thickness gradually.
Wipe dust with a damp microfiber, let dry, and spot-prime any shiny patches before you paint.
Match Ceiling Paint Undertones to Walls
When you match ceiling paint undertones to your wall paint, you prevent subtle color shifts that show up as flashes of pink, green, or yellow along the edges.
Use ceiling color psychology to guide choices: warm undertones on walls tend to warm the ceiling too, while cool walls look cleaner with cooler ceiling tinting.
Before you open cans, compare sample swatches under the same lighting you’ll use daily—daylight and evening bulbs change perception.
If your wall paint has gray-beige or greenish undertones, pick a ceiling tint with matching wall paint undertones.
Test with a taped border first.
Flat vs Matte: Pick the Smoother Finish
When you’re choosing ceiling paint, you should pick flat if your surface has small dents, cracks, or patchwork you want to hide.
If your ceiling already looks pretty even, go matte to keep a more consistent, smooth-looking sheen.
Either way, you’ll get a cleaner finish—so match the paint to your ceiling’s condition.
Choose Flat For Hiding Imperfections
Choosing the right sheen helps you hide ceiling flaws fast.
If your ceiling has uneven ceiling texture, you should choose flat paint, because it visually mutes shadows and tiny ridges. When light hits a flatter finish, it scatters more evenly, so minor dents and roller marks fade.
You also influence color psychology: flat ceilings tend to feel softer and more restful, which keeps the room from looking harsh.
Apply with steady strokes and don’t overwork spots. If you spot stains, prime first, then roll flat for a smoother, cleaner look.
Select Matte For Even Sheen
Matte sits between flat and sheen, giving you a smoother look without the glare that can spotlight drywall waves. When you’re choosing ceiling colors, remember that paint finishes affect how light travels across the room. If you want a more even sheen than flat but still minimal reflectivity, pick matte. It helps hide subtle texture and minor roller marks. Use the table below to match your goal with a finish choice:
| Goal | Best pick | Why |
|---|---|---|
| Hide waves | Matte | Low glare |
| Low touchups | Flat | Very forgiving |
| Bright rooms | Eggshell | Slightly durable |
| Ceilings | Matte | Smooth, soft look |
| High light | Satin | More washable |
When Semi-Gloss Ceiling Paint Is Worth It
Semi-gloss ceiling paint earns its keep when you need a finish that stands up to moisture and frequent cleaning—think bathrooms, kitchens, laundry rooms, or any space where steam and splatters are common.
You get real semi-gloss benefits here: better wipe-ability, less staining, and a slight sheen that helps ceiling light bounce. Use it when the ceiling sits above vents or cook zones.
For the best results, follow clean application techniques: prep fully, prime stains, cut edges carefully, and apply thin, even coats with a roller to minimize lap marks.
Paint New Ceilings White: Yes or No?
If you’re painting a new ceiling, white is usually the right call, especially if you want a clean, bright look and even light reflection. You’ll see this reflected in current ceiling paint trends: crisp whites, soft off-whites, and coatings designed to resist stains.
White also supports color psychology. It visually expands the room, reduces heaviness overhead, and helps natural and artificial light bounce farther.
If your ceiling is bare drywall or fresh plaster, you should go white to hide uneven tones and prevent glare from patchy areas. Choose quality ceiling paint for smooth coverage.
Keep the Same Color for Maximum Cohesion
Why change the room’s entire visual balance when you can keep it cohesive? If you want maximum cohesion, you’ll maintain color consistency by sticking with the same paint color for walls and ceiling. This simple choice keeps edges visually connected, so your eye moves smoothly across the space.
Choose cohesion: use the same paint color for walls and ceiling to keep edges connected, letting your eye move smoothly across the room.
You’ll also strengthen design harmony, especially in open-plan rooms where multiple surfaces meet in one view.
- Match undertones in the whole room
- Avoid noticeable color shifts
- Keep trim contrast intentional
- Use the same sheen level
- Test paint samples in daylight
Paint the Ceiling Differently for Height

Choosing a different ceiling color can make the room feel taller without changing the whole palette. If you want that lift, treat ceiling height like a design lever.
Paint the ceiling a shade that visually “pushes” upward, using color psychology to set the mood: slightly lighter or cooler tones can recede and reduce the sense of bulk. Instead of matching walls exactly, pick a subtle contrast that stays within your existing colors.
Keep edges crisp with painter’s tape, and roll in consistent directions for an even finish. This simple adjustment helps rooms feel more open.
Light Ceiling Colors Make Rooms Feel Bigger
When you choose light ceiling colors, you expand the visual space and make the room feel more open.
Bright ceilings also bounce natural light around, so the whole area looks airier.
Soft tones keep the room flowing smoothly from walls to ceiling, which helps everything feel cohesive.
Light Colors Expand Visual Space
Light ceiling colors can make a room feel larger, because they bounce more light around and reduce the visual weight of the overhead surface.
When you choose light colors, you trigger a visual expansion through color psychology and improved room perception. This brightness effect creates a subtle spatial illusion, pulling the ceiling “back” without major renovations.
- Reflects more ambient light
- Softens sharp edges overhead
- Improves mood enhancement
- Supports a positive room perception
- Boosts aesthetic appeal
If you want an airy, open feel, trust this ceiling choice for better brightness and a calmer, brighter aesthetic appeal.
Bright Ceilings Enhance Natural Light
Bright ceiling colors amplify the natural light that pours into your room, so the space feels open instead of shut in. When you choose a light, reflective paint, you boost natural light enhancement across walls and floors.
The ceiling acts like a quiet mirror, spreading brightness rather than absorbing it. You’ll notice bright ceiling benefits immediately: rooms feel taller, shadows look softer, and daytime glare becomes more even.
If your room has limited windows, this simple shift makes a big difference. Go for clean whites or pale tones to keep light moving.
Soft Tones Improve Room Flow
Soft ceiling tones help your room feel more connected, because they create a gentle visual bridge between the walls and the overhead space.
When you choose soft palettes, you strengthen color harmony and improve spatial perception, so the room reads larger and calmer. You also get mood enhancement through tonal balance and visual continuity, especially when trim and walls share related shades.
Aim for design cohesion by coordinating finishes and undertones, and let light reflection do the work.
- Match ceiling and wall undertones
- Use warm whites or pale neutrals
- Avoid stark contrast near edges
- Keep sheen consistent
- Test in daylight and evening
Dark Ceilings Create a Cozy, Grounded Feel
When you paint the ceiling a deeper shade, you visually lower the space and make it feel more intimate, not cavernous.
You can create a cozy ambiance that wraps the room in warmth, especially in bedrooms, dens, and lounges. That darker top anchors everything below, giving you a grounded atmosphere that feels intentional and steady.
The ceiling becomes part of the design, balancing tall walls and reducing visual “lift.”
If your room feels too airy or stark, darkening the ceiling can soften contrast and make the space feel immediately livable and calm, without changing the wall color.
Account for Trim Color Before Choosing Shade
Before you pick a ceiling shade, look at your trim color and plan to match it with your wall color.
If the trim is bright or dark, you’ll control the ceiling’s contrast and keep the room from looking mismatched.
Take a moment to test a few samples so the trim, walls, and ceiling all feel intentional together.
Match Trim With Wall Shade
Match your trim to the wall shade, but don’t ignore what the trim is really doing first.
Before you pick paint coordination, look at your ceiling color and how it affects trim design in daylight and lamps.
Use wall harmony as your guide: if your baseboards, crown, and door frames read warm or cool, match the wall tone so connections feel intentional.
Choose a trim shade that complements, not clashes, with the wall’s undertone.
- Sample wall and trim side-by-side
- Test in morning and evening light
- Keep undertones consistent
- Adjust sheen for crisp edges
- Let ceiling color support the blend
Control Ceiling Color Contrast
Why does ceiling contrast make or break a room’s look? When you choose ceiling color, you must account for trim color first. If trim stays bright or dark, your ceiling will either soften it or amplify contrast effects.
Start by sampling your trim and wall shades together, then pick a ceiling tone that bridges them. For light trim, a slightly lighter ceiling usually keeps everything airy. For dark trim, go a touch warmer or closer in value so the ceiling doesn’t look like a separate box.
Step back often under normal light. Adjust before committing.
Avoid Sheen Differences Between Wall and Ceiling
Sheen differences between the wall and ceiling can make the whole room look uneven, even if you apply the paint perfectly. You want design cohesion, so match sheen levels or use the same finish across surfaces to reduce wall contrast and harsh lighting effects.
Also, account for texture differences that can amplify glare and dullness. Consider paint durability too—some finishes wear differently and start looking blotchy.
- Choose the same sheen for ceiling color and walls
- Test samples under your room lighting
- Spot-check for texture differences
- Prioritize paint durability for even wear
- Aim for aesthetic appeal and better room ambiance
Plan Caulk Lines for Clean, Smooth Edges
Plan your caulk lines before you pick up the brush so you can create crisp, finished edges between the ceiling and walls (and around trim).
Mask along the joint lightly, then mark your stops where the ceiling meets corners, vents, and molding.
Use solid caulk techniques: cut a small opening, keep steady pressure, and run a continuous bead with consistent thickness.
Immediately tool the caulk with a damp finger or caulk tool to smooth gaps, then remove tape while the caulk skins.
This edge preparation reduces ridges, prevents gaps from showing through paint, and helps your cut lines look sharp.
Use the Right Tools for Ceiling Cut-Ins
After you’ve prepped the caulk seams for crisp borders, you’ll get the clean ceiling cut-in you want by using the right tools. Gather what you need before you start painting.
Choose the correct ceiling brushes for tight angles, and use proper cutting techniques for straight lines. Load paint evenly from paint trays, then switch to paint rollers for smooth coverage. Protect edges with edge guards, and control overlap with ceiling tape where necessary.
- Match color samples before you commit
- Note dry times between passes
- Balance sheen levels across surfaces
- Follow ventilation tips to stay safe
Test your approach, watch sheen, and work confidently.
Tape Ceiling Edges to Prevent Paint Bleed

One simple step saves you hours of touch-ups: tape your ceiling edges before you cut in. You’ll get cleaner lines by using tape methods that match your ceiling texture.
First, vacuum dust and let the surface dry, then press painter’s tape along the perimeter with firm, even pressure. Use a putty knife to seal down any lifted corners for better edge protection.
When you cut in, keep your brush angled so paint stays inside the taped line. After painting, pull the tape while paint is slightly tacky, not fully dry, to prevent tearing.
Prime Bare Spots for Even Ceiling Coverage
Once you’ve cut in and taped the edges, you’ll want to prime any bare spots so the ceiling absorbs paint evenly. If you skip this, those patches drink paint and you’ll see uneven sheen and color contrast, especially at higher ceiling height.
Before you roll, inspect for spots where drywall, old stains, or repairs show through. Then spot-prime with the right primer and let it dry fully. Use thin coats to prevent drips. Focus on coverage where light catches most.
- Clean dust and debris first
- Feather edges of old paint
- Match primer to stain type
- Allow proper dry time
Cut In the Ceiling Without Streaks
When you cut in the ceiling, use proper techniques so the line stays crisp and doesn’t look dragged.
Keep a wet edge as you work, and feather the paint to blend each pass for clean shifts.
If you let the edge dry, you’ll fight streaks—so stay consistent and move steadily.
Use Proper Cutting Techniques
Cutting in the ceiling cleanly comes down to how you load your brush and how you angle it. You want light, even paint on the bristles, then a shallow angle so paint lays flat instead of dragging.
Use solid cutting techniques: press only enough to guide, not to mash. Keep steady brush control, and focus on edge precision where ceiling meets wall.
Aim for smooth shifts by feathering your final strokes each pass. If you see streaks, reload, wipe excess, and start again.
- Light paint load
- Consistent shallow angle
- Controlled pressure
- Feather edges
- Recut mistakes quickly
Keep A Wet Edge
To keep the ceiling line clean, you need a wet edge as you cut in—don’t let the paint behind your brush dry before you reach it.
You should work in short sections, keeping your brush loaded and your strokes consistent. Use wet edge techniques: paint a foot or two along the ceiling, then immediately overlap into the fresh area without waiting.
Maintain moisture by controlling dip frequency, not overworking the same spot, and backing off if the line starts to tack. If you pause, stop and reload so your next pass lands on wet paint.
Feather For Clean Transitions
Feathering the paint keeps the ceiling line smooth and streak-free after your cut-in. You use the feather technique to soften the edge you just painted, so you get clean blends into the field coat.
Lightly reload your brush, then tap off excess so it glides. Drag from the cut line outward with short, overlapping strokes, barely moving the bristles.
- Use a dry-brush feel at the far edge
- Keep pressure consistent for smooth edges
- Work in sections before paint sets
- Blend wet-to-wet for paint blending
- Stop when the surface looks uniform
Roll Technique That Reduces Roller Marks
Use a steady “W” pattern and keep a wet edge as you roll to minimize roller marks. That simple roller technique helps you reduce marks because the nap stays evenly loaded and each pass blends into the last.
Start by loading the roller, then roll in overlapping W shapes across a section, applying light, consistent pressure. Reload only when the sheen dulls, not after you’ve crossed a full width.
Work top to bottom, and don’t stop mid-panel—finish the area before moving on. If you see streaks, re-roll gently while the paint’s still workable.
Prevent Drips and Splatter While Painting
To prevent drips and splatter, use edge guards and tape along trims. Then roll with even pressure so the paint lays down consistently.
When you cut in, control your brush and keep your strokes smooth to avoid heavy edges that run.
Stay alert as you work so you catch drips early before they dry into marks.
Use Edge Guards And Tape
Edge guards and painter’s tape let you control where the paint goes, especially along ceiling edges and trim. You’ll get cleaner lines and fewer drips when you use proper edge guard techniques and tape application tips.
Apply tape after you clean and dry surfaces, then press edges firmly so paint can’t creep underneath.
- Tape the trim corners and ceiling cut-lines
- Fit edge guards over crown molding edges
- Cut tape with a sharp blade for straight seams
- Remove tape while paint is slightly tacky
- Keep roller bristles loaded, not dripping
You’ll protect floors, lights, and walls fast—without reruns.
Roll With Even Pressure
Roll the paint on with steady, even pressure to prevent drips and splatter along the ceiling. Use a paint roller as your main tool, and practice pressure control throughout each pass.
Lightly load the roller, then roll at a consistent speed, overlapping slightly to build even coverage without flooding edges. This ceiling technique reduces roller marks and helps you maintain a smooth finish.
Keep your wrist and forearm aligned so the roller stays flat, and don’t stop mid-stroke. Follow these painting tips closely—proper technique is what keeps the ceiling clean.
Cut In With Controlled Brush
Cut in along the ceiling line with a controlled brush before you broaden the coverage. You prevent drips and splatter by loading less paint, then using brush techniques that stay steady.
Dip lightly, tap off excess, and keep a short, angled stroke. When you pause, lift the bristles instead of dragging.
- Use a small angled brush for precision cutting
- Keep the rim clean; wipe drips immediately
- Work in sections so paint doesn’t skin over
- Maintain light pressure to avoid ridges
- Feather edges so roller coverage blends seamlessly
Ventilation and Dry Time for Best Results
Once you start painting the ceiling, you need proper ventilation to help fumes clear and to keep the paint from drying too slowly. Use ventilation techniques: open windows, run a fan from clean air toward the doorway, and avoid blowing dust onto wet areas. Track dry time by reading the label, then wait before touching or re-coating. Humidity changes drying methods, so keep indoor conditions steady.
| Factor | Aim | Effect |
|---|---|---|
| Airflow | Clear fumes | Faster set |
| Temp | Stable warmth | Smooth leveling |
| Humidity | Lower moisture | Less sagging |
Apply Two Coats for True Ceiling Color
Apply two coats to get a true, even ceiling color. You’ll see better coverage and fewer faint patches when you follow solid painting techniques.
First, roll the edges and corners, then fill the field with smooth, parallel passes, keeping a consistent “wet edge.” Let the first coat fully cure before the second so you don’t drag pigment.
Roll edges and corners, then paint smooth parallel passes with a steady wet edge—let the first coat cure fully before the second.
Use these checks as you work:
- Use a quality roller cover
- Cut in evenly along trim
- Maintain light, uniform pressure
- Watch for missed spots in corners
- Keep coat directions consistent for finish
You’ll lock in the ceiling color without streaks.
Dry-to-Touch vs Recoat Time (Ceilings)
After you finish the first ceiling coat, you should wait until the paint feels dry-to-touch before you do anything else.
Then check the label for the recoat time so you apply the next coat at the right moment, without trapping moisture.
If you rush the second coat, you can end up with smudges, streaks, or uneven coverage—so time it carefully.
Dry-To-Touch Time For Ceilings
Dry-to-touch time matters because it tells you when the ceiling feels set enough to avoid smudges and finger marks, but it doesn’t automatically mean you can recoat. You should treat it as a check for safe handling, not readiness.
Drying factors like humidity impact and temperature effects shift how fast paint skins over. Pay attention to ventilation importance, paint types, absorption rates, and surface materials.
Also, remember curing times differ from dry-to-touch; only touch tests and label guidance confirm. Use proper application methods to protect finish durability and even coverage.
- Feel test after the listed window
- Avoid touching edges and roller marks
- Keep air moving for steady drying
- Watch for tackiness returning
- Record conditions for consistency
Recoat Time Before Next Coat
Even if the ceiling paint feels dry to the touch, you can’t assume it’s ready for the next coat—recoat time is what determines when the film has cured enough to bond properly without lifting, streaking, or uneven texture.
Check the label for the specified recoat timing based on your product and temperature. You should plan around ideal conditions: steady airflow, moderate humidity, and temperatures near the recommended range.
If you recoat too early, the undercoat can soften and drag. If you wait too long, you may need light sanding and re-priming for adhesion.
Test a small corner if unsure.
When to Skip Painting and Just Touch Up
You don’t need a full ceiling repaint every time you refresh a room—sometimes a few targeted touch-ups do the job.
Before you roll a whole new coat, check for localized issues and use proven touch up techniques. Skip repainting when flaws are small, edges are still solid, and coverage is mostly even, because ceiling maintenance works best with timely repairs.
- Fix hairline cracks only where they appear
- Spot-prime water rings after they dry fully
- Feather patched drywall so it blends
- Clean soot or stains before sealing
- Recoat just the affected band, not the whole surface
Spot-Test Color and Sheen in a Hidden Spot
Before you commit to a whole-ceiling color change, test the paint and sheen in a hidden corner first—like inside a closet doorframe or behind a curtain rod.
Test your ceiling paint and sheen in a hidden spot first—like inside a closet doorframe or behind a curtain rod.
Pour a small amount, apply two coats, and let it dry fully. Compare how it looks next to the wall color to confirm color compatibility, especially where trims meet.
Then evaluate sheen selection: flat can hide flaws but may look different once installed; eggshell or satin may reflect light more and look sharper on edges.
If the sample flashes, drags, or darkens, adjust your plan before you roll the entire ceiling.
How Ceiling Paint Affects Natural Light
Ceiling paint has an outsized effect on how natural light moves through a room, because the ceiling reflects more light than most other surfaces. Your natural light impact changes the moment you pick ceiling colors and matching undertones.
Lighter ceilings bounce daylight deeper, making corners feel brighter and walls less dull. Darker ceilings absorb light, shrinking the perceived space even when lamps and windows are strong.
To control this, consider:
- Choose cooler tones for crisper reflection
- Keep trim colors consistent to prevent light loss
- Avoid heavy pigments that swallow brightness
- Match undertones to your wall paint for even spread
- Reassess at different times of day
Best Sheen for High Ceilings
For high ceilings, the best sheen depends on how easily the surface shows imperfections and how much you want to amplify light.
If your ceiling is smooth, you can use a satin or eggshell finish to reflect more brightness. If you see cracks, bumps, or patch marks, choose flat or matte paint to hide them and avoid glare.
Your sheen recommendations should match the room’s lighting: brighter rooms tolerate more reflective finishes, while dim spaces benefit from a slightly eggshell look.
These high ceiling considerations help you choose coverage that feels even, not shiny.
Ceiling Painting Cost: What to Expect
Typical ceiling painting costs range from about $1 to $3 per square foot for materials and labor, depending on the height, surface condition, and how much prep you need.
Your final price comes from cost factors like ceiling types, repair needs, and the size of the project scope. You’ll also feel labor expenses if you require scaffolding, trimming, or rolling hard-to-reach areas.
Your final ceiling painting price depends on ceiling type, repairs, project scope, and added labor for scaffolding, trimming, and hard-to-reach areas.
Budget considerations help when you compare paint quality, especially for stain resistance and sheen.
Expect prep time to drive material use and labor. Track these items:
- surface patching
- stain-blocking primer
- cleanup and masking
- specialty roller/brushes
- multiple coats
Common Ceiling Painting Mistakes to Avoid
Before you start, it helps to know where ceiling jobs usually go wrong—because even small errors show up fast overhead. Avoid skipping primer, rushing prep, or ignoring ceiling height. Use the right paint types for your ceiling finishes and match texture differences. Choose ceiling color based on color psychology and room ambiance, not trends. Check lighting effects: glare and shadows reveal brush marks, roller stipple, and streaks. Practice painting techniques—cut in carefully, keep a wet edge, and don’t overload.
| Mistake | Result | Fix |
|---|---|---|
| Skipping tape | bleeding | seal edges |
| Wrong nap | stripes | use proper roller |
| No drying time | sagging | wait fully |
| Over-brush | texture lines | roll consistently |
| Ignoring maintenance | scuffs | touch up early |
Call a Pro: When Repairs Are Beyond DIY
When a ceiling repair goes past hairline cracks—like water stains, bubbling drywall, sagging sections, or repeated patch failures—you’ll get better results by calling a pro.
You can’t just paint over underlying issues; you need a professional assessment and careful damage evaluation. A skilled contractor spots hidden moisture, structural concerns, and code problems, then sets repair priorities before any paint touches the surface.
Use these expert recommendations to decide fast:
- Ask for moisture testing
- Expect drywall removal if needed
- Review venting and roof leaks
- Get a written scope and timeline
- Confirm primer and coating system
Seamless Finish Check: Walls and Ceiling Match
Once the repairs are handled, you’ll get the cleanest look by matching the wall and ceiling coatings so seams disappear.
Before you roll, compare sheen and dry time on the sample cards. Match the ceiling color to the wall tone, especially along light sources like windows and fixtures. If one surface dries glossier, you’ll see a hard line.
Also check texture contrast: even slight differences in nap or stipple can telegraph edges.
Apply primer to bare patches, then blend one continuous coat, feathering overlap while it’s still wet.
Step back often under diagonal light.
Frequently Asked Questions
Can I Paint Over Old Ceiling Wallpaper Without Removing It?
Yes, you can paint over old ceiling wallpaper if it’s sound and well-adhered. Clean it, sand glossy spots, and apply primer first to boost paint adhesion. If wallpaper peels, bubbles, or stains bleed through, remove it for best results.
How Do I Avoid Roller Marks on Large, Flat Ceiling Surfaces?
You can avoid roller marks by using fresh nap rollers and loading evenly. About 70% of painting defects come from inconsistent pressure. Work in 4–5 ft sections, back-roll lightly, overlap edges, and use ceiling paint techniques for avoiding streaks.
What’s the Best Way to Handle Popcorn Ceilings When Painting?
Handle popcorn ceilings by cleaning and protecting walls, then lightly prime and paint, working in sections. Skip popcorn ceiling removal unless it’s damaged. If needed, apply texture application carefully with a spray gun, matching the original stipple for an even finish.
Should I Remove Ceiling Fans and Fixtures Before Painting?
Yes—remove ceiling fans and fixtures when possible. You’ll make painting easier, avoid drips, and protect wiring. Use ceiling fixture removal precautions, turn off power, cover outlets, and follow painting safety precautions. If you can’t remove, mask thoroughly and secure covers.
Do I Need to Paint the Ceiling if I’M Only Repainting the Walls?
You usually don’t need to paint the ceiling if you’re only repainting the walls. Keep the current ceiling color unless you want sharper wall contrast effects or you see stains or peeling. Match finishes to avoid uneven sheen.
Conclusion
When you’re deciding whether to “dress up” your ceiling, don’t just grab ceiling paint and hope for the best. Check the condition, prime any stains, patch cracks, and smooth rough spots so the finish can behave. If the repairs start getting… complicated, it’s okay to call in a pro. After you paint, compare the wall-and-ceiling “blend” for a seamless look. Your room will feel instantly refreshed.
