
How to Fix Scratches on Painted Walls So They Disappear Completely
To make scratches on painted walls disappear completely, first check depth and wall finish. Clean the area well, then fill only what’s damaged using spackling or lightweight filler. Let it dry, sand smooth with fine grit, and wipe dust off. Prime exposed drywall if needed, then apply matching touch-up paint in thin, feathered layers, matching sheen. Blend edges beyond the scratch to avoid a halo, and allow full cure time before judging results—keep going to learn the best tricks.
Identify Scratch Depth and Wall Type
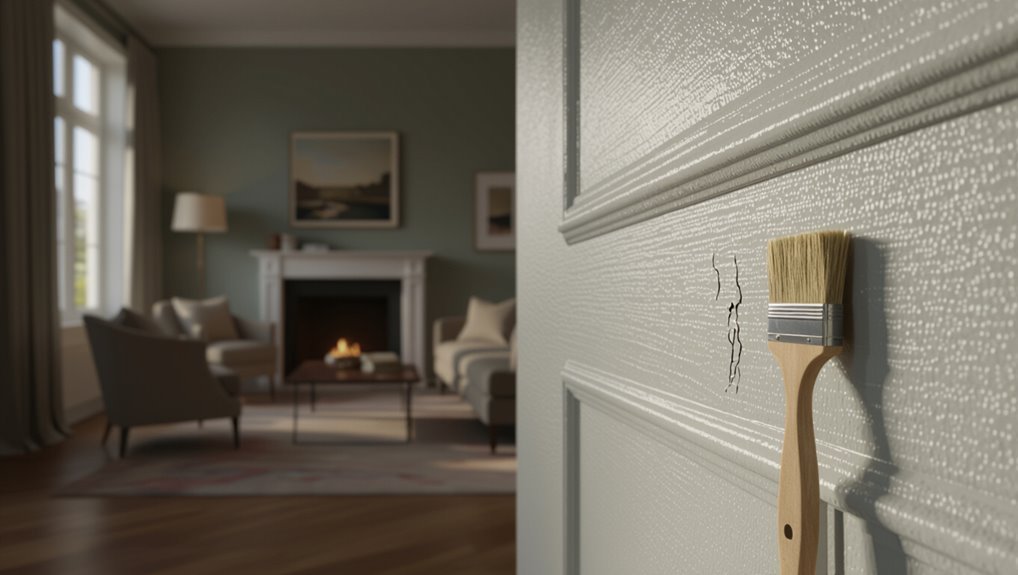
Before you start repairing anything, you need to figure out how deep the scratch is and what kind of wall you’re working with. You first inspect it under bright light, then run a fingertip gently across it to feel ridges.
Use a flashlight at an angle to spot whether paint only scuffed or the base is exposed. Classify scratch types: hairline surface marks, shallow gouges, or deep chips that cut through layers.
Next, confirm wall materials. Look for drywall texture, plaster, or panel seams, and check if paint is flat, eggshell, or glossy. This decides your filler and finishing approach.
Gather Tools and Materials First
Gather your supplies so you can repair the scratch cleanly and match the wall finish.
Before you start, plan tool selection: you’ll need painter’s tape, a putty knife or scraper, fine sandpaper (220–400 grit), a small angled brush, and a microfiber cloth.
Choose material types based on the wall: use spackling compound or lightweight wall filler for deeper scrapes, then matching primer if the scratch exposes bare drywall or wood.
For touch-up, pick the same paint brand, sheen level, and color, plus a paint tray.
Prepare a small container for water if needed.
Clean the Scratch for Best Paint Adhesion
Before you touch up the scratch, clean the area thoroughly.
Wipe it with a damp cloth and a mild cleaner, then remove every bit of dust or grit so paint can bond.
Let the wall dry completely before you apply any primer or matching paint.
Clean Scratch Area Thoroughly
Clean the scratch area thoroughly so the new paint sticks. Wipe away loose debris using a soft cloth lightly dampened with warm water and mild dish soap.
Rinse with a clean, damp cloth, then dry fully with a towel and air-dry. For oily spots, use a gentle degreaser, but don’t soak the wall.
Inspect the surface under good light; you should see no grime or chalky residue.
Follow solid wall maintenance tips: keep the area smooth and stable before you apply patching compound. This supports better paint adhesion and helps your paint selection advice work.
Remove Dust For Adhesion
Once you’ve rinsed and dried the scratch area, remove every trace of dust so the patch and new paint can bond securely. Use a clean microfiber cloth to wipe the scratch and surrounding paint, then repeat with a lightly damp cloth.
Next, vacuum loose particles from edges and corners, because grit kills adhesion. For best results, wipe once more with a tack cloth or painter’s wipe to finish dust removal.
Avoid touching the prepped spot with your fingers; oils transfer instantly. When the surface looks uniform and feels smooth, you’re ready to apply your patch and continue adhesion techniques.
Fix Minor Scuffs in Minutes (No Sanding)
Clean the scuffed spot with gentle soap and water so the surface is ready for repair.
Dab touch-up paint carefully, using light pressure and just enough to cover the mark.
Blend the edges with a soft cloth so the area looks smooth and seamless.
Clean With Gentle Soap
Before you reach for any repair products, wipe the scuffed area with a soft, damp cloth and a few drops of gentle dish soap mixed into warm water.
Focus on wall cleaning by working slowly in small circles, then rinse the cloth and go over the spot again to remove residue.
Choose soap options that are mild and fragrance-free, since harsh cleaners can dull paint sheen.
If the mark still looks dirty, repeat once more with the same mixture.
Let the wall dry fully before you assess the scratch—cleaning first often makes scuffs disappear.
Use Touch-Up Paint Carefully
Use touch-up paint carefully so you don’t make the scratch worse. Find the exact wall color, then test it in a hidden spot first.
Dampen a soft microfiber cloth and wipe away dust so your paint application sticks. Use a small angled brush or sponge tip; load it lightly and apply only to the scuffed area, dabbing instead of dragging.
Follow good touch up techniques: build thin layers, letting each dry before adding more. Keep edges slightly smaller than the scratch, so you don’t expand the damage.
Once dry, inspect under daylight and repeat only if needed.
Blend Edges For Smoothness
Once the paint has set just enough to stop looking wet, you can blend the edges so the repaired scuff disappears.
Lightly mist the area with water if your paint allows, then tap a small amount of dry-touch-up color beyond the scratch. Use your fingertip or a soft sponge to feather outward in short circles.
This is where color blending techniques matter: keep moving so no hard line forms. Check under bright light, then repeat a thin layer.
For texture matching, press gently to mirror the surrounding wall finish. Let it cure fully before judging.
Smooth Shallow Scratches With Filler
For smooth, shallow scratches, you can fill them with a lightweight wall filler that matches your paint finish.
Choose the right filler types for your wall: opt for a fast-drying lightweight formula for hairline marks.
Press a small amount into the scratch using a plastic putty knife, applying slight pressure and wiping across the surface to level it.
Let it dry fully, then sand gently with fine-grit paper until you feel no ridge.
Remove dust, then repaint using smooth application techniques that feather edges.
Check the sheen under light.
Repair Gouges With Patch Compound
First, clean the gouge and prep the surface so patch compound sticks well.
Next, scoop in patch compound and smooth it over the damaged spot, feathering the edges so the repair blends into the wall.
Let it dry, then lightly sand until it’s level and ready for paint.
Clean And Prep Gouged Area
Before you patch, clean the gouge so the compound can grip the wall. Vacuum dust, then wipe with a damp cloth; if grease is present, use mild soap and water, rinse, and let it dry fully. You want solid adhesion for scratch prevention and lasting wall maintenance.
Use a quick check:
| What you remove | How you test |
|---|---|
| Loose paint chips | Lightly tap with a fingernail |
| Dust residue | Shine a flashlight angle |
| Oils/marks | Water beads stay off |
| Moisture | Area feels dry to touch |
Now scrape away remaining debris.
Feather Edges With Patch Compound
Feathering the edges is what makes your gouge repair disappear. After you fill the dent, you use feathering techniques to blend the repair into the surrounding paint.
Load a putty knife lightly with patch compound and spread it beyond the gouge, working in thin layers. Keep your strokes long and angled so the patch thins toward the edges. Let each layer dry, then sand smooth using fine-grit paper.
Wipe away dust, then check for ridges by running your hand across the area. Apply primer and paint once the surface is level and seamless.
Match the Paint Sheen (Matte to Gloss)
Matching the paint sheen matters because the wrong finish makes scratches and patch repairs stand out instead of blending in.
You need to identify your wall’s finish type by checking the label, inspecting existing areas in daylight, and feeling how light reflects.
Use paint sheen options that match exactly: matte, eggshell, satin, semi-gloss, or gloss.
Matte hides flaws but can look flat after repairs; gloss reflects sharply, making mismatches obvious.
If you can’t match, you should test small amounts in an inconspicuous spot.
Once the sheen matches, your repair disappears visually.
Touch Up With Brush or Foam Roller
Touch up the scratch using the same application method you already used on the wall: a small angled brush for narrow lines or a foam roller for broader, flatter areas. Load lightly, then apply with controlled brush techniques—feather the edges of paint into the existing surface so the spot blends. For wider scuffs, use roller application: roll once, keep pressure even, and stop before you build a ridge.
| Fix | Feeling |
|---|---|
| Quick touch-up | Relief |
| Smooth match | Confidence |
| Even coverage | Calm |
| Clean blend | Pride |
Feather Blended Touch-Ups to Avoid Haloing
To prevent haloing, you need to blend beyond the scratch so the paint merges softly into the existing wall. Start by dabbing primer or touch-up paint onto the defect, then stop.
Next, use feathering techniques: lightly drag a nearly dry brush or sponge outward in widening arcs, keeping edges thin. Use blending methods to overlap each pass, wiping excess paint off the tool between strokes.
Work in short sections, let each layer dry, then repeat until the repair fades into the surrounding texture. Finish by smoothing lightly and checking under angled light.
Color Match Your Wall Paint the Right Way
Getting the color right starts with accurate preparation and a reliable reference. Before you touch up, grab the exact paint formula from the can label or a store color scan; you can’t guess reliably.
Use color matching techniques by sampling the scratched area under daylight and comparing swatches on poster board.
Use color matching techniques: sample the scratched area in daylight, then compare swatches on poster board for an accurate match.
When you mix, follow paint mixing tips: start with small batches, record ratios, and strain pigments for smoothness.
Apply test patches beside the scratch, let them dry fully, then compare sheen and undertone. If it’s off, adjust incrementally until it disappears.
Sand Between Coats for an Invisible Fix
After you’ve patched and let it dry, lightly sand between coats so the surface stays even.
Smooth any scuffed area with fine-grit sandpaper, using gentle pressure to avoid thinning the surrounding paint.
Then wipe away dust and apply the next coat for an invisible blend.
Light Sand Between Coats
Lightly sanding between coats helps you erase scratch lines and blend the repair so it disappears into the surrounding paint. After your patch or spot fill dries, grab a fine sanding sponge and use gentle, even sanding techniques. You’re not removing paint, you’re just leveling. Keep pressure light, then dust off thoroughly—great wall preparation prevents dull spots. If you see shiny edges, lightly repeat. Use a quick checklist to stay consistent:
| Step | Goal | Result |
|---|---|---|
| 1 | Feather edges | Smooth blend |
| 2 | Level raised filler | Flat surface |
| 3 | Remove dust | Better adhesion |
Smooth Scuff With Fine Grit
Once your patch or spot fill dries, smooth the area by scuffing it with fine grit sandpaper—think 220–320, depending on how smooth the surrounding paint already is.
Use light, even pressure and wipe dust frequently so you don’t grind grit into the filler. Start at the scratch edges, then blend outward in small circles.
This scuffing helps sanding techniques create a feathered shift, matching wall textures so the next coat bonds cleanly.
When the surface feels uniformly smooth to the touch, vacuum and wipe with a damp cloth. Let it dry before repainting.
Handle Gloss Paint Scars Without Flashing
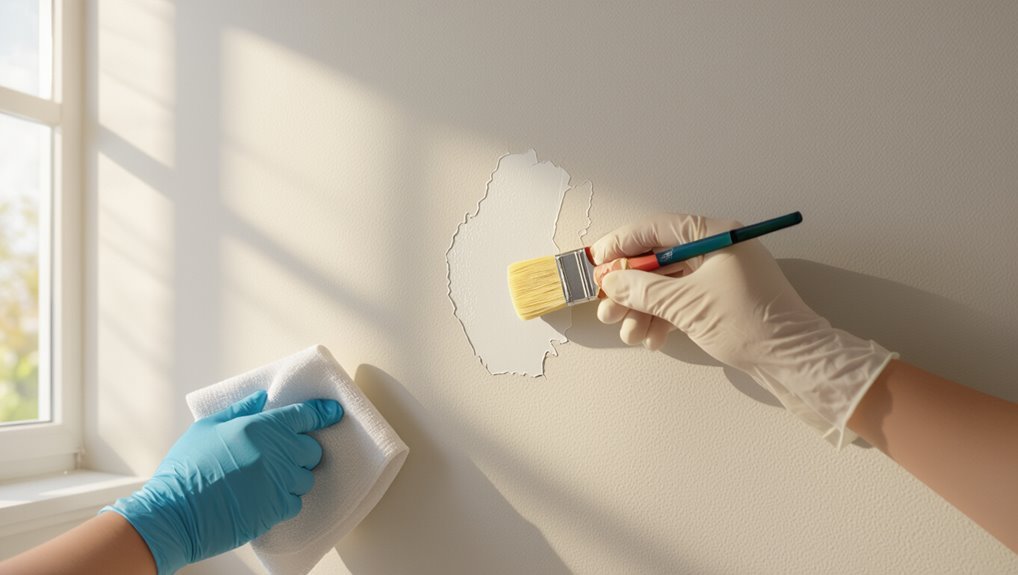
If you’ve got a scar on gloss paint, start by washing the spot with warm water and a little dish soap, then dry it completely—gloss shows every residue and will “flash” as you polish.
Next, use touch up techniques: dab a matching gloss paint with a fine brush or foam applicator, keeping coats thin and letting each dry.
If the scratch creates a ridge, lightly level it with very fine grit in gentle circles, then wipe clean.
Finally, buff with rubbing compound on a soft cloth, then finish with polish to blend the sheen.
Spot-Prime When Primer Shows Through
When the scratch exposes primer, spot-prime the bare area before you touch up the paint.
Use a small brush or foam applicator to apply thin coats only where the primer shows, using spot prime techniques that keep edges feathered.
Let it dry fully, then lightly sand the junction until it feels smooth and blends with the surrounding finish.
Choose primer selection that matches the existing system: stain-blocking if the old color bled through, bonding primer if the surface is chalky or peeling.
Wipe away dust, then proceed with your topcoat touch-up.
Prevent Scratches From Furniture and Hardware
Protect your freshly painted walls by controlling how furniture and hardware meet the surface. Plan furniture placement so chairs, dressers, and bed frames don’t drag or bump corners.
Add felt pads under legs, use corner bumpers, and apply door bumpers where handles swing close. For wall protection around outlets, install covers carefully and avoid overtightening that flexes paint.
When you mount shelves or hooks, use spacers and consider protective coatings like clear, paint-safe poly over high-traffic areas for scratch prevention.
Keep blankets or rugs between moving pieces and walls to reduce scuffs during daily life.
Choose the Best Supplies for Smooth Results
Choosing the right supplies makes scratch repairs look seamless and last longer, so gather a small kit before you start. Get painter’s tape, a putty knife, and quality spackle or wall filler that sands smoothly.
Match the touch-up paint to your exact paint finish—eggshell, satin, or flat—so repaired areas blend naturally. Use fine-grit sandpaper, from 220 up to 400, to feather edges without gouging.
For smoother results, choose a small foam roller or angled brush for applying thin coats. Follow reliable repair techniques: clean, fill, sand, then paint.
Avoid cheap tools that leave ridges.
Avoid Common Touch-Up Mistakes That Show
Even with the right filler and paint, scratch repairs can still look obvious if you rush or skip key steps.
Before you touch up, clean dust and let filler cure fully; rushing traps grit and causes pimpled texture.
Blend edges feather-light with a small brush or sponge, then wipe off excess instead of piling it on. Use matching sheen—mistakes here make the patch glare.
Don’t over-sand: stop as soon as the wall feels flat.
Apply paint in thin coats, letting each dry.
Finally, check lighting angles to spot common pitfalls before the repair sets.
Repaint a Full Section for Perfect Uniformity
Once the filler has cured and you’ve feathered the patch edges, repainting only the scratch area can still leave a noticeable halo. To avoid it, you should repaint a full section, not a spot.
After curing and feathering filler, repaint a full section—not just the scratch—to prevent a visible paint halo.
Choose an area bounded by natural lines like trim, corners, or a wall panel.
Do thorough surface preparation: wipe dust, scuff lightly with fine sandpaper, and vacuum.
Then apply primer on the patched zone and blend it smoothly with a wider coat.
Next, match your existing paint through careful color matching and use even strokes from edge to edge.
Let it dry before reassessing.
Dry and Cure Times for Durable Repair
After you finish priming and painting, you need to respect both dry and cure times for a repair that won’t flash back or peel. Don’t rush. Use correct drying techniques: keep air moving, avoid humidity, and let the coat dry until it feels fully hard, not cool or tacky. Then wait through curing processes so molecules bond in depth. Check labels, because temps and paint type change timing. Use this quick guide:
| Layer | Dry (hrs) | Cure (days) |
|---|---|---|
| Primer | 2-4 | 3-7 |
| Touch-up paint | 4-6 | 7-14 |
| Thick patch | 6-12 | 14-21 |
Test Paint and Finish in a Hidden Spot
Before you commit to your final touch-up, test the paint and finish in a hidden spot. Choose the back of a closet door or under a shelf, then apply a small amount where scratches won’t show.
Wipe away excess and let it dry, then check after curing. This confirms sheen and helps you spot color variations that can appear once the patch dries.
If the spot looks dull, glossy, or mismatched, adjust with a slightly different sheen or thinning ratio, then repeat test areas until the repair blends seamlessly with the surrounding wall.
Call a Pro for Large Damage or Cracks
For large damage or cracks, you should call a pro before you patch—especially if the scratch exposes bare drywall, the wall flexes, or the crack keeps spreading.
You need a professional assessment to spot structural or moisture issues. A contractor performs damage evaluation, then matches the right materials and base-coat system so repairs bond and blend.
Don’t DIY if the area is bigger than a coin or if multiple lines radiate outward.
Don’t DIY if the area is bigger than a coin—or if multiple lines radiate outward, it may signal deeper damage.
- Schedule an on-site inspection.
- Ask for a repair plan and timeline.
- Confirm matching paint specifications and finish.
Frequently Asked Questions
Can I Fix Scratches Without Repainting the Entire Wall Section?
Yes—fix scratches without repainting the entire section. For scratch removal, clean, lightly sand, then apply matching touch-up paint or filler, letting it dry. Feather edges for wall maintenance, and recoat only the damaged area until it blends seamlessly.
Will Magic Erasers Damage Certain Wall Paint Finishes?
Yes—magic erasers can damage certain finishes. You’ll notice patchy dullness on flat, matte, or textured paint. Test a hidden spot first; confirm paint finish compatibility so magic eraser effectiveness targets grime without stripping pigment.
How Do I Blend Touch-Ups Between Trim and Wall Edges?
Blend touch-ups between trim and wall edges by matching paint color carefully, then feather the repair outward with blending techniques. Use a small angled brush or sponge, wipe excess, and let it dry before adding thin layers for seamless integration.
What’s the Best Primer to Stop Bleed-Through on Water-Stained Walls?
Use a stain-blocking primer like Zinsser BIN or Kilz Original to stop bleed-through fast—it’s like magic. Prime after solid surface preparation techniques: clean, dry, sand glossy spots, spot-seal stains, then topcoat.
How Long Should I Wait Before Hanging Pictures After Repairing Scratches?
Wait at least 24 hours after patching and priming scratches, then check dryness. Follow hanging tips by anchoring into studs, and plan picture placement only when paint feels fully cured. If it’s humid, wait 48 hours.
Conclusion
Before you call it done, you need to watch the scratch vanish—step by step. You’ll start by matching the wall type and choosing the right fix, then you’ll clean, smooth, and fill with care. But don’t relax yet: the real test comes after priming, repainting, and letting everything cure. When it finally dries, you’ll know whether you nailed it… or whether that “quick fix” still whispers through.
