
How to Remove Paint From Exterior Walls Without Causing More Damage
Test a small, hidden spot first to see if paint softens, bubbles, or stains; wipe residue away and check the substrate. If there’s any chance of lead, test it and contain the area with plastic and HEPA cleanup. Wash off grime gently, then strip in layers using the least aggressive method for your wall (scrape, light sanding on stucco, careful heat, or the right chemical stripper). Let everything dry fully, then prime, caulk, and seal—keep going for more practical tips.
Test Your Exterior Paint Before Stripping
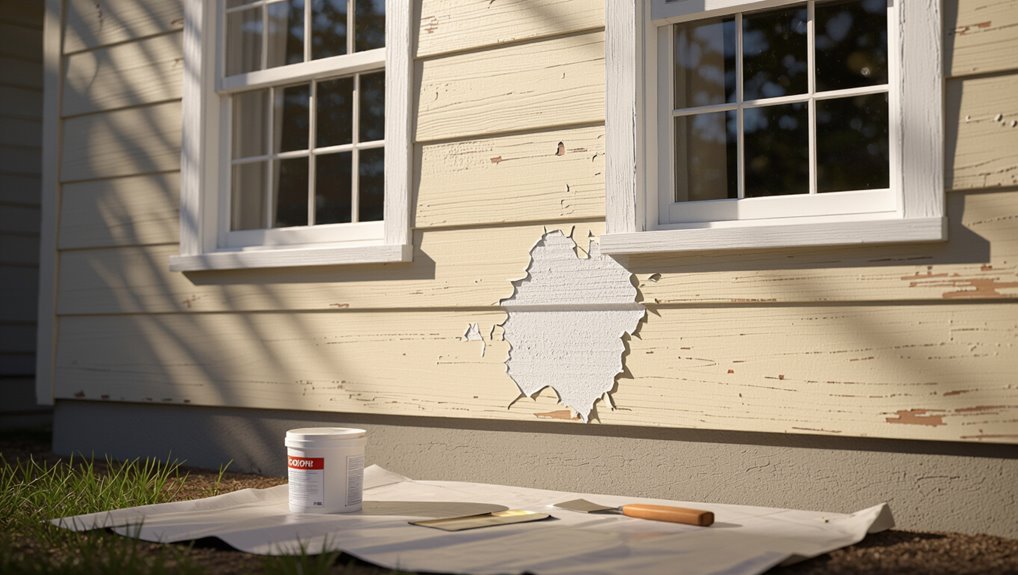
Before you strip a single section, test the paint you’re working with—because guessing can waste time and create messes.
Do paint testing first by choosing a small, hidden spot and applying your planned remover or method. Watch for bubbling, wrinkling, or softening; then stop and wipe away residue.
Test first in a hidden spot: apply your remover, watch for bubbling or softening, then wipe residue before proceeding.
Next, run surface evaluation: check the wood, stucco, or siding underneath for discoloration, pitting, or soft fibers.
If the paint won’t lift or the surface gets damaged, adjust the process, change products, or increase dwell time carefully—one test now saves you later repairs.
Match Your Method to Your Wall Material
Once you’ve confirmed how the paint reacts in a test area, pick a stripping approach that fits the wall material.
Brick and stone handle gentle chemical strippers and low-pressure washing, but you should avoid aggressive scraping that chips edges.
For stucco, choose soft methods, because thick coatings can crack when you work too hard.
Wood siding needs careful sanding or hand scraping to prevent gouges, and keep moisture low to avoid swelling.
Vinyl and metal typically respond best to mild cleaners and plastic-safe tools.
Always follow surface preparation steps—clean, rinse, and dry—before you strip.
Check for Lead Paint and Set Up Containment
Before you start stripping, test the paint for lead to protect yourself and others.
If it tests positive, seal off the work area, close windows, and keep people and pets out.
Cover nearby surfaces and prepare cleanup tools so lead dust doesn’t spread.
Test For Lead Paint
First, you should test for lead paint and decide what you’ll do next based on the results.
Before you scrape, burnish, or sand, confirm what’s on the wall. Use proper lead testing kits or a certified professional, since old coatings can hide hazards. Document every reading, then plan your removal method around the findings.
If lead is present, you’ll treat the surface as a serious source of paint hazards and choose controls that match the risk level.
- Test suspect layers (around trims, sills, and peeling areas).
- Compare readings to local guidelines and keep records.
- Stop if results look risky and reassess your approach.
Seal Off Work Area
After you finish testing and you know whether lead paint is present, you need to seal off the work area and control dust before you remove any coatings.
Set up plastic sheeting, close doors, and tape seams to prevent spread. Use workspace organization to keep clean tools separate from dirty ones, and plan the workflow with clear project planning steps.
Follow safety protocols: wear a respirator, gloves, and eye protection.
Apply material preparation early, including HEPA vacuuming. Schedule time management for wet methods and cleanup.
Maintain tool maintenance by inspecting blades and filters.
Consider environmental considerations like runoff control, and confirm paint selection before disposal.
Gather Tools and Safety Gear for Exterior Stripping
You’ll need the right stripping tools for exterior surfaces—choose scrapers, wire brushes, or a paint remover system that matches the paint type.
Wear proper protective safety gear, including a respirator, chemical-resistant gloves, eye protection, and protective clothing to prevent exposure.
Before you start stripping, gather a drop cloth, fans/ventilation if needed, and follow the product labels so you work safely and efficiently.
Select Appropriate Stripping Tools
Choosing the right stripping tools and safety gear keeps you efficient and protects the surface and your health.
Before you start paint removal techniques, match tools to the wall’s material and paint type. Use tool selection tips to prevent gouges, bubbling, and lingering residue. Start with low-aggression options, then escalate only if coverage demands it.
For textured stucco or brick, choose nylon brushes and plastic scrapers; for smooth siding, use carbide blades sparingly and test first.
- Plastic scrapers for edge lift and residue control
- Nylon brushes/rollers for durable paint
- Heat gun or steam unit only on proven coatings
Wear Proper Protective Safety Gear
Proper protective safety gear keeps you safe while you strip paint from exterior walls.
Before you start, put on a NIOSH-approved respirator, sealed goggles, and chemical-resistant gloves. Wear long sleeves, sturdy pants, and slip-resistant boots to reduce exposure and slips.
If you’re using heat or chemical strippers, add a face shield and protective apron. Work outdoors or with strong ventilation, then practice safety awareness by keeping people and pets away from the work zone.
Afterward, inspect and clean everything and follow gear maintenance so filters, gloves, and eye protection stay effective for the next job.
Decide If You Need a Pre-Strip Wash
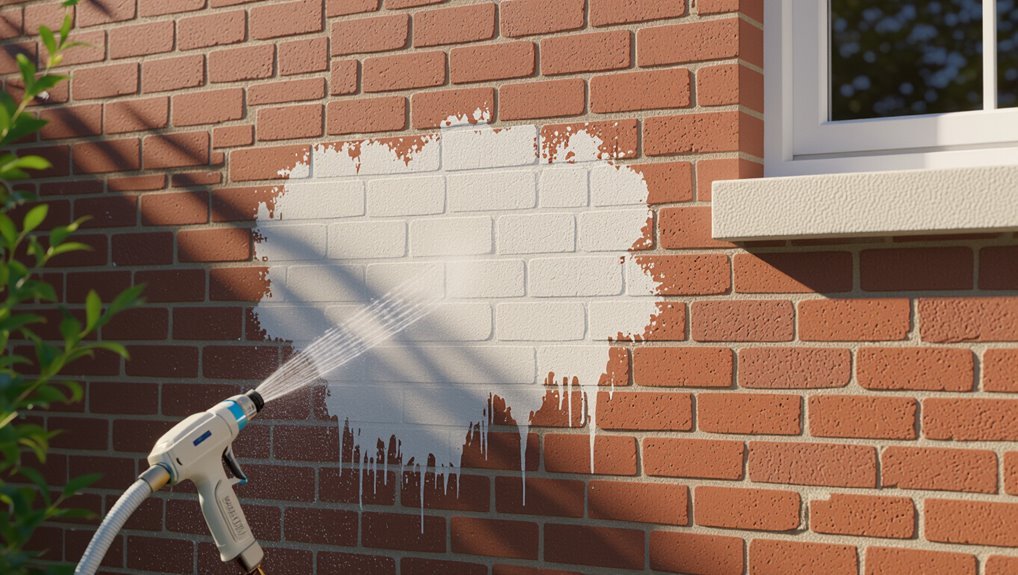
Before you start stripping, decide whether a pre-strip wash will help by removing surface grime, mildew, and loose debris.
If the wall looks chalky, stained, or fungus-speckled, a pre-strip importance step prevents you from grinding contaminants into the surface. You’ll also get wash benefits: better adhesion of any stripper gel and cleaner results with less blotchy peeling.
Check the area after dry wiping; if you still see residue or loosened paint flakes, wash first. Use a mild detergent, low-pressure rinse, and let it fully dry.
- Spot mildew or soot
- Watch for loose grit
- Confirm complete drying before stripping
Wash Away Dirt and Chalk Before You Scrape
Before you scrape, rinse the wall with clean water to knock off dirt and chalky residue.
If needed, scrub with a mild detergent solution, then rinse again to remove soap.
Let the surface dry fully so you don’t trap grime under the paint-removal tools.
Rinse With Clean Water
Rinse the wall thoroughly with clean water so you wash away dirt, dust, and chalky residue that can interfere with paint removal.
Use consistent water temperature—cool to lukewarm is usually safest for coatings and caulk.
Keep your rinsing techniques controlled: start at the top, move in overlapping passes, and avoid blasting seams or loose mortar.
- Wet the surface evenly; don’t leave dry patches.
- Spend extra time on chalky areas until runoff clears.
- Let the wall dry fully before you scrape.
Use Mild Detergent Scrub
After you rinse away loose grime, scrub the wall with a mild detergent solution to lift remaining dirt, chalky residue, and greasy spots that can gum up your scrape and cleaning steps.
Choose gentle detergent options—like dish soap or a non-abrasive wall cleaner—mixed with warm water.
Wet a soft-bristle brush or sponge, then scrub using steady, circular scrub techniques on stained areas.
Keep pressure light so you don’t dull siding texture. Rinse thoroughly as you work, removing loosened film before you move on.
Repeat spot scrubbing where chalk transfers. Let the surface stay wet only while you finish.
Let Surface Dry Fully
Let the wall dry fully so dirt, chalk, and detergent residue don’t smear or re-set on the surface when you start scraping.
After washing, you must manage wall conditions before you remove any paint. Use drying techniques like sunny, breezy exposure or a fan to speed evaporation, but avoid blasting with high-heat air that can warp trim.
Check the finish by touch—no cool damp spots, no slick detergent feel. Then proceed carefully.
- Wait 4–24 hours, depending on shade and airflow.
- Inspect seams, cracks, and weep holes for trapped moisture.
- Only scrape when the surface feels clean, dry, and stable.
Dry Scrape to Remove Loose, Flaking Paint
Dry scraping is the fastest way to knock off loose, flaking paint before you move to any washing or chemical stripping. Use sharp scrapers and steady pressure; you’re removing only what won’t adhere. Follow these dry scraping techniques as paint removal tips: work from edges, keep the blade low, and stop when the surface feels firm. Avoid prying into brick or siding. Use these checks as you go:
| Spot | What to do |
|---|---|
| Edges | Scrape lightly |
| Bubbles | Lift and remove |
| Peeling sheets | Pull back |
| Rust seams | Clear loose paint |
| Bare wood | Stop immediately |
Hand-Sand Carefully on Stucco Without Gouging
Before you sand, assess the stucco texture and check for any sealants so you don’t strip coatings that are still in good shape.
Use only fine-grit sanding and keep your pressure light, checking often to avoid gouging the surface.
Feather the edges of each spot so the shift stays smooth and paint removal doesn’t leave ridges.
Assess Stucco Texture And Sealants
Once you’ve confirmed the surface is real stucco, inspect its texture and look for cracks, weak edges, or previously applied sealants that can trap paint.
You want to start stucco maintenance by checking how rough or smooth the trowel finish feels, then spot any hollow-sounding areas.
Identify sealant types around trim, joints, and penetrations; some are silicone, others are acrylic or polyurethane, and each affects paint adhesion.
Carefully probe suspicious spots with light finger pressure, not tools, to gauge stability.
- Note texture variations and embedded grit.
- Map cracks and loose stucco edges.
- Mark sealant lines and boundaries.
Use Fine Grit Sanding Only
After you’ve mapped the stucco texture, cracks, and any sealant lines, you can prep the paint removal step with fine-grit sanding only.
Use a sanding block with 120–180 grit and light pressure so you don’t gouge the peaks or valleys. Follow the same direction as the stucco finish, and keep your strokes short to maintain texture.
Your sanding techniques should focus on dulling the paint film, not grinding it down to bare substrate in one pass.
Check often, then wipe dust clean for surface preparation. If you see fresh aggregate, stop and reassess.
Feather Edges Without Gouging
Feathering the edges without gouging matters because stucco peaks and valleys break easily when you press too hard.
When you hand-sand carefully on stucco, slow down and lighten your grip. Use feather techniques: keep the sander flat, and use short strokes that follow the texture, not against it. Switch to a finer grit as the paint fades, so you blend smoothly instead of carving lines.
- Maintain light, even pressure; let the paper do the work.
- Start off the edge, then sand back for gradual edge blending.
- Stop often, check contours, and avoid dips and ridges.
Use Heat Guns Only on Suitable Surfaces
Use a heat gun only on surfaces that can handle direct, concentrated heat—brick, stucco, and sound wood are usually good candidates, but vinyl siding, older masonry with weak mortar, and any surface with unknown coatings can warp or blister.
Before heat application, test a small hidden spot and confirm surface compatibility; you’re aiming to soften paint without scorching fibers or loosening mortar.
Keep the tool moving so you don’t concentrate heat in one area. If paint doesn’t lift readily, stop and switch methods—scraping harder can damage the substrate.
Control Heat Temperature to Avoid Wall Damage
Even if a surface can handle a heat gun, you still need tight temperature control to protect the wall beneath the paint.
Keep your heat application brief and move constantly; lingering heat can blister siding, soften mortar, or loosen caulk. Start with a low setting, test a small patch, and adjust until paint lifts without scorching.
- Watch for smoke, bubbling, or darkening—stop immediately.
- Maintain steady passes so temperature control stays consistent.
- Let sections cool before scraping to prevent gouges.
Use a thermometer if possible, and keep airflow steady for safer heat application.
Use Chemical Strippers for Stubborn Paint Layers
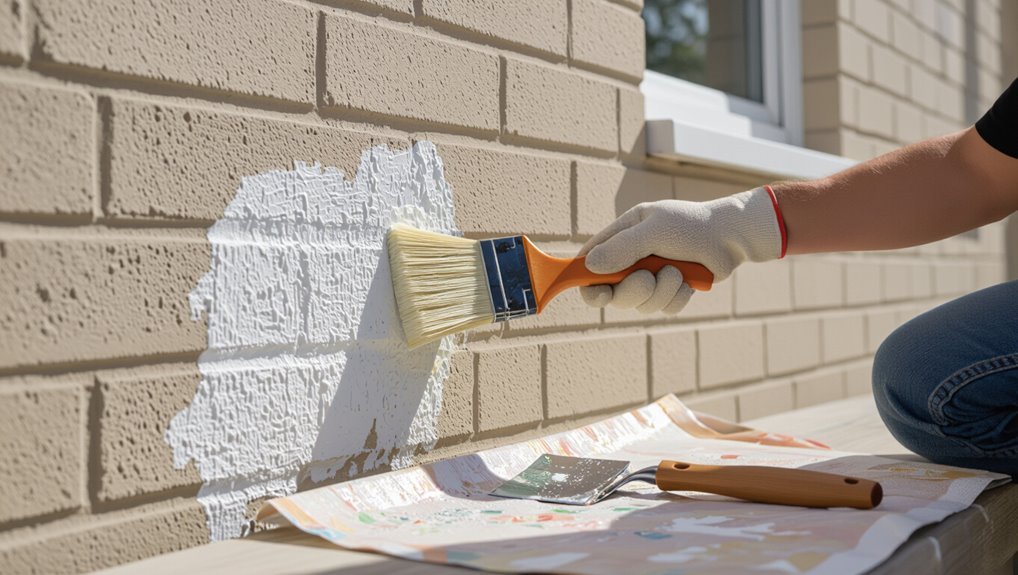
When the paint won’t budge, choose the right chemical stripper for the coating type and surface material.
Read the label carefully and follow the dwell time instructions exactly so the stripper can lift the stubborn layers without harming the wall.
Apply it in manageable sections, then scrape off the softened paint and rinse thoroughly as directed.
Choose Right Stripper Type
If your exterior paint layers include multiple coats, textured finishes, or older, stubborn areas that won’t soften with gentler methods, chemical strippers often save time and effort.
You should choose among paint stripper types based on surface and paint: gel formulas cling to vertical walls, paste helps lift thick layers, and low-VOC options protect nearby plants.
Favor eco friendly options when performance matches your coat thickness. Avoid mismatching products, since the wrong chemistry can stain or etch siding.
- Select gel/paste for vertical texture.
- Match stripper strength to coating age.
- Prefer low-VOC, eco friendly options.
Follow Dwell Time Instructions
Give the chemical stripper time to work—dwell time is what loosens stubborn, older paint. Follow the label’s schedule exactly, because too little time leaves layers bonded and too much can irritate siding.
Apply the stripper with proper application: spread evenly, keep edges covered, and don’t let it dry out early. Recheck every interval; if the paint blisters or wrinkles, you’re on track.
After dwell time, scrape gently with plastic or a suitable tool, then rinse as directed. Work in small sections so the stripper stays wet until it’s ready.
Choose a Stripper Based on Paint Type
To remove paint from exterior walls effectively, you need the right stripper for the job, because different coatings respond differently to heat, chemicals, or abrasives.
Match your remover to the paint type so you protect the surface and maximize paint compatibility. Test a small hidden area first; if the film softens and lifts cleanly, your stripper effectiveness is high.
Use a product formulated for oil-based, latex, or multi-layer systems, since one-size removers often leave residue.
- Identify oil vs. latex sheen and film thickness.
- Choose chemical strength for multi-layer coatings.
- Verify lift results before scaling up.
Apply Stripper Evenly to Prevent Smearing
Apply the stripper evenly so it won’t smear or leave patchy spots.
Use the same brush or roller strokes across the surface, keeping a consistent thickness as you work.
Tackle small sections methodically, finishing one area before moving on to the next.
Even Application Prevents Smearing
Even if the stripper is the right product, uneven coverage can trigger smearing and streaking, so you should work in deliberate sections.
Use even application techniques to coat every inch at the same thickness, then keep a steady pace so it stays wet while it bites. Apply with controlled, overlapping strokes, and don’t press hard into the surface.
If you see dry patches forming, add more stripper immediately rather than scrubbing.
For best results, focus on:
1) uniform thickness
2) full wall coverage
3) immediate touch-ups to avoid paint smears.
Use Consistent Brush Or Roller
Use the same brush or roller technique every time so the stripper stays wet long enough to work evenly.
Choose the right brush selection for your surface: natural bristles for textured areas, foam rollers for smoother walls.
Load the tool lightly, then apply in one direction, keeping steady pressure and a uniform stroke width.
Don’t pause mid-pass—work continuously so you don’t create thick ridges that smear when you scrape.
Between dips, keep your coverage consistent technique: overlap edges slightly, and recoat only where stripper starts to dry.
This prevents patchy lift.
Work Small Sections Methodically
Work one small wall area at a time so the stripper stays wet and keeps its lifting power. You need a methodical approach: apply stripper evenly, never let it dry out, then scrape right when the paint softens.
Keep a clear section focus by masking off nearby edges with plastic to reduce smears.
- Brush on stripper in thin, consistent passes across your chosen square.
- Watch dwell time, and scrape before the surface skins over.
- Reapply only to stubborn spots, blending edges while stripper is still active.
Use Containment and PPE When Stripping Hazards
Before you start stripping paint, set up containment to keep dust, chips, and fumes from spreading—seal off doors and windows, cover nearby surfaces with plastic sheeting, and use a HEPA vacuum to clean as you go.
Next, follow strict safety protocols: wear an appropriate respirator, chemical-resistant gloves, eye protection, and protective clothing. Tape seams in your plastic to prevent leaks, and control airflow so contaminated dust doesn’t drift.
When you bag debris, keep it sealed and label it for proper disposal. Replace filters when they load and avoid dry sweeping.
Remove Paint in Layers to Protect the Substrate
Once your containment and PPE are in place, focus on removing paint in layers so you don’t gouge the substrate. Start with the least aggressive method and work upward, keeping pressure consistent and tools flat.
Use layered removal strategies to loosen each coat before you scrape; this reduces chips and hidden damage. Between passes, pause to inspect texture, check for soft wood or masonry, and stop if you see bare substrate.
Apply substrate protection techniques by shielding edges, misting to control dust, and using plastic scrapers when paint resists.
- Score lightly, then peel
- Scrape gradually, reapply as needed
- Inspect often
Try Infrared or Low-Mess Alternatives to Heat
You can try infrared heat to loosen paint in a more precise, targeted way without blasting the whole wall.
If you want even less cleanup, choose a low-mess gel stripper that clings to the surface and reduces drips.
Test both methods in a small hidden spot first so you can match the right approach to your paint type.
Use Infrared Heat For Precision
Infrared heat helps you strip paint with more control than blasting the whole wall, because it warms the coating where you need it without overheating the surrounding materials.
You’ll get real infrared advantages when you use a handheld emitter to target edges, vents, or layered spots, instead of heating everything. Keep the beam moving slowly and test frequently so the paint softens but the substrate stays intact.
Focus on precision application by working in small sections and using a plastic scraper as soon as the film loosens.
- Sweep methodically to avoid scorch lines.
- Pause to let softening reach seams.
- Protect nearby trim and joints.
Choose Low-Mess Gel Strippers
Low-mess gel strippers help you remove exterior paint without the drips, splatter, and cleanup you get from harsher solvents.
You should pick a gel stripper formulated to cling to vertical surfaces, so you control dwell time and avoid runoff. This choice delivers key gel stripper advantages: cleaner edges, less mess, and reduced risk of stripping surrounding finishes.
If you’re already using infrared or want low-mess alternatives to heat, match the stripper to the coating type for better release.
For safer disposal and fewer fumes, look for eco friendly options with biodegradable ingredients and lower VOCs.
Treat Cracks and Peeling Edges as You Strip
As you strip the failing coating, focus on treating cracks and peeling edges right away so they don’t grow under the new finish.
Keep your blade shallow and work slowly along seams; you’ll uncover loose layers that want to spread.
Perform crack treatment immediately: stop widening by scraping only what’s detached, then feather the edges smooth.
Use edge preservation by leaving sound substrate intact and stabilizing any lifted corners with a compatible patching compound.
Finish each section before moving on, so nothing dries out unevenly.
- Rake loose paint, then vacuum dust.
- Patch cracks and feather connections.
- Re-smooth peeling borders for adhesion.
Skip Power Washing When Paint Still Sticks
Once you’ve stabilized cracks and flattened peeling borders, don’t rush to power wash if the old paint still holds tight. If you blast now, you risk embedding grit and loosening sound layers. Instead, start with gentle paint removal techniques: hand scraping, chemical softeners, and spot sanding where adhesion fails. Use a plastic drop cloth and tape off windows for surface protection, then test a small area to confirm the coating lifts cleanly.
| Situation | Next move |
|---|---|
| Paint grips | Spot treat |
| Minor bubbles | Scrape edges |
| Stains remain | Clean, don’t strip |
Stop Pressure Cleaning When You Risk Surface Damage
You need to watch for fragile wall materials like stucco, older brick, or cracked mortar, because high pressure can chip and break the surface.
When you see cracking, flaking, or gouges, stop pressure cleaning immediately and switch to a safer method.
Use the gentlest setting and keep the nozzle farther back to avoid pressure-induced damage.
Recognize Fragile Wall Materials
Before you apply any pressure washer, identify whether your exterior wall can handle the force. Fragile materials can flake, crack, or strip when you add too much impact.
Start by doing thorough wall assessments: look for old plaster, stucco with hairline fractures, soft brick mortar, deteriorated wood, and painted surfaces already peeling. Pay attention to bulges, chalking, or repaired patches—those areas often fail first.
- Test a small hidden spot by lightly rinsing.
- Check for cracks, delamination, and loose caulk.
- Avoid starting on unknown coatings—assume they’re fragile materials.
Avoid Pressure-Induced Surface Damage
Even if paint seems ready to lift, stop pressure cleaning when you start to see risk signals—softening mortar, widening cracks, lifting caulk, or paint turning to film and running.
You need surface protection and damage prevention, not faster stripping. Lower the pressure, increase distance, and switch to gentler methods if the surface responds poorly.
Keep the nozzle moving, because dwell time can etch brick, stucco, or wood. Test a small hidden section first, then reassess every pass.
If water starts soaking behind coating seams, stop immediately and let the wall dry fully before continuing.
Keep Primers and Coatings From Lifting During Prep
To prevent primers and coatings from lifting during paint removal, protect the substrate as soon as you start prep. You need solid paint adhesion, so treat the area gently and plan your surface preparation.
Keep primers stable by controlling moisture, heat, and dwell time; harsh methods can undercut layers and cause peeling. Before you scrape or sand, clean dust and chalk, then mist lightly to reduce airborne grit. Use chemical removers sparingly and rinse thoroughly, following label timing.
- Mask edges and seams to prevent wicking.
- Maintain consistent technique and pressure while scraping.
- Dry fully, then re-prime only after inspection.
Fix Water Leaks and Address Rust Stains First
Fix any water leaks and remove rust stains before you tackle paint removal, because moisture and corrosion will keep undermining new coatings. You need to locate dripping points, seal cracks, and direct runoff away from the wall. Treat visible stains as evidence of water damage—dry the area fully, then perform rust removal until metal is stable and clean. Use a patch compatible with exterior exposure, not interior drywall compound.
| Problem | Cause | What to do first |
|---|---|---|
| Staining | Water wicking | Seal leak, dry |
| Bubbling | Trapped moisture | Vent, then dry |
| Rust streaks | Corrosion | Rust removal |
| Cracking | Movement | Patch and seal |
Scrape and Brush Off Residue After Stripping
Once the paint layer lifts, you should scrape off every loose flake and bit of peeling film with a putty knife or stiff brush, working in small sections and down to the sound surface.
You then use residue removal techniques to clear dust and grit left by stripping methods, keeping pressure light to avoid gouges.
Vacuum the debris, then dry-brush until the surface looks uniform and solid.
Use a slightly damp rag only to pick up remaining powder, then let it dry fully.
Finally, inspect corners and edges, where residue clings.
- Scrape, don’t chip
- Brush in tight circles
- Remove all dust
Neutralize and Rinse Thoroughly for Adhesion
After you’ve removed loose paint and dust, neutralize the remaining stripping residue so your new coating will bond correctly. Use appropriate neutralizing agents, following label ratios, then rinse well with clean water until runoff looks clear. Don’t skip corners or joints; residue there breaks adhesion techniques. Check the surface by touch—no slick, soapy feel should remain.
| Step | Goal | Result |
|---|---|---|
| Apply neutralizer | Stop chemistry | Stable substrate |
| Dwell time | Work residue free | Even preparation |
| Thorough rinse | Remove salts | Clean bonding surface |
| Dry fully | Prevent trapped moisture | Strong cure |
Sand Only Enough to Smooth, Not Thin the Wall
With the neutralized surface rinsed and clean, you can move to sanding—just enough to knock down rough edges, feather remaining paint edges, and smooth out raised spots.
Use light pressure and stop often; you’re aiming for wall maintenance, not stripping more material. Choose your sanding techniques based on texture: start with medium grit to level bumps, then switch to finer grit for a uniform finish.
Always inspect by touch and eye, and wipe dust between passes. Focus on these targets:
- Remove glossy ridges and blisters.
- Blend connections where paint remains.
- Keep the substrate thickness intact.
Feather Edges Without Leaving Thin Spots
Feather the paint edges so they blend smoothly into the surrounding surface, without digging a trench.
After sanding, switch to feathering techniques: use a light, even pass with fine grit, keeping pressure minimal as you move outward from the bare area.
Blend in layers—stop, check, then sand again—so you don’t create shiny low spots or halos.
Use a sweeping motion at a slight angle, and regularly wipe dust to see progress.
If you hit bare spots, stop and refine, don’t keep pressing.
Solid edge blending prevents thin, weak patches and helps paint match.
Spot-Repair Wood, Brick, or Stucco Areas
Spot-repair the affected wood, brick, or stucco only after you remove the loose paint and inspect what’s underneath.
Once you confirm the substrate, you can do a careful spot repair: remove any crumbling material, patch cracks, and let each patch cure per directions.
Confirm the substrate first, then remove crumbling material, patch cracks, and let each patch cure fully per directions.
For wood, scrape to solid grain and fill dents; for brick, reapply mortar in shallow bites; for stucco, skim with compatible patching compound.
Focus on texture matching—match the original swirl, pitting, or sand finish before it hardens.
Then follow with a light cleanup around edges so the repair blends.
- Remove loose, unstable paint.
- Patch the damaged substrate.
- Do texture matching while wet.
Let the Wall Dry Fully Before Priming
After you patch and texture-match the wood, brick, or stucco, give the wall time to dry completely before you prime.
You must follow solid drying techniques: keep airflow moving, avoid sealing over damp areas, and let recent repairs cure until no cool, dark, or soft spots remain.
If you’re unsure, wait longer or check moisture with a simple meter.
Once the surface feels fully dry and stable, you can apply primer correctly.
These priming tips prevent trapped moisture, bubbling, and peeling, helping your exterior paint removal and repainting hold up season after season.
Prime for Exterior Paint Adhesion by Substrate
Prime the wall for exterior paint adhesion by matching the primer to the substrate you’re coating.
After you finish substrate preparation, you choose paint adhesion techniques that lock into the surface and reduce peeling.
Skim, spot-prime, and feather edges so old paint blends smoothly into new work.
- Use masonry primer for brick, stucco, and concrete.
- Use bonding primer on previously painted or chalky areas.
- Use rust-inhibitive primer on any metal fasteners or patch steel.
Apply thin, even coats, letting each dry fully before topcoats.
Use the Right Primer/Sealant System for Durability
Choose a primer and sealant system that matches your wall’s surface, moisture exposure, and the topcoat you plan to use, because durability depends on the layers bonding and sealing as one. Pick suitable primer types for masonry, wood, or previously painted areas, then seal ahead of time where moisture can creep. Think in layers: clean, spot-prime, then apply a compatible sealant to lock out water and reduce vapor movement. This prevents peeling and helps your topcoat stay intact longer.
| Situation | What to use |
|---|---|
| New masonry | Masonry primer |
| Chalky paint | Stabilizing primer |
| Wet-prone zones | Elastomeric sealant |
Caulk Gaps, Seal Joints, and Maintain Your Finish
Once the primer/sealant system cures, you need to stop air and water from sneaking behind your new finish by caulking gaps and sealing joints.
Use caulk techniques that fill voids flush, then smooth edges for clean lines. This joint sealing supports exterior durability and improves weatherproofing solutions, while protecting surface protection and strengthening paint adhesion.
Afterward, do regular finish maintenance: inspect cracks, re-caulk as needed, and touch up paint fast to prevent moisture intrusion and peeling.
- Dry-fit, clean, then caulk gaps.
- Tool seams for tight contact.
- Monitor and refresh for aesthetic enhancements.
Frequently Asked Questions
Can I Remove Paint in Wet or Humid Weather Without Damaging the Wall?
Yes, you can remove paint in wet or humid weather, but you should wait for the wall to dry. Moisture traps in finishes, slows paint removal, and increases peeling. Work in mild, dry weather, and keep tools and surfaces clean.
What Should I Do if the Stripped Surface Feels Gritty or Uneven?
If the stripped surface feels gritty or uneven, don’t panic—“measure twice, cut once.” Scrape lightly, sand smooth, then do surface preparation: rinse, dry, prime. Address texture repair with patch compound, let cure fully, and recoat only after it’s uniform.
How Do I Dispose of Paint Chips, Stripper Residue, and Contaminated Debris Safely?
Dispose of paint chips, stripper residue, and debris in sealed, labeled containers. Follow safety precautions: wear gloves, mask, and eye protection. Use local hazardous-waste rules for eco friendly disposal; never dump outdoors or down drains.
Will Removing Paint Void Warranties for Siding, Brick, or Stucco?
Yes, removing paint can trigger warranty implications for many siding materials like vinyl, wood, brick, or stucco. You’ll void coverage if you damage finishes or use unapproved chemicals. Check your manufacturer’s terms and hire licensed pros first.
How Long Should I Wait After Stripping Before Applying Primer or Stain?
After stripping, you should wait about 24–48 hours, depending on dryness and temperature. Let the surface dry fully, then do thorough surface preparation. Prime or stain as soon as it’s clean, dust-free, and stable to prevent adhesion problems.
Conclusion
Think of your exterior wall like an aging ship’s hull: harsh tools are the storms that chip away the good wood. When you test, contain, and choose methods that fit the surface, you move through the “rough seas” with steady hands. Let it dry, prime with the right system, and seal where water could sneak in. You’re not just removing paint—you’re restoring strength, one careful step at a time.
