
How to Protect Walls From Moisture Before It Becomes a Bigger Problem
You can prevent wall moisture from turning into mold by spotting the source early, then fixing it fast. Start by inspecting for damp spots, musty odors, and swelling, and trace stains to their highest point. Check the roof, plumbing lines, and HVAC ducts for leaks and condensation. Keep indoor humidity around 30–50% with proper bathroom/laundry venting and dehumidification if needed. Seal windows, doors, and exterior gaps, then do seasonal inspections and document any repeat leaks so you stop problems before they grow—so you’ll know what to do next.
Identify Moisture Sources Behind Wall Damage
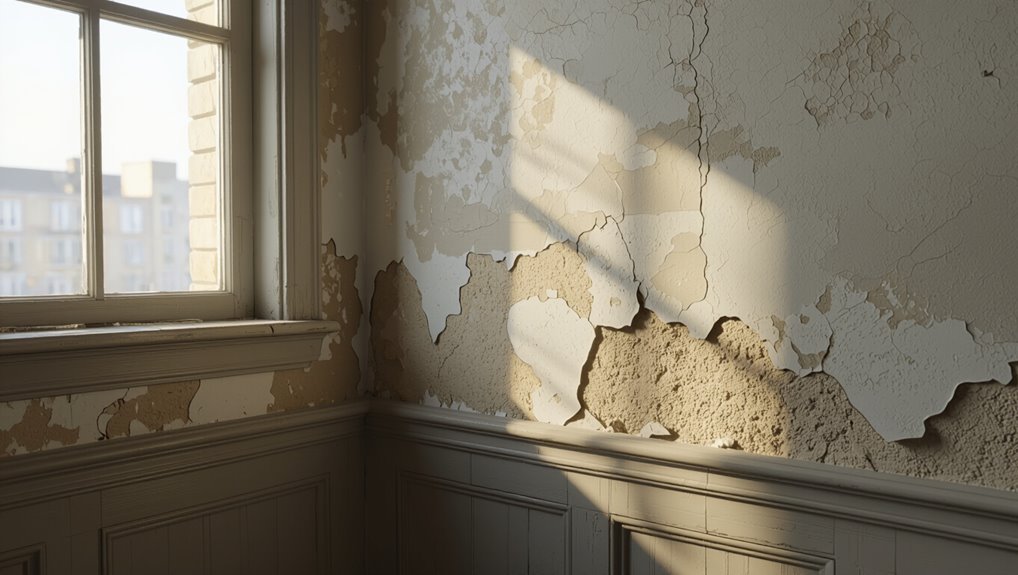
Before you try to seal or paint over a problem, you need to identify where the moisture comes from behind the wall. Start with moisture detection: look for damp spots, blistering, musty odors, and swelling baseboards.
Then check likely routes—plumbing leaks, condensation from HVAC or cooking vents, and cracks that let rain seep through. Use a hygrometer to compare wall and indoor humidity levels, and trace stains to their highest point.
If you find persistent cold surfaces, improve wall insulation to reduce condensation. Don’t guess; pinpoint the source so repairs actually stop the damage.
Check the Roof Before Treating Interior Walls
Before you treat any interior walls, inspect the roof for leaks and signs of water stains or sagging.
Check the flashing around vents, chimneys, and skylights, and make sure shingles are intact and properly sealed.
If you spot damage, fix it first—otherwise your wall repair won’t hold.
Inspect Roof Leaks Thoroughly
Start with the roof, because a hidden leak will keep feeding moisture even after you treat the interior walls.
Go outside and inspect every roof edge, vent, and seam; look for missing shingles, lifted corners, and clogged gutters.
Use proven leak detection techniques: check attic insulation for wet spots, scan for rust trails, and run a flashlight along suspected stains.
During roof maintenance tips, clean debris that traps water and confirm downspouts discharge away from the house.
If you spot drips, damp decking, or ceiling discoloration, address the source immediately before sealing walls.
Address Flashing And Shingles
Once you confirm there’s no ongoing leak elsewhere, focus on the places where water usually sneaks in—flashing and shingle edges. Check flashing around chimneys, vents, and valleys; replace rusted or lifted sections fast. Use proper flashing materials, seal joints correctly, and tighten any loose fasteners. Then perform shingle maintenance: look for missing, curled, or cracked shingles, and slide-up breaches along roof seams. Don’t wait—small gaps become hidden damp behind walls.
| Spot | What to watch |
|---|---|
| Chimney flashing | Gaps, rust |
| Roof valleys | Overflow stains |
| Vent boots | Cracks |
| Shingle edges | Lifting corners |
Inspect Plumbing Lines for Hidden Seepage
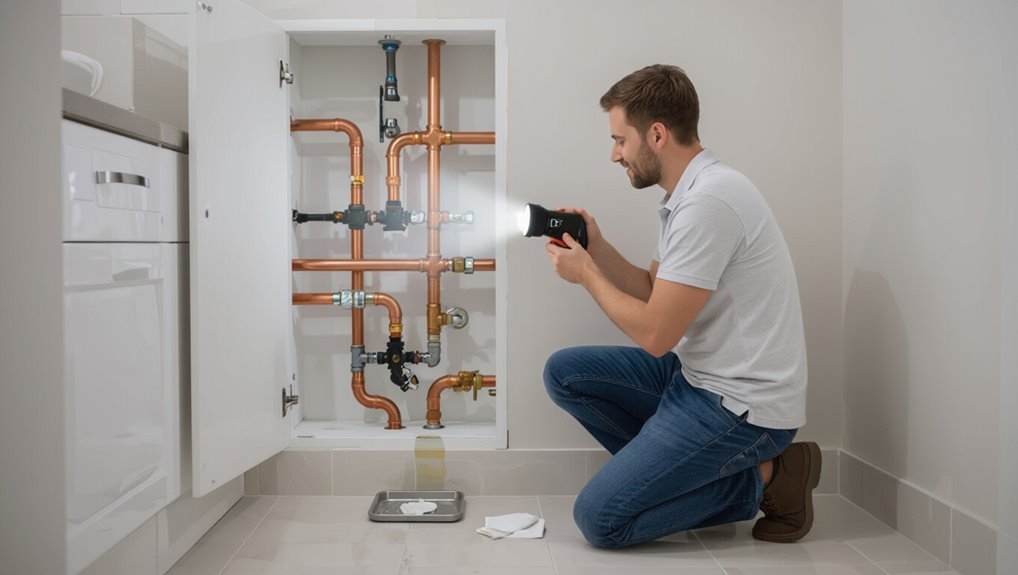
Check under-sink supply lines for crusting, damp spots, or soft cabinet bottoms, and tighten fittings if you spot leaks.
Inspect behind the toilet and around wall penetrations for discoloration, bubbling paint, or musty odors that suggest hidden seepage.
If anything looks off, run water briefly and recheck those areas so you can catch the problem early.
Check Under-Sink Supply Lines
Under-sink supply lines often leak before you ever notice stains, so you should inspect them closely for hidden seepage.
During under sink inspections, pull everything back, then check the hot and cold hoses, shutoff valves, and connections for dampness, crusting, or drips. Use a flashlight and paper towel to confirm any slow seep.
Tighten fittings gently if you find looseness, but don’t over-torque. If hoses look cracked, bulged, or stiff, replace them as part of plumbing maintenance.
After adjustments, run water for a few minutes and recheck joints and fittings.
Inspect Behind-Toilet And Wall Penetrations
Before you blame the finish, inspect the plumbing lines behind your toilet and through nearby wall penetrations for hidden seepage.
Start with toilet inspection: remove the tank lid, flush, and watch for moisture at the supply connection, wax seal area, and bolts. Shine a light into gaps and feel around pipes with a dry hand.
Next, check wall penetrations where shutoffs, drains, or vents pass through framing. Look for bubbling paint, soft drywall, rust streaks, or mildew smell.
If you spot dampness, dry the area, tighten fittings, or reseal—and consider a plumber if it returns.
Test HVAC and Ducts for Condensation Leaks
Start by verifying that your HVAC system isn’t leaking moisture through poorly sealed duct joints or faulty condensate handling.
Grab a flashlight and check supply and return runs for sweating, water stains, or damp insulation.
Then run the system and watch the condensate line connections while it cools; you want strong drainage, not backup.
These HVAC maintenance tips help you spot early failure.
- Feel duct seams for cold air and moisture
- Inspect the condensate pan and trap for cracks
- Confirm insulation stays dry and intact
- Track thermostat cycles to guarantee proper cooling
Use condensation prevention strategies before damage spreads.
Seal Gaps Around Windows and Exterior Doors
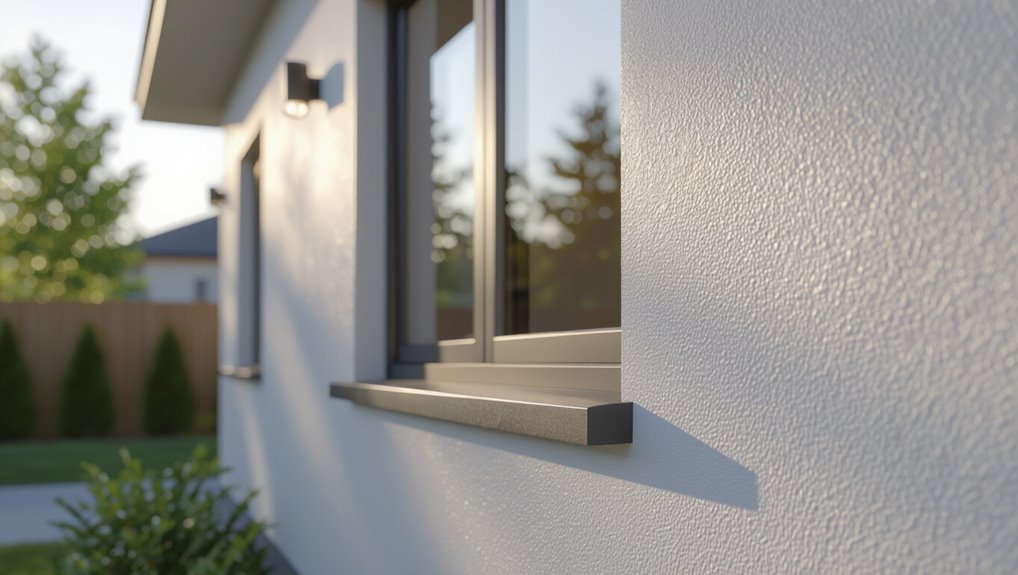
Once you’ve verified your HVAC isn’t pushing moisture through duct leaks, turn your attention to the spots where the outdoors meets the indoors—windows and exterior doors.
Inspect the perimeter caulk line, sashes, and frame corners. Remove failing caulk, then apply a continuous exterior-grade sealant to close cracks and gaps.
Fit or replace window insulation around the frames so cold air and humidity don’t sneak inside. Check operation, then install door weatherstripping along the jamb and threshold.
Test by feeling for drafts and confirming doors latch firmly. Recheck after storms and seasons.
Prevent Rain Intrusion at Siding and Flashing Seams
As you inspect your exterior, make sure you seal siding overlap joints so water can’t find a path behind the panels.
Check the flashing at shear edges and replace any worn or misaligned sections that could let rain slip through.
Then repair caulking and sealants around seams promptly, so they stay tight through every storm.
Seal Siding Overlap Joints
When siding boards overlap, tiny gaps at the joints and flashing seams can let wind-driven rain creep behind the cladding, so you need to seal them correctly.
You should confirm your siding materials match the manufacturer’s sealant recommendations and then apply joint sealing along each overlap seam. Use a continuous bead, not spot fills, and wipe any squeeze-out for a clean finish.
Check corners and connection lines where water can track.
- Dry weather only; seal after temperatures stabilize
- Caulk-compatible primer for rough or dusty surfaces
- Tool the bead to fully bridge the joint gap
- Recheck after curing for pinholes and voids
Inspect Flashing At Shear Edges
Carefully inspect the flashing at shear edges—those corners and junctions where the wall plane changes—because even small gaps or lifted seams can channel rain behind your siding and into the sheathing.
Get up close and look for missing sections, rusted or buckled flashing, and seams that opened. Verify the flashing materials are continuous through each changeover and that fasteners aren’t pulling it loose.
If you find movement, fix the attachment and re-align the metal so water sheds outward, not inward. Use appropriate sealing techniques at overlaps, ensuring a tight, durable bond.
Repair Caulking And Sealants
Re-seat and repair your caulking and sealants anywhere siding meets trim, flashing seams overlap, or joints change direction, because even a hairline crack can give rain a path behind the wall.
Pull out failed beadwork, clean dust and old filler, then match caulk types to the substrate and weather exposure. Use proper sealant application: tool smooth, keep gaps sealed, and don’t bridge movement joints—leave expansion space where needed.
- Check corners, window/door trim, and penetrations
- Replace brittle caulk, not just topcoat it
- Prime porous surfaces before applying sealant
- Re-caulk after dry, cool days for best cure
Fix Grading and Downspouts Draining to Walls
Fixing grading and downspouts that drain toward your walls starts with a simple check of where water actually goes.
Walk the perimeter after a rain and watch runoff paths. If you spot a low spot, fix the soil slope by adding compactable fill and reshaping it away from the foundation; this is one of the most reliable grading solutions.
Next, adjust downspout placement so each outlet discharges at least 5 feet from the wall, ideally onto splash blocks or underground drains.
Confirm drainage improvement by clearing clogs, extending leaders, and verifying the discharge lands on stable, dry ground.
Improve Ventilation in Bathrooms and Laundry Rooms
You should install exhaust fans properly so moist air leaves quickly instead of lingering on walls and ceilings.
Add humidity sensors or timers to make the fan kick on when levels rise and shut off when things dry out.
This simple setup reduces condensation and helps protect paint, drywall, and framing.
Install Exhaust Fans Properly
Proper exhaust fans protect bathroom and laundry walls by venting humid air outside, not back into the room. When you plan fan installation, choose the right exhaust fan types for the space size and humidity load.
Measure duct routes, keep bends minimal, and seal every joint to prevent leaks. Mount the fan housing securely, then connect it to rigid ducting that slopes slightly downward to the exterior.
- Verify the vent terminates outdoors with a backdraft damper
- Use correct wire gauge and a grounded connection
- Balance airflow with adequate fan CFM ratings
- Test operation and listen for rattles or airflow restrictions
Use Humidity Sensors Timers
Humidity sensor timers let your bathroom or laundry exhaust fan run only when moisture levels rise, instead of relying on guesswork or long manual run times.
You install the sensor so it triggers ventilation based on humidity control readings, then you set a short delay to clear lingering steam. As soon as moisture monitoring shows the air is dry, the fan shuts off automatically.
This reduces condensation on walls, ceilings, and grout while saving energy.
Test the fan after installation: shower, run a load, watch response time, and adjust sensitivity until it kicks in reliably.
Reduce Crawlspace Dampness Feeding Interior Walls
If crawlspace dampness rises, it can wick into the framing and eventually feed moisture problems in interior walls.
You can stop the cycle by targeting the crawlspace itself. Improve crawlspace ventilation so air moves through the space and dries surfaces instead of trapping dampness.
Lay moisture barriers on the ground to block evaporating water vapor, and seal seams and penetrations so the barrier actually works.
Lay moisture barriers on the ground to block evaporating vapor, and seal seams and penetrations so the barrier actually works.
Then inspect for leaks and standing water, and address any drainage issues fast.
- Check vents and airflow seasonally
- Repair duct gaps and block drafts
- Install continuous ground moisture barriers
- Seal plumbing and cable penetrations
Set Indoor Humidity Target (Aim for 30–50% RH)
Measure your indoor relative humidity (RH) with a cheap hygrometer and note the highs and lows.
Then keep it in the 30–50% RH range by running ventilation or dehumidification as needed.
If your RH stays above that range, adjust airflow or controls quickly to help prevent moisture from building up in the walls.
Measure Indoor RH Levels
Use a hygrometer to track your indoor relative humidity, then aim for 30–50% RH to help prevent condensation and damp materials.
You need to monitor humidity in every lived area, not just near windows, so you can catch spikes early. Place the sensor at chest height and away from drafts to get reliable readings.
Compare results over several days, and when numbers climb, assess ventilation—tight rooms can trap moisture even if you think airflow is fine. Track changes after showers, cooking, or rainy weather, and note which rooms run higher.
- Calibrate readings monthly
- Record highs and lows by room
- Note humidity after daily activities
- Assess ventilation patterns alongside readings
Maintain 30–50% Humidity Range
Once you’ve been tracking indoor RH levels, set a clear target so you can control moisture at the source: keep your home around 30–50% relative humidity. Use humidity control through proper ventilation, dehumidifiers, and HVAC settings. When RH climbs above 50%, you need moisture monitoring and quicker action. Aim for consistent readings, not spikes, and check sensors near bathrooms and bedrooms.
| RH level | What to do |
|---|---|
| <30% | Add ventilation |
| 30–50% | Maintain HVAC balance |
| >50% | Run dehumidifier |
| >60% | Inspect leaks fast |
Use a Hygrometer to Spot Wall-Risk Humidity
A simple hygrometer helps you catch wall-risk humidity before it turns into stains or peeling. Place it in problem areas—near windows, corners, and exterior walls—and check readings daily.
With hygrometer benefits, you get clear humidity monitoring signals, so you can act fast: run fans, adjust HVAC, or address leaks sooner. Keep relative humidity steady, and treat spikes as warnings, not normal weather swings.
Get clear hygrometer signals to respond quickly—run fans, adjust HVAC, or fix leaks—then treat RH spikes as warnings.
- Track RH trends, not single readings
- Compare indoor vs. outdoor humidity
- Log results during showers or cooking
- Aim for stable, safer RH levels
Spot Early Drywall Moisture Before It Spreads
When you notice subtle discoloration on drywall, take it seriously and feel for soft spots or swelling.
Check around window and baseboard caulk for gaps, and inspect plumbing fixtures, outlets, and hidden seams for leaks.
If you find any moisture signals, dry the area fast and address the source before it spreads.
Detect Discoloration And Soft Spots
How can you catch drywall moisture before it turns into a bigger problem? Start with eyes and touch: look for early discoloration, dark streaks, bubbling paint, and swelling corners.
Then use soft spot identification by pressing lightly near suspect areas; drywall that feels spongy or crumbly signals water intrusion from behind.
Pay attention to patterns—water travels along studs and ceilings, so discoloration causes can point to hidden plumbing or condensation.
- Check for rust halos around nails
- Notice peeling wallpaper or paint
- Feel ceilings and baseboards for give
- Smell musty odors near walls
Check Caulk Gaps And Leaks
Inspect caulk lines, seams, and window or door trim for tiny cracks or gaps, because even small leaks can seep behind drywall and spread fast.
Run your fingers along edges and look for peeling, shrinkage, or missing bead sections. Press the area lightly to see if it feels hollow or damp.
If you find gaps, clean the surface, remove failed caulk, and reapply fresh caulk with proper backing to seal joints tightly—this is smart caulk maintenance and supports leak prevention.
After curing, check again during rain or after watering. Repeat seasonally.
Look for Bubbling Paint and Soft Drywall Spots
Bubbling paint and soft drywall spots often signal trapped moisture behind your wall surface. When you notice bubbling paint, press lightly along the area and watch for paint blisters growing or seams separating.
If you tap and the spot feels spongy, you’ve likely got soft drywall that can’t hold structure. Catch it early before it spreads behind cabinets or near plumbing lines.
- Look for paint blisters, bubbling paint, or peeling edges
- Press test for give in the drywall (soft drywall)
- Check corners, outlets, and windows for wet-looking spots
- Turn on a flashlight and inspect for discoloration or swelling
Detect Musty Odors as a Moisture Warning
You should learn to spot musty smells early, since they often signal hidden moisture behind walls.
After any leak, rain, or plumbing issue, track where the odor shows up and whether it lingers or spreads.
If the smell returns or grows, don’t ignore it—investigate the source right away to prevent damage.
Identify Musty Smells Early
Why let damp conditions linger when your nose can catch the warning first? You should treat musty odors as an immediate moisture red flag and practice early detection.
Don’t wait for visible stains; your nose often notices before your eyes do. Step close to baseboards, window sills, and behind furniture, then take note of any persistent mildew-like smell. If you smell it, act fast: check ventilation gaps, confirm indoor humidity, and inspect wall edges for soft spots.
- Sniff corners and closets
- Use a hygrometer for readings
- Look for peeling paint at seams
- Follow smells to likely sources
Track Odors After Water Events
How quickly do musty odors show up after a leak? Often within 24–72 hours, especially behind walls where moisture detection is hardest. After any water event, you should sniff at vents, baseboards, and corners daily, and note when the smell intensifies. Use this quick log to track patterns and guide odor elimination:
| Location | Odor strength (0-3) |
|---|---|
| Baseboard | |
| Behind outlet | |
| Closet corner | |
| Ceiling seam | |
| Under window |
If odors linger after drying, you should suspect hidden moisture and act fast.
Find Rust Stains That Signal Trapped Moisture
Rust stains don’t just look unsightly—when you see reddish-brown streaks or spots on a wall, they often signal trapped moisture feeding corroding metal inside or behind the surface.
Reddish-brown streaks or spots often mean trapped moisture is corroding metal behind the wall—an issue to address promptly.
You can treat them as moisture indicators, not decoration. Use rust detection techniques by checking the stain pattern, probing lightly around it, and comparing nearby seams, fasteners, and outlets for signs of ongoing dampness.
- Look for vertical runs that track gravity and leaks
- Notice haloed discoloration where paint blisters
- Feel for cool, clammy drywall near the stain
- Inspect metal fixtures nearby for active corrosion
Address early to prevent spreading.
Check Baseboards and Trim for Swelling or Warping
Walk your room and inspect the baseboards closely for swelling or bubbling—those signs can mean moisture is getting trapped.
Next, check the trim for warping, gaps, or peeling paint, since even small shifts can let water move behind the surfaces.
If you spot any changes, address the source right away before the damage spreads.
Inspect Baseboards For Swelling
Inspect your baseboards and trim closely for swelling or warping, since moisture often shows up as bowed edges, raised paint lines, or gaps where the caulk used to seal.
As you do swelling detection, run your fingertips along seams and corners, and look for soft, bubbled, or discolored wood. If you catch early swelling, act fast to support moisture prevention.
- Press a thumb on suspect spots to test firmness
- Check caulk lines for cracking or separation
- Look for paint blistering near floor joints
- Use a flashlight at low angles for hidden gaps
Check Trim For Warping
Check your baseboards and other trim for warping as part of protecting your walls from moisture.
Walk the room and look for raised edges, gaps, or buckling along corners and doorways. Run your fingertips lightly over seams—you’ll feel swelling before it’s obvious.
Compare lengths at each wall; uneven lines often mean trapped humidity. Use moisture indicators like a damp meter or visible staining to confirm the source.
If trim flexes, remove affected pieces, dry the area thoroughly, and replace warped sections.
Keep up with trim maintenance by sealing joints and repainting on schedule.
Inspect Corners and Ceilings for First Leak Signs
When moisture starts to sneak in, corners and ceilings often show the earliest clues—so you should look for faint water stains, bubbling paint, or small cracks near seams, vents, and crown moldings.
As part of your corner inspections, scan tight junctions where walls meet ceilings; watch for dark rings that spread over days. Then do ceiling monitoring by checking around light fixtures, HVAC boots, and plumbing chases. Use your eyes first, then your phone flashlight to spot damp sheen at the edges.
- Look for rust streaks at fasteners
- Sniff for musty odors near corners
- Note peeling or blistered drywall paint
- Check caulk lines for separation
Use a Moisture Meter to Map Wet Drywall
Grab a moisture meter and scan the walls systematically so you catch wet spots fast.
You’ll quickly identify damp areas behind paint or near plumbing lines, then mark the affected drywall.
Finally, use those marks to direct drying efforts and keep the problem from spreading.
Scan Walls With Moisture Meter
Before you tear into repairs, use a moisture meter to scan the wall and pinpoint where moisture hides behind paint and drywall. Move the probes methodically across studs, outlets, and corners so you can map wet drywall fast.
You’ll get moisture meter benefits by separating normal dampness from problem zones, strengthening wall moisture detection before damage spreads.
- Mark readings on painter’s tape so you’ll track changes over time
- Check around plumbing lines and exterior seams where leaks start
- Take repeat measurements after the area dries to confirm improvement
- Photograph the map and label levels for cleaner repairs
Identify Damp Areas Quickly
How do you tell the difference between harmless humidity and wet drywall hidden behind paint? Start by using moisture assessment tools, especially a moisture meter, to scan the surface methodically.
You press probes against painted areas and note readings by zone, height, and wall section. Look for sudden spikes or consistent elevated values near baseboards, around outlets, and behind radiators—these are key damp detection techniques.
After the first pass, recheck any high-reading spots without guessing. Use your notes to map hot areas on a quick sketch, so you target repairs fast before paint conceals ongoing saturation.
Mark Drywall For Drying
After you’ve done your initial scan, use a moisture meter to map exactly where the drywall is still wet, not just where it might be. You’ll mark each reading on painter’s tape so your drying techniques target the right spots.
Move the probe slowly across seams, corners, and around fasteners; moisture detection works only when you measure consistently. Note higher values with arrows and dates, then plan airflow and dehumidification around those marks.
- Label studs and sheet edges with tape
- Record readings for daily comparison
- Focus fans on the wet zones first
- Recheck after 24 hours to confirm drying techniques
Do a Behind-the-Wall Check (Safer DIY Basics)
When you suspect moisture, you can’t fix the problem effectively until you see what’s happening behind the wall. Start with basic moisture detection techniques: use a moisture meter on drywall, check for soft spots, and look for staining patterns that trace pipes or leaks.
Next, choose a safer inspection path—open a small test area near the affected spot, not the whole wall. Shine a flashlight, feel for damp insulation, and inspect seams, fasteners, and plumbing runs.
If insulation is wet, consider wall insulation options like unfaced or moisture-resistant batts, then replace damaged materials after drying.
Know When to Call a Pro for Moisture Testing
Even if you’ve done a careful behind-the-wall check, some moisture issues need a trained eye to confirm the source and scope.
If you spot persistent staining, soft drywall, musty odor, or repeating condensation after cleanup, don’t guess—call for moisture testing. A pro can run readings in multiple locations, interpret hidden pathways, and recommend fixes that prevent return problems.
Consider getting a professional evaluation when humidity stays high, leaks are intermittent, or you’re planning repairs that could trap moisture.
- Visible mold or blistering paint
- Unexplained wet insulation
- Water intrusion from plumbing or roofs
- Health concerns or repeated failures
Dry the Area Fast: Then Verify It’s Dry
Start drying the affected area within hours—don’t wait for it to “dry on its own.” Run fans and, if you have it, a dehumidifier to pull moisture out of the air and materials, and keep airflow moving across the wall surface without blasting water deeper.
Next, verify it’s dry: use moisture detection tools to check the wall and nearby materials at several heights, not just the surface. Keep drying until readings stabilize at a safe level.
If you don’t have a meter, inspect edges, baseboards, and paint bubbling daily, and continue quick drying whenever dampness returns. Don’t rush—confirm before you stop.
Remove Wet Materials to Prevent Mold Growth
Remove any wet materials right away to limit moisture that fuels mold growth. You should pull out drywall, insulation, baseboards, carpeting, and damaged paper goods as soon as you can, and bag them to keep spores from spreading.
Use mold prevention practices by wearing gloves and a mask, then discard items that can’t be fully dried. Dry the remaining wall cavity fast; cracked insulation and soaked wood can stay damp behind finish layers. Install or repair moisture barriers during cleanup to block future saturation.
Wear gloves and a mask; discard anything you can’t fully dry, then quickly dry wall cavities and fix moisture barriers.
- Document wet extent and timing
- Ventilate while you remove materials
- Check seams and corners for lingering wetness
- Keep removed items sealed and labeled
Stop Airflow Issues That Keep Walls Damp
Fixing airflow problems is often what stops walls from staying damp, because moist air can get trapped in cavities and keep surfaces from drying.
You should seal gaps around windows, outlets, and plumbing penetrations so humid air can’t leak behind drywall. Use caulk or foam rated for building envelopes, then install airflow barriers where needed to block drafts.
Check for poorly sealed rim joists, attic hatches, and vent chases, and repair them promptly.
After you improve sealing, verify ventilation and pressure balance so you maintain condensation control without pushing moisture into wall cavities.
Reduce Temperature Swings That Cause Condensation
Even if you seal airflow leaks, big temperature swings can still drive condensation on cool wall surfaces. You need steady temperature control to prevent moisture from forming inside the wall cavity. Stabilize indoor temperatures day to night, and run HVAC consistently, especially in basements and bathrooms.
Even sealed leaks can’t stop condensation—big temperature swings cool wall surfaces. Keep indoor temps steady and HVAC running, especially in basements and bathrooms.
Check that your insulation effectiveness matches the local climate; under-insulated areas cool quickly when outdoor temps drop.
- Use programmable thermostats to reduce abrupt changes
- Seal interior window frames to limit cold drafts
- Add insulation to exterior walls and cantilevered sections
- Maintain proper ventilation so humidity doesn’t spike when temps change
Pick the Right Primer for Moisture-Prone Drywall
When your drywall’s moisture-prone, you should start by choosing a moisture-resistant primer that seals the surface.
Next, verify the drywall type and finish so you use the primer formulated for that specific substrate and texture.
Then apply a vapor-blocking sealer where needed to slow moisture transfer before paint.
Choose Moisture-Resistant Primer
Choosing the right moisture-resistant primer sets the foundation for long-lasting, dry walls, especially when your drywall lives in humid areas like bathrooms, basements, or near exterior walls.
You should pick primers designed for moisture barriers and strong adhesion so water can’t creep into the paper. Select from primer types based on your exposure level: choose a mold-resistant formula for damp corners, and a sealer for exterior-adjacent walls.
Confirm it’s compatible with your topcoat and apply it evenly for full coverage.
- Look for mold inhibitors
- Prefer high-bond sealing
- Use vapor-permeable options
- Match primer to topcoat
Verify Drywall Type And Finish
Before you prime, verify your drywall type and finish so you can match the coating to the surface moisture risk.
Start by identifying the drywall materials: look for green, blue, or regular paper-faced sheets, and check any notes from the builder.
Next, inspect the finish options on your wall—smooth, taped and ready, skim-coated, or textured.
Moisture-prone areas need a primer that bonds well without trapping moisture behind brittle paper.
If you see soft spots, peeling, or blistering, stop and repair before priming.
Then choose a primer rated for your surface and finish profile.
Use Vapor-Blocking Sealer
A vapor-blocking sealer can help protect moisture-prone drywall by slowing water vapor movement while still letting the wall stay workable for finish coats.
When you’re prepping, choose a primer rated for vapor sealers and designed as a moisture barrier, not a generic bonding primer. Apply it evenly with proper coverage, then let it cure before taping and painting. This reduces swelling, bubbling, and peeling near bathrooms, basements, or exterior walls.
- Check humidity levels and dry times before sealing
- Follow manufacturer mil thickness and recoat windows
- Seal fastener heads and seams for continuous protection
- Test a small area to confirm finish coat adhesion
Use Mold-Resistant Paint on Affected Areas
When you spot moisture-related discoloration or lingering dampness, apply mold-resistant paint directly to the affected areas to stop the cycle from continuing.
When you see moisture discoloration or lingering dampness, apply mold-resistant paint to affected areas to stop the cycle.
Scrape off any loose paint, dust, and residue, then let the wall dry fully. You should follow the manufacturer’s coverage and cure time, since early recoating can trap moisture.
Use proven mold prevention strategies by choosing a coating labeled mold- and mildew-resistant, ideally with antimicrobial additives.
Apply with clean brushes and rollers, using even pressure and two coats where stains persist.
Keep edges feathered for smooth paint application techniques and consistent adhesion.
Seal Cracks and Control Joints Against Water Entry
Inspect cracks and control joints for signs of moisture pathways so you can catch the problem early.
Seal expansion joints properly with the right exterior-grade material, and use water-resistant crack fillers to block water entry.
When you seal tightly and consistently, you help prevent leaks that can lead to mold and damage.
Inspect Cracks For Moisture Pathways
Before you apply any sealant, walk the walls at eye level and look for cracks, spalling, and open control joints that could act like tiny capillaries for water.
You’ll spot early moisture detection clues by watching for dark streaks, damp patches, and rust at anchors. Use crack evaluation to note width, direction, and whether the crack reaches masonry ties or exterior stucco.
Then, verify airflow and leaks by touching and inspecting for soft mortar, efflorescence, or bubbling paint.
- Mark active seep points for later repair
- Check crack edges for crumbling or delamination
- Look for water stains after storms
- Note any recurring wetting patterns
Seal Expansion Joints Properly
After you’ve identified which joints actually move, you can seal expansion joints and control joints to stop water from wicking into the wall.
Clean out debris and old caulk, then dry the joint fully. Choose expansion joint materials that match the joint width and movement rating, and install a backer rod if needed to control depth and bond.
Apply sealant using proper sealing techniques: tool it firmly, keep it smooth, and avoid air gaps. Inspect edges after cure, then recoat or touch up any shrinkage.
Reseal on a regular schedule to prevent leaks before stains spread.
Use Water-Resistant Crack Fillers
Choose water-resistant crack fillers that match your wall’s material and the crack width, then press them into the crack to block moisture pathways. You’ll control water entry when you use effective application: clean out loose debris, dry the area, and apply filler with firm pressure so it bonds fully.
- Check the crack depth and width before buying water resistant materials.
- Prime porous surfaces for stronger adhesion.
- Tool the surface flush to shed water, then cure fully.
- Reinspect and reapply if gaps reappear after freeze-thaw cycles.
Caulk and Use Backer Rod at Expansion Gaps
When expansion gaps open and close with temperature shifts, you need more than caulk to keep moisture out. Choose caulk types designed for movement, like elastomeric sealants, not rigid fillers.
Push a backer rod into the gap first, so you control depth and prevent three-sided adhesion. This keeps the sealant flexible as the wall flexes. Cut the backer rod slightly larger than the gap, then compress it into place.
Tool the caulk tightly along both edges, leaving no voids. Let it cure fully before exposing it to rain or washing.
Add Waterproof Wall Systems in High-Risk Zones
First, you should identify high-risk moisture zones like basements, splash areas, and exterior wall sections near grade.
Then, you need to install waterproof wall systems—such as liquid-applied membranes or water-resistant coatings—specifically in those areas.
Finally, you verify proper installation around penetrations so water can’t find weak points.
Identify High-Risk Moisture Zones
Even if your walls look solid, moisture usually starts where water lingers or wicks in—so you should map high-risk zones before you install any waterproof wall systems.
Start by scouting splash lines near sinks, showers, and HVAC returns, plus damp corners where plumbing runs. Use moisture detection techniques: pin meters, infrared scans, and simple tape tests with controlled observations.
Mark every area that sees condensation, rain intrusion, or ground moisture. Then decide which wall protection strategies match each hotspot, prioritizing repeating leaks and low-ventilation spaces.
- Exterior corners and window reveals
- Areas above basements or slab edges
- Behind toilets, tubs, and wet walls
- Low-lying rooms with poor airflow
Install Waterproof Wall Systems
Install waterproof wall systems in your highest-risk zones so water can’t penetrate or wick into the wall assembly.
You should apply waterproof materials at the right layers: behind cladding, within exterior sheathing, and over seams and penetrations. Use continuous membranes, taped connections, and sealed corners so no path remains for moisture.
Pay close attention to flashing interfaces at windows, doors, and rooflines; install them correctly to direct water outward.
Choose proven installation techniques, including overlapping membrane laps, correct fastener placement, and compatible sealants.
Finally, inspect workmanship and test for gaps before finishing, so your wall stays dry.
Install a Vapor Barrier Correctly for Your Climate
When you install a vapor barrier, your climate determines where it goes and how you tape and seal it. Choose vapor barrier materials suited to your climate considerations—use “warm-side” placement in cold regions and “perm-aware” strategies in hot-humid areas.
Choose vapor barrier materials for your climate—warm-side in cold regions, perm-aware in hot-humid areas. Tape and seal accordingly.
Keep the sheet continuous, overlap seams, and tape every joint so air can’t bypass the barrier. Use compatible tapes and flashing at corners, outlets, and window trim.
- Verify direction based on temperature swings
- Seal penetrations with proper gaskets
- Maintain full contact with framing
- Protect the barrier from punctures and tears
Avoid Trapped Moisture When Adding Insulation
To prevent trapped moisture, you need to think about what happens after you close the wall cavity with insulation.
You must control air leaks first, because warm, moist air getting inside turns into condensation when it cools. Seal penetrations around wiring, plumbing, and outlets, then add appropriate moisture barriers in the right plane for your climate.
Choose insulation types that match conditions—open-cell foam can dry inward, while batts need perfect fit and venting strategy. Keep gaps minimal, use taped seams, and maintain continuous barrier coverage.
If you spot wet framing, stop and dry before insulating.
Upgrade Attic Insulation to Cut Condensation Risk
After you’ve sealed air leaks and set the right moisture control approach for walls, the next place condensation usually shows up is the attic.
When you upgrade attic insulation, you reduce cold-spot surfaces where moisture can form. Start by inspecting coverage, then choose insulation materials that match your climate and attic type.
Don’t just add thickness—ensure proper attic ventilation so warm, humid air can’t linger against sheathing. Use a vapor-smart plan to keep the temperature stable year-round, and verify depth at rafters and eaves.
Ensure proper attic ventilation so warm, humid air can’t linger on sheathing—use a vapor-smart plan and verify insulation depth.
- Measure current R-value and gaps
- Upgrade baffles for attic ventilation
- Select insulation materials, not just bulk
- Seal around penetrations on insulation, not rafters
Seal Rim Joists to Prevent Air Leaks and Wetting
Seal rim joists to stop air leaks that pull moisture into wall cavities. Start by inspecting the rim area for gaps, splits, and poorly fitted boards.
Clean off dust, then apply foam sealant or caulk along seams where the rim meets the foundation and subfloor.
If you’re adding or revising rim joist insulation, pack it tightly so it doesn’t leave voids that invite airflow.
Focus on air leak prevention at corners, sill plates, and plumbing penetrations.
After sealing, check for drafts with a hand-held tester and patch any missed spots. This reduces wetting and condensation inside walls.
Add Drip Edges and Flashing to Stop Rain Seepage
Adding drip edges and properly installed flashing helps stop rainwater from seeping behind siding and into wall assemblies. You need solid drip edge installation so water falls clear of the wall, not back behind trim.
Install metal flashing at roof-wall intersections, window heads, and wherever changes occur, then overlap pieces in the right shingle direction to shed water. Keep edges tight and seal only where manufacturer guidance allows.
- Use corrosion-resistant metal and proper fasteners
- Flash above and integrate with housewrap WRB
- Check seams, then do flashing maintenance
- Inspect after storms for lifted edges
Clean and Repair Gutters and Downspouts
Clean gutters and tune your downspouts so water can move away from your walls quickly and consistently.
Do gutter maintenance twice a year, removing leaves, grit, and mildew buildup. Check for sagging sections and reattach loose brackets so rainwater flows to the downspouts, not over the edges.
Inspect downspouts for clogs and flush them with a hose. Repair cracks with gutter sealant or replace damaged sections.
Make sure your downspout installation directs runoff at least 4 feet from the foundation using extensions and splash blocks. Keep downspout elbows tight to prevent leaks.
Fix Foundation Cracks Before They Wet Interior Walls
Once you spot foundation cracks, you should fix them quickly to keep water from seeping into the wall system. Don’t wait for damp drywall or musty odors—address the entry point first.
Use solid foundation repair techniques: clean out loose debris, confirm the crack isn’t actively expanding, and seal with an appropriate injection or patching material.
- Inspect crack width and movement over a few days
- Stabilize with epoxy injection when needed
- Apply exterior sealing where accessible
- Finish with interior wall coatings to resist incidental moisture
After sealing, monitor humidity and recheck in wet seasons.
Improve Window-Well Drainage Near Exterior Walls
Proper window-well drainage keeps exterior walls drier by directing runoff away from the foundation instead of letting it pool around the opening. You should clear debris, leaves, and silt, then confirm the weep holes and outlet flow freely. Install drainage solutions like a gravel sump or perforated drain leading to daylight or a sump, keeping the slope away from the wall. Tighten any loose grates and verify downspouts discharge far from the window well. For window well maintenance, track problems before they spread:
| Check | Risk | Fix |
|---|---|---|
| Blocked weeps | Pooling | Clean |
| Flat slope | Wet wall | Regrade |
| No outlet | Seepage | Add drain |
| Loose grate | Overflow | Secure |
| Missing gravel | Mud clog | Refill |
Use Flexible, Expansion-Friendly Sealants on Trim
Choose flexible, expansion-friendly sealants when you caulk around exterior trim so they can move with temperature and humidity changes instead of cracking or pulling away.
Use sealant benefits to slow water intrusion at joints where wood, metal, and masonry meet. Check gaps before they widen, then apply a smooth bead with consistent coverage for solid trim maintenance.
- Select exterior-grade, paintable elastomeric sealants
- Tool the bead to guarantee full contact on both sides
- Remove old, failing caulk down to sound material first
- Reapply where you see shrinkage, gaps, or peeling paint
Maintain Bathroom Fans and Confirm Duct Venting
Maintain bathroom ventilation by regularly inspecting your fan and verifying the duct vents outside.
Turn off power, remove the grille, and clean dust and lint from the fan blades and housing. Check the fan’s airflow by running it briefly and feeling for strong exhaust at the grille. Perform fan maintenance every few months, especially after heavy use.
Then, confirm duct inspection: follow the duct run to the roof or exterior cap, ensuring it’s not crushed, disconnected, or blocked by debris or bird nests. Make sure the outside vent damper opens freely during operation.
Vent Kitchen Moisture to the Outside
1 effective way to protect your walls is to vent kitchen moisture outdoors. When you run your kitchen exhaust hood, you pull steam and cooking byproducts away from cabinets, ceilings, and nearby walls.
To strengthen humidity control, confirm the duct routes straight outside, uses a proper cap, and avoids kinks that restrict airflow. Also, keep fans on for a few minutes after cooking so moisture clears.
Confirm ducts route straight outside with a proper cap—avoid kinks, and run the fan a few minutes after cooking.
- Check duct connections for tight seals
- Use insulated ducting through cool spaces
- Clean filters and fan blades regularly
- Verify outside vent damper opens freely
Avoid Drying Mistakes That Leave Moisture Inside
Even with good venting, you can still trap moisture in your home if you dry the kitchen the wrong way—so pay attention to what happens after you cook.
Don’t just wipe counters and stop; use drying techniques that pull water off cabinets, under sinks, and around the dishwasher.
Keep fans running until surfaces feel fully dry, not just cool to the touch.
Avoid stacking wet dish towels or leaving damp sponges in enclosed drawers.
Check grout lines, caulk seams, and floor edges daily at first.
Practice moisture management by blotting, then ventilating, until humidity drops.
Keep Sprinklers and Hoses Away From Exterior Walls
Tending to your landscaping needs the same attention you give your indoor finishes—when you run sprinklers or stretch hoses, keep them off exterior walls. You prevent water from creeping into cracks, siding gaps, and trim by planning sprinkler placement and doing solid hose management.
Aim irrigation away from foundations, decks, and stucco edges, and shut off systems before overspray reaches the building.
Aim irrigation away from foundations and stucco edges, and shut off sprinklers before overspray reaches the building.
- Install directional heads and adjust angles regularly
- Keep hoses on lawns; use drip attachments for beds
- Add moisture barriers behind vulnerable siding seams
- Follow consistent exterior maintenance after irrigation season
Run a Seasonal Moisture Inspection Checklist
After you’ve set sprinklers and hoses away from the building, run a seasonal moisture inspection to catch problems early. Grab a flashlight and check walls at corners, around windows, and where downspouts discharge. Look for peeling paint, soft drywall, bubbling, musty odors, and rust stains. Verify caulk lines and the condition of moisture barriers behind cladding. Walk the base trim for gaps and ascertain grading sheds water. Follow this checklist as seasonal maintenance:
| Area | What to check | Action |
|---|---|---|
| Exterior | Staining | Seal/repair |
| Windows | Caulk gaps | Re-caulk |
| Base trim | Cracks | Patch & paint |
| Inside corners | Damp smell | Dry & investigate |
Document Findings and Repairs to Spot Repeat Leaks
Once you finish your seasonal inspection, document what you find right away so you can spot repeat leaks before they spread.
Use leak documentation to record every wet spot, stain, crack, and temperature difference, then tag each location on your moisture mapping plan. Take clear photos, note dates, and log weather or plumbing activity that matches the problem.
Use leak documentation to record wet spots, stains, cracks, and temperature differences—then tag each spot on your moisture map with photos and dates.
Mark what repairs you made, who did them, and when you’ll recheck.
- Photograph affected areas with timestamps
- Record readings: moisture level, humidity, and source guess
- Track repair details and materials used
- Schedule follow-up checks tied to each note
Understand Health Risks From Persistent Mold Moisture
If moisture keeps lingering in your walls, it can trigger mold growth and start affecting your health and comfort.
You may notice musty odors, worsening allergies, or asthma flare-ups as spores spread through indoor air. Persistent dampness can irritate your eyes, nose, and throat, and it can also contribute to persistent coughing and fatigue.
People with weakened immune systems face higher risks, including more severe respiratory infections.
To reduce exposure, you should prioritize mold prevention strategies like controlling humidity and ensuring materials dry quickly, supporting healthy indoor conditions and minimizing health effects.
Follow This Step-By-Step Plan to Protect Walls
Start protecting your walls with a clear, step-by-step plan: first, locate the moisture source so it can’t keep feeding mold or damaging materials.
Next, dry the area fast using fans and dehumidifiers, then repair any leaks or seepage.
Keep up moisture prevention with routine inspections after storms, plumbing work, or appliance use.
Perform wall maintenance by checking caulk, grout, and exterior seals; replace cracked sections promptly.
- Use a moisture meter to find hidden damp spots
- Fix gutters and downspouts to divert water away
- Vent bathrooms and kitchens; clean exhaust fans
- Apply a breathable water-repellent when surfaces stay dry
Frequently Asked Questions
Can Painting Over Damp Drywall Trap Moisture and Worsen Damage?
Yes—painting over damp drywall can trap moisture and worsen damage. You should pause, find and fix the leak, dry the area fully, then use moisture prevention and drywall maintenance. Otherwise, you’ll invite mold, bubbling paint, and faster deterioration.
How Soon Should I Remove Wet Insulation After a Leak?
Act fast: remove wet insulation within 24–48 hours of the leak stopping. Use careful wet insulation removal, then follow timing considerations by drying the cavity thoroughly to prevent mold growth, lingering odors, and structural damage.
Do Dehumidifiers Fully Replace Fixing the Underlying Moisture Source?
No, a dehumidifier can’t fully replace fixing underlying moisture sources. It reduces humidity, but dehumidifier limitations mean it can’t stop leaks, condensation, or poor ventilation. You still need to find and repair the source to prevent mold.
What’s the Safest DIY Way to Dry Walls Without Mold Growth?
You can dry walls safely by combining ventilation techniques with moisture barriers: open windows, run fans to move air, use a dehumidifier, and keep surfaces warm. Stop immediately if you see bubbling paint or lingering musty odor.
When Does Musty Odor Mean Hidden Moisture Behind Walls?
Musty odor usually means hidden moisture is already behind the wall, often within days. You should treat it as a moisture detection clue: check musty odor sources like leaks, condensation, or wet insulation, and dry/inspect fast.
Conclusion
By spotting moisture at its source—roof, pipes, HVAC, and window gaps—you stop dampness before it spreads. Stick to seasonal checks, document every finding, and fix repeat leaks fast. You’ll protect your walls, preserve finishes, and reduce mold risk. Start now with a clear plan: inspect, seal, repair, and monitor. When you act early, you’ll avoid costly damage, unhealthy air, and lingering stains. Don’t wait—prevent problems, protect property, and breathe easy.
