
Can Nano Tape Be Used on Painted Walls? What You Should Know
You can use nano tape on painted walls if you take precautions: make sure paint is fully cured, the surface is clean and smooth, and you test a small hidden spot first. It bonds via surface contact rather than chemical glue, so glossy or satin finishes work best while flat, chalky, or fresh paint are risky. Apply and remove slowly at a low angle to avoid peeling. Keep weight limits in mind, and keep going to learn practical tips and alternatives.
Quick Answer: Can Nano Tape Damage Painted Walls?
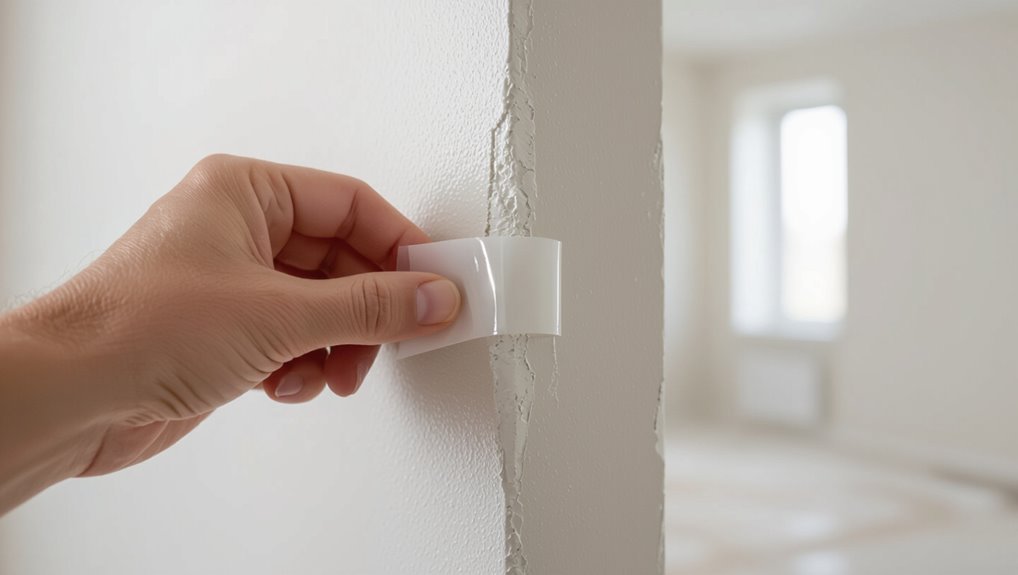
Wondering if nano tape will wreck your paint? You can usually use it safely if you focus on nano tape safety and proper wall preparation.
Clean, dry surfaces and cured paint reduce risk. Test a small hidden spot first, avoid textured or fresh paint, and remove the tape slowly at a low angle.
These steps minimize peeling or residue.
What Is Nano Tape and How Does It Work?
You’ll find nano tape is usually made from a clear polymer gel backed by a thin film or foam, sometimes with microscopic fillers to boost strength.
It sticks using van der Waals forces and a tacky surface layer that conforms to tiny surface irregularities for grip.
Understanding those materials and that adhesion mechanism helps you judge how it’ll behave on painted walls.
Composition And Materials
Nano tape blends a sticky polymer matrix with microscopic silica or acrylic beads and an adhesive layer that grips surfaces through van der Waals forces rather than chemical bonding.
You’ll recognize nano tape materials for their flexibility, transparency, and washable reuse.
Consider adhesive properties, thickness, and backing when choosing tape for painted walls.
- polymer matrix
- silica/acrylic beads
- washable reuse
- backing thickness
Adhesion Mechanism
When you press this tape onto a painted wall, its soft polymer surface conforms to microscopic bumps and the embedded silica or acrylic beads create countless tiny contact points that cling via van der Waals forces rather than a chemical bond.
You rely on adhesion science: surface energy, contact area, and cleanliness dictate tape performance, so prep the wall and avoid oils or loose paint for reliable hold.
Which Painted Walls Will Nano Tape Stick To?
Curious which painted surfaces will hold nano tape? You’ll find success where adhesive properties meet good wall compatibility: smooth, clean, and dry finishes.
Avoid textured or crumbly areas. Consider weight and duration before applying.
- Smooth glossy or satin finishes
- Properly cleaned semi-gloss walls
- Sealed or primer-coated surfaces
- Non-porous, well-cured paint
Paint Types That Increase Damage Risk (Flat, Chalky, New Paint)
Because flat, chalky, and freshly painted surfaces don’t bond well, you’ll risk peeling or paint lift if you apply strong adhesives to them.
Flat paint risks include low cohesion and weak adhesion. Chalky finishes shed particles that break tape bond. New paint needs curing; skip immediate mounting.
Prioritize proper surface preparation—cleaning, testing adhesion, or using gentler mounting options to reduce damage.
How Wall Texture Affects Nano Tape Adhesion
If your wall is smooth, nano tape will usually stick more firmly than on rough or heavily textured surfaces.
Porous finishes can soak up adhesives and weaken the bond, so you’ll want to test small areas first.
Check that the painted texture is compatible with nano tape before relying on it for heavier items.
Smooth vs. Rough Surfaces
When you press nano tape onto a smooth, painted wall, it forms a near-continuous bond with the surface, maximizing contact area and shear strength.
On rough or textured paint, however, the tape only touches peaks and grips less effectively, so hold capacity drops and failure is more likely at lower loads.
- Smooth surfaces: better adhesion differences, higher durability concerns addressed
- Rough surfaces: texture impact reduces grip
- Surface preparation and paint compatibility matter
- Application tips: press firmly, test load
Porous Wall Finishes
Though porous wall finishes soak up some of the nano tape’s adhesive layer, you can still get a strong hold by understanding how texture and porosity change contact mechanics.
On porous surfaces, uneven peaks reduce real contact area and increase paint absorption, so press firmly, allow longer dwell time, and choose larger contact patches.
Pre-cleaning and testing a small area minimizes failure.
Painted Texture Compatibility
Because texture changes how much of the nano tape’s adhesive actually touches the surface, you should match tape size and application technique to the paint finish: smoother paints give full contact and higher peel strength.
Light orange-peel or eggshell textures need larger pads and firmer pressure to bridge valleys.
Heavy knockdown or popcorn surfaces may never achieve a reliable bond without flattening or using an intermediate mounting plate.
- Assess paint finish compatibility
- Use larger pads on textured walls
- Apply firm pressure to bridge valleys
- Consider mounting plates for heavy textures
How Humidity and Temperature Affect Nano Tape
If you store or apply nano tape in very hot, cold, or humid conditions, you’ll notice its stickiness change because temperature and moisture directly alter the adhesive’s physical properties.
You should monitor humidity effects and temperature influences before mounting items: high humidity can soften and weaken the bond, extreme cold can make it brittle, and fluctuating conditions may cause gradual failure—so plan placement accordingly.
How Much Weight Can Nano Tape Hold?
When you’re deciding whether nano tape can hold a particular object, check both the tape’s rated load per strip and the surface area contact. Manufacturers often quote a few pounds per 1–2 cm width, but real-world capacity depends on how much tape you use and how well it adheres to your painted wall.
Use these tips to assess weight limits and load capacity:
- Match tape width to item base
- Clean and dry paint first
- Use multiple strips evenly
- Test with gradual loads
Short-Term vs Long-Term Use: What to Expect
After testing load limits and prepping the surface, you’ll want to evaluate how nano tape performs over hours versus months. You’ll notice short term benefits like strong grip and no marks, but long term consequences may include adhesive residue or paint lift. Use the table to compare expectations.
| Timeframe | Expectation | Risk |
|---|---|---|
| Hours | Firm hold | Low |
| Days | Stable | Moderate |
| Months | Weakened | Higher |
How to Test Nano Tape on a Small Area
Start by cleaning a small patch of the painted wall with a mild cleaner and let it dry completely.
Apply a strip of nano tape, press firmly for a few seconds, and leave it for 24–48 hours.
Inspect for any paint lift, residue, or discoloration before using the tape more broadly.
Clean A Small Patch
Before applying nano tape to a visible spot, clean a small patch of wall so you can test adhesion and paint reaction; pick a low-profile area like behind a picture, wipe gently with a mild cleaner, rinse, and let it dry fully before sticking the tape.
This surface preparation step helps guarantee paint protection and reduces risk.
- Choose hidden test spot
- Use mild, non-abrasive cleaner
- Rinse and air dry completely
- Note paint finish and condition
Apply And Inspect
With the test patch clean and dry, press a short strip of nano tape onto that hidden area and smooth it flat with your fingers, removing any air pockets.
Leave it 24–48 hours, then peel slowly at a 90° angle.
Note resistance for adhesion testing and inspect for finish lift or residue.
Record findings for surface evaluation before wider use.
Step-by-Step Wall Prep for Best Nano Tape Adhesion
1 clear prep routine will make the difference between nano tape that holds and tape that peels—so you’ll want to follow each step precisely.
Clean and dry the area, assess texture and paint compatibility, and consider environmental factors and weight limits.
Do adhesive testing on a small spot to verify no damage.
- wall cleaning
- surface preparation
- texture assessment
- removal strategies
How to Apply Nano Tape for Pictures and Decor
Now that you’ve prepped the wall and confirmed the paint and texture are compatible, it’s time to apply nano tape for pictures and decor. You’ll measure, mark, cut tape strips, press firmly, and test weight limits. For varied nano tape applications and decorative displays, follow placement guides below.
| Item | Size | Placement |
|---|---|---|
| Frame A | 8×10 | Centered |
| Frame B | 11×14 | Cluster |
| Shelf | Small | Evenly spaced |
Safe Removal Techniques to Avoid Peeling Paint
When you remove nano tape, pull it back slowly at a low angle to reduce stress on the paint.
If any adhesive stays behind, use a gentle solvent like isopropyl alcohol or a mild soapy solution to lift residue without damaging the finish.
Test your chosen removal method on a small, hidden area first so you’re sure it’s safe for your paint.
Proper Peeling Angle
Peel tape back slowly at a low, consistent angle—typically between 45° and 90° from the wall—so you reduce the chance of lifting paint; keeping the tape close to the surface rather than yanking it straight off helps the adhesive separate cleanly without tugging on the paint layer.
Use gentle peeling techniques for wall protection and steady pressure.
- Pull slowly
- Keep close to surface
- Maintain 45°–90°
- Support surrounding paint
Residue Removal Methods
1 simple trick for removing leftover tape adhesive is to work from least to most aggressive methods so you avoid damaging the paint: start with a soft eraser or microfiber cloth and mild soapy water,
then move to a citrus-based adhesive remover or rubbing alcohol applied sparingly, and only use stronger solvents or a plastic scraper if the residue resists—always test a hidden spot first and dab gently to prevent lifting the paint.
Identify residue types, choose appropriate removal tools, test, and proceed slowly to protect finish.
How to Fix Paint Damage Caused by Tape
If tape has lifted or torn your paint, you can usually restore the finish without a full repaint by evaluating the damage, preparing the surface, and using the right products to blend repairs.
Use careful paint repair techniques and wall surface preparation to match texture and sheen.
Use careful paint repair and surface prep to seamlessly match texture and sheen.
- Clean and sand edges
- Fill chips with spackle
- Prime exposed areas
- Feather and touch up paint
Nano Tape vs Alternatives for Painted Walls
When you need a temporary hold that won’t risk your paint, nano tape offers a low-profile, reusable option that sticks with micro-adhesion rather than heavy glue.
Compared with traditional masking tape, painter’s tape, or mounting putty, it typically leaves less residue and reduces the chance of lifting delicate finishes.
You’ll weigh nano tape benefits against alternative solutions, using adhesive comparisons to prioritize wall protection and ease of removal.
Best Nano Tape Products and What to Look For
When choosing nano tape for painted walls, you’ll want to compare product strength and hold so it supports your items without failing.
Check the surface compatibility guide to match tape to your paint type and finish.
Also look for low-residue formulas and follow removal tips to protect the paint.
Product Strength And Hold
Choosing the right nano tape comes down to two things: how much weight it can bear and how reliably it stays stuck over time.
You’ll want a strength comparison and tests of surface durability before buying. Consider these points when evaluating hold and longevity:
- Maximum load rating
- Repeated-stick performance
- Residue and aging tests
- Environmental resistance
Surface Compatibility Guide
1 clear rule will help you pick the right nano tape for painted walls: match the tape’s adhesive properties to your paint type and finish.
Check product specs for compatible adhesive types (removable, permanent, low-tack).
Consider surface preparation—clean, dry, and dust-free.
Choose tapes labeled safe for glossy, semi-gloss, or matte surfaces and test a small hidden area before committing.
Residue And Removal Tips
Because removal is where most users judge a nano tape, prioritize products that advertise low-tack or removable adhesives and have proven residue-free claims—then verify by testing on an inconspicuous patch for at least 24 hours before full use.
You’ll learn common residue types and safe removal techniques. Test, peel slowly, use heat or solvent sparingly, and clean any trace promptly.
- Test on hidden spot
- Peel slowly
- Use mild heat
- Apply gentle solvent
Common Mistakes People Make With Nano Tape
When you rush into using nano tape without prepping the surface, you’ll likely see it peel or leave residue; that’s one of the common nano tape mistakes tied to improper surface preparation.
You’ll also err by overloading weight limits, applying to damp or textured paint, reusing worn strips, or stretching tape while sticking.
Follow instructions, test a small spot, and respect load ratings.
Real User Scenarios When Nano Tape Is a Smart Choice
If you need a temporary, damage-free mounting solution, nano tape shines in small-scale, short-term jobs like hanging holiday decor, securing posters, or keeping throw rugs from slipping on painted floors.
You’ll find user scenarios and user experiences showing practical applications, creative solutions, installation tips, common issues, success stories, and design ideas.
- Hanging lightweight art
- Seasonal decorations
- Cable management
- Non-slip rugs
When Not to Use Nano Tape (Rentals, Antiques, Valuable Finishes)
Nano tape works great for quick, low-risk jobs, but you should avoid it on surfaces where even minor residue or finish changes would cause real harm.
If you rent, rental concerns matter—don’t risk losing a deposit over stubborn marks.
Likewise, skip nano tape on antiques or valuable finishes; prioritize antique preservation and consult professionals to avoid irreversible damage to delicate surfaces.
Quick Checklist: Should You Use Nano Tape on Your Wall?
Wondering whether it’s safe to use nano tape on your wall? Check basics: surface, paint age, weight, and exit plan.
Use this quick checklist to decide between nano tape and tape alternatives.
Use this quick checklist to choose nano tape or gentler alternatives for safe, damage-free wall mounting.
- Test on an inconspicuous spot first for wall safety
- Confirm paint is fully cured
- Limit weight and duration
- Have gentler tape alternatives ready for delicate finishes
Frequently Asked Questions
Can Nano Tape Leave a Residue Odor or Chemical Smell?
Yes — you might notice a faint chemical smell from nano tape’s adhesive properties, especially fresh rolls; you’ll find surface compatibility affects intensity, and odors usually fade, though prolonged contact can leave minimal residue you’ll remove.
Is Nano Tape Safe Around Children and Pets?
Absolutely—you won’t need hazmat suits: nano tape’s generally non-toxic, so you can prioritize child safety and pet safety, but don’t let kids or pets chew it, clean surfaces beforehand, and test small areas first.
Will Nano Tape Yellow or Degrade Over Time on Painted Surfaces?
Generally, nano tape can yellow or degrade over time, especially with heat or sunlight exposure. You’ll see variable long term durability depending on surface compatibility, paint quality, and removal frequency, so test a small area first.
Can Nano Tape Be Used Outdoors on Painted Exterior Walls?
About 70% of adhesive failures outdoors occur from UV and moisture—yes, you can use nano tape on painted exterior walls, but you’ll want outdoor durability and weather resistance-rated tape, clean surfaces, and occasional checks for loosening.
How Does Nano Tape Interact With Silicone or Caulked Seams?
Nano tape usually won’t bond well to silicone or fresh caulk; you’ll experience poor adhesive compatibility and possible failure. Let the caulk cure, test a small area, and use surface protection to avoid tearing or residue.
Conclusion
You can often use nano tape on painted walls, but don’t throw caution to the wind. It sticks best to smooth, fully cured, satin or semi-gloss paint and can pull or lift flat, chalky, or newly painted surfaces. Test a hidden spot, limit weight and time, and avoid rentals, antiques, or valuable finishes. When in doubt, choose removable hooks or low-tack alternatives to keep your walls safe as a house of cards.
