
Can Oil Paint Be Used on Walls? Pros and Cons
Yes — you can use oil paint on walls when you want extreme durability, superior washability, and a rich, glossy finish. It’s great for high-traffic or moisture-prone areas but dries slowly, smells strongly, and needs solvent cleanup and careful ventilation. Prep and priming are essential to avoid adhesion problems. If you’re okay with longer cure times and stronger VOCs, oil can be a smart choice, and below you’ll find practical tips and comparisons to help decide.
Who This Guide Is For and What You’ll Learn
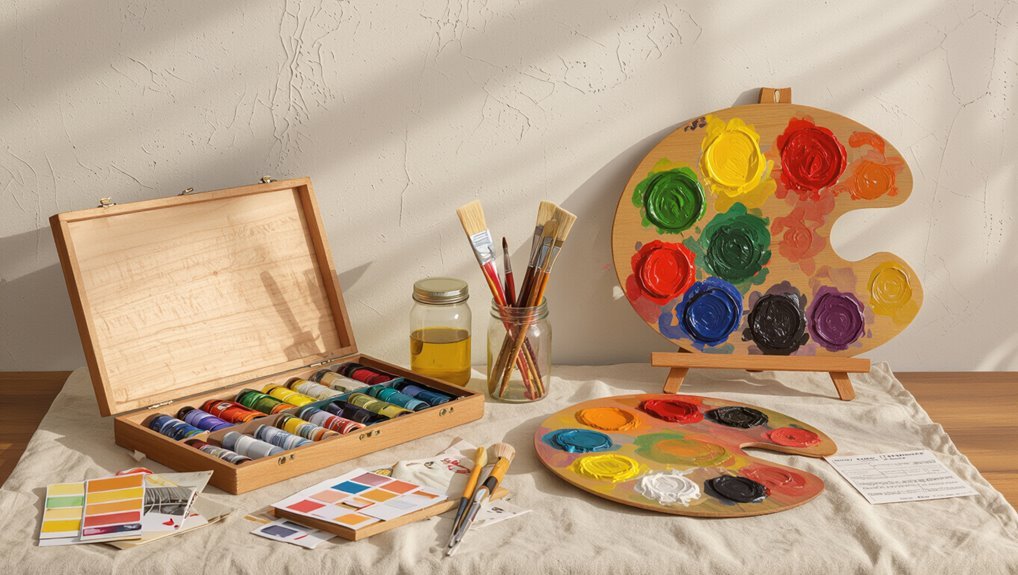
This guide is for homeowners, painters, and DIYers who’re weighing oil paint against other wall finishes and want a clear, practical rundown of benefits, drawbacks, and real-world considerations.
You’ll learn oil paint benefits, where it suits rooms, surface prep, and recommended application techniques.
You’ll get concise comparisons, maintenance tips, and decision checkpoints so you can choose confidently without unnecessary jargon or guesswork.
Quick Answer: Can You Use Oil Paint on Walls?
Now that you know who this guide targets and what you’ll learn, here’s the short answer: yes—you can use oil paint on walls, but it’s only the right choice in certain situations.
You’ll weigh oil paint benefits like durability and rich finish against oil paint drawbacks such as long drying, strong odor, and tricky cleanup, so pick it only when those trade-offs fit your project.
When Oil Paint Makes Sense for Interior Walls
When you need a wall finish that stands up to heavy use and cleans easily, oil paint makes sense—especially in high-traffic rooms or spaces where moisture and frequent wiping are concerns.
For durable, easy-to-clean walls in busy, moisture-prone areas, oil paint is a smart choice.
You should weigh oil paint benefits against oil paint drawbacks, then pick suitable rooms.
- Kitchens
- Bathrooms with good ventilation
- Hallways and stairwells
When to Choose Latex or Acrylic Instead
Although oil shines for durability and washability, you should pick latex or acrylic if you want faster drying, easier cleanup, lower odor, and better breathability for most interior walls.
You’ll appreciate latex paint benefits for routine rooms and quick recoats, while acrylic paint versatility suits trim, textured surfaces, and moisture-prone areas.
Choose water-based options when convenience and indoor air quality matter most.
How Oil Paint Differs From Water-Based Wall Paints
You’ll notice oil paint gives a richer, glossier finish and different sheen options than most latex or acrylics.
It also dries much more slowly, which affects work time and recoating schedules.
Finally, cleanup and odor are more intensive with solvents for oil, whereas water-based paints rinse clean and smell milder.
Finish And Sheen
Because oil paint uses natural oils and slower-drying binders, it creates a richer, glossier finish than most water-based wall paints.
So you’ll notice deeper color depth and smoother surfaces that reflect light differently. You should consider finish types and sheen levels when choosing oil for walls:
- High-gloss for durability and reflection
- Satin for subtle sheen and easy cleaning
- Eggshell for lower shine with some depth
Drying Time Differences
The finish you choose affects not just appearance but how long the paint keeps behaving while it dries.
So it’s worth comparing drying times before you start a project. Oil paints cure slowly by oxidation, extending the drying process to days or weeks, while water-based paints dry by evaporation in hours.
You should factor environmental conditions like temperature and humidity for predictable results.
Cleanup And Odor
While oil paint gives durable, smooth coverage, it also makes cleanup harder and leaves stronger odors than water-based paints.
You’ll need solvents like mineral spirits and good ventilation. You should follow precise cleanup tips and odor management to protect health and finishes.
- Use gloves, rags, mineral spirits.
- Ventilate constantly.
- Seal containers, dispose cloths safely.
Types of Oil Paint Suitable for Walls
Choosing the right oil paint for walls matters because different formulas suit different surfaces, climates, and maintenance needs.
You’ll pick between alkyds and traditional linseed-oil paints: alkyds dry faster and resist yellowing, making them ideal for wall application in busy rooms, while linseed blends offer richer tones for well-ventilated spaces.
Consider primer compatibility and VOC limits before buying.
Common Oil Paint Finishes for Interior Walls
When choosing a finish for oil-painted walls, you’ll weigh options like high gloss for maximum shine and durability.
Satin and eggshell give you a softer sheen with easier cleaning and fewer visible imperfections.
If you want a low-reflective, traditional look, a matte oil finish hides flaws but may be less washable.
High Gloss Sheen
High gloss sheen gives interior walls a mirror-like finish that really pops, reflecting light and making colors appear richer.
You’ll enjoy high gloss durability but accept visible imperfections; fingerprints show up more, so plan for frequent cleaning. Consider high gloss maintenance before choosing it.
- Reflective, vibrant appearance
- Scrubbable surface
- Shows flaws easily
Satin And Eggshell
Looking for a middle ground between glossy and flat? You’ll like satin sheen and eggshell finish options: they balance subtle light reflection with good durability, hide minor imperfections better than high gloss, and clean more easily than flat.
Use them in living rooms, hallways, or bedrooms where you want soft warmth plus practical wipeability—just prep surfaces and apply evenly for best results.
Matte Oil Finish
Matte oil finish gives interior walls a velvety, non-reflective look that downplays surface flaws and creates a calm, modern backdrop; you’ll get excellent color depth without the shine of satin or eggshell.
You’ll appreciate subtle oil textures and a true matte finish, though touch-ups demand care.
Consider:
- Low glare for photos
- Hides imperfections
- Requires skilled application
Surface Prep: Drywall Step-by-Step
1 clear step you can’t skip is prepping the drywall properly before you touch oil paint; it guarantees adhesion, hides imperfections, and prevents peeling.
You’ll sand seams, apply joint compound, and prime with oil- or alkyd-friendly primer.
Follow drywall finishing stages, choose appropriate texture options, and inspect for dust.
Once smooth and cured, oil paint will bond and finish evenly.
Preparing Plaster and Brick for Oil Paint
Preparing plaster and brick for oil paint means removing loose material, addressing moisture issues, and creating a sound, slightly porous surface so the paint can bond reliably.
You’ll do plaster preparation, moisture testing, and surface sealing to guarantee adhesive bonding and paint compatibility.
Consider texture consideration for finish durability and use proper brick priming.
- Clean and test
- Seal and prime
- Smooth selectively
Removing Glossy Coatings Before Oil Painting
Before you paint, you’ll need to strip or degloss any shiny finish so the oil paint can adhere properly.
Start with simple surface prep steps—cleaning, sanding, and repairing—and choose a deglossing method like solvent wiping, chemical deglosser, or light abrasion.
Use the right tools (abrasive pads, sandpaper, or a strippable primer) to make the surface receptive without overworking it.
Surface Preparation Steps
A dulling step you shouldn’t skip is removing any glossy coating so new oil paint can bond properly; you’ll want to clean the surface, sand or degloss with the right abrasives, and wipe away residues before priming.
- Assess surface types, wall textures, environmental factors, and project timelines.
- Follow safety precautions, proper application techniques, and finish selection.
- Plan for color matching, paint adhesion checks, and future maintenance routines.
Deglossing Techniques and Tools
One key step is deglossing — you’ll remove the shiny layer that prevents new oil paint from adhering, using either abrasive sanding, chemical deglossers, or a combination depending on the surface.
Choose deglossing methods and deglossing tools suited to substrate: sandpaper, sanding blocks, orbital sanders, scuff pads, or solvent-based strippers.
Proper surface preparation guarantees reliable oil paint application and longer finish life.
Best Primers for Oil-Painted Walls
Choosing the right primer lets your new paint stick, hide stains, and last longer on oil-painted walls.
You’ll want to match primer types to substrate and use proper application techniques for adhesion.
Consider these options:
- Oil-based bonding primer — great for bare or previously oiled surfaces.
- Shellac primer — excellent for stains and odor sealing.
- Acrylic adhesion primer — faster drying, easy cleanup.
Can You Apply Oil Over Existing Oil or Latex?
Curious whether you can roll oil paint over existing oil or latex? You can, but oil paint compatibility depends on the old finish.
Scuff, clean, and degloss latex; use a bonding primer on slick oil.
Perform thorough surface preparation—repair, sand, and remove contaminants—to guarantee adhesion and prevent peeling.
Test a small area first to confirm proper bonding before full application.
Ventilation and Odor Control Strategies
Because oil-based paints release strong fumes and slow-evaporating solvents, you should prioritize ventilation before and during application.
Prioritize strong ventilation when using oil-based paints to reduce exposure to potent fumes and slow solvents.
Use fans, open windows, and seal off vents to direct airflow.
Combine ventilation techniques with odor neutralizers for quicker comfort.
- Cross-ventilation with box fans
- Mechanical exhaust (window/duct fans)
- Activated-charcoal or baking-soda odor neutralizers
Drying Times for Oil Paint: Realistic Expectations
When you use oil-based paint, expect longer wait times than with latex: surface tack dries in 6–8 hours under ideal conditions, but full curing can take weeks to months depending on thickness, temperature, and humidity.
You should plan project phases, use proper drying techniques like thin coats and good airflow, and monitor environmental factors—temperature, humidity, and ventilation—to avoid tacky spots and guarantee durable results.
Tools and Brushes for Oil Paint on Walls
You’ll want to pick brushes suited to oil—natural bristles for smooth, even coverage and angled sash brushes for cutting in.
For larger areas, choose a dense roller or foam pad designed for oil to avoid streaks.
Have proper cleaning and maintenance tools on hand, like solvent-safe containers, brush combs, and rags, so your equipment lasts.
Choosing The Right Brushes
Brush selection shapes how your oil-painted walls will look and how easy the job feels, so pick tools that match your technique and surface.
You’ll choose brush types for edges, texture, and smooth coverage, and practice brush techniques for strokes and blending.
Consider:
- Flat synthetic for smooth coverage.
- Filbert for controlled blending.
- Angular for crisp edges.
Roller And Pad Options
1 good roller or pad choice can make oil paint go on faster and more evenly, so pick tools that match your wall texture and finish goals.
For smooth walls use short-nap rollers; textured walls need thicker naps. Foam pads suit touch-ups and trim.
Practice roller application for even laydown and try pad technique for edges and corners to reduce brush marks and control buildup.
Cleaning And Maintenance Tools
While oil paint’s durability makes walls easier to care for long-term, keeping them looking their best means using the right cleaning and maintenance tools: soft natural-hair brushes for dusting trim, microfiber cloths and gentle, oil-safe cleaners for spot-cleaning, and fine synthetic brushes or touch-up pens for repairing nicks.
- Use soft brushes for delicate dusting (Cleaning Techniques).
- Wring microfiber damp, mild cleaner for stains (Maintenance Tips).
- Keep touch-up brushes handy for quick repairs.
Apply Oil Paint: Roller and Spray Techniques
Two main tools—rollers and sprayers—give you fast, even coverage for oil paint on walls, but each demands different prep and technique.
For roller application, choose a dense nap, work wet edges, and use solvent-resistant trays.
For spray technique, thin paint per manufacturer, mask thoroughly, and practice consistent passes.
Both need proper ventilation, tack-free time, and careful cleanup.
How to Avoid Brush Marks and Lap Lines
Avoid visible brush marks and lap lines by working quickly and keeping a wet edge so each stroke blends into the next; use the right brush or roller, load it evenly, and maintain consistent pressure and overlap to produce a smooth, uniform finish.
You’ll reduce flaws using brush technique tips and simple lap line solutions.
- Feather edges
- Cross-roll lightly
- Keep consistent paint load
Thinning Oil Paint and Solvent Choices
When you thin oil paint, choosing the right solvent—turpentine, mineral spirits, or a low-odor alternative—changes handling and cleanup.
Follow recommended thinning ratios to keep viscosity consistent and avoid weakening the paint film.
Remember that added solvent also speeds or slows drying time, so adjust layers and ventilation accordingly.
Solvent Options Explained
Although oil paint can often be applied straight from the tube, you’ll usually want to thin it or modify its drying and handling with a solvent; choosing the right one affects workability, drying time, toxicity, and final surface quality.
- Mineral spirits: common solvent types, good for cleaning; moderate fumes.
- Turpentine: faster drying, stronger odor; observe solvent safety.
- Odorless solvents: lower VOCs, slower drying; better for indoor work.
Thinning Ratios Guide
Now that you’ve weighed solvent types and their effects, you’ll need clear thinning ratios to get predictable handling and drying.
For brushing, start with 5–10% solvent by volume; for thin glazes, 15–25%.
Use mineral spirits for faster flow, linseed oil sparingly for gloss and flexibility.
Practice thinning techniques on scrap board, note solvent ratios, and adjust for temperature and pigment load.
Drying Time Effects
Because solvents and oils change how quickly oil paint skins over and oxidizes, choose thinning agents with drying behavior in mind: mineral spirits and turpentine speed film formation and reduce tack time, while adding linseed, poppy, or walnut oil slows surface drying but increases flexibility and gloss.
Consider drying techniques and environmental factors affecting recoat timing.
- humidity impact
- temperature effects
- ventilation influence
Prevent and Fix Blistering and Cracking
Blistering and cracking happen when oil paint can’t adhere properly or when trapped moisture, heat, or incompatible layers cause the film to fail.
You’ll prevent blisters by ensuring surfaces are dry, clean, and primed; control temperature and humidity during application.
For cracking solutions, remove failed paint, sand edges, prime, and recoat with compatible oil formulations to restore a stable finish.
Stain and Bleed-Through Prevention
If old stains, knots, or tannins migrate through oil paint, they’ll show up as ugly discolorations unless you block them first; you should prep surfaces with a shellac or oil-based primer for stain resistance and reliable bleed through prevention.
Follow these steps:
- Clean and sand area.
- Apply primer coat thoroughly.
- Seal edges and repairs, then paint when dry.
How Many Coats of Oil Paint Do Walls Need?
When deciding how many coats of oil paint your walls need, consider how many primer coats you’ve applied and the paint’s coverage per coat.
Your choice of finish—glossy, satin, or matte—also affects whether you’ll need extra layers to achieve uniform sheen.
Aim for the fewest coats that give full, even coverage without visible brush marks or underlying stains.
Number Of Primer Coats
Because oil paint bonds differently than latex, you’ll want to plan your primer coats carefully to get durable, even coverage on walls.
Choose primer types suited to your surface and follow proper application techniques. Generally:
- One coat on well-prepped, previously painted drywall.
- Two coats for porous or patched areas.
- Three coats for stains, glossy surfaces, or heavy color changes.
Finish And Coverage
Although oil paint covers more opaquely than latex, you’ll usually need two to three coats on walls to get a consistent, durable finish; you should expect improved finish durability and better coverage uniformity after multiple thin coats, sanding lightly between coats for adhesion.
| Coat | Purpose |
|---|---|
| 1 | Base coverage |
| 2 | Build finish |
| 3 | Perfect uniformity |
Cost Comparison: Oil Paint vs Latex Per Room
1 room’s paint cost depends mainly on material price, coverage, and how many coats you need—oil paint runs higher per gallon but sometimes covers better on problematic surfaces, while latex is cheaper up front and often needs fewer prep coats.
Factor in primer, labor, and cleanup to compare true per-room costs.
- Calculate cost factors by room size and surface condition.
- Tally primer, paint, tools, and disposal.
- Estimate DIY vs pro labor for final per-room price.
Durability and Long‑Term Performance on Walls
Cost and prep choices you just weighed also shape how long a finish will hold up, so it helps to evaluate durability next. You’ll weigh oil’s superior hardness against flexibility needs; use a durability comparison to pick primers and finishes that improve long term performance.
| Feature | Result |
|---|---|
| Hardness | High |
| Flexibility | Low |
| Lifespan | Longer with proper prep |
Cleaning and Maintaining Oil-Painted Walls
Because oil paint forms a tougher, less porous surface than many water-based finishes, cleaning it’s usually easier but requires gentler methods to avoid dulling the sheen or damaging the film.
You’ll use careful cleaning techniques and simple maintenance tips to preserve finish.
- Dust with a soft cloth regularly.
- Clean with mild detergent and water.
- Dry and inspect for wear.
Removing Grease and Scuffs From Oil Finishes
After dusting and spot-cleaning, you’ll often face stubborn grease marks and scuffs that ordinary detergent won’t lift from oil finishes; handling them correctly preserves the paint’s sheen and integrity.
For grease removal, blot excess, apply a mild solvent or dedicated cleaner sparingly, then rinse.
For scuff treatment, gently rub with a soft eraser or nonabrasive pad and clean residue; always test first.
Recoating and Touch-Up Tips for Oil Walls
When you need to refresh oil-painted walls, proper recoating and touch-up technique keeps the finish uniform and prevents peeling or visible seams.
You should sand lightly, clean, and feather edges before painting. Use compatible paints and allow full dry time.
Follow these recoating techniques and touch up methods:
- Sand and clean
- Feather and blend
- Match sheen and cure time
Health Risks: VOCs and Solvent Exposure
When you choose oil paint, be aware that many formulas release volatile organic compounds (VOCs) that can linger and affect indoor air quality.
You’ll also face solvent exposure during application and cleanup, which can irritate eyes, skin, and lungs if you don’t use proper ventilation and protection.
Let’s look at practical ways to minimize these risks.
VOC Emission Concerns
Although oil-based paints give you durable, glossy finishes, they release higher levels of volatile organic compounds (VOCs) and solvents that can affect indoor air quality and health.
You should consider VOC regulations, health implications and long term effects, then choose alternative solutions or eco friendly options.
- Monitor indoor air quality.
- Pick low-VOC or waterborne alternatives.
- Ventilate during and after painting.
Solvent Exposure Risks
Because oil-based paints rely on solvents to stay workable and dry, you’re exposed to chemicals that can irritate eyes, nose and throat, trigger headaches or dizziness, and—at higher or prolonged levels—damage the liver, kidneys or nervous system.
You should practice solvent safety: ventilate, use low-VOC or water-miscible alternatives, wear appropriate respirators, and monitor exposure symptoms so you stop work and seek fresh air or medical help.
Safer Oil-Based Options and Low‑VOC Alternatives
If you want oil’s durability without the harsh fumes, safer oil-based formulations and low‑VOC alternatives give you practical choices that cut solvent exposure and indoor air risks.
You can still get tough, washable finishes while minimizing odors and health impacts. Consider these options:
- Alkyd water‑based hybrids for easier cleanup and lower VOCs.
- Plant‑based oils blended for reduced solvents.
- Low VOC alternatives like acrylic‑alkyd hybrids.
Solvent Fire Risks and Safe Storage
When you work with oil solvents and rags, remember that they’re highly flammable and can ignite suddenly from heat, sparks, or unexpected combustion; store solvents in tightly sealed, clearly labeled metal containers and keep oily rags in a fireproof can with a self‑closing lid until you can dispose of them safely. Follow solvent safety and simple storage tips.
| Item | Risk | Action |
|---|---|---|
| Solvent cans | Fire | Seal, label |
| Oily rags | Sudden ignition | Metal can |
Environmental Impact and Disposing Oil Paint Waste
Although oil-based paints give durable, attractive finishes, they carry a heavier environmental cost than water-based alternatives.
Although oil-based paints offer durable, attractive finishes, they come with a greater environmental cost than water-based options.
You should handle leftovers and washout carefully to prevent soil and water contamination. Follow local environmental regulations and proper oil disposal to avoid fines and pollution.
Consider:
- Curing and recycling cans.
- Hazardous-waste collection.
- Absorbents for solvent cleanup.
Compatibility With Trim, Doors, and Cabinetry
When you use oil paint on walls, think about how sheen levels will match trim, doors, and cabinetry so the finish looks cohesive.
Check adhesion on different materials—wood trim, MDF doors, and lacquered cabinets can accept oil differently.
Also plan for touch-ups and routine maintenance, since oil paints behave differently than latex when you need repairs.
Matching Sheen Levels
Because sheen affects both appearance and durability, you’ll want to match or intentionally contrast oil-painted walls with trim, doors, and cabinetry to get a cohesive look.
Use a simple sheen comparison to decide goals, then apply sheen matching when selecting finishes.
- Match gloss for uniform reflection.
- Contrast matte walls with semi-gloss trim.
- Coordinate durability needs with aesthetic choices.
Adhesion To Surfaces
If you’re planning to paint walls, trim, doors, or cabinets with oil paint, make certain the substrate and existing finishes will accept it—oil binds differently than latex, so adhesion depends on surface type, previous coatings, and prep.
You’ll face adhesion challenges on slick or previously oil-finished surfaces; sand, degloss, and use proper primers to guarantee surface compatibility and long-lasting bond.
Touch-Up And Maintenance
Although oil paint gives trim, doors, and cabinets a durable, lustrous finish, you’ll need a clear plan for touch-ups and routine upkeep to keep that look intact; oil dries slower and sets harder than latex, so matching sheen and surface preparation are key.
- Use compatible primers and follow touch up techniques precisely.
- Sand, clean, and feather edges before repainting.
- Schedule maintenance tips: gentle cleaning and occasional recoats to preserve finish.
Using Oil Paint for Accent Walls and Effects
One striking way to use oil paint is to create an accent wall or decorative effect that adds depth and sheen to a room; oil’s rich pigments and smooth finish let you achieve luxe, durable results that water-based paints can’t always match.
You can try accent wall techniques like subtle glazing, color blocking, or textured tools to produce creative effects—plan ventilation, curing time, and proper priming.
How to Get High-Gloss and Enamel Wall Finishes
To get a true high-gloss or enamel wall finish, you’ll need to start with meticulous surface preparation—cleaning, sanding, and priming to guarantee adhesion and smoothness.
Pick a quality high-gloss enamel formulated for walls and match your primer and thinner recommendations to that product.
Apply with the right tools, thin coats, and controlled curing conditions to avoid runs, orange peel, and premature yellowing.
Surface Preparation Essentials
Getting a true high-gloss or enamel finish starts with meticulous surface prep: you’ll clean, repair, sand, and prime so the oil paint can adhere evenly and reflect light without flaws.
Consider surface types and wall textures, optimize paint adhesion, and mitigate maintenance challenges.
- Match primer to surface and environmental considerations.
- Smooth textures for uniform finish durability.
- Test color selection and application techniques.
Choosing High-Gloss Enamel
If you want a true high-gloss or enamel wall finish, choose products and techniques that prioritize smoothness, adhesion, and controlled application—gloss exaggerates every flaw, so your choices matter.
Pick a high-quality oil or alkyd enamel labeled for walls for high gloss durability. Sand between coats, use proper primers, and employ steady application techniques to minimize brush marks and guarantee an even, long-lasting sheen.
Application And Curing Techniques
You’ve prepared the right enamel and sanded between coats, now it’s time to focus on application and curing so that the gloss lays flat and stays durable.
Use precise application techniques and proper curing methods to avoid orange peel or blush.
- Thin, even coats with a quality brush or roller.
- Maintain recommended temps and humidity.
- Allow extended cure before washing or heavy use.
Faux Finishes and Oil-Based Glazes
One popular way to add depth and character to oil-painted walls is through faux finishes and oil-based glazes, which let you layer translucent color and texture for effects that range from subtle warmth to dramatic antiquing.
You’ll use faux techniques and glazing strategies—oil glazes, textured finishes, and color layering—to create decorative effects.
Choose finish variations and precise application methods for controlled results.
Matching Historic Oil Paints in Period Homes
When you’re restoring a period home, getting the historic color right is essential for authenticity and resale value.
You’ll also need to match the original oil paint’s sheen so new work blends seamlessly with remaining old surfaces.
Start by sampling existing paint and consulting period color guides to guarantee both hue and finish are accurate.
Historic Color Accuracy
Because historic oil paints used different pigments and binder recipes than today’s formulas, matching them in a period home means more than picking a similar swatch—you’ll need to take into account aging, sheen, and substrate interactions to get an authentic look.
You’ll focus on historic palettes and color authenticity. Consider these steps:
- Analyze original samples.
- Match pigments, not just visual tones.
- Test small areas.
Matching Original Sheen
Start by evaluating the original sheen across several areas—trim, walls, and cornices—so you can recreate how light once played on the surfaces.
Test gloss levels with small panels, document results, and choose sheen matching techniques like flattening or adding varnish.
Consider sheen durability factors—original binder, surface prep, and traffic—to guarantee your recreated finish lasts and stays true to the period.
When to Hire a Pro vs DIY for Oil Walls
Thinking about tackling oil-painted walls yourself or hiring a pro? You’ll weigh oil paint benefits against time, odor, and prep.
If you lack tools or need a flawless finish, hire someone; focus on contractor selection and references.
If you enjoy meticulous work and have ventilation, DIY can save money.
- Quality concerns
- Budget and timeline
- Health and safety
Time and Skill Required for a DIY Oil Project
If you tackle an oil paint job yourself, you’ll need to plan for thorough prep and good ventilation to control fumes and guarantee adhesion.
Expect longer drying times between coats compared with latex, which can stretch a weekend project into several days.
Be realistic about your schedule and patience—rushing recoats will cost you finish quality.
Prep And Ventilation
Because oil paint dries slow and gives off strong fumes, you’ll need to plan more time and take extra precautions before you roll up your sleeves.
Prepare the room and choose ventilation methods that guarantee steady air circulation. Follow these steps:
- Open windows and use fans for cross-ventilation.
- Add a filtered exhaust fan if possible.
- Wear a respirator and seal off adjoining rooms.
Drying And Recoat Time
Although oil paint gives a rich, durable finish, it takes far longer to dry than latex, so you’ll need patience and careful scheduling for recoats and furniture return.
You’ll plan around drying factors like temperature, humidity, and coat thickness. Expect longer recoat intervals—often 24–72 hours or more—and allow up to weeks before heavy use.
Skillful thin coats speed curing and reduce problems.
Contractor Cost Factors for Oil Finishes
When you hire a contractor for an oil finish, several cost drivers will shape the final price: surface preparation, type and quality of oil, number of coats, drying and ventilation requirements, and labor skill level.
You should get clear contractor pricing that reflects labor costs, material expenses, project scope, finish quality, regional differences, time estimates, bidding process, surface conditions, and client preferences.
- Site prep
- Materials
- Labor
How to Test Oil Paint in a Small Area?
Pick an inconspicuous spot like inside a closet or behind trim so any issues stay hidden.
Prep the surface as you’d the whole wall—clean, sand, and prime if needed—then apply a small patch of oil paint.
Check drying time and how well the paint adheres over 24–48 hours before committing to a full coat.
Choose An Inconspicuous Spot
Because oil paint can behave differently on old finishes or textured surfaces, pick a small, out-of-the-way spot to test it before committing to a whole wall.
Choose hidden spots near trim, behind furniture, or inside a closet to assess adhesion and sheen without ruining visible areas.
Consider how wall texture affects coverage and drying time.
- Trim seams
- Closet corners
- Behind furniture
Prepare Surface Properly
Before you apply a test patch, clean and scuff the area so the oil paint can adhere properly: wipe away dust and grease with a mild detergent or TSP substitute, rinse and let dry, then sand lightly to remove gloss or loose flakes.
Patch a small area, fill surface imperfections, and note oil absorption on raw spots. Use primer on porous sections before testing.
Observe Drying And Adhesion
Now that the surface’s prepped and you’ve applied a small patch, watch how the oil paint behaves over the next few days to assess drying and adhesion.
Test for Durability concerns and Surface compatibility by observing tack, color shift, and bond.
- Check tack after 24–72 hours.
- Inspect for lifting or cracking.
- Try a mild adhesion peel.
Common Mistakes With Oil on Walls (And How to Avoid Them)
When you’re excited to use oil paint on interior walls, it’s easy to overlook pitfalls that can ruin the finish. This section covers the most common mistakes—like skipping proper priming, using the wrong sheen, or applying too-thick coats—and shows how to avoid them so your work looks professional and lasts.
Check oil paint application steps, confirm wall surface compatibility, sand between coats, thin sparingly, control ventilation, and test adhesion on a small area before full application.
Safely Strip Old Oil Paint From Interior Walls
Strip old oil paint carefully to protect your health and the underlying wall—start by testing for lead, then choose a removal method that matches the paint age and wall material.
You’ll want safe oil paint removal and thorough wall surface preparation to avoid damage. Follow these steps:
- Use lead test kits, ventilate, wear PPE.
- Try chemical strippers or heat guns cautiously.
- Sand, patch, and clean for repainting.
Painting Oil-Painted Walls With Latex Later
If you’re repainting oil-painted walls with latex, start by scuffing the surface, cleaning off grease, and repairing any loose areas so the new paint can bite.
You’ll need a high-quality bonding primer that’s formulated to stick latex to oil without yellowing or peeling.
Keep in mind that even with proper prep and primer, long-term adhesion can be riskier than staying with oil, so monitor for lifting or failure over time.
Surface Preparation Steps
Preparing oil-painted walls for later latex paint means doing a few focused steps to guarantee adhesion and a smooth finish.
You’ll address surface imperfections, consider environmental considerations and health impacts, and use proper application techniques to secure finish durability.
- Clean and degloss.
- Sand and repair imperfections.
- Use compatible sealing methods to promote paint adhesion.
Primer Compatibility Needs
Because oil paint creates a slick, nonporous surface, you’ll need a primer that bonds to both oil and latex to prevent adhesion failure and flashing; choose primer types like bonding or shellac-based, follow proper primer application, and let cure fully before latex.
| Primer Type | Best Use | Dry Time |
|---|---|---|
| Bonding | Glossy oil | 2–4 hrs |
| Shellac | Stain block | 1–2 hrs |
| Acrylic | General prep | 4–6 hrs |
Long-Term Adhesion Risks
When you paint latex over old oil-based paint without proper preparation, the new finish can peel, flake, or develop hairline cracks as the oil layer continues to cure and repel the waterborne topcoat.
You should address surface compatibility and long term durability by prepping and priming properly.
- Sand and degrease
- Use bonding primer
- Test small area first
Local Rules for Indoor Paint Ventilation and VOCs
If your city or building has specific rules for indoor paint ventilation and VOC limits, you should check them before you start, since they can affect product choice, drying times, and required equipment. You’ll follow ventilation requirements, protect indoor air quality, and meet VOC regulations for painting safety. Check local codes, use monitors, and document compliance.
| Requirement | Action | Proof |
|---|---|---|
| Ventilation | Open/MECH | Log |
| VOC limit | Low-VOC product | Label |
| Permits | If required | Permit |
Recommended Oil Paints for Interior Walls
Having confirmed ventilation and VOC limits, you can focus on which oil-based interior paints will meet both safety requirements and aesthetic goals.
Choose recommended oil paints from the best brands with clear durability ratings, varied color options and finish types. Follow safety tips and preferred application methods; consider eco friendly alternatives for lower VOCs.
- Alkyd enamel
- Water-miscible oil
- Low-VOC alkyd
Recommended Primers, Solvents, and Cleaners
Before you start rolling oil paint on walls, pick primers, solvents, and cleaners that match the coating type and the substrate so adhesion, drying, and cleanup go smoothly. Use recommended primers (alkyd or oil-based), solvent choices like mineral spirits, cleaning methods with gentle detergent then solvent, and maintenance tips: wipe spills quickly, recoat only after full cure.
| Item | Recommendation |
|---|---|
| Primer | Alkyd/oil |
| Solvent | Mineral spirits |
| Cleaner | Mild detergent then solvent |
Room Planning Checklist for an Oil-Paint Job
Start by walking the room and listing tasks, measurements, and potential problem areas so you know what tools, materials, and time you’ll need.
Walk the room first—list tasks, measurements, and problem areas so you can gather tools, materials, and time.
Then plan color selection, finish options, surface types, texture effects, and application techniques.
Note maintenance strategies, environmental considerations, historical accuracy, DIY tips, and safety precautions.
- Materials checklist
- Prep steps
- Risk mitigation
Example Timeline for a Single-Room Oil Paint Job
With your checklist and prep plan in hand, map out a realistic timeline so you know how long each phase will take and when you’ll need help or extra supplies.
Day 1: room clearing and wall preparation.
Day 2: priming and drying.
Days 3–4: apply oil paint techniques in thin coats, allowing extended cure between coats.
Final day: touch-ups and ventilation.
Cost-Saving Tips When Using Oil Paint Indoors
If you want to cut expenses when using oil paint indoors, plan carefully and choose products that deliver the best value—good brushes and a quality alkyd primer will save you money by reducing wasted paint and minimizing rework.
- Buy concentrated tins and thin sparingly to stretch coverage.
- Choose budget friendly brands proven for durability.
- Prep surfaces thoroughly for cost effective solutions and fewer touch-ups.
Case Studies: Successful Oil-Painted Rooms
Those cost-saving habits pay off when you look at real rooms—seeing how others stretched materials and still got durable, beautiful finishes gives practical guidance you can copy.
You’ll study a kitchen with glossy oil aesthetics resisting grease, a hallway showing stain-blocking longevity, and a restored parlor celebrating oil’s historical significance.
Each case highlights prep, ventilation, and maintenance routines you can adapt confidently.
Decision Checklist: Should You Use Oil Paint on Your Walls?
Wondering whether oil paint is the right choice for your walls? Consider these quick checks to weigh oil paint benefits against application challenges and room needs.
- Durability vs. ventilation: will you get proper airflow for fumes and drying?
- Surface prep: can you sand/prime to avoid adhesion problems?
- Maintenance: do you value easy cleaning and long-lasting finish enough to justify effort?
Frequently Asked Questions
Can Oil Paint Be Used on Exterior Walls or Outdoor Surfaces?
Yes — you can use oil paint on exterior walls, but you’ll need primers and sealers for exterior durability, follow specific application techniques, and expect longer curing, more maintenance, and sensitivity to temperature and moisture during application.
Will Oil Paint Yellow Over Time on Light-Colored Walls?
Yes — oil paint can yellow over time on light-colored walls, especially alkyds; you’ll see oil paint longevity affected by varnish, pigment choice, and light exposure, which can cause light color fading unless you use non-yellowing formulations.
How Does Oil Paint Affect Indoor Humidity and Condensation?
Oil paint doesn’t improve humidity regulation; it’ll form a less permeable surface, so you may see more condensation issues on cold surfaces. You should use ventilation or breathable coatings to reduce trapped moisture and mold risk.
Are There Insurance Implications for Using Oil-Based Paints at Home?
Yes — you should check insurance coverage and liability concerns because oil-based paints can raise fire risk, ventilation issues, and contractor claims; your insurer might require disclosures or higher premiums, and exclusions could apply.
Can Oil-Painted Walls Be Safely Used in Nurseries or With Pets?
Like a stubborn stain, you shouldn’t use oil-painted walls in nurseries or with pets; you’ll face safety concerns from fumes and VOCs, and durability issues like chipping and yellowing, so choose low-VOC alternatives instead.
Conclusion
If you want walls that feel like a stubborn, glossy billboard that refuses to fade or scuff, oil paint’s your secret weapon—just brace for fumes, drying times, and careful prep. For most rooms you’ll do better with latex, but pick oil when you need unbeatable durability, rich depth, or a vintage look. Weigh the cost, ventilation, and patience required; pick oil only if you’re ready to commit like it’s forever.
