
Can You Paint Latex Over Oil: Compatibility and Preparation Guide
Yes — you can paint latex over oil if you prep it correctly. You’ll need to clean, degrease, and degloss the surface, sand to scuff the sheen, and use a high-quality bonding or shellac primer for proper adhesion. Work in thin, even coats, allow full dry times, and sand between coats for best results. Watch for yellowing, cracking, or trapped moisture that signal deeper problems. Keep going to learn specific steps, tools, and when to strip instead.
Can You Paint Latex Over Oil?
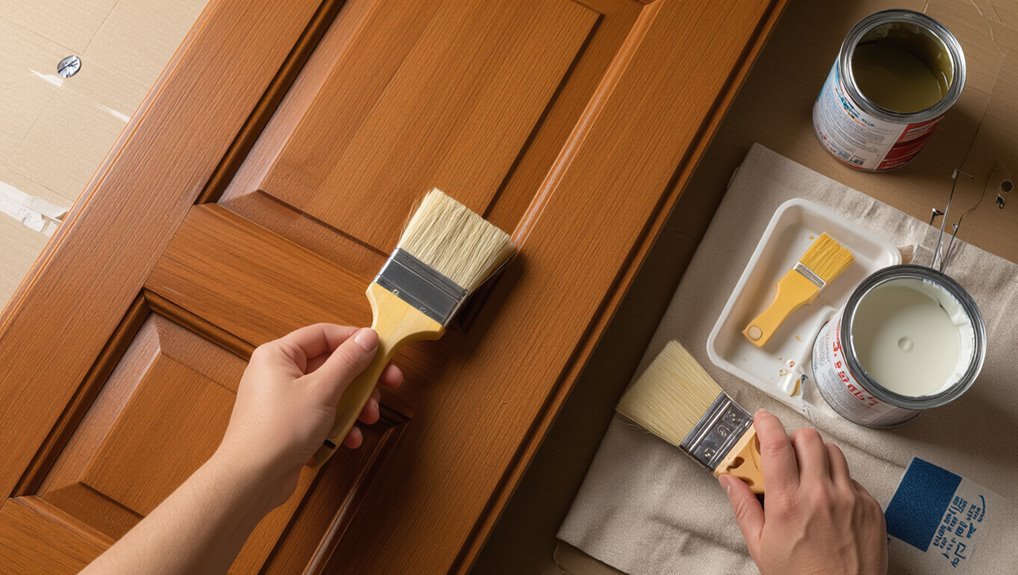
Yes—you can paint latex over oil, but you’ve got to prepare the surface properly.
You’ll remove gloss, clean grime, and sand or degloss to promote adhesion. Use a high-quality bonding primer to bridge oil paint drawbacks and gain latex paint benefits like easier cleanup, flexibility, and lower VOCs.
Follow curing times and test a small area before proceeding.
When Painting Latex Over Oil Works : Quick Rules
You can successfully paint latex over oil when two conditions are met: the surface is thoroughly cleaned and a proper bonding primer is used.
Make sure grease, dirt, and loose paint are removed before priming. Without that prep and a quality primer, the latex coat won’t adhere reliably.
Surface Fully Cleaned
Scrub the surface thoroughly so the latex paint can bond properly to the old oil finish. You’ll follow surface preparation steps and proven cleaning techniques: degrease, rinse, and scuff. Remove wax and contaminants; let dry. Expect better adhesion and fewer failures when you’re meticulous.
| Step | Action | Result |
|---|---|---|
| 1 | Degrease | Clean |
| 2 | Rinse | No residue |
| 3 | Scuff | Tooth |
Use Bonding Primer
After cleaning and scuffing, apply a quality bonding primer to bridge the oil surface and the latex topcoat.
You’ll see bonding primer benefits immediately: improved adhesion, stain blocking, and fewer failures.
Use proper application techniques—thin, even coats, recommended dry times, and light sanding between coats.
Follow manufacturer instructions, work in suitable temperature/humidity, and inspect adhesion before topcoating with latex.
Why Oil Paint Fails Over Time
You’ll notice oil paint can yellow as its oils oxidize, changing the color and finish you thought was stable.
Over time the film can also develop hairline cracks as it becomes brittle, which then undermines adhesion.
Those failures mean new latex topcoats may peel or blister unless you address the aged oil surface first.
Oil Film Yellowing
Because oil paint binds through oxidation and polymerization, its translucent binder can slowly darken and yellow as it ages, especially in low light or high humidity.
You’ll notice warm, amber tones deepening, which affects oil paint longevity and appearance.
For yellowing prevention, control humidity, increase ventilation, and use quality alkyd or modern non-yellowing mediums before repainting with latex over oil.
Surface Cracking
Yellowing often signals deeper aging in oil layers, and another common sign is surface cracking.
You’ll notice fine fissures as the oil layer loses surface flexibility and becomes brittle. Cracks let moisture and dirt reach underlying layers, accelerating failure.
To paint latex over such areas, you’ll need to address cracking first—stabilize, fill, and guarantee sound paint adhesion before proceeding.
Poor Adhesion Over Time
While oil paint often starts with strong bite to the substrate, its adhesion can fail over years as binders oxidize and lose tack.
You’ll notice lifting, flaking, and delamination as solvents evaporate and flexibility declines.
Understand poor adhesion causes—UV, moisture, dirt, and incompatible topcoats—and address them before applying latex.
Ignore long term effects and you’ll face costly repairs and frequent repainting.
Signs an Oil Surface Needs Special Prep
If you see cracking, peeling, heavy gloss loss, or persistent stains on an oil-painted surface, it needs special prep before you roll on latex.
If an oil-painted surface shows cracking, peeling, heavy gloss loss, or stubborn stains, prep it before rolling latex.
Check oil paint for brittleness, flaking edges, uneven surface texture, and areas where gloss varies.
Also watch for tannin bleed, mildew, or oil-rich spots that repel latex.
Those signs mean sanding, cleaning, or priming is required.
Tools and Materials You’ll Need
Gather a few essential tools and materials before you won’t interrupt the job to hunt for supplies.
You’ll need quality brushes—natural and synthetic brush types—roller covers, drop cloths, sandpaper, tack cloths, rags, painter’s tape, and a scraper.
Choose primer options suitable for oil surfaces, like bonding or shellac-based primers, plus latex paint, a tray, stir sticks, and gloves.
How to Clean Oil-Painted Surfaces for Adhesion
Before you prime, give the oil-painted surface a thorough cleaning so the latex will stick properly.
Remove dust and grease with a mild detergent or TSP substitute, rinse well, and let dry.
Spot-clean stubborn residues with mineral spirits, then rinse.
This surface preparation reduces contaminants and promotes adhesion improvement, ensuring primer and latex bond evenly without trapped oils or dirt compromising the finish.
How to Scuff or Degloss Oil Paint Correctly
Before you scuff oil paint, make sure the surface is clean and free of grease or residue so abrasion will bite.
Use the right grit sandpaper or a sanding pad and apply even pressure to dull the sheen without cutting through the paint.
Finish by removing all dust with a tack cloth or vacuum so the primer or latex paint bonds properly.
Surface Cleaning First
Start by cleaning the oil-painted surface thoroughly so the new latex will stick — dirt, grease, and old waxes can prevent adhesion even if you scuff the finish.
For effective surface preparation, remove contaminants with a mild degreaser or trisodium phosphate alternative, rinse well, and dry.
Use targeted cleaning techniques for stains; repeat where necessary to guarantee a clean, oil-free base.
Proper Abrasion Techniques
Once the surface is clean and dry, abrade the oil paint lightly to create a keyed profile that the latex can grip.
Use proper abrasion techniques during surface preparation so the new coat bonds. Follow these steps:
- Sand with 220–320 grit for light scuffing.
- Use a sanding block for even pressure.
- Feather edges and dull glossy spots before priming.
Final Dust Removal
After scuffing and feathering the surface, remove residual dust so the primer and latex finish can bond properly; any leftover particles will show through and prevent adhesion.
Use a vacuum with brush attachment, tack cloths, and a damp microfiber to capture grit. Work top-to-bottom and change cloths often.
Good dust control and focused cleaning techniques guarantee a clean profile for primer bonding and a smooth latex topcoat.
Chemical Deglosser vs. Sanding: When to Choose Which
When you’re deciding whether to use a chemical deglosser or sanding, weigh the surface condition, your time, and the finish you want—deglossers dissolve old sheen fast and work well on smooth, intact oil finishes, while sanding gives better adhesion on damaged or uneven surfaces but takes more effort.
Weigh surface condition, time, and finish—deglossers for quick sheen removal on smooth oil surfaces; sand for damaged areas.
- Choose deglosser benefits for quick prep.
- Pick sanding for maximum sanding effectiveness.
- Combine both for stubborn spots.
Best Primers for Painting Latex Over Oil
If you’re switching from oil to latex, pick a primer that bonds to glossy, nonporous surfaces and blocks stains so your topcoat won’t peel or show through.
Choose between bonding primers, shellac-based, and oil-based primer types based on surface compatibility.
Bonding primers excel on slick finishes; shellac blocks severe stains; oil-based offers good adhesion on previously painted oil surfaces.
Step-by-Step: Prime and Paint Latex Over Oil
Start by making sure the surface is clean, dry, and sanded smooth so the primer can adhere properly; remove grease, loose paint, and glossy sheen with a deglosser or light sanding, then wipe away dust with a tack cloth.
Start with a clean, dry, lightly sanded surface—remove grease and sheen, then wipe away dust.
Follow these steps for prepping surfaces and paint selection:
- Apply oil-locking primer evenly.
- Lightly sand primer, remove dust.
- Roll two thin latex coats, allow cure.
Troubleshooting: Peeling, Flashing, and Yellowing
If your latex topcoat peels, flashes, or starts to yellow, you’ll want to identify the likely causes quickly so you can fix them.
Check for poor adhesion from inadequate sanding or priming, tacky solvent entrapment that leads to flashing, and contaminants or low-quality paints that cause yellowing.
I’ll walk you through how to diagnose each issue and the specific steps to prevent it.
Causes Of Peeling
When latex paint peels after being applied over oil-based paint, it’s usually because the new coating can’t properly bond to the old surface—either the oil layer is too glossy, contaminated, or hasn’t been properly prepped—so you’ll see lifting, flaking, or large sheets coming away rather than a uniform failure.
- Improper adhesion: glossy oil or poor sanding causes peeling causes.
- Contamination: dirt, grease, or solvent residue.
- Moisture issues: trapped water or high humidity undermines bond.
Tack And Flashing
Although it may look like a simple sticky film, tack and flashing signal that the latex topcoat isn’t curing or bonding right to the oil underlayer; you’ll notice tack issues when the surface stays sticky and flashing problems when patches gloss differently.
To fix this, remove contaminated latex, clean and degloss the oil finish, allow full solvent cure, then apply a proper primer before recoating.
Preventing Yellowing
Because oil-based paints and certain primers tend to yellow as they age, you’ll want to choose materials and prep methods that minimize discoloration before you coat with latex.
Follow these steps for yellowing prevention and long term protection:
- Seal oil with a shellac/solvent primer.
- Use a high-quality waterborne alkyd or stain-blocking primer.
- Topcoat with UV-resistant latex and maintain ventilation.
When to Strip or Replace Oil Paint Instead
If the oil paint is badly blistered, powdery, or flaking, you should strip or replace it rather than try to topcoat with latex. You’ll need proper oil paint removal when adhesion fails; consider oil paint alternatives only if removal isn’t feasible. Choose stripping, sanding, or full replacement based on substrate condition and cost.
| Situation | Action |
|---|---|
| Blistering | Strip |
| Powdery | Replace |
| Small flake | Sand |
Specialty Surfaces: Trim, Cabinets, Metal, and Floors
Once you’ve decided whether to remove or topcoat failing oil paint, look next at specialty surfaces—trim, cabinets, metal, and floors—since each needs a different prep and coating approach.
- Trim: use sanding, deglosser, and specific trim techniques before primer.
- Cabinets: strip glossy layers, choose durable cabinet finishes and bonding primer.
- Metal/floors: use rust prep, metal coatings, or proper floor treatments and urethane topcoats.
Cost, Time, and Durability Trade-Offs
When weighing latex over oil, you’ll balance upfront costs, the time you’ll spend prepping and painting, and how long the result will last. Choosing cheaper materials or skipping steps can save money now but often costs more in rework and touch-ups later.
Do a cost analysis: factor primer, labor, and cure time.
Use a durability comparison to decide if higher-quality primer and prep justify the investment.
Frequently Asked Questions
Can I Paint Latex Over Oil in High-Humidity Climates?
Yes — you can, but you’ll need thorough cleaning, sanding, and a quality bonding primer because humidity effects can reduce paint adhesion; otherwise the latex may peel, so wait for lower humidity and follow proper prep.
Will Latex Over Oil Affect Indoor Air Quality or VOC Levels?
Yes — like a fog lifting, you’ll notice VOC emissions can spike when painting latex over oil unless you prep properly; poor paint adhesion worsens off-gassing, so prioritize indoor ventilation to reduce health concerns and lingering odors.
Can I Use Latex Over Oil on Exterior Painted Surfaces?
Yes — you can, but you’ll need proper surface preparation and adhesion testing first. You’ll strip loose paint, clean and sand, use a bonding primer, then test small areas to verify adhesion before painting the full exterior.
How Long Should I Wait Before Repainting Latex Over Oil?
You should wait at least 24–48 hours for oil to dry, often up to 7 days depending on conditions; verify thorough surface preparation—cleaning, sanding, and deglossing—before applying latex to guarantee proper adhesion and finish.
Are There Warranty or Insurance Issues When Painting Latex Over Oil?
Yes — you should check warranty considerations and insurance implications first; manufacturers or insurers might void coverage if improper prep causes failure. You’ll want documented prep, primer use, and approval from relevant warranty or insurance providers.
Conclusion
You can often paint latex over oil if you prep properly, but don’t skip the steps that guarantee adhesion and longevity. One study found that improperly prepped oil-to-latex shifts double the likelihood of peeling within five years, so clean, sand, and prime with a bonding primer when needed. If you see heavy yellowing, cracking, or persistent gloss failure, strip or replace the oil instead—those issues usually mean repainting won’t last.
