Can You Paint Over a Powder Coat Finish? What Pros Won’t Tell You for Free
You can paint over powder coat, but only if you prepare it right: clean, degloss, scuff, and prime; otherwise the new paint will lift, look uneven, and won’t match the original toughness. Smooth, well-adhered powder coat takes paint well for color changes or touch-ups, but heavily damaged, flaking, or rusted parts need stripping and re‑powdering for durability. Follow proper prep, primer, and paint choices for best results, and keep going to learn the exact steps pros use.
Quick Answer Can You Paint Over a Powder Coat Finish?
Yes—you can paint over powder coat in many cases, but it depends on the substrate condition and prep.
If the coat is clean, scuffed, and a proper primer and paint are used, results can look good and last several years; if the powder is glossy, peeling, or improperly adhered, paint will fail quickly.
Know the limitations and be realistic about longevity before you start.
Short, Direct Verdict
You can paint over a powder coat, but it only works reliably if you properly clean, scuff, and prime the surface first; otherwise the new paint won’t adhere well or last.
In short: yes, can you paint over a powder coat finish — but only with proper prep, compatible primer/paint, and patience.
Skip shortcuts and expect failures without those steps.
When it’s feasible and when it’s not
When the powder coat is clean, intact, and you’re willing to do proper prep—degreasing, scuffing, and priming—painting over it’s feasible and can produce a durable result.
You shouldn’t attempt it when the coating’s peeling, heavily textured, or on parts exposed to high heat or abrasion.
Also skip DIY painting if you can’t access all surfaces or won’t commit to correct adhesion steps.
Typical results and longevity expectations
How long will a paint-over last? You can expect variable longevity: properly prepped and primed, a paint-over may last several years outdoors; poor prep or heavy wear cuts that to months.
Expect thinner coverage, reduced durability, and higher peel risk compared with fresh powder.
Touch-ups hide blemishes but won’t restore original toughness—plan on periodic refinishing for lasting appearance and protection.
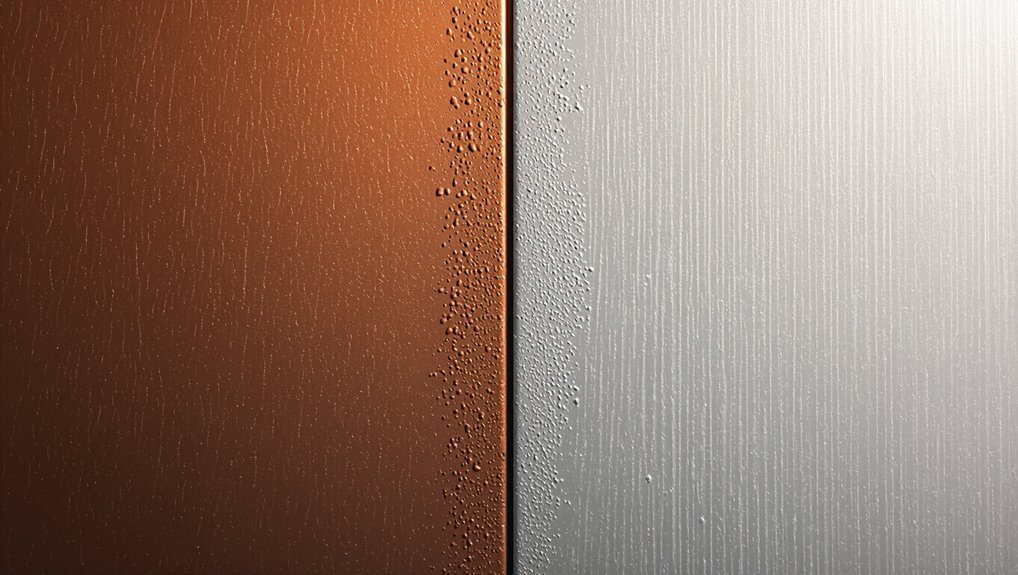
Basic Understanding What Is Powder Coating and How Is It Different from Paint?
You’re dealing with a dry powder that’s electrostatically bonded to metal and then cured into a hard film, not a wet paint layer that simply dries on the surface.
That cured coating brings superior durability, adhesion, and distinct textures because it’s chemically fused and heat-cured rather than solvent-based.
Because of that bond and curing, powder coat behaves very differently from bare metal or previous liquid paints when you try to repaint or modify it.
What powder coating is and how it bonds
Because powder coating uses dry, electrostatically charged particles that fuse under heat, it creates a hard, continuous finish that’s chemically and physically different from liquid paint.
You can think of powder as solid polymer that melts, flows, and chemically crosslinks to the substrate.
Bonding relies on electrostatic attraction and heat-driven fusion—not solvent evaporation—so adhesion mechanisms differ from traditional wet paints.
Key properties: durability, adhesion, texture, and curing
Having covered how powder particles electrostatically bond and fuse under heat, let’s look at the specific properties that set powder coating apart: durability, adhesion, texture, and curing.
You’ll find powder coats resist chips, chemicals, and UV better than many paints. Adhesion is strong when applied to proper substrates.
Textures vary from smooth to wrinkle. Curing locks polymers into a hard, long-lasting film.
Why powder coat behaves differently from bare metal or previous liquid paint
While both aim to protect and finish metal, powder coating behaves differently from bare steel or liquid paint because it’s applied as a dry thermosetting polymer that fuses into a continuous film rather than flowing and evaporating like liquid coatings.
You’ll notice tougher, thicker surfaces, different adhesion mechanics, and no solvent-driven leveling. That changes surface prep, sanding, and primer needs when repainting.
Reasons You Might Want to Paint Over Powder Coat
You might want to paint over a powder coat to change the color or freshen up its look without stripping the whole finish.
Painting can also hide minor chips or wear and let you customize pieces quickly instead of doing a full recoating.
We’ll compare the costs and time involved so you can decide when a paint touch-up makes sense.
Cosmetic updates and color changes
If your bike, patio set, or tool chest no longer matches your style or the décor, painting over its powder coat can give it a fresh, customized look without replacing the whole piece.
You can switch colors to match trends, create accents, or unify mismatched parts. Just pick proper paint and prep carefully so the new finish looks intentional and lasts.
Repairing minor damage or wear
Besides changing color, painting over powder coat is a practical fix when small chips, scratches, or worn spots make a piece look tired.
You can spot-prime and blend with matching paint to restore appearance, prevent corrosion, and extend life. Light sanding, cleaning, and proper adhesion promoter guarantee the repair lasts.
This saves time and cost versus full stripping or recoating.
Quick customization vs full recoating
When you want a new look fast, painting over powder coat gives you instant customization without the time and expense of a full recoat.
You can tweak colors, add accents, or test finishes before committing to a permanent solution. It’s ideal for trends, seasonal updates, or prototypes, letting you refresh appearance quickly while preserving the underlying durable powder coat.
Cost and time considerations comparison
Although a full recoat delivers the most durable, uniform finish, painting over powder coat usually saves you significant time and money—you’ll skip the stripping, curing, and often the shop labor that add days and hundreds of dollars to a project.
You’ll pay less up front and finish faster, though longevity and warranty differ.
| Option | Time | Cost |
|---|---|---|
| Paint over | Low | Low |
| Recoat | High | High |
| DIY paint | Medium | Very Low |
| Pro paint | Low | Medium |
When You Should Recoat vs When to Strip and Re-powder
If the powder coat is mostly intact with only cosmetic issues, you can often get away with a simple paint-over to save time and money.
However, if you’re seeing peeling, bubbling, extensive corrosion, or structural failures, those signs mean you should strip and re-powder for proper adhesion and longevity.
Consider the trade-offs: paint-over is cheaper and faster but won’t match the durability and performance of a full strip and re-powder.
Criteria favoring a simple paint-over
Because powder coat is designed to be durable, you can often get away with a simple paint-over when the existing finish is intact, well-adhered, and only cosmetically faded or lightly scratched.
Choose recoating when adhesion tests pass, corrosion is absent, edges and welds show no delamination, and substrate tolerates lower prep.
Light surface sanding, proper cleaning, and a compatible primer will yield lasting results.
Signs that require stripping and re-powdering
When the powder coat shows more than cosmetic wear, recoating won’t cut it—you’ll need stripping and re-powdering.
If you see deep corrosion, widespread bubbling, cracking, peeling, or failed adhesion, the substrate’s compromised.
Also strip if previous layers hide contamination, weld scale, or uneven thickness.
Any structural rust or flaking finish demands full removal and re-powder to guarantee proper bonding and longevity.
Cost, performance, and durability trade-offs
Although recoating costs less upfront and gets your piece back in service faster, you should weigh that saving against long-term performance and repair frequency. You’ll choose recoating for light wear and quick fixes; strip and re-powder for structural corrosion or repeated failures. Compare cost, longevity, and appearance to decide.
| Option | Cost | Lifespan |
|---|---|---|
| Recoat | Low | Short |
| Strip & re-powder | High | Long |
Step-by-Step: How to Paint Over Powder Coat (Surface Prep to Finish)
Before you start, gather the right tools and materials so you won’t stop mid-job.
Inspect the powder coat for chips, burns, or contamination, then clean with a degreaser and sand or abrade using the recommended grits for good mechanical adhesion.
Finish by choosing an appropriate primer—etching, adhesion promoter, or epoxy—based on the coating and final paint system.
Tools and materials needed
You’ll need a handful of specific tools and materials to get a durable, professional-looking finish when painting over powder coat. Gather abrasion pads, tack cloths, and masked-off areas for neat edges.
Prepare:
- Sandpaper (320–600 grit), scuff pads, or media for dulling gloss.
- Adhesion promoter or primer rated for powder-coated surfaces.
- Spray gun or aerosol paint, respirator, gloves, and clean rags.
Step 1 Inspect surface for defects and contamination
Now that you’ve got your tools and materials together, start by carefully inspecting the powder-coated surface for defects and contamination.
Look for chips, cracks, runs, orange peel, uneven coverage, rust, or flaking. Run your hand to feel grit, embossing, or raised edges.
Mark problem areas for repair or removal, and note whether the finish is smooth enough for adhesion before proceeding.
Step 2 Clean thoroughly: degreasing and removing contaminants
1. You’ll remove grease, oils, and dirt before painting. Follow a simple routine:
- Use a citrus or dedicated degreaser, wipe with clean rags.
- Rinse with warm water and a lint-free cloth to remove residue.
- Finish with isopropyl alcohol or acetone wipe-down, letting the surface fully flash before proceeding.
Thorough cleaning guarantees adhesion and prevents finish problems later.
Step 3 Sanding and abrading for mechanical adhesion (techniques and grit recommendations)

Scuff the powder-coated surface to create mechanical bite for the new paint — chemical cleaning alone won’t give you reliable adhesion.
Use 220–320 grit sandpaper for general scuffing, finer 400–600 grit for smooth areas.
For curves or crevices, use Scotch-Brite pads or abrasive wheels at low speed.
Sand until gloss dulls, then remove dust with tack cloth before priming.
Step 4 Choosing the right primer (etching primers, adhesion promoters, epoxy primers)
Before you prime, pick a product that matches the powder coat and the topcoat you plan to use—your choice of primer determines adhesion, corrosion resistance, and final finish.
Use etching primers for smooth, inert powder coats to chemically bite the surface; adhesion promoters for tricky plastics or glossy finishes; and epoxy primers when you need strong corrosion protection and a robust base for subsequent paint layers.
Step 5 Proper paint selection (acrylics, urethanes, spray options)
Step 5 is picking the right paint: choose a formulation that bonds to your primer, matches the durability you need, and suits your application method.
Use acrylic lacquers for quick drying and easy touch-ups, two-component urethanes for chemical and UV resistance, and high-quality aerosol or HVLP spray systems for even coverage.
Match paint to primer chemistry and expected wear.
Step 6 Application technique (spray distance, coats, flash times)
Anyone can ruin a great prep job by spraying poorly, so focus on consistent technique: keep a 6–10 inch spray distance, maintain smooth, overlapping passes, and apply thin, even coats.
Allow proper flash time—typically 5–10 minutes—between coats to tack up without running. Build two to three coats for uniform coverage, adjusting based on product instructions and film thickness measurements.
Step 7 Curing and post-cure handling (air-dry vs heat-cure considerations)
When you finish spraying, decide whether you’ll let the paint air-dry or use a heat cure—each method affects adhesion, hardness, and how long you must handle the piece.
Air-dry’s gentler but slower; avoid stacking or stressing parts for 24–72 hours.
Heat cure accelerates crosslinking, boosts durability, and shortens handling time, but requires temperature-safe substrates and controlled oven cycles to prevent blistering.
Step 8 Clear coat and protection options
After curing, you’ll want to decide on a clear coat to lock in color and add the level of protection your project needs.
Choose between spray polyurethane for UV and chemical resistance, acrylic clears for easy application, or ceramic coatings for abrasion toughness.
Apply thin, even coats, allow full flash times, and lightly sand between coats if needed.
Finish with recommended cure time.
Comparison: Painting Over Powder Coat vs Other Options
When you’re choosing how to change a powder-coated piece, consider how paint-over stacks up against lighter touch-ups, full chemical stripping and repainting, or sending it out for professional re‑powder coating.
Each option trades off time, cost, durability, and finish quality, so you’ll want to match the method to the item’s condition and desired outcome.
Next we’ll compare the pros and cons of each approach to help you pick the best route.
Paint-over vs light touch-up
Although both approaches aim to restore appearance, choosing between painting over a powder coat and doing a light touch-up comes down to the scope of damage, durability you need, and how much prep you’re willing to do.
You’d pick a full paint-over for widespread chips or color change; choose touch-up for isolated scratches where matching and minimal sanding preserve the original finish and longevity.
Paint-over vs chemical stripping and repainting
If your damage or color goals go beyond a few scratches, you’ll be weighing painting over the existing powder coat against stripping it back to bare metal and repainting.
Painting over saves time and avoids harsh chemicals, but adhesion, longevity, and color fidelity suffer.
Stripping and repainting costs more and takes longer, yet gives a guaranteed clean substrate for superior bond, finish, and durability.
Paint-over vs professional re-powder coating
Because repainting over powder coat is quicker and cheaper, you might be tempted to skip professional re-powder coating—but the two options tackle durability and appearance very differently. You’ll save time and money painting, but lose longevity and factory finish. Consider trade-offs below:
| Option | Durability | Cost/Time |
|---|---|---|
| Paint-over | Low | Low/Quick |
| Re-powder | High | High/Long |
| DIY strip+paint | Medium | Medium/Moderate |
Common Problems and Mistakes When Painting Over Powder Coat
When you paint over powder coat, you’ll run into issues like poor adhesion and eventual peeling if the surface isn’t prepped or the primer is incompatible.
You might also see orange peel, runs, or a texture mismatch, plus trapped dust or contaminants that show up as defects.
Don’t forget thermal expansion and brittleness can cause cracking or failure later on.
Poor adhesion and peeling root causes
Although a fresh coat can look tempting, poor adhesion and peeling usually come from a handful of preventable causes: contamination, inadequate surface preparation, incompatible paint chemistry, and insufficient curing or drying time.
You’ll avoid failure by cleaning oils, dirt, and wax; abrading glossy powder coat for mechanical keying; confirming primer and topcoat compatibility; and allowing full cure/dry times before handling or recoating.
Orange peel, runs, and texture mismatch
If you’re repainting a powder-coated surface, expect texture issues like orange peel, runs, or a finish that just doesn’t match the original — these problems usually come from spray technique, paint viscosity, or surface condition.
You’ll get orange peel from too-distant spraying or thick paint, runs from overapplication, and mismatched texture when you don’t mirror the original finish.
Adjust gun settings, thin properly, and practice.
Incompatible primers or paints
Why isn’t your new paint sticking or looking right? You’re likely using the wrong primer or paint chemistry.
Epoxy, acrylic, and urethane systems won’t all bond to powder coat the same way. Use a primer formulated for powder-coated surfaces and match topcoat chemistry.
Test adhesion with a small panel and follow manufacturer recommendations; incompatible products cause peeling, flaking, and premature failure.
Trapped contaminants and dust defects
When you paint over powder coat without thoroughly cleaning and controlling your workspace, dust and oils get trapped under the new finish and create pits, fisheyes, or a sandy texture.
You’ll see bumps, adhesion failures, and mottled sheen. Prevent this by degreasing, tack-ragging, and using a filtered spray booth or dust-free area.
Light scuffing and solvent wipe help remove residues.
Overlooking thermal expansion and brittle failures
Because powder coat and topcoats expand and contract at different rates, you can get cracks, crazing, or flakes where the new paint separates from the base finish if you don’t account for thermal movement.
You should match coating flexibility, use compatible primers, and test temperature cycles.
Rigid topcoats on a pliable powder coat often fail; plan for heat, cold, and vibration to avoid brittle failures.
How to Prevent Failures Best Practices and Pro Tips
Start with a strict surface-prep checklist—clean, degloss, and scuff to guarantee adhesion—and pick primers and topcoats that are chemically compatible with powder coat.
Control temperature, humidity, and ventilation during application, then verify adhesion with a small test patch and a tape pull before committing.
If you’re unsure about materials or finish integrity, consult a professional or your powder coater to avoid costly mistakes.
Surface prep checklist before painting
A firm surface prep checklist prevents peeling, runs, and poor adhesion when you paint over powder coat—so inspect, clean, and abrade systematically before touching a brush or spray gun.
You’ll follow steps that remove contaminants, create mechanical bite, and verify readiness.
- Degrease and wash thoroughly.
- Lightly scuff or sand to dull gloss.
- Wipe with solvent and tack cloth.
Selecting compatible primers and topcoats
When you’re ready to coat over powder, choose primers and topcoats formulated for adhesion to cured thermoset or thermoplastic finishes and chemically compatible with the powder’s resin chemistry; mismatched systems are the most common cause of flaking, blushing, or solvent-induced lifting.
Test adhesion with a crosshatch and solvent rub, pick polyester or epoxy primers for durability, and use manufacturer-recommended topcoats for guaranteed compatibility.
Environmental and application controls (temp, humidity, ventilation)
After you’ve matched primers and topcoats to the powder chemistry, control of temperature, humidity, and airflow becomes the factor that actually determines whether those coatings stick and cure properly.
Work between recommended temp/humidity ranges, precondition parts, and avoid spraying in high humidity or cold.
Use consistent airflow and exhaust to remove solvents and overspray.
Monitor conditions and adjust cure times accordingly.
Testing adhesion with a small patch and tape test
Because powder-coated surfaces can hide adhesion problems until it’s too late, always run a small patch and tape test before committing to full recoat.
Clean and scuff a discreet area, apply your primer/topcoat per instructions, let it cure, then press a strong adhesive tape and remove sharply.
Inspect for lifting or residue; any failure means address prep or compatibility before painting entire piece.
When to consult a professional or powder coater
If your patch test shows problems you can’t fix with more prep or a different primer, call a pro or the original powder coater before you tackle the whole piece.
They’ll diagnose adhesion, coating chemistry, or substrate issues, advise compatible products, or recommend stripping and recoating.
Consult a powder coater for warranties, complex parts, color matching, or if corrosion, heat, or structural concerns might affect performance.
Real-World Scenarios and Recommendations
When you’re deciding whether to paint over powder-coated wheels, outdoor furniture, or industrial gear, you should weigh durability, corrosion risk, and safety requirements for each item.
For automotive parts and safety-critical equipment, temporary touch-ups might work short-term but lifelong solutions usually mean stripping and recoating or using compatible spray systems.
For outdoor furniture and corrosion-prone pieces, choose long-term protective coatings and proper prep to avoid recurring failures.
Automotive parts and powder-coated wheels
Although powder-coated wheels and automotive parts are built to resist chips and corrosion, you’ll still run into scuffs, color changes, or curb rash that make repainting tempting.
You can spot-repair with epoxy primers and paint after sanding and scuffing, but full refinishes require stripping or etching for adhesion.
Match automotive-grade coatings, cure properly, and weigh cost versus replacing or professional recoat.
Outdoor furniture and corrosion-prone items
Because outdoor gear faces constant moisture, salt, and abrasion, powder-coated patio furniture and metal fixtures often need special care before you repaint.
You should remove rust, degrease, and scuff with appropriate abrasives, then apply a corrosion-inhibiting primer.
Use UV-resistant topcoats and paint designed for exterior metal.
Maintain seals and touch up chips promptly to prevent undercutting and long-term corrosion.
Industrial equipment and safety-critical components
If you’re repainting powder-coated industrial equipment or safety-critical components, plan for more stringent prep and testing than you’d for consumer items.
You’ll need certified surface prep, adhesion testing, and coatings qualified to the component’s spec. Consult engineers, follow OEM and regulatory requirements, document procedures, and validate performance under expected loads and environments.
Never assume cosmetic fixes meet safety or functional standards.
Quick fixes vs long-term solutions for each scenario
When you need a fast cosmetic fix, think short-term: spot-sand the damaged area, apply a compatible touch-up paint, and seal it to slow corrosion while you schedule a proper repair.
For bikes, patio furniture, or noncritical trim, touch-ups work. For structural, safety, or high-wear parts, strip and recoat or replace.
Document condition, pick correct materials, and plan permanent restoration.
Cost and Time Estimates
You’ll want to budget for materials and tools when doing a DIY paint-over, from sandpaper and primer to spray paint or a small HVLP setup.
Compare that to professional paint-over or full re-powdering, which can run higher but may save time and yield more durable results.
Also factor in time for prep, application, and cure—DIY can take a weekend while pros might finish faster but require scheduling.
DIY paint-over typical cost breakdown
Tackling a powder coat repaint yourself can save money, but you’ll still need to budget for key items: surface prep materials (sandpaper, stripper, or scuff pads), primer and paint formulated for metal, spray equipment or brushes, protective gear, and small extras like masking tape and drop cloths.
| Item | Typical Cost |
|---|---|
| Prep materials | $10–$40 |
| Primer & paint | $20–$80 |
| Spray gear/brushes | $15–$60 |
| Misc & PPE | $5–$30 |
Professional paint-over vs re-powdering cost comparison
If you’ve weighed DIY costs and decide the job’s bigger or more delicate than you want to handle, compare hiring a pro to re-powdering the part.
A professional paint-over typically runs lower upfront—labor plus materials—while re-powdering costs more but yields durable, factory-quality finish and longer life.
Factor in part complexity, color-matching, and warranty when choosing between lower short-term cost and long-term value.
Time required for prep, application, and cure
Expect the whole process—from prep through application to full cure—to take anywhere from a single afternoon for a simple spray-on touch-up to several days for a complete, high-quality job.
You’ll spend hours degreasing, sanding, and masking, then a few coats with dry times between.
Full chemical or oven cures add overnight or longer, so plan for downtime and verify cure specs for your chosen coating.
FAQs
You’ll likely have specific questions like whether automotive spray paint will stick to powder coat, if painting will void warranties or change performance, and how long a paint-over lasts versus re-powdering.
You might also wonder about sanding, chemical stripping at home, or whether it’s safe to bake painted, powder-coated parts to cure the topcoat.
I’ll answer those points so you can pick the safest, most durable option.
Can I spray automotive paint over powder coat?
Curious whether you can spray automotive paint over a powder coat? Yes—you can, but surface prep is critical.
Clean thoroughly, sand or scuff to promote adhesion, and use a compatible adhesion promoter or primer rated for powder-coated surfaces.
Spray in thin, even coats and allow proper cure times.
Test a small area first to confirm bond and finish before committing to the entire piece.
Will painting over powder coat void warranties or affect performance?
While painting over powder coat is technically possible, it can affect warranties and performance depending on the manufacturer and the part’s function.
You should check warranty terms—many makers void coverage if you alter the finish.
Performance risks include changed corrosion resistance, heat tolerance, and adhesion failures under stress.
For safety-critical or high-heat parts, get manufacturer approval or consider professional re-coating to preserve specs.
How long will a paint-over last compared to re-powdering?
How long will a paint-over last compared to re-powdering?
A properly prepped paint-over can last several years outdoors, but it won’t match powder’s typical decade-plus durability, UV resistance, or chip resistance.
Expect faster wear, peeling at edges, and more frequent touch-ups.
Re-powdering restores industrial-grade adhesion and longevity, so choose paint-over for budget or quick fixes, not long-term protection.
Can I sandblast or chemically strip powder coat at home?
If you’re leaning toward a paint-over because re-powdering isn’t practical, you might still want to remove the existing powder first—so can you sandblast or chemically strip it at home?
You can, but both require proper equipment, ventilation, PPE, and waste disposal.
Sandblasting risks substrate damage; strippers can be toxic and need neutralization.
Consider costs, safety, and local regulations before attempting it.
Is it safe to bake painted powder-coated parts to cure the topcoat?
Wondering whether you can safely bake painted powder-coated parts to cure a topcoat? You can, but cautiously.
Powder coating already cured might soften or discolor if you exceed its glass changeover temperature.
Match the topcoat’s cure schedule to the powder coat’s heat tolerance, use lower-temperature coatings or catalytic systems, and test a scrap piece.
When in doubt, consult the powder supplier for max bake limits.
Conclusion Recommended Decision Flowchart
To wrap up, you’ll use a quick decision checklist to choose whether to paint over, touch up, or re-powder.
Check the coating condition, exposure needs, and desired longevity to guide your choice.
Follow the flowchart steps and you’ll pick the most practical option fast.
Quick decision checklist: paint-over, touch-up, or re-powder?
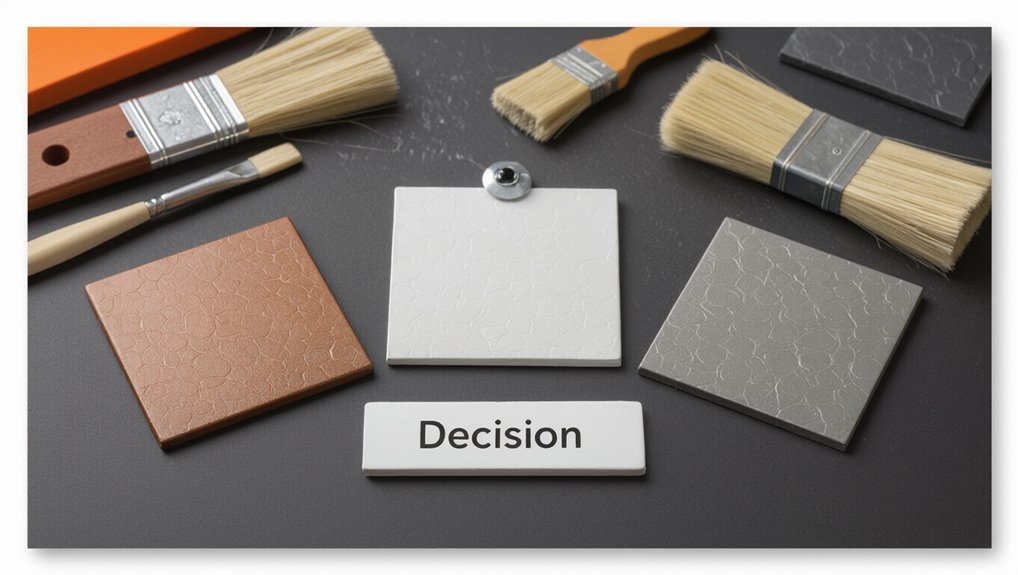
How do you decide whether to paint over, touch up, or re-powder a powder-coated part?
Check damage: tiny chips or scuffs—touch up.
Faded color but intact coating—paint-over after proper prep.
Large areas, peeling, or corrosion—re-powder for durability.
Consider use, budget, and time.
If unsure, test a small spot first and prioritize adhesion and corrosion protection.