Can You Paint Over Pencil on Walls? The Right Way to Prep Before Painting
Yes — you can paint over pencil on walls if you prep properly. Start by evaluating the marks (graphite, colored pencil, charcoal) and test-clean a small spot. Erase gently, sand any stubborn smudges, and clean the surface to remove dust and oils. Spot-prime with a shellac or stain-blocking primer for heavy graphite or waxy colored pencils, or use a water-based primer for light marks. Follow with two thin paint coats, and keep going to learn full prep and troubleshooting.
Quick Answer Can You Paint Over Pencil on Walls?
Yes—you can usually paint over pencil on walls if the marks are light or you prime first.
If the pencil is heavy, smudged, or on a porous surface, you’ll need to erase, sand, and use a stain-blocking primer before painting.
Follow those steps and your new coat will hide the marks.
Short direct answer
You can paint over pencil on walls, but you should erase as much as possible and prime the area first so the marks don’t show through or bleed into the new paint.
If faint lines remain, sand lightly, clean dust, and apply a stain-blocking primer.
Then paint as usual; priming prevents graphite from telegraphing and guarantees a uniform finish when you paint over pencil on walls.
When painting over is acceptable vs when it’s not
If you’ve wiped and primed as described, decide whether painting over is the right move: light pencil sketches and shallow marks usually hide fine after erasing, sanding, and using a stain-blocking primer.
However, deep graphite, heavy shading, or pencil used on textured or glossy surfaces may still show or bleed through.
If marks remain, remove or spot-prime; otherwise go ahead with your topcoat.
Basic Understanding What Pencil Marks Are and Why They Matter
You’ll run into different kinds of pencil marks—graphite, colored pencil, and charcoal—and each behaves differently on wall surfaces.
Know that some marks can bleed through paint, leave ghosting, or affect texture if not properly sealed. Understanding those differences helps you choose the right cleaning, priming, or painting approach.
Types of pencil marks (graphite, colored pencil, charcoal)
Marks from graphite, colored pencil, and charcoal each behave differently on walls, so knowing what you’re dealing with matters before you grab a brush.
Graphite leaves gray smudges that can smear; colored pencil deposits waxy pigment that may resist primers; charcoal is dusty, easily smudged, and often deeper in texture.
Identify the type to choose proper cleaning and sealing steps.
How pencil interacts with paint and common issues (bleeding, ghosting, texture)
When pencil meets paint, the pencil’s material and how it’s applied determine whether you’ll see bleeding, ghosting, or texture showing through; graphite can smudge into fresh paint, colored pencil wax can repel primers and cause faint outlines to reappear, and charcoal’s dusty grit can leave a textured shadow that paint won’t fully hide.
You’ll need cleaning, sealing, or sanding to prevent those issues before repainting.
Overview of Preparation Approaches (Quick Comparison)
You can choose from three prep paths: no-prep painting for quick touch-ups, light prep options like erasing or spot-priming, and full prep for the best, longest-lasting results.
No-prep is fastest but risks ghosting; light prep balances effort and outcome. Full prep takes more time but gives the most reliable finish.
No-prep painting
No-prep painting skips sanding, priming, and heavy cleanup so you can cover pencil marks fast; it works best on smooth, clean walls with light pencil lines and durable primer or paint that adheres well.
You’ll roll or spray a topcoat directly, saving time and materials. This approach risks bleed-through on darker or oily marks, so inspect the surface and test a small area first.
Light prep options
Although you can skip heavy prep in some cases, light prep gives you a balance of speed and reliability for covering pencil on walls.
Wipe marks with a damp cloth, use a soft eraser for smudges, and sand glossy spots gently.
Apply a stain-blocking primer only where pencil shows through.
These steps are quick, minimize texture changes, and improve topcoat adhesion.
Full prep (recommended for best results)
If light prep doesn’t give you the confidence you want, move on to a full prep routine that tackles pencil marks and surface issues from start to finish. You’ll sand, clean, spot-prime, and skim as needed so paint adheres and marks vanish. Follow steps methodically for durable, smooth results.
| Step | Action |
|---|---|
| 1 | Sand |
| 2 | Clean |
| 3 | Spot-prime |
| 4 | Skim |
| 5 | Paint |
Step-by-Step Prep Before Painting Over Pencil
Start by evaluating the pencil marks—note their size, depth, and whether they’re graphite or another material.
Test a small, hidden spot and then clean the area to remove dust, oils, and residues before you proceed.
Use appropriate erasing tools, melamine sponge, or light sanding and feather the edges on textured walls to guarantee a smooth surface for painting.
Step 1 Assess the mark: size, depth, and material
Begin by looking closely at the mark to judge its size, depth, and what made it—light surface scribbles need a different approach than deep impressions or graphite-heavy strokes.
Note whether it’s pencil, crayon, ink, or dirt. Measure area affected, feel for texture, and check if pressure gouged paint.
This informs cleaning, sanding, or priming choices before you proceed.
Step 2 Test a small inconspicuous area
While you’re still at the prep stage, pick a small, hidden spot—inside a closet, behind furniture, or near a baseboard—and try your chosen cleaning method and paint on that area to see how the surface reacts.
Observe adhesion, discoloration, and sheen after it dries. If the pencil mark shows through or the paint beads, adjust primer choice or application before tackling visible walls.
Step 3 Cleaning the wall (dust, oils, residues)
If your patch test looked good, move on to cleaning the whole wall so paint will stick and look uniform.
Wipe surfaces with a microfiber cloth to remove dust, then degrease with a mild detergent solution or trisodium phosphate alternative.
Rinse with clean water, let dry completely, and inspect for remaining residues.
Clean, dry walls guarantee primer and paint adhere evenly.
Step 4 Erasing techniques and tools (rubber eraser, kneaded eraser, melamine sponge)
1 key step before priming is removing as much pencil as you can with the right tools so the marks won’t show through; use a soft rubber eraser for general lines, a kneaded eraser to lift delicate or shaded areas without abrasion, and a melamine sponge for stubborn smudges—working gently and testing each method on an inconspicuous spot first.
Then wipe residue with a dry microfiber cloth.
Step 5 Sanding and feathering edges for textured walls
Once you’ve removed pencil residue and wiped the wall clean, next sand and feather the edges so paint sits evenly on textured surfaces.
Lightly sand around erased marks with fine-grit paper, blending raised texture into surrounding wall. Use a sanding block for control, vacuum dust, then wipe with a damp cloth.
Feather until changes feel smooth to the touch and visually seamless.
Step 6 Using a stain-blocking primer vs regular primer
Because pencil marks can sometimes bleed through paint, you’ll want to decide between a stain-blocking primer and a regular primer before you paint.
Use a stain-blocking primer when marks persist after cleaning or when graphite transfers show through. Regular primer’s fine for faint, fully cleaned pencil traces.
Apply one thin, even coat, let it dry, and inspect for any remaining shadow before topcoating.
Step 7 Choosing paint type and finish
After the primer dries and you’ve confirmed no graphite is showing through, pick a paint type and finish that fits the room’s use and look.
Choose durable acrylic latex for easy cleaning in high-traffic areas, and consider eggshell or satin for living spaces.
Use semi-gloss in kitchens or bathrooms for moisture resistance.
Match sheen to existing trim and practical needs for lasting results.
Step 8 Application tips for seamless coverage (brush, roller, number of coats)
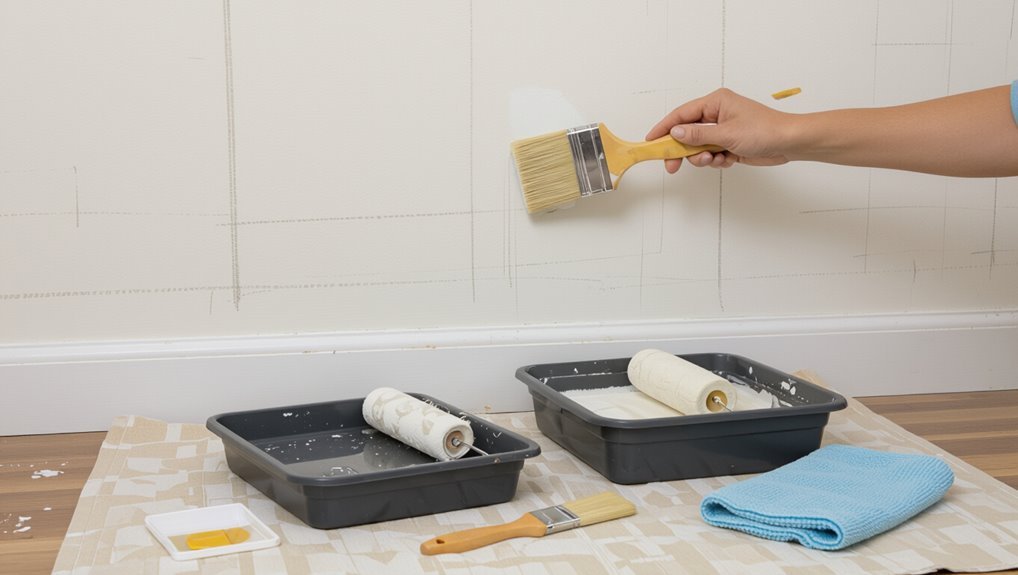
When you’re ready to paint, choose the right tools and a clear plan so the pencil marks stay hidden and the finish looks uniform. Use a high-quality angled brush for edges and a dense nap roller (3/8″–1/2″ for smooth to semi-rough walls) for field coverage. Plan on at least two thin coats of paint—more if the color change is drastic.
- Cut in carefully with the angled brush.
- Roll in a “W” pattern, keep a wet edge.
- Allow proper drying between thin coats; sand light imperfections before the final coat.
Special Cases and Materials
When you’re dealing with pencil that’s on wallpaper, trim, textured or faux-finish walls, or different substrates like drywall, plaster, and wood, the cleanup and priming needs can change considerably.
You’ll need to treat glossy or delicate surfaces more gently and choose primers that bond to the specific material.
I’ll walk you through the best approaches for each case so you get a smooth, lasting paint job.
Pencil on wallpaper
If your wallpaper has pencil marks, you’ll need to be gentler than with painted drywall because the paper and adhesive can lift or stain easily.
Test a small hidden area first. Lightly erase with a soft vinyl eraser, then blot residue with a barely damp cloth.
If marks persist, prime with a stain-blocking primer designed for wallpaper before painting to prevent bleed-through.
Pencil on painted trim or glossy surfaces
Although pencil on painted trim or glossy surfaces can look stubborn, you can usually remove it without damaging the finish by choosing the right gentle method.
Start with a soft eraser, then try a damp microfiber with mild dish soap.
For persistent marks, use a magic eraser very lightly or rubbing alcohol on a cotton swab, testing an inconspicuous spot first.
Pencil on textured or faux-finish walls
Because textured and faux-finish walls catch pencil graphite in crevices and raised patterns, you’ll need a gentler, more deliberate approach than with smooth surfaces.
Lightly brush with a soft-bristle brush or use a kneaded eraser to lift surface marks without flattening texture.
Clean with a mild detergent and spot-prime stubborn areas using a stain-blocking primer before repainting for even coverage.
Pencil on drywall vs plaster vs wood
Different substrates—drywall, plaster, and wood—grab and hold pencil marks in distinct ways, so you’ll adjust your removal and repainting steps accordingly.
On drywall, erase gently, sand light, prime if graphite shows.
On plaster, clean with a damp cloth, spot-prime hairline areas, and use a stain-blocking primer for stubborn marks.
On wood, sand to bare grain and seal before painting.
Comparison Primers and Products That Prevent Pencil Bleed-Through
When you’re choosing a primer to stop pencil bleed-through, compare oil-based, shellac-based, and water-based stain-blocking options for their adhesion, odor, and drying time.
Shellac primers block stains fastest and work well on stubborn graphite. Oil-based primers offer strong adhesion for difficult surfaces, and water-based primers are low-odor and easier to clean up.
Below is a quick product selection guide keyed to common scenarios so you can pick the right primer for your situation.
Oil-based vs shellac-based vs water-based stain-blocking primers
If you want reliable protection against pencil bleed-through, choosing the right stain-blocking primer matters: oil-based, shellac-based, and water-based primers each block stains differently and suit different surfaces and conditions.
Oil-based offers strong sealing and durability but smells and cures slowly.
Shellac works fast and blocks stubborn marks, though it’s pricier.
Water-based is low-odor and easy cleanup but may need extra coats.
Quick product selection guide by scenario
Start by matching the primer type to your specific situation so you get reliable pencil bleed protection without overkill. Choose shellac for stubborn marks, oil for porous surfaces, water-based for light pencil on clean walls. Apply primer thinly, sand if needed, then topcoat.
| Scenario | Recommended Primer |
|---|---|
| Stubborn pencil | Shellac |
| Porous wall | Oil |
| Light marks | Water-based |
Common Mistakes to Avoid
Don’t rub too hard or you can gouge the paint or drywall while trying to remove pencil marks.
Make sure you prime when needed, use a suitable eraser or cleaner for the finish, and always test a small area first.
Also let cleaners and primers fully dry before painting to avoid bleed-through and tacky spots.
Rubbing too hard and damaging the surface
Although you might think pressing harder will erase every pencil mark, rubbing too forcefully can gouge paint, remove primer, or sand through drywall paper.
You should use gentle erasing with a soft eraser, light sanding with fine-grit if needed, and test a small area first.
Work patiently to avoid uneven texture that shows through new paint and creates extra repairs.
Skipping a primer when needed
If you skip primer when the wall needs it, the new paint may not adhere, hide stains, or cover the repaired area, leaving you with patchy color and premature peeling.
You’ll want to spot-prime pencil marks, stains, and patched drywall before topcoating.
Primer seals porous spots, evens sheen, and guarantees uniform coverage so your finish lasts and you avoid sanding or repainting sooner than necessary.
Using the wrong eraser or cleaner for the finish
Once you’ve spot-primed pencil marks and repairs, the next mistake is using the wrong eraser or cleaner for the paint finish — and that choice can undo your prep work.
Don’t grab a harsh solvent on delicate finishes or a gritty eraser on glossy paint. Use a soft rubber eraser or a mild, pH-neutral cleaner and test a hidden patch so you don’t cause staining or abrasion.
Not testing first or painting without adequate drying time
Because paint behaves differently over pencil, you should always test in an inconspicuous spot and let primers, cleaners, and repairs fully dry before rolling or brushing—rushing can trap moisture, cause lifting, or reveal bleeding through later.
If you skip testing or paint too soon, you risk stains reappearing, uneven sheen, and adhesion failures.
Wait the recommended cure times for reliable, lasting results.
Best Practices and Tips for a Professional Finish
Before you start, make a tools-and-materials checklist so you’ve got the right primer, sanding supplies, tack cloth, and paint.
Use protective coatings and simple touch-up strategies to prevent future marks and make repairs easy.
If the damage is extensive or the finish must be flawless, call a pro to save time and guarantee a perfect result.
Tools and materials checklist
1 simple checklist will keep your project on track: gather the right tools, select appropriate materials, and prep the surface properly before you paint.
You’ll need a soft eraser, mild cleaner, sandpaper (220 grit), spackling compound, putty knife, primer (stain-blocking), quality brush and roller, painter’s tape, drop cloths, and fine-grit sanding sponge.
Have rags and gloves ready.
Preventing future marks (protective coatings, touch-up strategies)
If you want your freshly painted walls to stay clean and scuff-free, add a protective topcoat and plan for simple touch-ups now so repairs are quick and invisible later.
Use a clear satin or semi-gloss finish in high-traffic areas, keep a small amount of mixed paint for touch-ups, store proper brushes, and address marks promptly with light sanding and feathered blending for seamless results.
When to call a pro
Even with a protective topcoat and a touch-up kit on hand, some jobs are worth handing over to a professional.
Call a pro when stains bleed through, large areas need color matching, textured surfaces require skim-coating, or repairs go beyond simple filling.
Pros save time, guarantee even coverage, match finishes, and prevent costly redo jobs if you’re unsure or short on tools and experience.
Troubleshooting If Pencil Shows Through After Painting
If you still see pencil marks after painting, start by checking whether you used enough primer or if the marks were heavy graphite.
You can re-sand the area, spot-prime the stains with a stain-blocking primer, and add extra topcoats until the marks disappear.
If those fixes don’t work, you’ll need to remove the affected finish or refinish the wall.
Identifying causes (insufficient primer, heavy graphite)
When pencil marks still peek through fresh paint, you’ll usually find two main culprits: heavy graphite deposits that bleed through and primer that wasn’t applied properly or at all.
You should inspect marks for deep, dark strokes or smudges and check whether primer covered the area evenly.
Also consider surface texture and previous coatings—both affect how graphite shows through new paint.
Remedial steps (re-sand, spot-prime, additional coats)
Start by sanding the affected area smooth to remove loose graphite and create a good bite for primer; you’ll want to feather the edges into the surrounding paint so the repair blends.
Clean dust, apply a stain-blocking spot primer, let it dry fully, then repaint.
If pencil still shows, sand lightly and add additional thin coats of primer or finish paint until the mark’s concealed.
When removal or refinishing is necessary
Although spot-priming and extra coats usually hide pencil marks, you’ll sometimes find graphite bleeding through after paint dries.
If that happens, sand the area smooth, clean off dust, then erase remaining lines with a soft rubber or solvent if needed.
When marks persist, strip and refinish the problematic section or install a thin drywall patch before priming and repainting for a permanent fix.
FAQ
You’ll find quick answers here to common questions like whether a regular primer will hide pencil marks and if bleach or cleaners can remove them safely.
We’ll cover how many paint coats are usually needed, whether it’s safe to sand pencil marks on plaster, and if colored pencil or marker need different treatment than graphite.
If you still have a specific situation, ask and we’ll give tailored steps.
Will a regular primer hide pencil marks?
Can a regular primer cover pencil marks effectively?
You’ll find ordinary primers may reduce light, shallow graphite but won’t fully hide darker or heavily pressed marks.
For reliable results, erase as much as possible first, then use a stain-blocking or high-hide primer.
That combination seals remaining graphite and creates a uniform base so your topcoat looks clean and consistent.
Can I use bleach or cleaners to remove pencil marks?
Wondering whether bleach or household cleaners will lift pencil marks from your walls? You can try mild cleaners or a diluted bleach solution on painted surfaces, testing a hidden spot first.
Harsh chemicals may strip paint or discolor finishes, so work gently with a soft cloth and rinse thoroughly.
For stubborn marks, gently sanding or using a specialized cleaner is safer than repeated bleaching.
How many coats of paint are usually needed to cover pencil?
Most walls need two coats of paint to fully hide pencil marks.
Though lightly penciled lines might disappear with one good coat if you use a high-quality, high-coverage paint. You should prime any stubborn marks first; then apply the recommended drying time between coats.
Darker pencils or heavy pressure often require two coats plus careful feathering to avoid ghosting.
Is it safe to sand pencil marks on plaster walls?
If two coats of paint or priming don’t fully hide stubborn pencil lines, you might consider sanding the marks on plaster, but you should proceed carefully.
Use fine-grit sandpaper, light pressure, and a sanding block to avoid gouging. Test a small area first.
After sanding, wipe dust, spot-prime exposed plaster, and inspect for texture changes before repainting to guarantee a smooth finish.
Can colored pencil or marker be treated the same way as graphite?
How you treat colored pencil or marker depends on the medium: they don’t behave like graphite. You’ll need different prep.
Colored pencil may lift with gentle erasing or a detergent scrub; permanent marker often soaks in and stains.
Test a hidden spot, use stain-blocking primer for ink, and consider light sanding only for waxy crayons.
Always prime before repainting to prevent bleed-through.