
Can You Paint Plastic Shower Walls? Best Methods Explained
Yes — you can paint plastic shower walls and get a durable, attractive finish if you prep and use the right products. Start by identifying the material (ABS, PVC, acrylic, or fiberglass), clean and sand lightly, then apply a plastic-bonding primer and a waterproof, mildew-resistant topcoat. Use spray for smooth coverage and allow full cure before wet use. With proper technique you’ll avoid peeling and stains — keep going to learn materials, tools, and troubleshooting tips.
Quick Overview: When Painting Plastic Showers Makes Sense
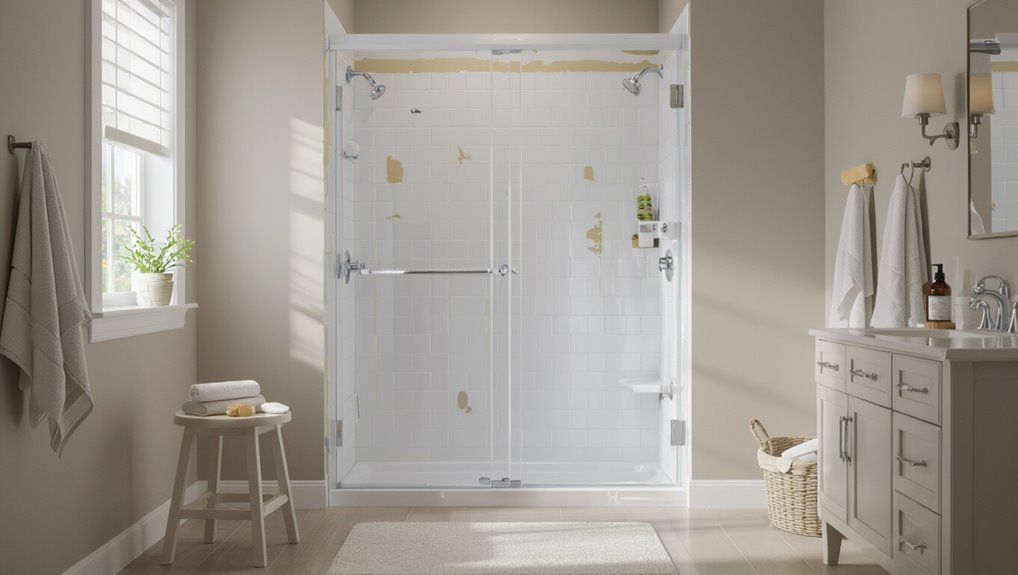
If your plastic shower is stained, faded, or you just want a new color without replacing the unit, painting can be a practical and cost‑effective option—provided the surface is in good condition, firmly bonded, and properly prepped.
You’ll decide based on cost, longevity, and moisture levels; prioritize surface prep and appropriate painting techniques to improve shower aesthetics and avoid peeling, discoloration, or trapped moisture.
Quick Answer: Can You Paint Plastic Shower Walls?
Wondering whether you can paint plastic shower walls? You can, but success depends on prep, primer, and paint choice to match your shower design and current color trends.
Consider these steps:
Consider these steps: clean, prime with a plastic-bonding primer, then finish with a water-resistant topcoat for lasting results.
- Clean and sand thoroughly.
- Use a plastic-bonding primer.
- Apply a durable, water-resistant topcoat.
Follow instructions precisely to get a lasting, stylish update.
Which Shower Wall Materials Accept Paint (ABS, PVC, Acrylic, Fiberglass)
Which shower wall materials take paint well depends on their surface chemistry and porosity. You’ll learn paint compatibility for common plastic types and choose primer choices and adhesion techniques. Focus on surface preparation, color selection, finish options, environmental impact, maintenance tips, and DIY techniques for lasting results.
| Material | Paintability |
|---|---|
| ABS | Good with primer |
| PVC | Moderate, needs prep |
| Acrylic | Excellent with etch |
| Fiberglass | Excellent with proper primer |
How to Identify ABS, PVC, Acrylic, and Fiberglass Panels
How can you tell whether your shower panels are ABS, PVC, acrylic, or fiberglass? Use quick material identification tips and simple panel comparison methods to inspect texture, weight, and edges.
- Visual: glossy vs matte, visible fibers, seam style.
- Sound/weight: hollow light (PVC/ABS) vs solid/heavier (acrylic/fiberglass).
- Edge test: smooth molded edge (PVC/ABS) vs layered or resin edge (acrylic/fiberglass).
When to Paint vs Replace Shower Walls
You’ll want to weigh repairability against cost and condition when deciding whether to paint or replace shower walls.
If panels are cracked, warped, moldy, or have failing seams, replacement is usually the safer long-term choice.
If the surface is sound but faded, scratched, or stained, painting can be a viable, budget-friendly option.
When To Replace
If your shower walls have only surface issues—like minor scratches, discoloration, or peeling finish—you can often paint them and get months or years of improved appearance; but when damage goes deeper, replacement becomes the safer, longer-lasting option.
- Structural cracks, mold behind panels, or water damage warrant replacement.
- Extensive fading harms shower wall longevity and resale value.
- For cost effectiveness, weigh aesthetic upgrades and maintenance tips against replacement.
When Painting Is Viable
When damage stays cosmetic—minor scratches, surface peeling, or dull finish—painting can be a practical and cost-effective choice instead of replacing the walls.
You’ll weigh painting techniques and surface preparation to guarantee paint adhesion and paint durability.
Consider color selection, address moisture issues with sealers, use proper repair methods, follow maintenance routines, consult product recommendations, and perform a brief cost analysis before deciding.
Cost and Time: Painting vs Replacing Shower Walls
Deciding between painting and replacing shower walls comes down to how much time and money you’re willing to invest: painting typically costs a few dozen to a few hundred dollars and can be done in a weekend, while replacement often runs into the thousands and takes several days to a week or more.
Decide by budget and schedule: paint for a quick, inexpensive refresh; replace for a pricier, longer-lasting overhaul.
Use cost analysis and time efficiency to choose.
- Paint: low cost, fast.
- Replace: high cost, long.
- Consider longevity vs budget.
Tools and Safety Gear You’ll Need
You weighed cost and time, and now you’ll need the right kit to get the job done safely and efficiently. Gather safety equipment and essential tools: respirator, goggles, gloves, sanding block, primer, and paint. Keep a drop cloth and painter’s tape ready.
| Personal | Tools | Extras |
|---|---|---|
| Respirator | Sanding block | Drop cloth |
| Goggles | Primer & paint | Painter’s tape |
Surface Condition and Why It Matters for Adhesion
Before you paint, make sure the surface is spotless—soap scum, oils, and mildew will stop primer and paint from sticking.
Check for cracks, chips, or uneven areas and repair or sand them smooth so the finish bonds evenly.
If you skip cleaning or fixing damage, the paint will peel or look patchy quickly.
Surface Cleanliness Importance
Although a glossy finish might look fine at first, any grime, soap scum, or oily residue on plastic shower walls will prevent paint from sticking properly.
You’ll need proper surface preparation, choose cleaning solutions for your plastic types, and follow adhesion techniques. Clean, rinse, and dry thoroughly before priming.
- Degrease
- Decontaminate
- Rinse and dry
Damage And Imperfections
Minor nicks, deep scratches, peeling areas, and soft spots all compromise paint adhesion on plastic shower walls and demand repair before you prime.
You’ll perform surface repair to eliminate adhesion issues, choosing texture options and color selection that boost aesthetic appeal.
Proper prep improves finish durability and moisture resistance.
Follow maintenance tips to extend life and prevent future problems.
Which Primers Bond to Plastic Shower Walls
When you’re repainting plastic shower walls, the primer you choose makes the difference between a durable finish and peeling paint; primers formulated for nonporous plastics or for vinyl surfaces give the best adhesion.
You’ll consider primer types, adhesion factors, bonding agents, surface treatments, paint compatibility, application techniques, product recommendations, and primer benefits.
- Etch/specialty plastic primers
- Bonding primers
- Adhesion-promoting sprays
Best Paints for Plastic Shower Surfaces
If you want a finish that stands up to moisture and cleaning, choose paints formulated for nonporous, high-humidity environments and that’re compatible with your primer—the best options are acrylic enamel or water-based epoxy paints designed for vinyl or plastic surfaces.
You’ll compare common paint types and evaluate best paint brands for adhesion, durability, and low-VOC formulas, then test a small area before full application.
Best Epoxy and Specialty Coatings for Wet Showers
When you need maximum durability in a wet shower, marine-grade epoxies offer waterproof adhesion and chemical resistance that regular paints can’t match.
Consider moisture-cured polyurethane coatings for flexible, long-lasting protection in constantly humid conditions.
Also look for anti-microbial shower finishes that inhibit mold and mildew to keep surfaces cleaner between cleanings.
Marine-Grade Epoxy Options
Because showers stay wet and get scrubbed, you’ll want a marine-grade epoxy that’s formulated for constant immersion and abrasion resistance.
You’ll appreciate marine grade benefits like epoxy durability, environmental resistance, and varied finish types.
Focus on surface preparation, curing processes, and application techniques. Consider color options for aesthetics.
- Product selection
- Prep checklist
- Application steps
Moisture-Cured Polyurethane Coatings
Although moisture-cured polyurethane (MCPU) sounds technical, you’ll find it’s one of the best choices for wet showers because it bonds tightly, resists abrasion, and tolerates constant humidity better than many standard coatings.
You’ll get excellent moisture resistance and long-term durability.
Follow precise application techniques: clean, scuff, use correct humidity/temperature, apply thin coats, and allow full cure before regular shower use.
Anti-Microbial Shower Finishes
Moisture-cured polyurethane handles humidity and wear well, but if you’re worried about mold and bacterial growth on plastic shower walls, anti-microbial finishes offer an added level of protection.
You get anti microbial benefits like mold resistance and improved health safety, plus finish durability and surface longevity that aid cleaning ease.
- Epoxy with silver ions
- Polyurethane blends
- Specialty antimicrobial topcoats
Spray, Brush, or Roller: Which to Use and When
Wondering whether to spray, brush, or roll your plastic shower walls? You’ll choose based on surface compatibility and finish quality:
spray techniques give smooth, fast coverage and best application speed for textured panels;
brush advantages suit edges and detail work;
roller benefits balance speed and control for flat areas.
Prioritize tool selection to optimize paint durability and a professional-looking result.
Cleaning Soap Scum and Grime: Step‑by‑Step Prep
Before you paint, you’ll need to remove soap scum with a dedicated cleaner or a vinegar-and-baking-soda paste so the surface will accept primer.
Next, degrease using a trisodium phosphate (TSP) solution or a strong bathroom degreaser to lift oils and residue.
Rinse thoroughly and let the walls dry completely before moving on to sanding or priming.
Remove Soap Scum
Start by stripping away soap scum and grime so your paint will bond properly to the plastic surface.
Use targeted soap scum removal with appropriate cleaning products and a nonabrasive sponge.
Follow this quick routine:
- Apply cleaner, let sit briefly.
- Scrub gently in circular motions.
- Wipe with a damp cloth and dry completely before moving on.
Degrease And Rinse
Degrease the surface thoroughly to remove oils and residue that soap scum cleaners can leave behind, because paint won’t stick to slick areas.
Use cleaning supplies with effective detergents suited for plastic compatibility. Apply degreasing techniques, scrub, then follow rinsing methods to clear residue.
Observe recommended drying times before priming. Maintain regular cleaning frequency to guarantee long-term adhesion and successful surface preparation.
How to Sand Plastic Shower Walls Without Damage
Sanding plastic shower walls requires a light touch and the right materials so you don’t scratch or melt the surface; use fine-grit sandpaper (320–600 grit) and a soft sanding block.
Keep the pad moving evenly, and check your progress frequently to avoid removing too much finish. Use safe sanding techniques and follow plastic safety:
- Clean and dry area.
- Sand gently in circles.
- Wipe debris.
Repairing Scratches, Gouges, and Cracks in Panels
Repair scratches, gouges, and cracks in plastic shower panels by first evaluating the damage and choosing the right repair method—light scratches can be polished or filled, deeper gouges need a plastic filler or epoxy, and cracks often require adhesive plus reinforcement. Perform surface preparation, follow repair techniques for scratch repair, gouge filling, and crack sealing, then schedule regular panel maintenance and panel restoration.
| Fear | Relief |
|---|---|
| Visible damage | Confidence restored |
| Time lost | Finish satisfied |
Masking and Protecting Fixtures, Grout, and Drains
Before you paint, cover fixtures like faucets and soap dishes tightly with painter’s tape or plastic so paint can’t seep under.
Protect grout lines by laying thin painter’s tape along edges to avoid buildup that’s hard to remove.
Temporarily seal drains with tape or a rubber stopper to keep paint and debris out while you work.
Covering Fixtures Securely
Because paint and primer won’t tolerate constant contact with metal or open grout, you’ll need to mask and protect every fixture, seam, and drain before you roll.
Tape edges tightly and cover faucets, handles, and showerheads with plastic or painter’s tape and film.
Follow these fixture protection strategies:
- Use adhesive tape techniques to secure coverings.
- Consider fixture paint compatibility and shower hardware considerations.
- Focus on masking shower edges and protecting tile surfaces.
Protecting Grout Lines
Protect grout lines with tight masking to keep paint out of joints and prevent future peeling; use low-tack painter’s tape pressed firmly into seams and a thin bead of removable caulk or masking film over drains and fixture gaps to create a clean barrier.
Then remove paintable tape after curing, inspect grout protection, and consider grout sealing on cured surfaces to preserve appearance and prevent moisture intrusion.
Sealing Drains Temporarily
When you’re ready to paint, seal drains and fixtures tightly so paint, primer, and sanding dust don’t clog or stain them; use low-tack painter’s tape wrapped around drain edges, a bit of removable caulk to bridge gaps, and plastic or paper covers secured with tape over faucets and showerheads.
- Apply drain covers for full protection.
- Create temporary seals with removable caulk.
- Tape plastic over fixtures and grout.
How to Apply Primer to Plastic Walls (Exact Technique)
Start by cleaning the walls thoroughly—wash with a mild detergent or TSP substitute, rinse well, and let the surface dry completely.
Then sand lightly with 220–320 grit to scuff the plastic so primer will adhere.
Lightly sand with 220–320 grit to scuff plastic, improving primer adhesion for a lasting finish.
Tape edges, ventilate, and use a high-adhesion bonding primer.
Apply thin, even coats with a nylon brush or foam roller for consistent primer application and improved plastic adhesion.
How Long to Wait Between Primer and Paint Coats
Because primer needs time to form a proper bond, you should wait until it’s fully dry and tack-free before painting—typically 1 to 4 hours for fast-drying bonding primers, but up to 24 hours for heavier or oil-based formulas.
Check the product label for exact recoat times and work in thin coats to avoid long cure delays.
- Check label recoat time.
- Assess surface tack.
- Verify consistent paint drying and primer application.
Painting Technique for a Smooth, Factory‑Like Finish
Aim for steady, deliberate strokes and thin, even coats to get a smooth, factory‑like finish on plastic shower walls.
Use a high‑density foam roller or fine‑nap roller for uniform laydown, and feather edges to avoid ridges.
Keep a wet edge, sand lightly between coats with fine grit, and remove dust before final pass to guarantee smooth finish and consistent factory appearance.
How Many Paint Coats for Durability
When you want a durable finish on plastic shower walls, plan on applying three thin, even coats: a primer, two topcoats of a high‑quality epoxy or marine enamel, and light sanding between coats to promote adhesion and smoothness.
Follow these coat recommendations for paint durability and shower wall longevity:
- Primer for paint adhesion
- First topcoat — thin, even
- Second topcoat — finish and cure
Painting Seams, Corners, and Textured Panels
If seams, corners, and textured panels aren’t prepped and painted carefully, moisture and wear will reveal weak spots quickly—so take extra time to seal joints, mask tight corners, and work paint into textured recesses for a uniform, long‑lasting finish.
Use textured panels techniques and seam painting tips, corner detailing methods, and surface preparation strategies to overcome adhesion challenges.
Apply pattern application techniques, color blending ideas, and finishing touches advice.
Curing Time and When to Resume Shower Use
Curing time varies by paint and temperature, so check the manufacturer’s recommended wait before using the shower.
Keep the bathroom fully ventilated during curing to speed drying and reduce fumes.
For your first shower, use lukewarm water, avoid strong sprays on seams, and wait the full cure time to prevent damage.
Cure Time Guidelines
Allow the paint to fully harden before you use the shower again — most specialty paints need 24–72 hours for initial cure and up to 7 days for a full, chemical-resistant cure.
Follow cure time and drying duration guidelines precisely:
- Wait 24–72 hours before light use.
- Avoid heavy water exposure for 7 days.
- Check manufacturer directions for final cure.
Full Ventilation Importance
You’ll want to keep the bathroom well-ventilated while the paint cures, because good airflow speeds solvent evaporation and reduces lingering odors that can affect the finish and your comfort. Use fans or open windows for ventilation benefits and steady air circulation; wait recommended cure time before regular use to protect the finish.
| Duration | Action | Notes |
|---|---|---|
| 24–48h | Ventilate | Light touch dry |
| 72h+ | Limited use | Improved cure |
| 7 days | Full use | Ideal durability |
First Shower Precautions
Because the paint needs time to harden, plan to keep showers off-limits for at least 72 hours and avoid heavy water exposure for a full week to protect the finish.
You’ll preserve bathroom aesthetics and guarantee proper shower maintenance by following these steps:
- Wait 72–96 hours before light use.
- Avoid full showers for 7 days.
- Use gentle cleaners after curing.
When to Add a Clear Waterproof Sealer
If your painted plastic shower will see regular water spray, add a clear waterproof sealer after the paint fully cures to protect the finish and prevent peeling.
You should apply clear sealers or waterproof coatings in thin, even layers, following manufacturer drying times.
Recoat only when tack-free, avoid pooling, and guarantee good ventilation.
Test a small area first to confirm adhesion and appearance.
Cleaning and Maintenance for Painted Shower Walls
Keep your painted shower walls looking good by cleaning them gently with non-abrasive cleaners and a soft cloth to avoid scratching the finish.
You’ll also want to dry the area after use and improve ventilation to prevent mold growth.
For long-term maintenance, inspect the sealer periodically and touch up or recoat any worn spots before water can penetrate.
Regular Gentle Cleaning
While painted shower walls can handle daily use, they do best with a routine of gentle, regular cleaning to prevent soap scum and mildew from taking hold.
You’ll protect paint durability and mildew resistance by using soft cloths and mild cleaners matched to surface texture and color selection.
Maintenance tips tie back to proper application techniques.
- Rinse
- Wipe
- Dry
Preventing Mold Growth
Because moisture invites mildew, you’ll want a consistent routine to prevent mold on painted shower walls: ventilate after showers, wipe down wet surfaces, and use mild, mold-inhibiting cleaners suited to your paint type.
Follow simple mold prevention strategies: dry grout lines, remove soap scum promptly, and spot-treat early.
Use effective cleaning methods weekly to keep coatings intact and mold at bay.
Long-Term Maintenance
Since painted shower walls face constant moisture and soap residue, you’ll need a simple, regular maintenance routine to preserve finish and prevent damage.
Clean gently weekly with pH-neutral cleaner, rinse, and dry to aid mold prevention and maintain paint durability.
- Ventilate after showers.
- Wipe splashes and seals.
- Reinspect caulk and touch up paint as needed.
Handling Mold and Mildew on Painted Plastic
If mold or mildew shows up on painted plastic shower walls, act quickly to remove it and prevent recurrence.
Use mildew removal techniques from a cleaning solutions guide (diluted bleach or vinegar), follow mold prevention strategies and humidity control tips, inspect paint for damage during post paint inspection, apply surface protection methods, and schedule regular maintenance routines to address paint durability concerns and keep surfaces clean.
Common Causes of Peeling and How to Prevent It
If your paint starts to peel, it’s usually because the surface wasn’t prepped properly, the paint wasn’t compatible with plastic, or moisture and poor ventilation undermined the bond.
You’ll learn how to clean and sand the walls, choose the right primer and paint, and improve airflow to prevent problems.
Follow those steps and you’ll avoid most peeling issues.
Poor Surface Preparation
When you skip proper cleaning, sanding, or priming, paint won’t adhere to plastic shower walls and will start to peel quickly; contamination, slick factory finishes, and insufficient abrasion are the usual culprits.
You must address adhesion challenges across plastic types with correct cleaning methods, surface smoothing, primer selection, and bonding agents. Common prep mistakes ruin surface texture and application techniques.
- Clean
- Scuff
- Prime
Incompatible Paint Choices
Although proper prep gives paint a fighting chance, choosing the wrong type of paint will still make your shower walls peel. You must avoid incompatible paint types and check surface compatibility before priming. Use a primer formulated for plastic and a paint labeled for high-humidity surfaces. Test a small area first to confirm adhesion and durability.
| Paint Type | Compatibility | Note |
|---|---|---|
| Acrylic | Medium | Needs primer |
| Epoxy | High | Best for plastic |
| Latex | Low | Avoid without bonding agent |
Moisture And Ventilation
Because constant damp and poor airflow undermine even the best prep, you’ll often see paint peel where moisture builds up on plastic shower walls.
You need moisture control and simple ventilation tips to prevent failure. Do these steps:
- Run exhaust fan during/after showers.
- Wipe walls dry and fix leaks promptly.
- Use mildew-resistant primer and paint for long-lasting adhesion.
Fixing Chips, Bubbles, and Adhesion Failures
If you spot chips, bubbling, or areas where paint won’t stick, address them before repainting so the repair lasts.
You’ll start by evaluating damage, ensuring cleanliness, and preparing surfaces.
Focus on repairing chips and fixing bubbles, sanding and cleaning residues.
Repair chips and bubbles, then sand and clean all residues for a smooth, long-lasting finish.
For addressing adhesion, prime and apply sealants where needed.
These steps improve finishes, enhance durability, and prevent peeling.
Expected Lifespan for Painted Plastic Showers
When you paint plastic shower walls with the proper prep, primer, and a high-quality epoxy or acrylic paint, you can expect the finish to last roughly 3–7 years under normal use; poor prep, incompatible products, or heavy wear will shorten that considerably.
Follow these maintenance tips and monitor wear:
- Clean gently weekly.
- Touch up chips promptly.
- Recoat every 3–5 years for best expected lifespan.
How Temperature and Humidity Affect Paint Cure
Those lifespan estimates assume the paint cured under suitable conditions; temperature and humidity have a big effect on how epoxy or acrylic paints set and bond to plastic.
You’ll avoid problems by monitoring environmental factors: avoid temperature extremes, control humidity levels, and guarantee steady moisture control.
Follow recommended application techniques and wait full paint drying and curing process under ideal conditions for durable adhesion.
VOCs, Ventilation, and Safety in Bathrooms
How will you manage fumes while painting plastic shower walls? You must prioritize VOC awareness and paint fumes control, follow safety protocols, and limit chemical exposure.
Use ventilation methods and boost air circulation with fans or open windows; monitor bathroom air quality and humidity levels.
Increase ventilation—use fans or open windows and continually monitor bathroom air quality and humidity levels while painting.
Keep moisture control, workspace safety, and PPE in mind.
- Ventilate
- Monitor
- Protect
Rental‑Friendly, Reversible Painting Approaches
After you’ve controlled fumes and kept the bathroom safe, choose painting methods that you can undo when the lease ends.
Opt for peelable paint films, removable wallpaper designed for moist areas, or semi-permanent coatings that respect surface versatility.
These temporary solutions support rental aesthetics, let you explore design choices, and offer budget-friendly options for easy updates without damaging walls or violating lease terms.
Matching Paint Color to Tiles and Fixtures
When you choose a paint color for plastic shower walls, coordinate it with your fixture finishes so metals and tones don’t clash.
Pay attention to tile undertones—warm tiles need warm paints, cool tiles need cool paints—for a cohesive look.
Test swatches next to both tiles and fixtures before committing.
Coordinate With Fixture Finishes
Pick a paint tone that complements your fixtures and tile rather than competing with them.
You’ll focus on fixture color coordination and finish compatibility when choosing sheen and hue.
Consider:
- Match warmth/coolness to fixtures.
- Choose a sheen that pairs with metal finishes.
- Test swatches near fixtures under bathroom light.
This keeps the look unified and intentional.
Match Tile Undertones
Because tiles carry subtle warm or cool undertones that change how paint reads, you should match your paint’s temperature to those undertones so fixtures and tiles look cohesive.
When you sample swatches, check them against tile in different light, note undertones, and test near metal finishes.
Accurate color matching creates design harmony, prevents clashes, and guarantees your painted shower walls feel intentional and professionally integrated.
Faux Finishes and Textures for Plastic Panels
You can transform plain plastic shower panels into stylish surfaces by using faux finishes and textures that mimic tile, stone, or plaster.
You’ll use faux textures, creative patterns and paint techniques to achieve design inspiration.
Consider color choices and finish options for aesthetic effects and visual enhancements.
Choose thoughtful colors and finishes to enhance mood, depth, and visual interest across your faux-finished shower panels.
- Layered glaze
- Sponge texture
- Trowel plaster effect
Using Stencils and Accent Designs on Shower Walls
When you add stencils and accents to plastic shower walls, pick durable, non-porous stencils that won’t warp or shed over repeated cleaning.
You’ll need to thoroughly clean and scuff the plastic so paint bonds, and tape edges carefully for crisp patterns.
Finish with a waterproof sealer rated for plastic to protect your design from moisture and scrubbing.
Choosing Durable Stencils
Several key factors will help you pick stencils that stand up to moisture and frequent cleaning.
You’ll want durable materials and smart stencil designs that suit your theme coordination.
Consider paint application, color choices, pattern styles, layering techniques, and finishing touches to guarantee longevity.
- Material quality
- Complexity vs. repeatability
- Maintenance ease
Preparing The Plastic Surface
Although plastic shower walls can take paint, they need careful prep before you apply stencils or accent designs; skip these steps and the paint won’t bond or resist moisture.
You’ll perform surface cleaning, damage assessment, and adhesion tests, choose prep materials and primer selection for paint compatibility, use gentle sanding techniques, follow safety precautions, and plan protective coatings and moisture barriers to guarantee long-lasting stencil work.
Sealing And Waterproofing
Now that you’ve prepped the plastic surface and primed it for paint, you’ll need to seal and waterproof your stencil work so moisture doesn’t lift the finish.
Use waterproof sealants rated for plastic, apply thin even coats, and let cure fully.
Quick checklist:
- Test adhesion.
- Apply two coats.
- Regular shower wall maintenance: rinse and inspect seals.
When to Hire a Pro vs DIY Painting
When should you call a pro instead of tackling your plastic shower walls yourself? If damage is extensive, mold recurs, or waterproofing’s compromised, seek a professional assessment.
Hire pros for complex prep, structural concerns, or warranty work.
DIY if you have steady hands, proper materials, and DIY confidence for small, cosmetic jobs.
Be honest about skills to avoid costly fixes later.
How to Test Adhesion Before Painting the Whole Shower
Before you commit to painting the entire shower, run a simple adhesion test on a small, inconspicuous area so you’ll know the paint will stick and hold up under wet conditions.
Before painting the whole shower, test adhesion on a small, hidden spot to ensure paint will hold.
Test steps:
- Clean a plastic surface, sand lightly, apply primer/paint sample.
- Let cure 48–72 hours, then press tape and peel.
- Check for lifting, blistering, or peeling; if any, rethink approach.
Buying Guide: Primers and Paints That Actually Stick
Before you buy anything, you’ll want to prep the surface—clean, scuff, and repair any nicks so primers can grip.
Pick a primer formulated for plastics or adhesion-promoting bonding primers, then choose a durable, water-resistant topcoat like acrylic enamel or epoxy paint.
I’ll cover specific product recommendations and application tips so your finish actually lasts.
Surface Preparation Tips
Although plastic shower walls can seem smooth and slick, proper surface prep is the difference between paint that peels and paint that lasts — so you’ll want to strip soap scum, sand lightly to create tooth, and clean with a solvent like isopropyl alcohol.
Follow steps:
- Surface cleaning, Damage assessment, Adhesion testing.
- Tool organization, Ventilation importance, Safety precautions.
- Surface texture, Primer selection, Paint application, Maintenance tips.
Best Primers For Plastic
When you want paint that actually bonds to plastic shower walls, the right primer matters more than the paint itself; choose products formulated for non-porous surfaces, like adhesion-promoting or bonding primers, and you’ll save time and avoid peeling later. Use plastic adhesion techniques and follow primer application tips for clean prep.
| Primer Type | Best Use |
|---|---|
| Bonding | Smooth plastic |
| Acrylic | Light repairs |
| Epoxy | Heavy wear |
Durable Paint Finish Options
If you want a paint job that stands up to steam, scrubbing, and daily use, pick finishes and formulas designed for nonporous surfaces and heavy wear.
Consider durability considerations, surface compatibility, paint longevity, finishing techniques, color selection, texture options, maintenance tips, and cost analysis.
Choose epoxy or enamel primers and topcoats.
- Epoxy
- Acrylic urethane
- Rust‑inhibiting enamel
Budget Product Swaps That Still Work
You don’t need top-shelf supplies to get great results on painted plastic shower walls; smart substitutions can cut costs without sacrificing durability.
Try budget swaps like affordable primers and water-based enamel for product effectiveness.
Use affordable alternatives and DIY solutions for prep, follow cost saving tips, and choose budget friendly options.
Opt for DIY prep, budget-friendly products, and simple cost-saving tricks for durable painted shower walls.
Economical choices and value comparisons help you balance price and performance.
Tools Buyers’ Checklist for Best Results
Because proper tools make the job easier and longer-lasting, gather a compact checklist before you start so you won’t interrupt the work to hunt for supplies.
Decide on tool types by buyer preferences, balancing essential tools, prep equipment, safety gear, application tools, cleanup supplies, maintenance tools, and finish options. Compare paint brands for adhesion and durability.
- Tape, cleaners, sandpaper
- Primer, rollers, brushes
- Respirator, gloves, rags
Small Update Case Study: One Weekend Refresh
With your tools gathered and a plan in place, tackle a weekend refresh that takes a tired plastic shower from dingy to polished in two days.
Day one: clean, sand lightly, and apply primer for adhesion.
Day two: roll two thin coats of bathroom-grade paint, cure fully, and reseal edges.
You’ll improve shower wall aesthetics while ensuring paint durability for regular use.
Full Refresh Case Study: Multi‑Day Remodel
Ready for a bigger project?
In this multi-day remodel you’ll get a clear day-by-day timeline, a checklist of materials and prep steps, and before-and-after photos to guide each stage.
Follow the plan and you’ll see how the shower transforms.
Day‑By‑Day Timeline
Day 1 kicks off with a thorough assessment and preparation: you’ll remove fixtures, clean and sand the plastic walls, repair any cracks or gouges with appropriate filler, and tape off edges and hardware so paint only goes where you want it.
Follow this multi‑day timeline:
- Day 2: adhesion testing, priming, and first coat.
- Day 3: second coat, color choices, and detail work.
- Day 4: curing, maintenance tips, final inspection.
Keep project planning focused on surface preparation, painting techniques, DIY pitfalls, and product recommendations.
Materials And Prep
Start by laying out every material and tool you’ll need so you won’t stall mid‑project: a high‑adhesion bonding primer formulated for plastic, a semi‑gloss acrylic or epoxy topcoat, 220–320 grit sandpaper, a degreasing cleaner, filler for gouges, quality painter’s tape, foam rollers and angled brushes, respirator and gloves, drop cloths, and a tack cloth for final dust pickup.
Identify surface types, test adhesive options, sand, clean, fill, tape, and ventilate.
Before‑And‑After Photos
With materials staged and surfaces prepped, let’s look at a real multi‑day refresh to show what you can expect.
You’ll see clear before after transformations and the visual impact of each step.
- Day 1: clean, sand, prime.
- Day 2: paint coats, dry time.
- Day 3: seal, reinstall fixtures, final inspection.
Top DIY Mistakes and How to Avoid Them
Although painting plastic shower walls is doable, many DIYers make avoidable mistakes that lead to peeling, uneven finish, or mold-prone surfaces.
Know common misconceptions, preparation pitfalls, and skip shortcuts. Clean thoroughly, sand lightly, use compatible primers and paints, and follow cure times.
Test adhesion in a small area, ventilate, and maintain seals to prevent moisture intrusion that ruins your work.
Safely Dispose of Cleaners, Solvents, and Leftover Paint
After you’ve finished prepping and painting, don’t treat cleaners, solvents, or leftover paint like ordinary trash — they can harm plumbing, landfill workers, and the environment if disposed of improperly.
You should:
- Take solvent and paint to a local hazardous waste drop-off.
- Use labeled, sealed containers for transport.
- Follow municipal guidelines for eco friendly disposal; don’t pour down drains.
Alternatives When Painting Won’t Work (Liners, Panels)
If painting the plastic shower walls won’t give you a durable, attractive finish, consider replacing them with a shower liner or installing wall panels designed for wet areas. You can choose from prefab shower liner options or DIY panel installation for faster, waterproof results. Compare cost, material, durability.
| Option | Pros | Cons |
|---|---|---|
| Liner | Affordable | Limited styles |
| PVC panel | Waterproof | Moderate cost |
| Acrylic | Durable | Higher price |
| Tile panel | Stylish | Complex install |
| Fiberglass | Lightweight | Can scratch |
Weekend Paint‑Job Checklist: Step‑by‑Step
Pick a weekend and set aside a solid block of time—you’ll move fastest if you prep, paint, and cure without long interruptions.
Reserve a weekend and block uninterrupted time—prep, paint, and let it cure all at once for best results
Plan: Weekend prep, Project planning, Cost estimation.
- Clean, sand for Surface texture, follow Cleanliness standards.
- Choose Color selection, test samples for Paint durability.
- Use Tool recommendations, follow Safety protocols and Ventilation needs.
How to Calculate Paint and Primer Quantities
Start by measuring the shower walls—length times height for each panel—and add up the square footage you’ll paint, because knowing the exact surface area lets you calculate how much primer and paint you need without guesswork.
Use paint quantity estimation: divide total square feet by paint coverage per gallon.
Do a primer coverage calculation similarly, then add 10–15% for overlap, waste, and extra coats.
Questions to Ask Paint Retailers and Contractors
What should you ask a paint retailer or contractor before committing to a job?
Be direct: confirm compatibility with plastic shower walls, expected paint durability, and recommended paint sheens.
Ask for timeline, warranty, and surface prep steps.
Request references and photos of similar work.
Provide a written estimate and maintenance tips.
- Warranty
- Prep steps
- Past projects
Troubleshooting: 10 Common Problems and Fixes
When problems crop up after painting plastic shower walls, you’ll usually be able to fix them without redoing the whole job. This section walks you through the ten most common issues—what causes each one, how to troubleshoot it, and the practical fixes to try.
Check paint adhesion, revisit surface preparation, confirm paint compatibility, address moisture issues, adjust color selection or texture options, follow safety precautions, use repair techniques, set maintenance strategies, and include cost analysis.
Project Plan: Timeline and Checklist for Your Painted Shower
Now that you’ve got troubleshooting strategies for common paint problems, map out a clear project plan so you finish efficiently and avoid rework.
Now that you know common fixes, create a clear project plan to work efficiently and avoid rework.
Create a concise project timeline and checklist, accounting for surface prep, primer, paint drying, and curing.
- Prep: clean, sand, mask.
- Prime/paint: follow recoat times.
- Cure: wait full drying/curing before use.
Frequently Asked Questions
Will Painted Shower Walls Affect Home Resale Value?
Yes, painted shower walls can affect resale considerations: you should match buyer preferences, use professional-looking, durable finishes, and avoid amateur touches. Buyers may value updated, neutral baths, but poor paintwork can lower perceived home value.
Can I Use Regular Interior Paint From a Big-Box Store?
No — you shouldn’t. Like trying to glue glass, regular interior paint won’t give reliable paint adhesion; you need thorough surface preparation, primer designed for plastics, and a moisture-resistant topcoat so the finish lasts in a shower.
Are There Colorfastness Issues With UV Exposure in Bathrooms?
Yes — UV can cause color fading over time, but you can minimize it. Use UV-resistant primers and quality acrylic enamel or epoxy for better paint durability, and ventilate to reduce sunlight and moisture that accelerate fading.
How Do Painted Panels Handle Hard Water Staining?
Like a shielded mirror, painted panels resist hard water staining but paint durability varies — you’ll need gentle cleaners and squeegees. Maintenance tips: wipe after showers, avoid abrasive scrubs, and reseal or touch up coatings when mineral buildup appears.
Can Painted Shower Walls Be Safely Steam-Cleaned?
Yes — you can steam clean painted shower walls cautiously; you’ll protect paint durability by using moderate heat, short bursts, and a soft cloth, avoiding peeling, softened edges, or compromised adhesion from prolonged high-temperature, saturated exposure.
Conclusion
You can paint plastic shower walls when the surface’s sound, the finish’s simple, and your goal’s refreshment, not renovation. Prep thoroughly: clean, sand, prime, and use a plastic-bonding primer plus a moisture-resistant topcoat. Choose paint for the material, budget, and expected longevity. Expect upkeep, know when replacement’s smarter, and plan for ventilation and drying. Paint to update, paint to economize, paint to extend—but don’t paint to fix structural damage.
