
Can You Paint PVC Ceiling Panels? Tips for a Lasting Finish
Yes — you can paint PVC ceiling panels, but success depends on prep and the right products. Clean thoroughly, sand lightly, and fix any damaged or loose panels. Do a small adhesion test with plastic primer and acrylic or water-based enamel; use thin coats with a foam roller and angled brush, letting each dry fully. Choose a low-sheen finish to hide flaws and inspect periodically for chips. Keep going and you’ll find detailed steps, tools, and safety tips to get a lasting result.
Can You Paint PVC Ceilings? Quick Answer
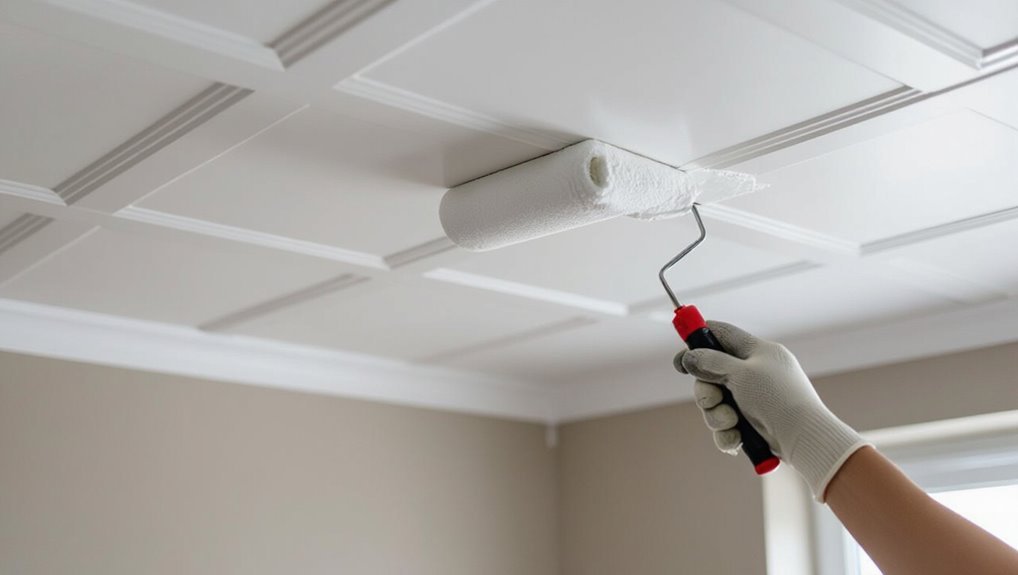
Can you paint PVC ceilings? Yes — with proper prep you’ll improve PVC ceiling aesthetics and extend paint longevity.
Clean, sand lightly, apply a compatible primer, then use quality acrylic paint for adhesion.
You’ll avoid peeling by ensuring surfaces are dry and free of oils.
Painted PVC looks refreshed and lasts when you follow these straightforward steps and choose the right materials.
When Should You Replace Instead of Repainting PVC?
While repainting can refresh PVC ceilings, replace them when damage or underlying issues will keep returning or compromise safety — for example, when panels are cracked, warped from heat, extensively stained by mold or water intrusion, or bowed so paint won’t lay flat. You should watch for replacement indicators and severe panel damage; replacement saves time and prevents recurring problems.
| Sign | Action |
|---|---|
| Cracks | Replace |
| Warping | Replace |
| Mold stains | Replace |
| Bowing | Replace |
How To Tell If PVC Panels Will Accept Paint (Adhesion Test)
If panels look sound but you’re not sure paint will stick, run a quick adhesion test before you commit time and materials.
Clean a small area, sand lightly, then apply primer and a paint patch.
After 24 hours, use tape pull and score tests to check hold.
These surface testing adhesion methods tell you if coating will bond or if other prep is needed.
Pre-Paint Checklist For PVC Ceilings
Before you start painting, run through a short checklist to make sure the PVC ceiling is clean, sound, and properly prepped: inspect panels for damage or loose seams, clean grease and dust, repair cracks, and sand glossy spots for adhesion.
Confirm your surface preparation choices match your color selection for desired sheen and coverage.
Ventilate the room and test a small area before proceeding.
Tools And Materials You’ll Need For PVC Ceiling Paint Jobs
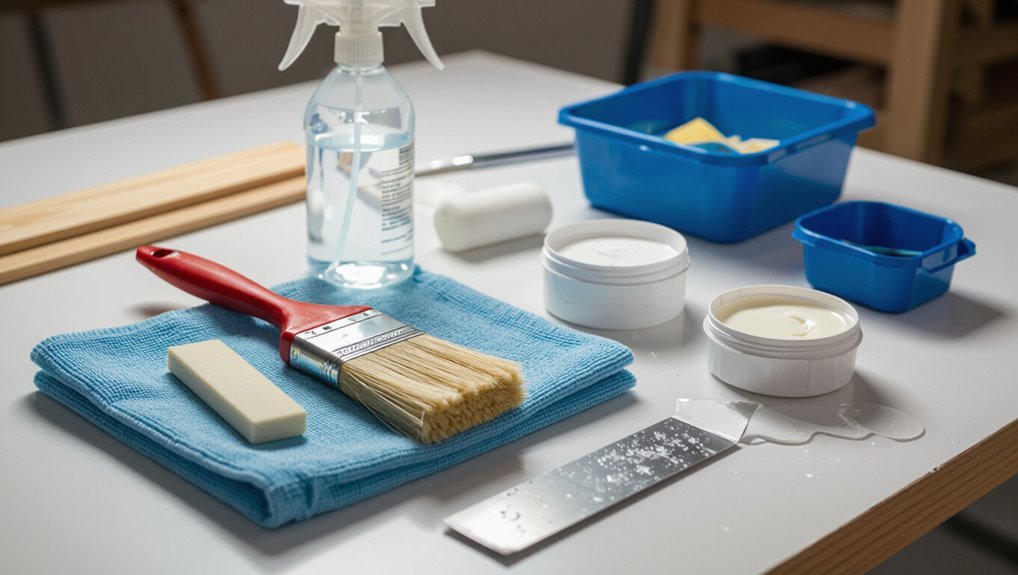
Before you start, make sure you’ve got the essential painting tools like rollers with extension poles, angled brushes, sandpaper, and drop cloths to protect the room.
You’ll also want recommended paint materials: a primer formulated for PVC, a high-quality acrylic or latex paint, and a compatible cleaner or degreaser.
With the right tools and products on hand, the job will go much smoother and give a longer-lasting finish.
Essential Painting Tools
A sturdy ladder and the right brushes will make the job smoother—here’s what you’ll need to paint PVC ceiling panels effectively. You’ll want essential painting tools and learn basic painting techniques to work safely and cleanly:
| Tool | Purpose |
|---|---|
| Ladder | Reach ceiling |
| Angled brush | Cut edges |
| Roller with extension | Large areas |
| Drop cloths | Protect floors |
| Sandpad | Scuff surface |
Recommended Paint Materials
Think of this section as your shopping list: you’ll need paint formulated for PVC or flexible vinyl, a good-quality primer designed for plastics, solvent-based or adhesion-promoting cleaners, and the right applicators—rollers with a short nap, an angled brush for trims, and lint-free rags.
- PVC-compatible paint
- Plastic primer
- Cleaners and applicators
Check paint compatibility and follow surface preparation steps to guarantee adhesion and a durable finish.
How To Clean PVC Ceiling Panels Before Painting
When you’re getting ready to paint PVC ceiling panels, cleaning them first guarantees paint will adhere evenly and last longer.
Use mild cleaning solutions (dish soap and water or diluted vinegar) and soft cleaning tools like microfiber cloths and non-abrasive sponges. Wipe gently to remove dust, grease, and residue.
Proper surface preparation includes rinsing, drying thoroughly, and addressing stubborn spots before painting.
How To Sand PVC Safely Without Damage
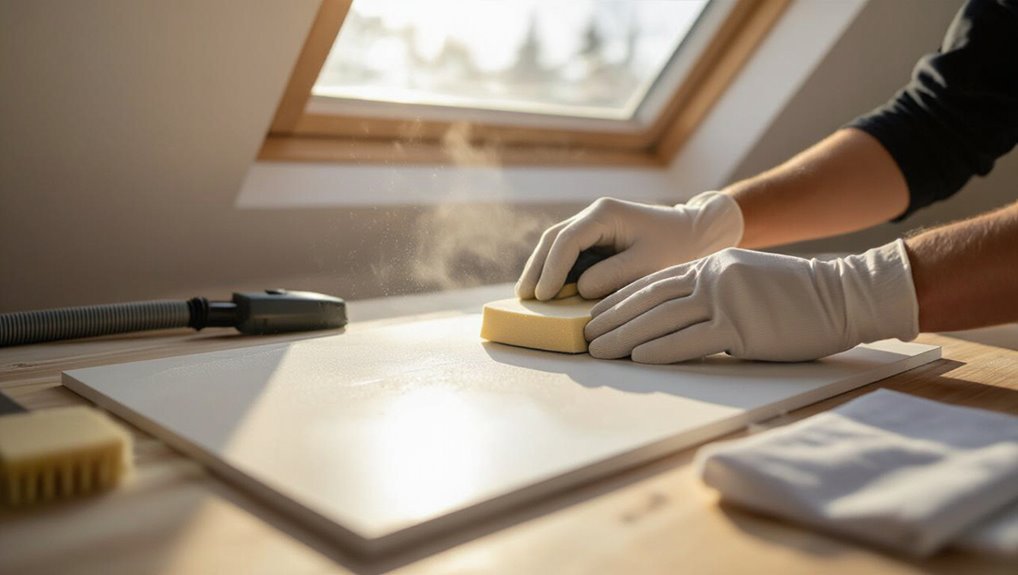
When you sand PVC, pick a fine grit (220–320) to scuff the surface without cutting into the panel.
Sand by hand with light, even pressure so you don’t warp or melt the PVC from friction.
Wipe away dust and inspect your work before priming.
Choose The Right Grit
Because PVC is soft and can scratch or melt under heat, you’ll need to pick sandpaper grit carefully to avoid damaging the surface.
Use proper sanding techniques and thoughtful grit selection to scuff—not cut—the PVC before painting.
Choose from:
- 220–320 for light scuffing and adhesion
- 120–180 only for stubborn gloss
- Finish with 320–400 for smoothness
Gentle Hand Sanding
Start by laying the panel on a soft, flat surface and don a pair of low-lint gloves so you can feel the finish without leaving oils or fingerprints.
Use light, even strokes with fine-grit sandpaper, testing pressure to avoid gouges.
Employ consistent sanding techniques across the panel to achieve uniform surface smoothness.
Wipe dust with a tack cloth before priming or painting.
Which Primer Bonds Best To PVC Ceilings?
Choosing the right primer matters: for PVC ceiling panels you’ll want a product formulated to bond to smooth, non-porous plastics, typically a solvent-based or specially labeled plastic primer that creates a keying layer for paint.
You should perform adhesion testing and compare primer options.
Consider these choices:
- Plastic-bonding primer
- High-solvent adhesion primer
- Specialty PVC primer
Oil-Based Or Acrylic Primer: Which Is Best For PVC?
When you’re choosing between oil-based and acrylic primer for PVC, think about how well each will stick to smooth surfaces and how quickly they dry.
Oil primers often grab slick PVC better but take longer to cure, while acrylics dry fast and stay more flexible.
Balance adhesion, drying time, and long-term durability to pick the right one for your ceiling.
Adhesion To Smooth PVC
Although PVC’s slick surface can seem unwelcoming, you can get excellent paint adhesion by selecting the right primer and preparing the panel properly.
Use adhesion methods and surface treatments to improve bonding:
- Lightly scuff with fine sandpaper and clean residue
- Apply a compatible oil-based or acrylic primer per label
- Test a small area to confirm adhesion before full coverage
Drying Time Differences
Now that you’ve prepped and primed the PVC, consider how primer type affects drying time and your project’s schedule.
Oil-based primers generally take longer to dry but tolerate variable drying conditions, while acrylic primers dry faster for quicker recoats.
Monitor humidity impact—high humidity slows both types.
Adjust work times, ventilation, and temperature to guarantee tack-free, uniform curing before painting.
Flexibility And Durability
Because PVC panels flex slightly with temperature and building movement, choosing a primer that stays flexible without sacrificing adhesion is key.
You’ll want a product that bonds well to flexible materials and supports durable finishes. Consider:
- Acrylic primer for elasticity and fast drying
- Oil-based for hard, long-lasting adhesion
Test compatibility with your paint and PVC before full application.
Best Paint Types For PVC Ceilings (Vinyl-Safe Options)
Choosing the right paint for PVC ceilings matters because vinyl reacts differently than wood or plaster; you’ll want products labeled vinyl-safe or formulated for plastics to guarantee adhesion and prevent peeling or discoloration. Use vinyl safe primers, acrylic latex paints, and solvent-based options sparingly. Follow best application techniques: clean, prime, thin coats.
| Type | Adhesion | Dry Time |
|---|---|---|
| Acrylic latex | High | Fast |
| Solvent-based | Moderate | Medium |
| Vinyl primer | Essential | Fast |
Choosing Paint Sheen And Color For PVC Ceilings
After picking a vinyl-safe primer and paint, you’ll want to think about sheen and color because they affect light reflection, perceived height, and how seams or textures show on PVC panels.
Consider sheen selection and color psychology when choosing finishes:
Consider sheen and color psychology when finishing PVC—they shape light, mood, and how imperfections appear.
- Matte hides imperfections, reduces glare.
- Satin balances reflectivity and cleanability.
- High-gloss highlights texture, eases wiping; use sparingly for ceilings.
How To Test Paint Adhesion Before Painting The Whole Ceiling
Before you roll paint across the whole ceiling, you should run a simple adhesion test on a hidden spot or scrap panel to confirm your primer and paint will stick to the PVC. Clean, sand lightly, apply test coat, let cure, then tape-pull to check bond—this checks adhesion test and surface sensitivity before committing.
| Step | Result |
|---|---|
| Clean | Ready |
| Sand | Key |
| Test coat | Cure |
| Tape-pull | Inspect |
Step-By-Step Primer Application For PVC Panels
Start by preparing a clean, dry workspace and gather the right primer, brush/roller, sandpaper, and tape so you can work efficiently; a good primer and the right tools make the rest of the job predictable and faster.
You’ll follow concise primer types guidance and proven application techniques:
- Lightly sand and clean panels
- Apply thin, even coats
- Allow full drying between coats
How To Paint PVC Ceilings By Hand (Roller & Brush)
Now that the primer’s set, you’ll prep the PVC by cleaning, sanding lightly, and wiping away dust so the paint will stick.
Choose a high-quality acrylic or water-based enamel made for plastics and grab a foam roller plus an angled brush for edges and seams.
Work in thin, even coats and let each dry fully before applying the next for a smooth, durable finish.
Surface Preparation Steps
Get your workspace ready by clearing dust, grease, and loose material from the PVC ceiling panels so paint will stick evenly.
You’ll follow surface cleaning, panel inspection, and adhesion testing before sanding techniques.
Choose primer selection and plan paint application to guarantee finish durability and color choices.
Keep a maintenance routine and observe safety precautions.
- Clean
- Sand
- Test adhesion
Best Paint And Tools
When you’re ready to paint PVC ceiling panels by hand, pick a high-quality acrylic primer plus a water-based acrylic or latex paint formulated for plastics.
Gather a 3/8″ nap roller for smooth panels, a foam roller for textured surfaces, a sash brush for edges, and a small angled brush for tight corners.
Choose paint types and best brands known for adhesion; test a sample, use tack cloths, and work in thin, even coats.
How To Spray-Paint PVC Ceilings Safely
Before you spray-paint PVC ceiling panels, take a moment to prepare both the work area and yourself so you’ll avoid health risks, surface damage, and a messy finish.
Use proper spray paint techniques and follow safety precautions:
- Mask fixtures and flooring tightly.
- Test spray distance on scrap PVC.
- Wear respirator, goggles, and disposable coveralls.
Cleanup, Ventilation, And Safety After Spray Painting
Once you finish spraying, set up strong ventilation by opening windows, running fans, and using an exhaust if available to clear fumes.
Wipe brushes and overspray with the recommended solvent, dispose of rags and paint waste in sealed containers, and clean surfaces before they cure.
Keep wearing your respirator, gloves, and eye protection until the area is fully aired and cleaned.
Proper Ventilation Setup
Although spray painting PVC ceiling panels can be quick, you’ll need a clear ventilation plan to keep fumes and overspray out of the room and protect your breathing.
Emphasize ventilation importance and guarantee proper air circulation with these steps:
- Open windows and doors to create cross-ventilation.
- Use a box fan blowing outward near an exit.
- Run a HEPA-rated air purifier while you paint.
Safe Paint Cleanup
When you finish spray painting PVC ceiling panels, treat cleanup and ventilation as part of the job: keep air moving, collect overspray, and handle solvents and rags safely to prevent fumes, fires, and lingering residues.
Seal used rags in metal containers, follow local paint solvent disposal rules, and use eco friendly cleaners for surfaces and tools.
Dry thoroughly before restoring airflow and fixtures.
Personal Protective Gear
Personal protective gear keeps you safe during cleanup and ventilation after spray painting PVC ceiling panels, so pick and use it deliberately:
- Wear protective gloves, safety goggles, a respirator mask or dust mask, and coveralls for chemical protection.
- Use knee pads and work boots when accessing panels, and ear protection if using noisy tools.
- Remove and wash gear, ventilate the area thoroughly afterward.
Working With Tongue-And-Groove And Fitted PVC Panels
Tongue-and-groove and fitted PVC panels lock together cleanly, so you’ll want to plan your layout and cuts before you start fastening anything; this guarantees tight seams and minimizes visible joints.
Use tongue and groove techniques to stagger joints, check for square lines, and allow expansion gaps.
For fitted panel considerations, measure precisely, dry-fit sections, and fasten to recommended supports to avoid warping before painting.
How To Handle Seams And Panel Joins Before Painting
Start by inspecting every seam and joint for gaps, misalignment, or protruding tongues so you know exactly where you’ll need to fill, sand, or re-seat panels before painting.
Start by checking every seam and joint for gaps, misalignment, or protruding tongues before painting.
Address seam treatment and guarantee proper panel alignment.
Then:
- Re-seat loose panels and tighten clips.
- Fill gaps with flexible PVC caulk; sand lightly.
- Prime joints with adhesion primer for an even finish.
Tips For Painting Around Fixtures, Vents, And Lights
When you’re painting around fixtures, vents, and lights, work carefully and methodically to avoid drips, missed spots, or damaged hardware; remove what you can, mask what you can’t, and paint in controlled passes to keep edges clean.
Check fixture positioning before masking, guarantee full vent coverage with breathable tape, provide light protection with heat-safe guards, and apply precise edge sealing for neat shifts.
Painting PVC In High-Humidity Rooms (Bathrooms/Kitchens)
After protecting fixtures and vents, you’ll want to address how humidity affects PVC in bathrooms and kitchens.
After protecting fixtures and vents, address humidity’s effects on PVC in bathrooms and kitchens.
You’ll need coatings with strong moisture resistance and prep for humidity challenges. Follow these essentials:
- Choose mildew-resistant primer and paint
- Guarantee good ventilation and exhaust fans
- Seal seams and edges with waterproof caulk
These steps help your painted PVC resist damp conditions and stay durable.
Drying And Recoat Times For A Durable PVC Finish
Because proper drying is critical for adhesion and durability, you’ll want to follow the manufacturer’s specified dry and recoat times for both primer and paint, and adjust them for temperature, humidity, and ventilation in the room.
Use active drying methods like fans or dehumidifiers to speed curing, monitor tack-free times, and plan recoat timing conservatively to guarantee a hard, durable PVC finish.
How To Avoid Common PVC Paint Problems (Peeling, Bubbling)
Prevent peeling and bubbling on PVC by addressing surface prep, product choice, and application technique before you ever open a can.
Prevent peeling or bubbling on PVC: prep the surface, choose PVC-compatible products, and apply thin, even coats.
You’ll guarantee paint adhesion and longevity with proper surface preparation, primer, and drying. Follow these quick steps:
- Clean and sand to promote adhesion.
- Use PVC-compatible primer and paint.
- Apply thin, even coats; avoid high humidity while drying.
How To Fix Peeling Or Flaking Paint On PVC Panels
Start by removing loose paint and evaluating the damage so you know whether you’re dealing with surface flakes or deeper adhesion failure.
Sand the area, clean with a degreaser, and prime with a PVC-specific primer.
Use flexible acrylic paint made for plastics.
For persistent peeling paint or flaking issues, strip to sound substrate and repeat preparation; guarantee proper drying between coats for lasting adhesion.
Touching Up Chips And Scratches After Installation
Once you’ve stabilized any peeling or flaking, you can address the small chips and scratches that show up after installation.
Use gentle cleaning, fine sanding, and compatible primer before paint.
Try these quick touch up techniques and simple repair methods:
- Clean and degrease the area.
- Fill shallow chips with PVC-safe filler.
- Feather paint with a small brush for an invisible finish.
Maintenance Tips To Keep Painted PVC Ceilings Looking New
Because painted PVC ceilings stay looking their best with a little regular care, you’ll want to adopt a simple maintenance routine that focuses on gentle cleaning, quick touch-ups, and periodic inspections to catch issues early.
Use mild detergents, soft cloths, and gentle cleaning techniques to avoid abrasion.
Promptly address chips with matching touch-up paint to boost paint retention, and inspect seams and vents every few months.
Eco-Friendly Paint And Primer Options For PVC Ceilings
After you’ve settled on a maintenance routine, consider choosing low-VOC primers and water-based paints formulated for plastics to keep PVC ceilings healthier for indoor air and the environment.
Opt for low-VOC, water-based primers and paints designed for plastics to keep PVC ceilings healthier and low-odor.
You’ll find eco friendly options that bond well and reduce odors. For paint selection, pick adhesion-promoting primers, washable finishes, and certified low-VOC brands.
- Adhesion primer
- Washable satin paint
- Low-VOC certified options
How Long Will Painted PVC Ceilings Last?
How long painted PVC ceilings last depends on the quality of materials, surface prep, and the room’s conditions—expect anywhere from 5 to 15 years before noticeable wear, with high-quality primers, proper adhesion, and low-humidity environments pushing that lifespan toward the upper end.
You’ll extend paint durability by using recommended primers, avoiding abrasive cleaners, and monitoring maintenance frequency; touch up chips promptly to prevent peeling.
Cost Estimate: DIY Painting Vs. Professional Service
Deciding whether to paint PVC ceiling panels yourself or hire a pro comes down to comparing time, skill, and total cost—you’ll usually save on labor with DIY but may pay more in mistakes or tools, while a professional charges more upfront yet delivers faster, guaranteed work.
Decide between DIY savings and risk or a pro’s higher fee for faster, guaranteed PVC ceiling painting results
- DIY: lower upfront cost, higher risk — cost comparison matters
- Pro: higher price, reliable service benefits
- Hybrid: hire for prep, DIY finish
Safety Tips For Ladders, Scaffolds, And Ceiling Work
Choosing between DIY and pro work also means thinking about how you’ll actually get up to the ceiling: using ladders or scaffolds changes risks, time, and required precautions.
Always inspect equipment, set ladders on level ground, maintain three-point contact, and secure scaffold stability with proper bracing and load limits.
Wear eye protection, non-slip shoes, and a hard hat; never overreach or work alone.
Frequently Made Mistakes And How To Avoid Them
Because ceiling work happens overhead and often on unstable footing, small mistakes can become expensive or dangerous—so you’ll want to recognize the common ones before you start.
Ceiling work is overhead and risky—spot common mistakes early to avoid costly, dangerous repairs.
Avoid these common pitfalls and refine your painting techniques:
- Skipping cleaning or primer
- Using wrong roller/brush for slick PVC
- Overloading paint, causing drips and runs
Prep, right tools, and patience prevent costly fixes.
Case Studies: Successful PVC Ceiling Paint Jobs
After avoiding those common mistakes, you’ll want examples that show what good prep and technique actually look like in real projects.
These case studies highlight successful transformations: you’ll see innovative techniques for adhesion, solutions to common challenges like seams and gloss, and clear aesthetic enhancements that suit styles.
Follow their steps to replicate long lasting results and skip trial-and-error.
Final Quick-Start Checklist Before You Paint
- Before you start, review this quick-start checklist so you’ll finish efficiently and avoid mistakes.
- Clean, sand, and degrease panels; confirm primer compatibility and finishing techniques.
- Test color selection on a scrap panel and check drying times and lighting.
- Protect fixtures, ventilate the room, and have brushes, rollers, and touch-up supplies ready.
Frequently Asked Questions
Can Painted PVC Be Safely Heat-Formed or Bent Later?
Like a cautious dancer, yes — but carefully: painted PVC reduces heat resistance, so you’ll need low-heat bending techniques, test samples, and gentle, even heating. Don’t overheat paint or substrate to avoid cracking or delamination.
Will Paint Color Fade Differently on Textured Versus Smooth PVC?
Yes — texture impact matters: textured PVC can hide fading but exposes more surface area, so you’ll see uneven wear; smooth PVC shows uniform color loss. Use UV-rated paint and proper primers for better color retention.
Can Painted PVC Be Refinished With Wallpaper or Wallcoverings?
Ironically, yes—you can refinish painted PVC with wallpaper, but you’ll need careful adhesive selection and surface prep; otherwise wallpaper durability suffers. You’ll want primers and high‑quality adhesive made for nonporous, flexible plastic surfaces.
Does Painting PVC Affect Fire Rating or Smoke Toxicity?
Yes — painting PVC can alter its fire safety and may increase smoke emissions; you’ll want to use heat-resistant, low-smoke coatings and check manufacturer fire-rating data and local codes to avoid degrading performance or raising toxicity.
Are There Warranties That Cover Painted PVC Ceiling Panels?
Some manufacturers void warranties if you paint PVC ceiling panels; you’ll face warranty limitations and maintenance concerns. You should check product documents, get written approval, and follow recommended coatings and upkeep to avoid claims being denied.
