
How to Prevent Paint From Peeling off Walls for Good
To stop paint peeling for good, start by fixing moisture and leaks, then strip loose paint, sand smooth, and clean grease or mold thoroughly; prime with a compatible, high-quality primer and use acrylic-latex paint for walls or alkyd for trim, applying thin even coats and allowing full drying between coats. Maintain good ventilation, control humidity, touch up chips promptly, and inspect seasonally to catch problems early — keep going for step‑by‑step prep, product picks, and troubleshooting tips.
How to Stop Paint Peeling : Quick Fixes and Priorities
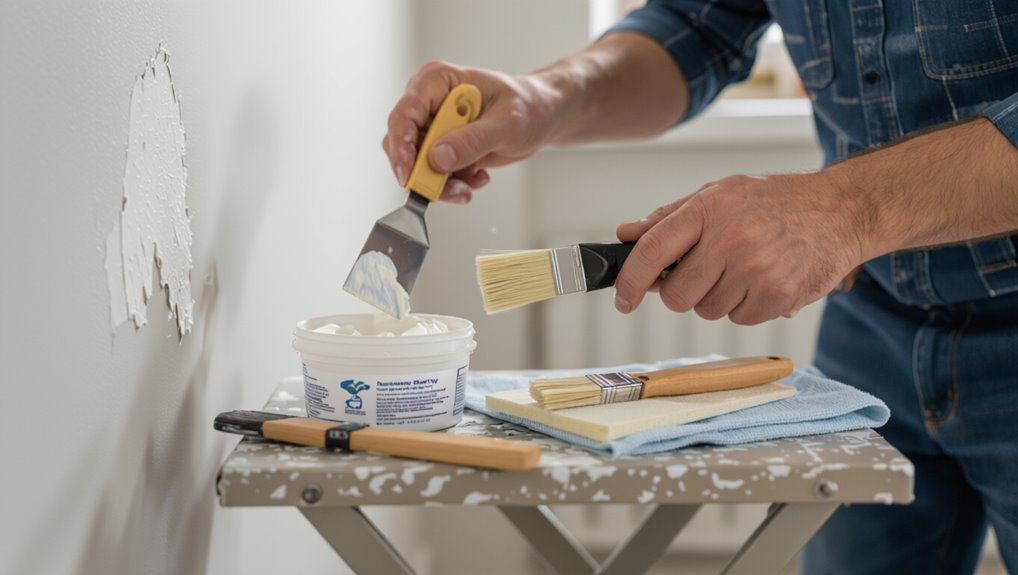
Assess the damage quickly so you can prioritize fixes that stop further peeling.
You’ll remove loose flakes, clean surfaces, and sand edges for a smooth base.
Use primer and matched paint to seal problem spots.
For moisture issues, address leaks before repainting.
These quick fixes focus on peeling prevention so you limit work and keep surfaces stable long term.
Why Paint Peels: The Main Causes
When paint starts peeling, it’s usually because the surface beneath couldn’t hold the coating—poor adhesion from dirt, oil, or an incompatible previous paint; trapped moisture from leaks or high humidity; or excessive surface movement from wood swelling or thermal expansion.
- Check substrate compatibility, surface textures, and surface imperfections.
- Mind paint formulation, application techniques, and paint durability.
- Control environmental factors, temperature fluctuations, and moisture barriers.
How Moisture Causes Paint Failure
You already noted moisture as a major culprit, but it’s worth spelling out how it actually ruins paint. You’ll see bubbling, blistering, and adhesion loss when humidity or leaks saturate walls. Focus on moisture control to stop stains and mold, preserving paint longevity.
| Sign | Cause |
|---|---|
| Blisters | Trapped vapor |
| Flaking | Prolonged dampness |
How Poor Surface Prep Leads to Peeling
If you skip thorough cleaning, dirt and grease can stop paint from sticking.
Leaving moisture trapped in the substrate or painting before surfaces are fully dry will also cause peeling.
And if you don’t sand or prime properly, the paint won’t adhere and will lift over time.
Inadequate Cleaning
Because paint needs a clean, stable surface to stick to, skipping proper cleaning sets the stage for peeling. You must use effective cleaning techniques during surface preparation so paint bonds.
Follow these steps:
- Remove dust, grease, and loose paint with detergent and a scraper.
- Sand glossy spots for keying.
- Wipe with a tack cloth and let dry before priming.
Remaining Moisture Problems
When trapped moisture stays behind paint or primer, it undermines adhesion and causes bubbling, blistering, and eventual peeling. You need to eliminate dampness during prep so coatings can bond to a dry, stable surface.
Check for leaks, dry wet spots, and test with a moisture meter. Use proper moisture barriers and active humidity control before priming so paint adheres and lasts.
Poor Surface Adhesion
Moisture problems often reveal other prep failures that let paint lose its grip, so you’ll also need to address surface adhesion before repainting.
Assess surface conditions and substrate types, then choose adhesion techniques:
- Clean, sand, and match paint compatibility.
- Use bonding agents and proper application methods.
- Control environmental factors and respect curing times to guarantee lasting bonds.
How Low‑Quality Paints Accelerate Peeling
If you choose a low-quality paint, you’ll likely see peeling happen sooner because cheap formulations lack the binders and flexibility that keep coatings adhered under stress.
You’ll notice thin films, poor adhesion, and faster color fading when builders use low quality materials.
These paints reduce paint durability, crack under thermal movement, and let moisture penetrate—so you end up repainting more often than necessary.
When to Repair vs. When to Repaint
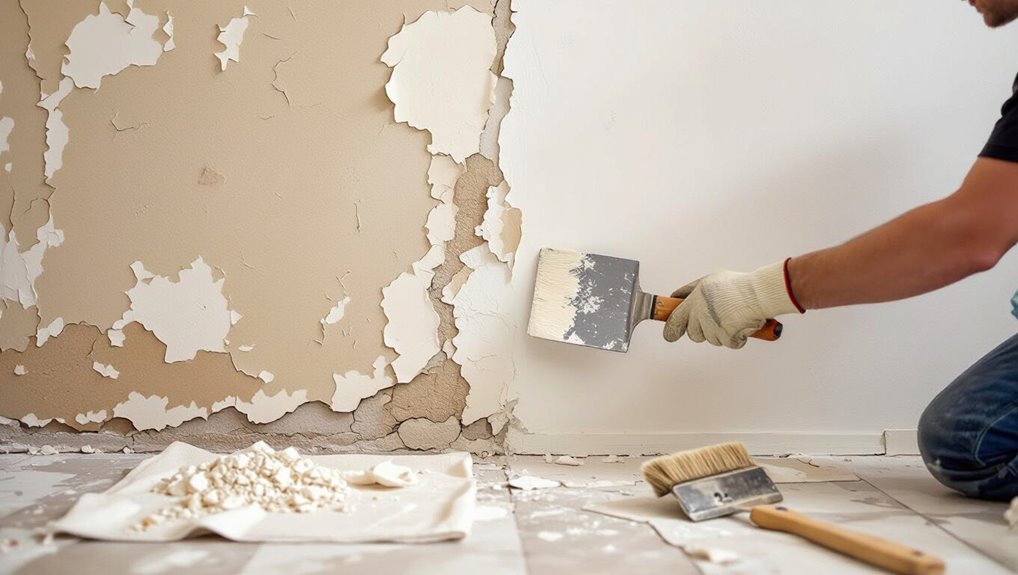
Wondering whether to spot-repair or strip and repaint the whole surface? Decide by scope, adhesion, and repaint frequency.
Use targeted repair techniques for small bubbles, cracks, or peeling edges. Repaint when widespread failure, persistent moisture, or old coatings demand full renewal.
For small bubbles, cracks, or peeling edges, spot-repair; reserve full repainting for widespread failure, moisture, or aged coatings.
- Small damage: spot-repair.
- Adhesion loss: consider full repaint.
- Frequent peeling: investigate causes before repainting.
How to Inspect Walls for Early Peeling Signs
Because paint often gives subtle clues before it peels, you should make regular, focused inspections—look for bubbling, cracking, discoloration, or areas where the topcoat seems to lift from the substrate.
Move close, use good light, and note visual cues like fine hairline cracks or tiny blisters.
Early detection lets you address adhesion issues promptly before larger repairs or repainting become necessary.
How to Find Hidden Moisture Behind Paint
Look for visual signs of damp like discoloration, bubbling paint, or salt stains on the surface.
Use a moisture meter to get quick, accurate readings through the paint and pinpoint problem areas.
Don’t forget to inspect behind fixtures and outlet covers where leaks and trapped moisture often hide.
Visual Signs Of Damp
Can you spot the subtle cues that mean moisture is lurking beneath your paint?
You should perform a quick moisture inspection looking for damp indicators. Check these signs:
- Peeling or bubbling paint concentrated near corners or plumbing.
- Dark, patchy stains or salt-like white efflorescence on plaster.
- A musty smell, soft or crumbling plaster when you press gently.
Use A Moisture Meter
When you suspect hidden damp but can’t see obvious signs, a moisture meter lets you pinpoint wet spots behind paint without tearing out plaster.
You’ll perform moisture measurement quickly across suspect areas, comparing readings to baseline dry levels.
Use pin or pinless modes for different surfaces, record hotspots, and act on moisture detection results—repair leaks, improve ventilation, and only then prep and repaint affected sections.
Inspect Behind Fixtures
A moisture meter can point you to trouble, but fixtures like light switches, cabinets, and built-in shelves often hide the wettest spots; you’ll want to inspect behind them to confirm what’s going on.
- Turn off power, remove covers, check for damp studs and paint bubbles — fixture inspection.
- Pry cabinet backs to spot rot or mold.
- Document hidden damage, dry, repair, and reseal before repainting.
How to Check for Leaks That Cause Paint Peeling
Start by inspecting areas where moisture most often shows up—ceilings, exterior walls, around windows, and under sinks—because identifying the leak source is the first step to stopping paint from peeling. Do a quick leak detection and moisture assessment: use a moisture meter, check for stains, and trace plumbing. Repair leaks, dry surfaces, and repaint with appropriate primer.
| Tool | Action |
|---|---|
| Moisture meter | Measure dampness |
| Flashlight | Inspect gaps |
| Wrench | Tighten fittings |
How Humidity and Ventilation Affect Paint Life
You should control indoor humidity because excess moisture softens paint and encourages peeling.
Improve room ventilation—use exhaust fans or open windows—to remove damp air before it damages surfaces.
Together, humidity control and good airflow will extend your paint’s life.
Control Indoor Humidity
Because moisture and poor airflow make paint lose adhesion, controlling indoor humidity is one of the simplest ways to extend your paint’s life.
You should aim for humidity control and a steady moisture balance to prevent peeling.
Try these steps:
- Use a dehumidifier in damp rooms.
- Run exhaust fans during showers.
- Fix leaks and dry wet areas promptly.
Improve Room Ventilation
Controlling humidity helps, but good airflow is what keeps moisture from lingering on walls and under paint films. You should use ventilation systems and position fans to boost air circulation, especially in kitchens and bathrooms. Maintain vents, open windows briefly after showers, and consider exhaust fans to dry surfaces fast.
| Action | Benefit |
|---|---|
| Ventilation systems | Reduce humidity |
| Fans/windows | Improve air circulation |
Which Paints Resist Peeling Best?
Durability matters most when you want paint that won’t peel, so choose formulations designed for strong adhesion and flexibility.
You’ll prioritize durable finishes, surface compatibility, color stability, and wear resistance while considering environmental factors and application techniques.
Compare brands for formulation differences and long term performance.
- Acrylic latex for flexibility
- Alkyd for adhesion on trims
- Specialty primers for tricky surfaces
How to Choose the Right Paint Finish
When you pick a finish, think about how the surface will be used and how much wear it’ll get; higher-sheen finishes stand up to scrubbing but highlight imperfections, while flatter sheens hide flaws but clean less easily.
Choose paint finish types by weighing gloss levels, sheen effects, texture options and durability comparison.
Consider light reflection, style considerations and application techniques to match room function and look.
Why Primer Matters and Which One to Use
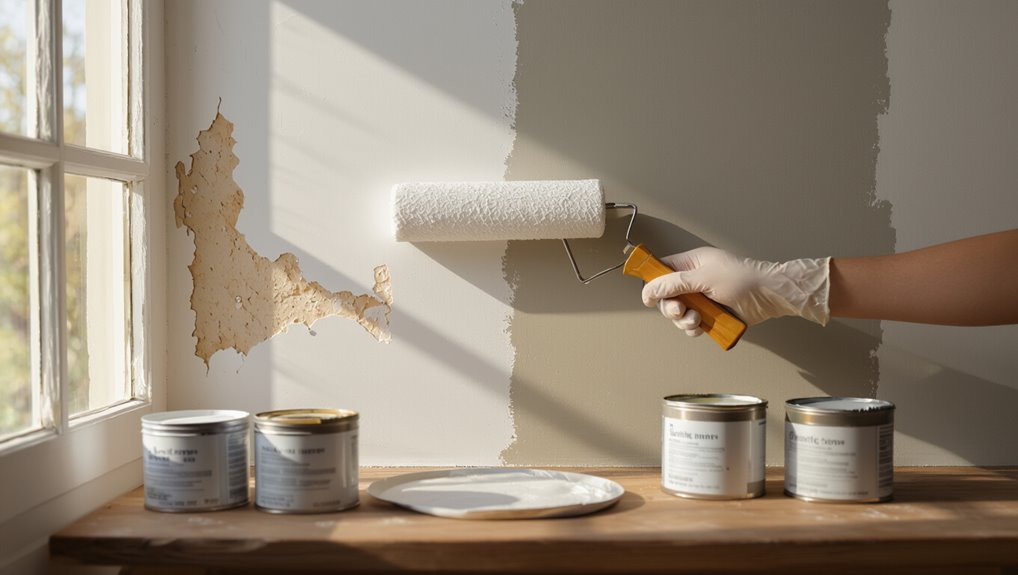
Because a proper primer bonds paint to the surface and seals porous materials, you’ll get a smoother, longer-lasting finish and fewer peeling problems down the line.
A good primer bonds paint and seals porous surfaces for a smoother, longer-lasting finish with less peeling.
You should know primer benefits and primer types to pick smartly.
- Oil-based: blocks stains, durable.
- Latex: fast-drying, flexible.
- Shellac: seals extreme stains.
Use primer to improve adhesion and longevity.
How to Match Primer to Your Surface
To pick the right primer for your job, start by identifying the material you’re painting—bare wood, drywall, metal, or glossy finishes each call for different properties—then match a primer that handles adhesion, sealing, and stain-blocking for that substrate.
Consider primer types (latex, oil-based, shellac) and check surface compatibility; choose moisture-resistant primers for humid areas and rust-inhibiting ones for metal.
Prep Checklist: Interior Walls Before Repainting
Start with a quick scan of the room and a plan for what needs fixing so you’ll avoid surprises mid-project.
Check for cracks, mold, loose paint, and grease; note necessary Surface Treatment and decide Paint Selection.
- Clean and degrease surfaces.
- Patch, sand, and prime problem spots.
- Protect trim, floors, and fixtures before you paint.
Prep Checklist: Exterior Walls Before Repainting
Before you repaint exterior walls, you’ll want to start by power-washing surfaces and treating any mold or mildew so paint can adhere properly.
Scrape and sand loose or peeling paint, then patch holes, rot, and other damage to create a smooth, stable base. Taking these steps now prevents future peeling and extends the life of your new finish.
Surface Cleaning & Mold Removal
If mildew, dirt, or loose paint are left on your walls, the new coat won’t bond and will peel sooner than you expect.
You’ll remove grime, treat mold, and disinfect surfaces for mold prevention and surface disinfection before painting.
- Pressure-wash gently.
- Apply diluted bleach or a mildew cleaner.
- Rinse, dry, and inspect for staining.
Loose Paint & Damage Repair
Assess and remove any loose or flaking paint so new coatings can bond properly; you’ll scrape, sand, and spot-prime areas where the substrate is exposed or damaged. Check surface conditions, match paint types to substrate, and repair rot or cracks before priming.
| Task | Action |
|---|---|
| Scrape | Remove loose paint |
| Repair | Patch, replace, spot-prime |
How to Remove Loose and Flaky Paint Safely
When paint starts to flake, don’t try to chip it off with bare hands—prepare the area, protect yourself, and remove loose sections methodically so new coatings will adhere properly.
Use safe removal and effective techniques with necessary tools under ideal conditions. Choose removal methods, assess flaky surfaces, and plan repair options.
- Strip
- Scrape
- Contain
How to Sand Walls for a Durable Finish
Start by choosing the right sandpaper grit—coarse for old paint and finer grits for smoothing.
Sand evenly to remove imperfections without gouging the drywall or wood.
Wipe away dust thoroughly and apply a primer before repainting for a durable finish.
Choose The Right Grit
Although it might seem minor, choosing the right sandpaper grit makes the difference between a smooth, long-lasting finish and paint that peels early.
You’ll use grit selection and sanding techniques to prep properly. Follow this quick guide:
- Start coarse (80–120) to remove old paint.
- Move to medium (150–180) for blending.
- Finish fine (220+) before priming.
Smooth Imperfections Evenly
If you want a durable, professional-looking finish, sand evenly across the wall using consistent pressure and overlapping strokes so you don’t create low or high spots; keep the same grit progression you chose and check frequently with your hand and a light held at an angle to catch imperfections.
Use smoothing techniques that blend feathered edges, work in sections, and guarantee even application before moving on.
Clean And Prime Surface
After you’ve smoothed imperfections, clean and prime the surface to lock in a durable finish.
You’ll perform a Surface Assessment, choose Cleaning Techniques, then sand lightly before priming to guarantee adhesion.
Follow these steps:
- Inspect and repair defects after Surface Assessment.
- Use vacuum, tack cloth, and solvent as Cleaning Techniques.
- Sand, wipe, then apply a quality primer for lasting results.
How to Repair Cracked Plaster to Prevent Peeling
Start by evaluating the crack to determine its width, depth, and whether it’s hairline, structural, or just surface plaster—this tells you what materials and repair method to use.
For cracked plaster, clean loose material, widen hairlines slightly, apply bonding agent, and use appropriate filler or plaster patch.
Sand smooth, prime, and repaint. Choose repair techniques matching damage to prevent future peeling.
How to Repair Drywall Before Painting
Tackle drywall repairs before you paint so the finish stays smooth and the new coat adheres properly: identify holes, dents, and seams, remove loose tape or compound, and clear dust and debris.
- Patch holes with joint compound and mesh for drywall repair.
- Sand seams feathering edges for even texture.
- Prime repaired spots before applying painting techniques for uniform coverage.
How to Fix Mold and Mildew Under Paint
If you spot mold or mildew under paint, start by identifying the affected areas and removing growth with a proper cleaner and protective gear.
Once the surface is dry and mold-free, treat it with a fungicidal solution to prevent regrowth.
Finally, prime the repaired area with a mold-resistant primer before repainting to keep the problem from returning.
Identify And Remove Mold
Before repainting, you’ll need to find and remove any mold or mildew hiding under the paint, because it will return and ruin your new finish if left untreated.
You should do mold identification and mold removal like this:
- Inspect discoloration and musty smell.
- Scrub with detergent or diluted bleach solution.
- Dry thoroughly and verify no regrowth before painting.
Treat And Prime Surfaces
Start by treating the cleaned area with a mold-killing solution, then let it dry completely before priming; this assures any remaining spores are neutralized and won’t compromise the new paint. You’ll apply proper surface treatment, choose primer selection for stain-blocking, and follow manufacturer cure times to guarantee adhesion.
| Step | Action |
|---|---|
| 1 | Kill mold |
| 2 | Prime |
How to Treat Efflorescence on Masonry Walls
Efflorescence looks like a chalky white powder on brick, block, or concrete, and you’ll want to remove it quickly because it signals water moving through the masonry.
Use proper efflorescence treatment and masonry cleaning steps:
- Dry-brush loose salt, then vacuum.
- Apply mild acid rinse or specialized cleaner; rinse thoroughly.
- Find and fix moisture source to prevent recurrence; repaint only when dry.
How to Seal and Caulk Gaps That Cause Paint Peeling
Start by inspecting seams, trim, windows, and joints to find gaps where moisture can get behind the paint.
Once you’ve identified problem areas, clean out old caulk and loose material so the new sealant will bond.
Apply a paintable, exterior-grade caulk with a steady bead and smooth it for a tight, even seal.
Inspect And Identify Gaps
Before you seal anything, thoroughly inspect the area for gaps, cracks, and loose trim that let moisture or air reach the paint film.
Do a quick gap analysis to prioritize repairs and choose sealing techniques. Follow these steps:
- Note visible gaps and soft spots.
- Check joints, windows, and baseboards.
- Measure gap sizes and document locations for repair.
Proper Caulking Techniques
Now that you’ve identified where moisture and air are getting in, you can seal those gaps with the right caulking techniques to stop paint from peeling. Use silicone or acrylic caulk for effective sealing, focus on gap filling, and follow application tips for smooth bead, tooling, and curing. This creates moisture barriers, improves paint adhesion, guarantees durable finishes, and offers lasting surface protection.
| Tool | Caulk | Result |
|---|---|---|
| Gun | Silicone | Seal |
| Knife | Acrylic | Smooth |
| Rag | Water | Clean |
When and How to Use Bonding Primer
Although you can sometimes get away with a regular primer, you’ll want a bonding primer whenever the surface is slick, previously painted with glossy enamel, or has been patched with difficult-to-coat materials.
Bonding primers chemically adhere where ordinary primers won’t, creating a secure base so your topcoat won’t peel.
Bonding primers chemically lock to slick or glossy surfaces, ensuring a secure base so your topcoat won’t peel.
Use bonding benefits and primer types like this:
- Clean and sand.
- Apply thin, even coats.
- Let cure fully before topcoat.
How Temperature Affects Paint Application
Bonding primer gives you a stable surface, but temperature still shapes how both primer and topcoat perform.
You’ll avoid problems by watching surface temperature and avoiding temperature extremes; paint won’t cure properly if too cold or too hot.
Consider climate considerations like humidity and daily swings.
Plan application timing to coat when conditions match the paint’s recommended range for reliable adhesion.
How to Time Your Paint Job for Best Adhesion
Pick a day when humidity is low so the paint can dry evenly and bond well.
Don’t paint in very hot sun or when temperatures will drop below the paint’s recommended range, because extreme heat or cold ruins adhesion.
Check the forecast and plan your job for a stable stretch of mild, dry weather.
Paint When Humidity Is Low
If you want your paint to stick and dry properly, time your project for days when the relative humidity is low—ideally between 40% and 60% for most paints.
You’ll manage humidity control and temperature regulation, choose paint selection suited to conditions, and finish surface preparation.
Steps:
- Check local humidity forecasts.
- Use dehumidifiers or fans.
- Avoid painting after rain.
Avoid Extreme Temperatures
Because temperature affects how paint cures and adheres, plan your job for days when temperatures stay within the paint manufacturer’s recommended range—typically between 50°F and 85°F (10°C–29°C).
You should avoid painting during rapid temperature fluctuations that cause paint expansion and contraction. Choose stable conditions so coatings bond properly, dry evenly, and resist future peeling.
Monitor forecasts and delay if extremes are expected.
How to Apply Paint for Long‑Term Adhesion
When you apply paint for long-term adhesion, work methodically and follow a few key practices: clean and sand surfaces, use the right primer, maintain a wet edge, apply thin, even coats, and allow proper drying between layers.
- Prep: remove dust, grease for long lasting adhesion.
- Technique: maintain a wet edge for ideal paint application.
- Finish: inspect and touch up only dry areas.
How Many Coats Do You Really Need?
Wondering how many coats you really need? You usually need two: a primer and one topcoat, but surface and paint quality can change that.
Do a coats comparison—cheap paints may need extra layers, high-hide paints often don’t.
Use proper layering techniques: let each coat fully dry, sand lightly between coats, and apply even coverage to guarantee adhesion and prevent peeling.
Maintenance Checklist: Preventing Paint Peeling
Now that you know how many coats to apply and why proper layering matters, keep that care going with regular maintenance to stop peeling before it starts.
Follow a simple checklist for paint maintenance and routine wall inspections:
- Monthly visual check for bubbles, cracks, stains.
- Clean gently with mild detergent and soft cloth.
- Touch up chips promptly and seal problem spots.
How to Upgrade Ventilation to Protect Paint
Because moisture and poor airflow undermine even the best paint job, upgrading your ventilation is one of the smartest preventative moves you can make.
Improve ventilation systems, boost air circulation with exhaust fans and strategic window placement, and balance humidity control for better air quality.
Combine thermal insulation and regular HVAC maintenance to stabilize the indoor environment and extend paint longevity.
Tools That Improve Paint Adhesion and Finish
You’ll get better, longer-lasting results when you use the right surface preparation tools — sanders, scrapers, and degreasers — to create a clean, profile-ready substrate.
Adding adhesion-boosting additives or primers can further help paint grab onto difficult surfaces.
Below we’ll cover which tools and additives work best and how to use them.
Surface Preparation Tools
Good prep makes the difference between a paint job that lasts and one that peels; the right tools help you strip old coatings, smooth imperfections, and create a surface paint can bond to.
Use these essential tools and prep techniques:
- Scrapers, wire brushes, and chemical strippers for wall cleaning.
- Sanding methods: sandpapers and orbital sanders.
- Tape, rollers, primer selection, and careful paint application.
Adhesion-Boosting Additives
Once your surface is clean and smooth, boost bonding further by using adhesion additives and primers formulated to improve paint grip and durability.
You’ll follow adhesion principles: promote mechanical keying, reduce surface tension, and match chemistry.
Choose additive types—silane primers for slick substrates, acrylic promoters for drywall, or bonding agents for glossy surfaces.
Apply per instructions to guarantee long-lasting, peel-resistant finish.
Common DIY Painting Mistakes to Avoid
Because small mistakes early on can lead to peeling later, it’s important to avoid common DIY painting errors like skipping surface prep, using the wrong primer or paint, painting in unsuitable weather, and applying coats too thickly or too quickly.
- Mind paint application: choose paint types, control drying times, and consider environmental factors.
- Fix surface imperfections before painting.
- Use proper application techniques—smooth brush strokes and correct roller usage—and sensible color selection.
How Professionals Prevent Paint Failure (When to Hire One)
When small errors keep causing peeling despite your best efforts, it’s time to contemplate hiring a pro.
You should call experts when damage is widespread, substrates need repair, or moisture problems persist.
Professionals use professional techniques—surface diagnostics, proper remediation, priming, and controlled application—and share expert insights to prevent recurrence.
They’ll save time, secure durability, and guarantee a lasting finish.
Estimate Cost vs. Lifespan for Paint Options
Although higher-quality paints cost more up front, you’ll often save money over time by reducing the need for repairs and recoats.
Higher-quality paints cost more initially but often save money long-term by reducing repairs and recoats.
Do a cost comparison and lifespan analysis to pick smartly. Consider:
- Cheap options: low cost, short lifespan, frequent recoats.
- Mid-range: balanced cost and durability.
- Premium: higher initial cost, longest lifespan, fewer touch-ups required.
How Warranty and Product Specs Predict Peeling Risk
Check the warranty length before you buy—longer warranties usually mean the manufacturer expects better durability.
Look at product specs to spot limits like recommended surfaces, temperature ranges, and expected coverage. Together, those details help you gauge how likely the paint is to peel in your conditions.
Warranty Length Signals Quality
A longer warranty usually means the manufacturer trusts their formula and expects it to resist peeling over time, so you can use warranty length as a quick signal of quality.
Use warranty indicators and quality assurance clues to choose paint. Consider:
- Warranty years — longer often = confidence.
- Transferable coverage — shows manufacturer backing.
- Claim process ease — reflects true quality support.
Product Specs Reveal Limits
1 key way to predict peeling risk is to read product specs closely, because they tell you the limits manufacturers tested for—surface types, temperature and humidity ranges, recommended primers, and expected adhesion times.
You’ll learn product durability ratings and whether advanced paint technology suits your conditions. Follow their prep and application limits; ignoring them raises peeling risk and voids warranties, so match product to environment.
Troubleshooting New Peeling After Painting
If fresh paint starts peeling soon after you finish a job, don’t assume the paint itself is defective; you’ll usually find the cause in surface preparation, moisture, or improper product choice.
Check these quickly:
Quick checks to pinpoint peeling: surface prep, moisture, application, and product choice.
- Inspect surface texture and wall materials for contamination or poor adhesion.
- Review application techniques, drying times, and paint layering versus temperature fluctuations.
- Consider new paint, color choices, paint additives and environmental factors.
How to Protect Painted Surfaces From Water Damage
When you’ve ruled out prep mistakes and poor product choice as reasons for new peeling, turn your attention to protecting paint from water damage—moisture will undo even well-applied coatings.
Use water resistant coatings, moisture barriers and waterproofing solutions; apply sealing techniques and surface treatments.
Improve ventilation systems and humidity control, and consider paint additives for mold resistance so your finish survives damp conditions.
Seasonal Maintenance That Extends Paint Life
Although seasonal changes are inevitable, keeping up with a few targeted maintenance tasks each spring and fall will dramatically extend your paint’s lifespan.
Do seasonal inspections and address minor issues before they worsen, considering weather considerations like freeze/thaw and humidity.
- Wash surfaces
- Touch up chips and seams
- Clear gutters and trim vegetation
How to Track Paint Performance and Plan Repaints
To keep your exterior looking its best and avoid surprise repainting costs, set up a simple tracking routine that logs condition, repairs, and dates of touch-ups or full coats. You’ll use paint durability strategies and repaint scheduling tips to plan inspections, note fading or bubbling, and prioritize areas.
| Date | Issue | Action |
|---|---|---|
| 05/24 | Fading | Touch-up |
| 10/24 | Crack | Patch |
| 04/25 | Peel | Full repaint |
Frequently Asked Questions
Can Paint Peeling Be Caused by Underlying Structural Movement or Settling?
Yes — like a house sighing, your walls can shift and crack, and that movement stresses paint. You’ll spot peeling tied to structural integrity problems, often from foundation issues, so address those first to stop damage.
Can Pets or Household Chemicals Accelerate Paint Failure?
Yes — pets and household chemicals can accelerate paint failure. You’ll see scratches, scuffs, and moisture from pets, and chemical exposure can break down finishes; prioritize pet safety and avoid harsh cleaners to protect paint.
Do Exterior Siding Materials Require Different Repaint Cycles?
Yes — different sidings need varied repaint cycles: you’ll assess siding maintenance needs, material porosity, and exposure; wood and fiber cement often need repainting sooner than vinyl, affecting paint durability and maintenance frequency accordingly.
Can Stained or Nicotine‑Discolored Walls Affect Primer Adhesion?
Yes—stains and nicotine can block primer adhesion, so you’ll need stain removal and thorough surface preparation; you’ll scrub, degrease, and use a stain‑blocking primer so the new paint will stick and last.
Is Vapor Barrier Installation Necessary to Protect Interior Paint?
You don’t always need a vapor barrier, but it’s often recommended: vapor barrier benefits include improved moisture control, reducing condensation and mold risk, helping paint adhesion and longevity, especially in high‑humidity or cold‑climate walls.
