
Why Is My Wall Paint Turning White and How to Fix It
Your wall paint’s probably turning white because moisture, salts (efflorescence), UV damage, or incompatible primers and paints are breaking down pigments and binders. Start by checking for damp spots, leaks, or poor ventilation, wipe and scrub away powdery residue, dry the area, then sand, prime with an alkali- or bonding primer, and repaint with a moisture-resistant finish. Fix leaks and improve drainage or airflow to prevent recurrence, and keep going for steps on testing, repair, and prevention.
Why Paint Turns White: Quick Answer
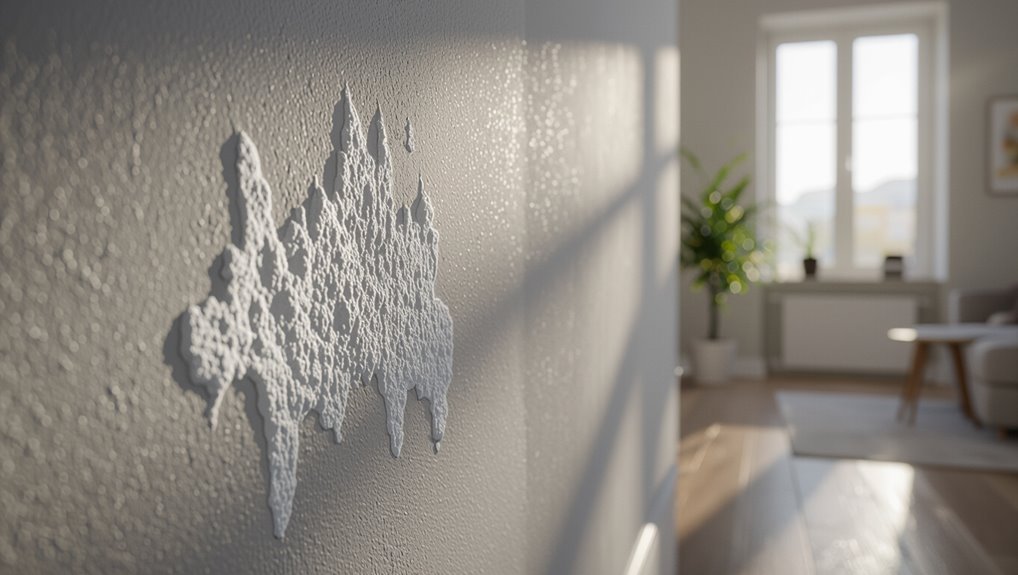
If your wall paint is turning white, it’s usually due to moisture, efflorescence, or paint breakdown from UV exposure and aging.
You should know paint chemistry drives how pigments and binders react to salts, water, and sunlight.
Color fading happens when pigments degrade or leach out, leaving a chalky residue.
When pigments break down or leach away, paint fades into a chalky, powdery residue over time
Assess moisture sources and substrate health before choosing repairs.
Quick Fixes to Stop White Streaks Now
Now that you know why paint turns white, you can tackle the visible streaks with fast, practical steps that stop further damage and improve appearance.
Wipe affected areas gently using a mild detergent for paint cleaning, rinse, then let dry.
Scrape loose residue, sand lightly, and prime spots as part of surface preparation.
Repaint with quality, moisture-resistant paint to prevent return.
Diagnose White Streaks: 5 Quick Tests
Start by checking the surface moisture with a simple touch test and a moisture meter if you have one, since damp walls often cause paint to chalk or blister.
Then try a salt efflorescence test by rubbing the affected area with a damp cloth—if white powder transfers or reappears after drying, salts are likely leaching through.
These quick checks will point you toward whether the issue is moisture-related or salt-related.
Surface Moisture Check
Wondering whether moisture is behind those white streaks? Check for moisture sources like leaks, condensation, or rising damp.
Use quick inspection techniques: touch walls for dampness, feel temperature differences, smell mustiness, and use a moisture meter if available.
Document wet areas, test after drying, and prioritize repairs—seal leaks, improve ventilation—before repainting to prevent recurrence.
Salt Efflorescence Test
If moisture checks pointed to damp walls but you still aren’t sure what’s causing the white streaks, run a simple salt efflorescence test to confirm whether salts are migrating to the surface.
Dampen a cotton swab, rub the streaks, and let it dry—white residue on the swab indicates salts.
Address efflorescence causes and use prevention methods like waterproofing, improved drainage, and breathable coatings.
Tools and Materials for Inspection
A small kit of the right tools will help you diagnose why paint’s turning white and decide the fix.
Gather inspection tools: flashlight, magnifier, stiff brush, scraper, pH test strips, and disposable gloves.
Include moisture meters for quick surface and substrate checks.
Add clean cloths, a bucket, mild detergent, and a notepad to record readings and photos for later comparison.
Moisture: Interior Leaks and White Streaks
With your inspection kit ready, focus next on moisture—interior leaks often show up as white streaks on paint when water carries salts or mineral deposits to the surface.
Check ceilings, behind furniture, and around windows for damp patches. Measure interior humidity, inspect wall insulation for damp or compressed areas, and trace leaks to plumbing or roof sources so you can repair and dry affected areas promptly.
Efflorescence vs. Paint Failure: Key Differences
How can you tell whether those white marks are efflorescence or plain paint failure? You’ll check substrate moisture, texture, and location: efflorescence causes are salt migration from masonry, while paint failure ties to adhesion and paint durability. Use these quick contrasts:
| Efflorescence | Paint Failure |
|---|---|
| Salt deposits, powdery | Cracking, flaking |
| Linked to moisture ingress | Linked to poor adhesion or age |
What Efflorescence Looks Like on Walls
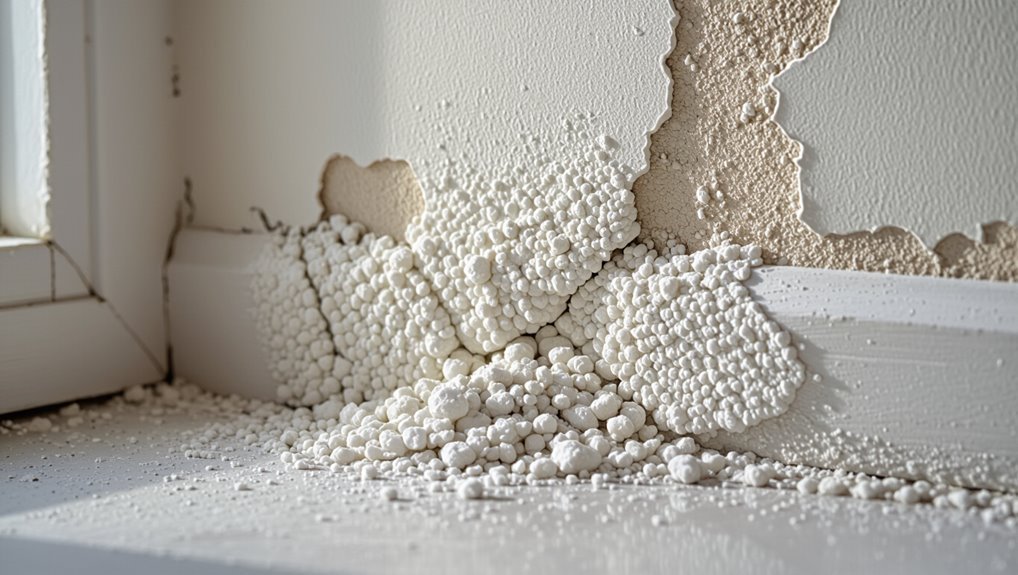
If those white marks aren’t paint failure, they’re likely efflorescence — and you’ll spot it by texture and pattern rather than color alone.
You’ll notice efflorescence appearance as powdery, crystalline deposits causing wall discoloration.
Look for:
- powdery white streaks following joints or seams
- crusty patches you can brush off
- repeating patterns where moisture travels
Salt Migration vs. Mold or Mildew : How to Tell
Wondering whether those white patches are salt or something living? You’ll spot salt migration as powdery, crystalline streaks from damp masonry; it brushes off easily.
For mold identification, look for fuzzy or spotty growth, musty odor, and spread despite dry surfaces.
Test suspect areas by wiping: salt leaves residue, mold smears and may regrow.
Address source moisture accordingly.
Chalking: When Poor Paint Quality Is to Blame
Chalking happens when low-quality paint breaks down and leaves a fine, powdery residue on the surface. You’ll often see it on exterior walls exposed to sun and rain.
You can address it by improving paint quality and following chalking prevention steps:
- Clean and remove powder before repainting.
- Use high-quality exterior paint.
- Prime with a bonding primer to guarantee adhesion.
Painting Over Damp Plaster: What Goes Wrong
You might think chalking and damp problems are unrelated, but painting over damp plaster creates its own visible failures that can look like whitening or peeling.
If you paint before plaster dries, moisture lifts binder and causes flaking, efflorescence, and poor adhesion.
Proper prep and drying matter; choose breathable primers, adjust painting techniques, and fix moisture sources first to prevent recurring damage.
Condensation: How It Causes White Discoloration
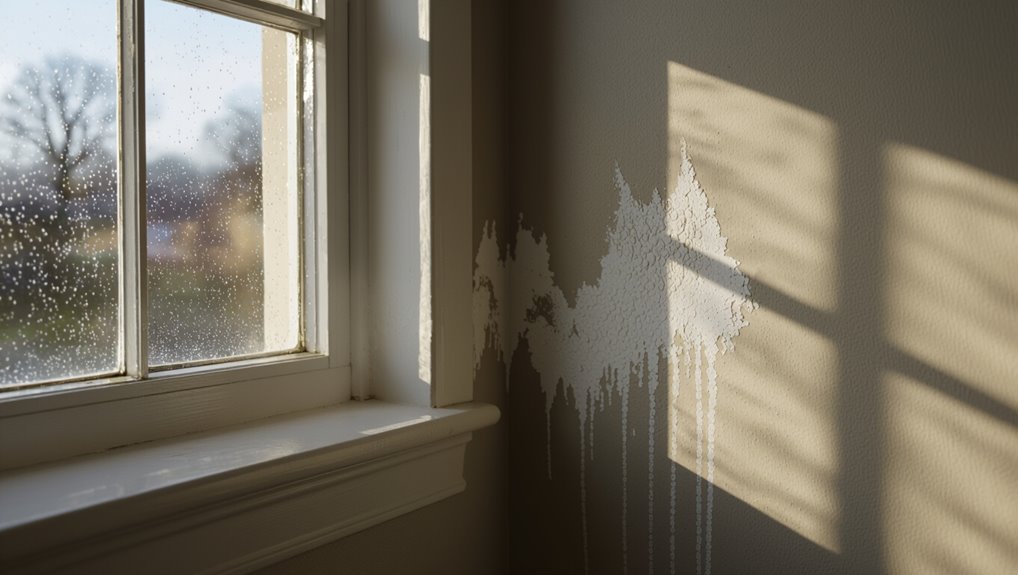
When warm, humid air hits a cold wall you’ll get condensation that soaks the paint and causes moisture-driven blooming, leaving a chalky white film.
That trapped water can also dissolve salts in the plaster and carry them to the surface, where they crystallize as white efflorescence.
Addressing the humidity and drying the wall will stop new staining and let you remove or treat the salt deposits.
Moisture-Driven Paint Blooming
If warm, moist air hits a cooler painted surface, condensation can form and trigger a white, powdery bloom on the finish.
You’ll notice reduced paint adhesion and increased moisture retention that weakens the film.
To address it, you should:
- Improve ventilation to reduce humidity.
- Wipe and dry affected areas promptly.
- Use breathable, moisture-resistant paints to prevent recurrence.
Salt Efflorescence Formation
One common cause of white discoloration is salt efflorescence, which happens when moisture in masonry dissolves soluble salts and carries them to the surface.
As the water evaporates, it leaves a powdery white deposit that can stain paint and undermine adhesion.
You should remove deposits, address sources of moisture, and apply appropriate wall treatment or salt damage-resistant primers to prevent recurrence.
Exterior Leaks That Damage Interior Paint
Because moisture can travel through tiny gaps in siding, flashing, or roofing, exterior leaks often show up as white, chalky or blistered paint on interior walls.
You should act fast to prevent water intrusion and wall deterioration, preserving paint longevity and structural integrity.
Inspect and perform leak detection, then plan moisture management and paint maintenance:
- Check roof, flashing, siding
- Repair breaches promptly
- Dry and repaint affected areas
Alkali in New Plaster and Paint Bleaching
When new plaster or fresh mortar dries, it releases alkaline salts that can migrate to the surface and bleach or powder paint.
So you’ll often see a white, chalky residue called efflorescence or alkali burn.
You should address the alkali reaction before repainting: allow full cure, remove salts with a mild acidic wash, then apply appropriate plaster treatment and alkali-resistant primer to prevent recurrence and staining.
Primer Mistakes That Create White Patches
After you’ve treated alkali stains and primed the plaster properly, don’t assume any primer will do — choosing or applying the wrong primer can itself cause white patches.
After treating alkali stains and priming plaster correctly, using the wrong primer or application can still cause white patches.
You’ll avoid issues by focusing on primer selection and correct application techniques:
- Pick a high-alkali-blocking primer suited to substrate.
- Follow manufacturer drying times; don’t over-thin.
- Apply even coats with proper tools to prevent streaks.
Paint Incompatibility: Common Signs
If your paint is flaking off in chips or sheets, that’s a clear sign the layers aren’t bonding and the finish can turn white over time.
You might also notice blotchy color transfer when you touch or wipe the wall, indicating incompatible coatings.
Check what primers and paints were used so you can match compatible products and stop further damage.
Visible Paint Flaking
Visible flakes or chips peeling away from your wall are a clear sign the topcoat isn’t adhering to the layer beneath.
You’ll notice paint deterioration and obvious aesthetic concerns. Address them quickly to avoid spread.
- Scrape loose flakes and sand edges.
- Prime with a compatible bonding primer.
- Repaint using products designed for the existing substrate to guarantee proper adhesion.
Blotchy Color Transfer
When old paint reacts with a new topcoat, you’ll often see uneven, blotchy patches where color seems to transfer or stain the fresh finish; this is a classic sign of paint incompatibility.
You’ll notice a blotchy appearance and accelerated color fading in spots.
To fix it, strip incompatible layers, prep the surface, use a proper primer or a compatible paint system, then repaint.
Sunlight and UV: Fading to a Chalky Finish
Though it’s easy to overlook, prolonged exposure to sunlight and ultraviolet (UV) rays breaks down paint binders and pigments, leaving your wall with a faded, chalky surface.
Prolonged sun and UV exposure degrades paint, leaving walls faded and chalky without protective coatings
You’ll notice reduced paint quality and a powdery, chalky texture that alters the surface finish.
To address it, consider:
- UV-resistant topcoats
- Shaded window treatments
- Higher-quality, fade-resistant paint
Step‑By‑Step Moisture Test (What to Look For)
How do you tell if moisture is causing your paint to turn white? Use a dry cloth and press a clear plastic sheet against the wall for 24 hours; look for darkening under the sheet.
Inspect nearby moisture sources—plumbing, roof leaks, condensation—and note affected paint types (latex vs. oil).
Soft, blistered, or peeling areas point to damp intrusion needing repair.
Step‑By‑Step Test for Salt Residues (Efflorescence)
If the moisture check didn’t show active damp spots, you should next test for salt residues—efflorescence—which can make paint look white even without ongoing leaks.
For salt testing and residue identification, try this quick procedure:
- Scrape a small area and brush off loose powder.
- Dampen a cloth, rub; salts will dissolve.
- Collect dissolved sample; let evaporate to confirm crystalline residue.
How to Test for Chalking From Bad Paint
Want to know whether your paint is chalking or it’s something else? Rub a white cloth over the faded area; chalking leaves powder on the cloth.
Test multiple spots, compare sheltered versus exposed areas to judge paint quality.
Scrape a small patch—poor adhesion from bad surface preparation flakes easily.
Note persistence after brushing; chalking returns quickly, confirming degraded paint.
Cleaning and Removing Efflorescence Safely
Ever wondered what’s causing that powdery white residue on your masonry and how to get rid of it without damaging the surface?
You can tackle efflorescence removal with gentle, safe cleaning methods that won’t etch or harm masonry.
Try these steps:
- Dry-brush loose salts, then vacuum residue.
- Rinse with water and a mild detergent.
- Use a diluted vinegar rinse for stubborn deposits.
Treat Damp Walls Before Repainting: Methods
Before you repaint, you’ll need to identify where the moisture’s coming from—roof leaks, rising damp, plumbing faults, or condensation all need different fixes.
Once sources are stopped, dry the walls thoroughly using dehumidifiers, fans, or controlled heating and check moisture levels.
Finally, treat the surface with appropriate products like salt neutralizers, waterproofing primers, or breathable render before applying new paint.
Identify Moisture Sources
When you’re about to repaint, the first step is finding where the moisture’s coming from so your new paint won’t fail. Inspect both obvious and hidden sources like roof leaks, rising damp at the base of walls, leaking pipes, condensation from poor ventilation, and groundwater seeping through foundations.
Identify moisture sources and stop water leaks before treating or repainting.
- Check roof and guttering
- Trace plumbing lines
- Assess ventilation paths
Drying And Treatment
If you’ve found and fixed the leak, you still need to dry and treat the wall properly so your new paint will stick and last; use fans, dehumidifiers, and heat to speed drying techniques, and verify moisture with a meter.
For treatment options, apply a fungicidal wash, salt neutralizer for efflorescence, and a penetrating sealer or primer designed for damp or previously affected surfaces before repainting.
Prepare and Prime New or Alkaline Plaster
Since new or alkaline plaster can react with standard paints and cause whitening or poor adhesion, you’ll need to neutralize and seal the surface first.
New or alkaline plaster must be neutralized and sealed first to prevent whitening and ensure paint adhesion.
Treat and prime to guarantee paint adhesion and a reliable moisture barrier. Follow these steps:
- Neutralize alkalinity with a mild acid rinse, then dry.
- Apply alkali-resistant primer evenly.
- Check for pinholes and recoat if needed.
Choose Paints That Resist Chalking and Moisture
After neutralizing and priming alkaline plaster, pick paints formulated to resist chalking and repel moisture so your finish stays stable and long-lasting.
You’ll favor quality paint selection labeled “mildew resistant” or “high-hiding” and choose acrylic or elastomeric formulas. This boosts color durability, reduces powdering, and limits moisture intrusion.
Test a small area, follow manufacturer specs, and replace failing coatings promptly to maintain protection.
Correct Painting Technique to Avoid White Patches
When you paint, use consistent pressure and overlap each stroke by about 30% so the coating lays down evenly and avoids thin, powdery spots that turn white. Work wet‑edge to wet‑edge, keep a full roller or brush, and don’t stop mid‑panel where lap marks and chalking can start.
Follow simple steps:
- Use correct brushwork and maintain a full applicator.
- Paint at the ideal temperature and humidity.
- Thin coats beat heavy ones; let each dry evenly.
Repairing and Repainting Affected Areas
Now that you’ve followed good application technique to prevent white patches, it’s time to fix any affected spots and repaint for a uniform finish.
Scrape loose film, sand feathered edges, and clean for proper surface preparation.
Prime stained areas, choose compatible paint selection (same sheerness and base), and apply thin, even coats.
Allow drying between coats for seamless blending.
Call a Pro: Structural Moisture Red Flags
If you spot persistent white staining, bubbling paint, musty odors, or damp patches that recur despite surface repairs, call a professional—these are common red flags of structural moisture issues that need diagnosis and remediation beyond DIY fixes.
Persistent white staining, bubbling paint, musty odors, or recurring damp patches signal structural moisture—call a professional for diagnosis and repair.
You’ll want an expert to locate moisture sources and protect structural integrity.
- Hidden leaks
- Rising damp
- Compromised foundations
Prevent Future White Streaks: Ventilation and Drainage
To stop white streaks from coming back, you need to improve indoor airflow and keep exterior water away from your walls.
Open vents, use exhaust fans, and run a dehumidifier in damp rooms to reduce interior moisture.
Outside, fix grading, clean gutters, and extend downspouts so water drains away from your foundation.
Improve Indoor Airflow
Someone’s got to control the airflow in your home, because poor ventilation and trapped moisture are the main reasons paint develops white streaks and efflorescence.
You can reduce humidity and improve circulation with simple steps:
- Open windows, use exhaust fans regularly.
- Place indoor plants strategically to absorb moisture.
- Run air purifiers or dehumidifiers to keep surfaces dry and paint stable.
Ensure Proper Exterior Drainage
Indoor airflow matters, but you also need to control what’s happening outside your walls—poor exterior drainage can send water into masonry and cause the same white streaks and efflorescence you’re seeing inside.
Check gutters, downspouts, and grading so water flows away. Install or repair drainage systems, seal foundation cracks, and add proper flashing.
These steps preserve paint longevity and prevent recurring stains.
Maintenance and Common Mistakes to Avoid
If you want your paint to keep its original color, regular maintenance and avoiding a few common mistakes make all the difference. You should prioritize wall care and simple inspections to guarantee paint longevity.
Follow basic steps and skip shortcuts that trap moisture or use wrong cleaners:
Follow simple steps and avoid shortcuts that trap moisture or use inappropriate cleaners.
- Clean gently with mild soap
- Fix leaks and vents promptly
- Recoat with compatible primer and paint
Frequently Asked Questions
Can Household Cleaners Cause Paint to Turn White Over Time?
Yes — think of cleaning products as tiny sandblasters; they can erode finishes and cause surface damage. You’ll strip binders, dull pigments, and eventually see white haze if you use harsh cleaners or scrub too aggressively.
Do Pets or Insects Contribute to White Streaks on Walls?
Yes — you’ll see white streaks from pet behavior (saliva, rubbing, oily fur) and insect activity (webs, residue, droppings). Clean gently, trim pet access, use washable paint, and address infestations to prevent recurrence.
Can Paint Turn White From Nearby Construction or Vibration?
Yes — nearby construction and vibration effects can cause paint fading, microcracking, or dust embedment that makes surfaces look white. You’ll notice flaking or dullness; clean, touch up, or repaint with vibration-resistant coatings.
Will Wallpaper Adhesive React and Create White Discoloration?
Yes — wallpaper adhesive can react and create white discoloration. You’ll see it more with certain wallpaper types and poor adhesive quality; moisture, alkaline primers, or cheap glue will cause efflorescence, staining, or adhesive bleeding onto paint.
Are Certain Furniture Types Causing White Patches Through Contact?
Yes — certain furniture types can cause white patches through contact: if furniture materials hold moisture or trap it against paint, moisture absorption leads to efflorescence or finish damage, so check materials, ventilation, and use barriers.
