
What to Use to Wash Exterior Walls Before Painting for Best Results
You should use a cleaner and method that match your siding so paint will stick: soft wash or low-pressure rinse with mild detergent for vinyl and wood, pH-neutral cleaners for stucco, and gentle scrubbing for brick or masonry; use diluted bleach or oxygen bleach for mildew, rinse thoroughly, and avoid high pressure that damages surfaces. Wear goggles and gloves, protect plants, and let walls dry 24–72 hours before priming — keep going for detailed steps and tips.
Quick Checklist: Prep Exterior Walls for Painting
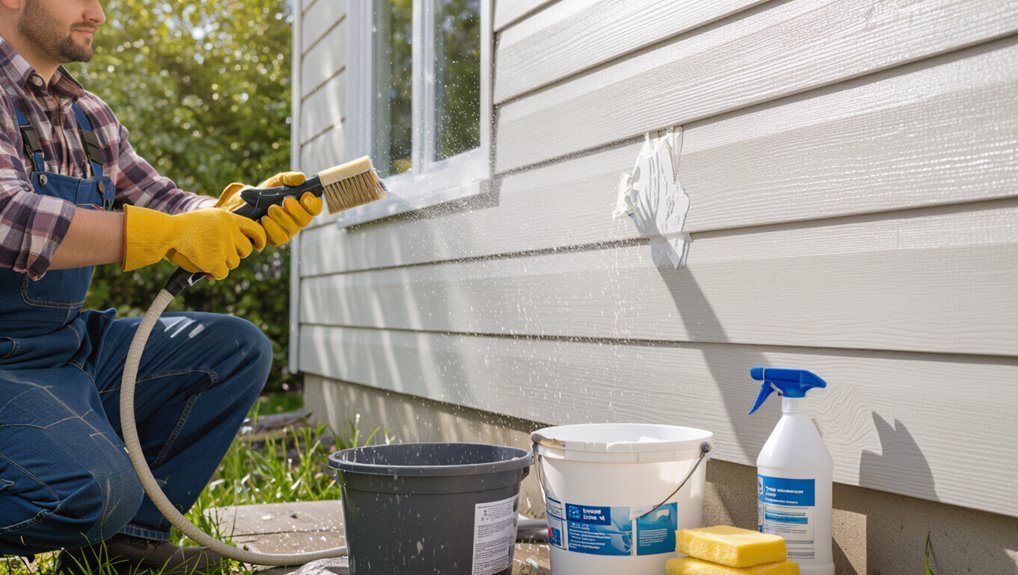
Start by surveying the surface for mildew, flaking paint, chalking, cracks, and loose trim so you know what needs attention.
You’ll note damaged areas, remove loose material, and plan repairs.
Prioritize surface preparation steps: patch, sand, and secure trim.
Prioritize prep: patch holes, sand rough spots, and firmly secure trim for a lasting paint job.
Choose cleaning techniques—soft wash, pressure rinse, or detergent scrub—matched to siding and contamination to guarantee paint bonds properly.
What Cleaned Surfaces Must Look Like Before Painting
Before you prime or paint, cleaned surfaces must look uniformly free of dirt, mildew, chalky residue, and loose material so the coating can adhere properly.
You’ll check that surface texture is consistent, without glazing or rough patches, and that any repaired areas blend smoothly.
Verify paint compatibility with the substrate and previous coatings, ensuring no peeling, fingerprints, or missed stains remain before you proceed.
How to Identify Your Siding Material Fast
Start by looking for visual cues like grain patterns, seams, and surface texture to tell wood, vinyl, fiber cement, or metal apart.
Then run your hand over the siding to feel thickness and rigidity—thin, flexible panels are usually vinyl, while thicker, solid boards suggest wood or fiber cement.
Those two quick checks will help you pick the right cleaning method.
Visual Material Cues
Look closely at your home’s exterior—your eyes can quickly tell you whether you’ve got vinyl, wood, fiber cement, stucco, or brick by noting texture, seams, and fastener patterns.
Use visual cues: horizontal overlapping boards usually mean wood or vinyl; smooth panels with visible joints suggest fiber cement; rough, continuous texture hints stucco; regular mortar lines signal brick.
Match painting techniques accordingly.
Touch And Thickness
Feel the difference—running your hand along the siding and gauging its thickness gives you fast, reliable clues about what you’re dealing with.
Use touch techniques: note smoothness, grain, flex, and seams. Compare firmness to determine material—vinyl flexes, wood feels solid, fiber cement is dense.
Apply thickness considerations to pick cleaning pressure and chemicals, avoiding damage while ensuring proper prep.
Why You Must Clean Surfaces Before Painting
You should clean surfaces before painting because proper prep improves paint adhesion and helps the finish last.
Removing dirt, mildew, and grease thoroughly guarantees the coating bonds evenly and won’t peel.
Cleaning also prevents long-term damage to the siding that could lead to costly repairs later.
Improve Paint Adhesion
Start by removing dirt, mildew, chalking, and loose paint—any of these will stop new paint from forming a strong bond with the wall.
You should prep the paint surface so adhesion factors like moisture, contact angle, and texture favor bonding.
Clean, dry, and lightly abraded surfaces let primers and paints penetrate and lock on, reducing peeling and extending finish life.
Remove Contaminants Thoroughly
Wash every inch of the surface so dirt, grease, mildew, and chalking won’t block the paint from bonding.
You need to remove surface contaminants completely—use detergent, bleach solutions for mildew, and degreasers where needed.
Inspect for residues and rinse thoroughly.
Set a practical cleaning frequency based on exposure and staining so surfaces stay ready for priming and painting without surprises.
Prevent Long-Term Damage
Thorough cleaning does more than improve paint adhesion—it prevents long-term damage that can shorten your walls’ lifespan and raise repair costs.
You’ll remove mold, mildew, and grime that eat at fibers and finishes, preserving surface protection and structural integrity.
Set a sensible cleaning frequency, inspect annually, and address stains promptly so paint and substrate stay sound, avoiding costly repairs later.
Best Cleaners to Wash Exterior Walls Before Painting
Before you paint, pick a cleaner that matches the surface and the soil you’re tackling so the new finish will adhere and last.
Use mild detergent for painted wood, trisodium phosphate alternatives for heavy grime, and bleach solutions for mold. Choose eco-friendly cleaners when possible to reduce runoff.
Proper surface preparation includes rinsing, spot treating stains, and allowing full drying before priming and painting.
What to Use on Vinyl Siding Before Painting
When prepping vinyl siding for paint, start by removing loose dirt, mildew, and chalk with a soft-bristled brush or a low-pressure power washer so the surface is clean without being damaged.
Use a mild detergent or diluted trisodium phosphate alternative for stubborn grime, rinse thoroughly, and spot-treat stains.
Follow vinyl siding manufacturer guidance and these painting tips to guarantee proper adhesion and a lasting finish.
How to Wash Wood Siding Without Damage
If your wood siding needs cleaning, start gently to avoid stripping paint or damaging the grain: rinse with low-pressure water, use a soft brush, and mild detergent formulated for wood.
Test a small area first. Work top to bottom, avoid soaking trim, and let siding dry fully before painting.
Follow wood siding care and simple maintenance tips to preserve finish and prevent warping.
Cleaning Stucco: Gentle Products and Techniques
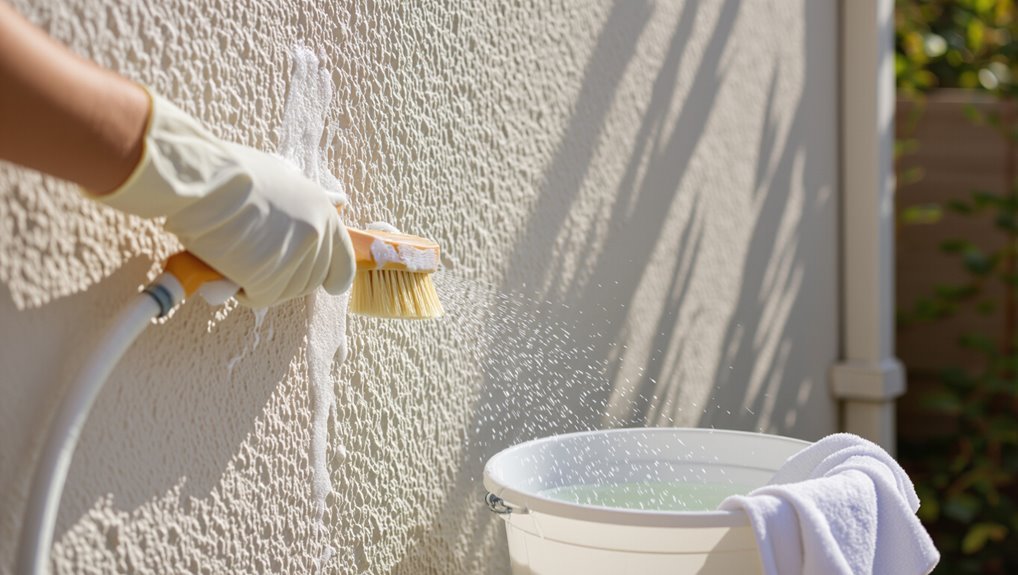
When cleaning stucco before painting, you’ll want to choose gentle, pH-neutral cleaners that remove dirt without etching the surface.
Use soft-wash techniques—low-pressure rinsing and gentle scrubbing with a soft brush—to protect the textured finish.
Test your cleaning solution on a small area first to confirm it lifts grime without discoloring the stucco.
Gentle Cleaning Solutions
A few mild cleaners can remove dirt, mildew, and chalking from stucco without damaging its textured surface.
Use gentle solutions like diluted trisodium phosphate alternatives or oxygen bleach, and test a small area first. You’ll prefer eco-friendly options when possible to protect landscaping.
Apply with a soft-bristled brush, rinse thoroughly, and repeat only where stains persist to avoid surface erosion.
Soft Washing Techniques
Beyond spot-cleaning with mild solutions, soft washing offers a low-pressure, chemical-assisted method that removes grime, algae, and mildew from stucco without blasting away texture or paint.
You’ll mix biodegradable cleaners and low-concentration bleach or peroxide, apply evenly, let dwell, then rinse gently.
This soft washing approach protects stucco, improves adhesion, and guarantees proper surface preparation before priming and painting.
How to Clean Brick and Masonry for Paint Adhesion
Start by evaluating the brick or masonry for loose mortar, efflorescence, mold, and dirt so you know which cleaning methods and safety gear you’ll need; proper prep guarantees paint will bond and last.
Use brick cleaning methods like gentle scrubbing, low-pressure washing, and trisodium phosphate for heavy grime.
Follow masonry cleaning tips: repair joints, rinse thoroughly, and allow full drying before priming and painting.
Removing Mildew and Mold Safely and Effectively
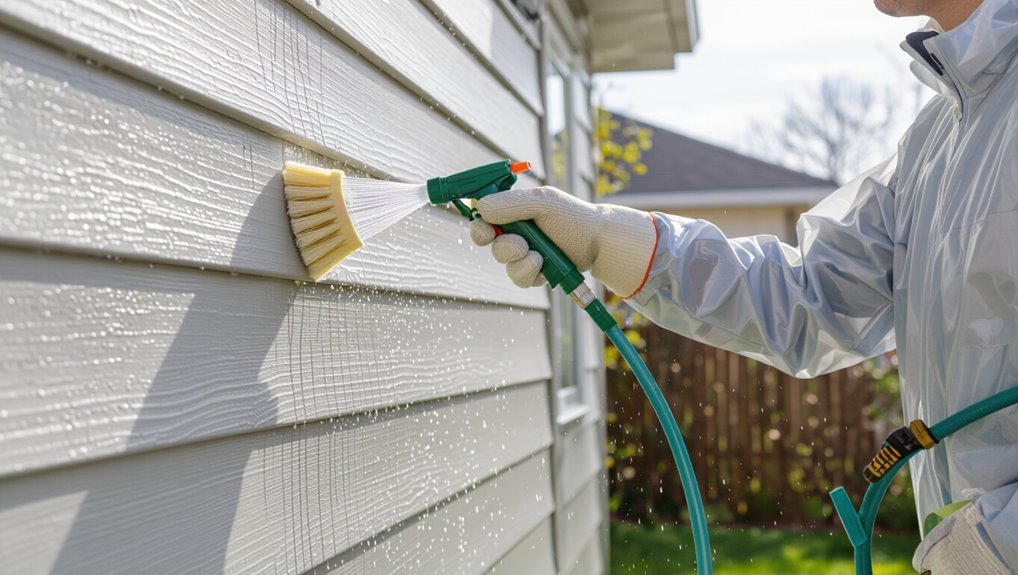
You’ll want to tell mildew and mold apart before you start cleaning: mildew is usually powdery and stays on the surface, while mold can be fuzzy and may penetrate materials.
Use safe cleaners like diluted bleach (follow label instructions), hydrogen peroxide, or commercial mold removers, and always test a small area first.
Wear gloves, eye protection, and a mask, and rinse thoroughly so paint will adhere properly.
Identify Mildew Vs. Mold
Mildew and mold often look similar on siding and trim, but you can tell them apart by appearance and growth habits: mildew is powdery and stays on the surface, while mold is fuzzy, can be darker, and penetrates porous materials.
- Note mildew characteristics: powdery, white/gray
- Mold: fuzzy, dark spots
- Check texture by scraping
- Inspect porous areas
- Prioritize mold prevention before painting
Safe Cleaning Solutions
Now that you can tell mildew from mold, tackle their removal with cleaning solutions that kill spores without damaging siding or surrounding plants.
You’ll choose safe products: diluted bleach for stubborn growth, oxygen bleach for color-safe jobs, or natural alternatives like vinegar and baking soda.
Test spots first, wear protection, rinse thoroughly, and repeat with effective mixtures until surfaces are clean and ready for painting.
Dealing With Chalky Residue on Old Paint
If the old paint rubs off as a fine powder, you’re dealing with chalking and should remove it before applying new coating. You’ll need to clear chalky residue and address paint flaking for good adhesion.
Use these steps:
- Dry-brush loose chalk and flakes
- Wash with mild detergent
- Rinse thoroughly
- Sand rough spots
- Apply a bonding primer before repainting
Removing Grease and Oil Stains From Exterior Walls
Grease and oil spots can prevent new paint from bonding, so you’ll want to remove them thoroughly before you prime.
Use a degreasing detergent or trisodium phosphate alternative, scrub with a stiff brush, then rinse.
For stubborn stains, apply a paste of baking soda and water or a commercial grease-elimination product, let sit briefly, agitate, then rinse.
Repeat oil removal as needed.
Cleaners to Avoid That Harm Surfaces or Paint
Don’t use harsh acidic cleaners on exterior walls, because they can etch masonry, strip coatings, and weaken paint adhesion.
Avoid abrasive powdered scours that scratch surfaces and leave micro-grooves where paint won’t stick.
Choose gentler, manufacturer-recommended solutions to protect the substrate and guarantee a lasting finish.
Harsh Acidic Cleaners
When you’re prepping exterior walls, steer clear of harsh acidic cleaners—strong acids like muriatic, hydrochloric, or undiluted sulfuric solutions can etch masonry, strip primers, and discolor siding, creating bigger problems than the stains you meant to remove.
- They’re harsh chemicals that cause rapid surface damage.
- They weaken paint adhesion.
- They corrode metal trims.
- They harm plants and concrete.
- They’re dangerous to handle.
Abrasive Powdered Scours
Scrubbed with the wrong cleaner, your walls can end up worse than before—abrasive powdered scours grind away paint, rough up siding, and leave micro-scratches that trap dirt and accelerate weathering.
You’ll avoid these by rejecting heavy scouring techniques; any perceived abrasive benefits are outweighed by damage.
Use soft brushes, mild detergents, or pressure-washing at safe settings to preserve surfaces before painting.
Mix DIY Bleach or TSP Safely (Recipes & Ratios)
Before you mix anything, gather proper protective gear—gloves, goggles, and a respirator—so you can handle bleach or TSP safely; both are effective cleaners but can harm skin, eyes, and lungs if used carelessly.
- Use 1 cup bleach per gallon for mildew removal.
- Try bleach alternatives for delicate surfaces.
- Mix TSP per label; common TSP ratios: 1/3 cup per gallon.
- Rinse thoroughly.
- Never mix bleach with ammonia.
Choosing Pressure Washing vs. Soft Washing
You’ll need to pick the method that matches your wall material—brick and concrete tolerate higher pressure, while wood, stucco, and older siding usually need gentler treatment.
Check recommended PSI levels so you remove dirt and mildew without etching or loosening the substrate.
Choosing the right technique now will improve long-term paint adhesion and reduce future prep work.
Surface Material Compatibility
When deciding between pressure washing and soft washing, match the method to the wall’s material and condition so you don’t damage surfaces or leave stubborn stains behind.
Use surface preparation techniques and follow cleaning frequency recommendations to preserve finishes.
Consider compatibility:
- Vinyl: soft wash for grime
- Brick: gentle pressure, avoid mortar
- Wood: low pressure, soft detergents
- Stucco: soft wash only
- Metal: mild pressure and rinse
Pressure And PSI Levels
Although choosing between pressure washing and soft washing depends on the surface, you’ll decide primarily by matching PSI and nozzle settings to the material and the grime level; higher PSI (1,800–3,000+) blasts away paint and mold on masonry, while low PSI (500–1,200) or soft-wash methods use detergents and gentle flow to protect wood, stucco, and older siding.
You should test pressure settings, vary cleaning techniques, and adjust nozzle angles to avoid damage while achieving thorough cleaning.
Long-Term Paint Adhesion
Decide based on long-term adhesion: choosing pressure washing or soft washing affects how well new paint bonds and how long it lasts.
You should pick a method that cleans without damaging substrate or altering surface textures, so paint primers adhere properly and coatings last.
- Evaluate mildew and dirt removal
- Test for loose paint
- Match method to surface textures
- Protect trim and plants
- Use compatible paint primers
Pressure Washer Settings by Siding Type
Different siding materials need different pressure and nozzle choices, so you’ll want to match your washer settings to the surface.
For vinyl and aluminum use lower PSI and wider nozzles; fiber cement tolerates medium PSI.
Adjust pressure washer types for siding compatibility: gas units give power, electric offers gentler control.
Test a small area, keep wand at an angle, and maintain distance to avoid damage.
Tools and Brushes That Speed Cleaning Without Scratching
Grab the right tools and you’ll cut cleaning time while protecting the surface—soft nylon brushes, non-abrasive scrub pads, extendable poles, and foam or soft-bristle rollers move grime without scratching.
You’ll follow safety precautions, choose proper brush types, and work methodically to avoid damage.
- Soft nylon brush
- Non-abrasive scrub pad
- Extendable pole
- Foam roller
- Soft-bristle roller
Protect Plants, Windows, and Fixtures While Washing
Before you start washing, cover plants with breathable tarps or mesh to prevent chemical and water damage.
Tape plastic sheeting over windows and seal light fixtures and vents so spray and runoff can’t get inside.
Use temporary barriers and low-toxic cleaners to protect landscaping and finishes without trapping moisture.
Cover Plants Thoroughly
1 simple step protects your landscaping and home features: cover plants, windows, and fixtures completely before you start washing.
You’ll shield foliage with breathable fabric, secure plastic for nonporous items, and choose gentle cleaning techniques to avoid damage. Prioritize plant protection and limit runoff.
- Use breathable cloths
- Tape edges securely
- Elevate potted plants
- Rinse covers after use
- Check seals periodically
Protect Windows & Fixtures
When you wash exterior walls, protect windows and fixtures by sealing them off with the right coverings and fastenings so water, detergent, and pressure won’t sneak into seams or basements; use plastic sheeting or removable silicone covers for hardware, tape edges carefully, and keep a close eye on vulnerable spots as you work.
Use snug window coverings and fixture protection to prevent damage and staining.
Use Safe Seal Barriers
You’ve already sealed windows and fixtures; now focus on creating safe barriers that protect nearby plants, remaining openings, and finishes from runoff and overspray.
Use safe sealants and deliberate barrier applications to shield everything before washing. Cover, divert, and secure materials so cleaners don’t harm landscaping or hardware.
- Plastic sheeting
- Painter’s tape
- Drop cloths
- Mulch protection
- Temporary shields
Personal Safety Gear and Safe Washing Practices
Before you start blasting or scrubbing, gather the right personal protective gear and set clear safety practices so you can work confidently and avoid injuries.
Wear safety goggles, protective gloves, a respirator for bleach or solvent use, and slip-resistant footwear.
Secure ladders, keep bystanders clear, test cleaners on a small area, and follow product label instructions to prevent chemical exposure and falls.
Best Weather and Temperature for Exterior Cleaning
If the weather’s too cold or too hot, cleaning won’t be effective and surfaces can be damaged, so pick mild, dry conditions for exterior washing.
You’ll account for seasonal considerations and weather impacts to choose days with stable temps, low humidity, and no rain.
- Aim for 50–85°F (10–30°C)
- Avoid bright midday sun
- Choose low-humidity days
- Skip windy days
- Consider seasonal timing
How Long to Let Surfaces Dry Before Priming
Once your cleaned walls feel dry to the touch and the day’s conditions have stayed within that 50–85°F, low-humidity window, plan on letting surfaces cure longer before priming—moisture trapped beneath paint causes adhesion problems and long-term failures.
Generally allow 24–72 hours drying time under ideal conditions; thicker substrates or recent pressure washing may need up to a week.
Check multiple spots before priming.
Test Patch: When to Re-Clean or Repair First?
When you do a small test patch, you’ll quickly see whether your cleaning and repairs held up under paint. That insight tells you if you need to re-clean, sand, or fix blemishes before priming.
Doing a small test patch shows whether cleaning and repairs held up—and if you must re-clean, sand, or fix imperfections.
Use test patch techniques to judge adhesion and finish; consider cleaning frequency based on results.
- Check adhesion
- Inspect for residue
- Note texture issues
- Re-clean stubborn spots
- Re-sand glossy areas
Minor Repairs to Do After Washing Before Painting
Although you’ve cleaned the surface, you’ll still want to tackle small repairs—nail pops, loose trim, hairline cracks, and peeling edges —before painting so the finish looks smooth and lasts. Do a surface inspection, apply appropriate repair techniques, sand, and prime. Quick reference:
| Issue | Fix | Tip |
|---|---|---|
| Nail pops | Countersink, fill | Use epoxy filler |
| Cracks | Caulk/patch | Match joint movement |
| Peeling | Scrape, prime | Feather edges |
Eco-Friendly Cleaner Options and Responsible Disposal
Because cleaners can affect your health and the environment, choose eco-friendly options and dispose of waste responsibly.
You’ll prefer eco-friendly alternatives like biodegradable detergents and vinegar solutions, rinsing well to avoid runoff, and following local rules for responsible disposal.
Use protective gear and minimize dilution.
Consider composting plant debris and collecting contaminated rinse for proper disposal.
- Biodegradable detergent
- Vinegar solution
- Oxygen bleach
- Minimal runoff
- Collect rinse for disposal
Common Cleaning Mistakes That Ruin Paint Adhesion
After rinsing and disposing of cleaners responsibly, don’t let sloppy prep undo your work: common cleaning mistakes can leave residues or surface damage that prevent paint from sticking. You should avoid over-bleaching, poor pressure washing, leaving soap film, and painting dirty patches. Focus on proper cleaning techniques and monitor adhesion factors.
| Mistake | Effect | Fix |
|---|---|---|
| Over-bleach | Etches | Dilute |
| Low pressure | Leaves dirt | Increase |
| Soap film | Prevents bond | Rinse |
| Wet paint | Peels | Dry |
Final Prep Checklist: Rinse, Dry, and Start Painting
1 simple final sweep sets you up for a durable finish: thoroughly rinse away all cleaning agents and loosened grime, let surfaces dry completely (48–72 hours for full dryness in shaded or humid conditions), and inspect for missed spots, loose material, or lingering soap film before you lay down primer or paint.
- Confirm final drying time
- Check weather conditions forecast
- Remove remaining dust
- Repair loose material
- Mask and protect trim
Frequently Asked Questions
Can I Paint Over Lead-Based Exterior Paint After Washing?
You can’t safely just paint over lead-based exterior paint after washing; you’ll face lead paint hazards, so you should follow strict paint preparation: test, repair, encapsulate per regulations, or hire certified abatement to protect people and property.
How Long After Rain Should I Wash Walls Before Painting?
You might think you must wait longer, but wash walls 24–48 hours after rain once surface is tack-free. Use proper preparation methods and allow full drying time before painting so primer and paint adhere and finish evenly.
Will Washing Remove Termite or Insect Damage Signs?
No, washing won’t reliably remove termite detection signs; you’ll clean surface dirt and stains, but visible damage or galleries remain. You’ll still need a thorough inspection for structural issues and insect prevention measures to address infestations.
Can I Wash and Paint in High-Humidity Coastal Areas?
You can, but don’t rush—high humidity delays curing and can trap moisture, so schedule painting during lower-humidity windows. Consider humidity considerations and coastal maintenance: use breathable primers, anti-corrosion coatings, and extend drying time for proper adhesion.
Do Sealants or Water Repellents Affect Paint Adhesion?
Yes — they can. You’ll need to choose compatible sealant types because some water repellents or silicone sealers reduce paint adhesion; use breathable, paintable sealants (acrylic, silane-modified) and follow manufacturer cure times for best results.
