
Do You Have to Paint Over Primer? When It’s Required
Yes — you should usually paint over primer. It’s a preparatory layer that seals, evens out color, and helps paint stick, but it isn’t durable, weatherproof, or stain-resistant on its own. Exceptions exist—some specialty primers or certain exterior systems tolerate brief exposure—but primer generally needs a topcoat for longevity, proper sheen, and true color. If you’ve got stains, glossy spots, or heavy use planned, don’t skip the paint; more details and exceptions follow.
Quick Decision: Do You Need to Paint Over This Primer?
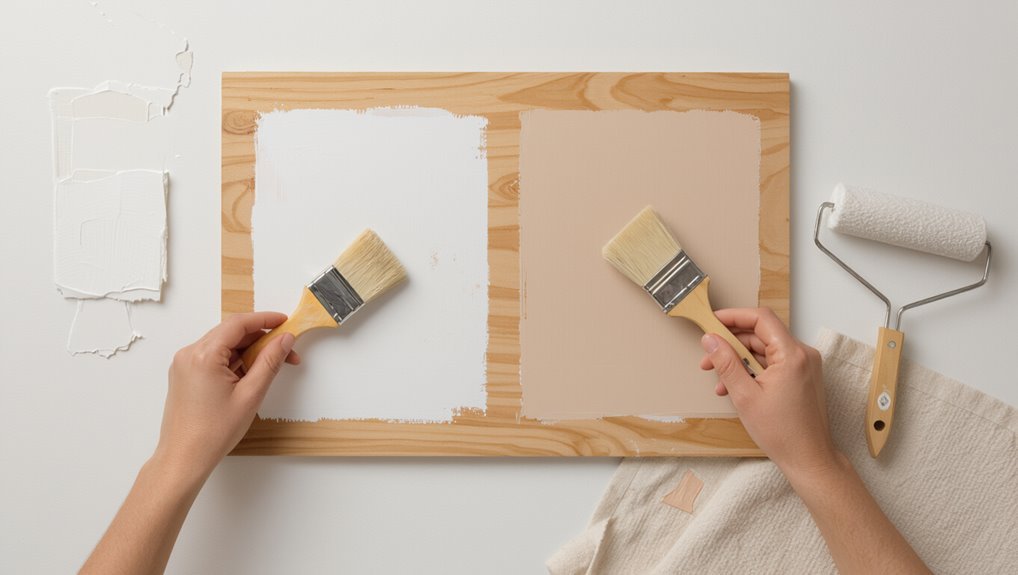
Wondering whether you need to paint over that primer? You should if the primer types include stain-blocking, bonding, or tinted primers meant as undercoats.
Check surface feel and coverage: if it’s matte, fully dry, and evenly applied with proper application techniques, paint can go on.
If you see seams, glossy spots, or texture issues, sand or reapply primer before painting.
Who This Guide Is For and What It Answers
If you’ve checked the primer and decided whether it’s ready for paint, you’ll want to know if this guide fits your needs.
You’ll get clear advice on primer types, application techniques, surface compatibility, and finish options.
It also covers cost implications, environmental impact, health considerations, and realistic project timelines so you can plan materials, safety, and scheduling confidently.
What Primer Actually Does for Paint Adhesion and Coverage
Primer helps your paint stick better to surfaces so your finish lasts longer and resists peeling.
It also seals porous materials like bare wood or drywall, preventing uneven absorption and blotchy color.
Improves Paint Adhesion
Because a primer creates a uniform, slightly porous surface, your topcoat can grab hold better and spread more evenly, reducing brush marks and drips.
You’ll notice improved adhesion when using proper adhesion techniques and compatible bonding agents; primer evens surface energy, minimizes lift, and lets thinner topcoats cover fully.
That means fewer coats, crisper finish lines, and longer-lasting paint without premature peeling.
Seals Porous Surfaces
When you’re working with raw wood, fresh drywall, or masonry, a sealing primer soaks into pores and creates a uniform surface that prevents uneven absorption of the topcoat.
You’ll use primer sealing to lock in loose fibers, reduce sanding dust, and stop blotchy finish on porous surfaces.
Apply evenly, let it dry fully, then proceed with your chosen paint.
Enhances Coverage Efficiency
Sealing porous surfaces also sets the stage for better coverage by your topcoat; once pores are filled and loose fibers locked down, paint spreads more evenly and you need fewer coats.
You’ll notice primer finishes create a uniform base so coverage techniques like rolling or spraying work efficiently.
That uniformity improves adhesion, reduces touch-ups, and lets you achieve consistent color with less paint and effort.
Why Primer Is Not a Finished Surface in Most Cases
You’ll notice primer often leaves a different texture and sheen than finished paint, which can look uneven under light.
It’s also still porous, so it won’t repel stains or moisture the way a topcoat will.
Because primer isn’t fully sealed, you should always apply finish paint for durability and a consistent appearance.
Visible Texture And Sheen
Because primer’s job is to bond and hide, not to look polished, its surface often shows texture and a flat, matte sheen that most people find unfinished. You’ll notice texture contrast and sheen variation versus finished paint, so you’ll want topcoat for uniformity.
| Primer look | Finished look |
|---|---|
| Matte, textured | Smooth, glossy or satin |
| Dull, uneven | Even, reflective |
Porous, Unsealed Surface
That visible matte texture also signals a more practical problem: primer is porous and not designed to be a sealed, finished surface.
You’ll notice primer absorption leaves a dull, uneven look and weak protection. For proper surface preparation, you must topcoat to seal pores, improve durability, and guarantee uniform color and sheen.
Skipping paint sacrifices longevity and invites staining or damage.
Primer Types and Special Cases: Oil, Latex, Bonding, and More
While primers all aim to create a sound base, they differ in chemistry and purpose—oil, latex, bonding, shellac, and specialty primers each handle adhesion, stain-blocking, and substrate compatibility in distinct ways.
You’ll choose based on surface and finish: oil for tannin/stain block, shellac for odor, bonding for slick surfaces.
Mind primer compatibility issues and follow specific application techniques to guarantee durable topcoats.
Which Primers Are Formulated to Be Left Uncoated
Most primers are meant to be covered, but a few formulas are actually designed to be left exposed in certain situations.
You’ll find masonry primers, rust-inhibiting metal primers, and some clear sealers made for primer longevity without a topcoat.
Check surface compatibility and manufacturer instructions: these products resist weather and stains on concrete or metal, but you still must confirm UV and wear limits before leaving them uncoated.
When a Topcoat Is Required for Durability
If the area will see heavy use, you’ll usually need a topcoat to give long-term wear protection that primer alone can’t provide.
A durable finish also improves resistance to scratching, moisture, and stains on high-traffic or work surfaces.
Before you skip the topcoat, consider how tough the finished surface must be.
Long-Term Wear Protection
Because primer’s main job is to promote adhesion and block stains, it rarely provides durable surface protection by itself; you’ll need a topcoat when the surface will face wear, moisture, or frequent cleaning.
You’ll rely on primer benefits for bonding, but apply a quality topcoat to achieve a long lasting finish, resist abrasion, and simplify maintenance so the surface endures over time.
Surface Resistance Needs
When a surface will see regular contact, moisture, or cleaning, you shouldn’t rely on primer alone for protection; the topcoat supplies the durable, washable layer that resists abrasion, stains, and moisture intrusion.
You’ll need a topcoat for true surface resistance despite primer benefits like adhesion and sealing.
Choose a finish rated for wear, cleanability, and moisture to guarantee long-term durability and easy maintenance.
When a Topcoat Is Required for Color and Appearance
Although primer can block stains and create a uniform base, you’ll almost always need a topcoat to achieve the final color and finish you expect; primers don’t offer the pigment saturation, sheen control, or UV resistance that topcoats provide.
You’ll rely on topcoat necessity for true color depth and durability, since primer aesthetics improve adhesion and uniformity but don’t deliver final appearance.
Drywall and New Plaster: Primer Rules
With new plaster you’ll need a sealer primer to lock in moisture and prevent uneven sheen once you paint.
For drywall, a quality drywall primer is essential to cover paper joints and create a uniform surface.
Skipping these primers can lead to blotchy finish and poor paint adhesion.
New Plaster Sealing Needs
Ever wondered whether new drywall or fresh plaster needs a primer before you paint?
You should treat new plaster with sealing techniques that control drying time and guarantee moisture resistance.
Focus on surface preparation, choose compatible primers for texture application and paint compatibility, and perform adhesion testing on a small area.
Proper sealing prevents blistering and uneven finish.
Drywall Primer Necessity
Wondering whether you need a primer for drywall or fresh plaster? You should prime new drywall and plaster to seal porous surfaces, control drywall texture visibility, and guarantee even primer application.
Skipping primer risks blotchy paint and uneven sheen. Use a quality drywall primer or sealer, apply per instructions, and sand lightly between coats for a smooth, durable finish before topcoating.
Bare Wood and Knots: Primer Rules
How should you treat bare wood and knots before painting?
You’ll need thorough wood preparation: sand, clean, and apply a quality primer suited for raw wood.
For visible knots, use a dedicated knot sealing product or shellac-based primer to block tannins and sap.
After sealing and priming, finish coats will adhere evenly and resist bleed-through, ensuring a smooth, lasting paint job.
Metal and Rust-Prone Surfaces: Primer Rules
Wood and knots need careful sealing, but metal brings a different set of concerns.
You’ll follow metal surface preparation and surface treatment considerations, using rust prevention techniques and industrial primer options.
Apply primer application tips to gain corrosion resistance benefits and metal finishing methods that lock coatings.
Combine weatherproofing strategies with proper primer to prevent rust and extend service life.
Previously Painted Surfaces: Primer Rules
Check the existing paint for peeling, chalking, or stains so you know whether it’s sound enough to keep.
If the old coat is intact and you’re staying with a similar finish and color, you can usually skip primer.
But if you’re covering repairs, stains, or a strong color change, you’ll want to prime first.
Assess Existing Paint Condition
Wondering whether you need primer over an existing finish? Inspect for flaking, gloss level, stains, and adhesion. Check paint durability and surface compatibility before skipping primer. Sand glossy spots and clean stains; loose paint needs removal. Use this quick scan:
| Issue | Action |
|---|---|
| Flaking | Strip |
| Glossy | Sand |
| Stained | Clean |
| Chalky | Prime |
| Good | Recoat |
When Primer Is Optional
If your existing paint is sound, clean, and a similar color to the new coat, you can often skip primer and go straight to repainting; just scuff-sand glossy areas and wipe away dust first.
You’ll save time when primer benefits aren’t needed, but be mindful of primer limitations: bare spots, stains, drastic color changes, or adhesion issues still require priming to guarantee even coverage and durability.
Concrete, Masonry, and Brick: Primer Rules
Masonry surfaces demand the right primer before you paint: concrete, brick, and block are porous and alkaline, so you’ll need a primer formulated for masonry or a high-alkali-blocking primer to guarantee adhesion and prevent blistering or efflorescence.
For proper concrete sealing and Masonry paint results, match Brick texture with Surface compatibility, follow Primer application and Adhesion techniques, consider Environmental factors, Primer longevity, Color assessment, and Finish options.
Primed Furniture and Cabinetry: When You Can Skip a Topcoat
When can you skip a topcoat on primed furniture and cabinetry?
You can leave primed surfaces exposed indoors if the primer is a high-build, stain-blocking product and the piece sees light use.
Consider finish options like clear sealers or waterborne topcoats for durability and sheen control.
Skip a paint topcoat only when the primer’s appearance and protection meet your functional and aesthetic needs.
Exterior Uses: Can Primer Be Left Exposed Outside?
You shouldn’t assume primer can handle outdoor exposure on its own, because most primers aren’t formulated for long-term weather durability.
They’ll offer some UV and moisture resistance initially, but you’ll need a topcoat designed for exterior conditions to protect the substrate fully.
Also, proper surface preparation and choosing the right exterior primer are key if you ever consider leaving it exposed temporarily.
Primer Weather Durability
If you’re planning an exterior project, know that most primers aren’t meant to be left exposed for long: they can tolerate brief weather exposure but will break down under prolonged sun, rain, and temperature swings.
You should monitor primer longevity and choose products with strong weather resistance for short-term exposure.
Still, plan to topcoat promptly to preserve adhesion, finish, and long-term protection.
UV And Moisture Protection
Having noted that primers don’t hold up well to long-term exposure, consider how UV and moisture specifically affect an untopcoated exterior primer.
You’ll find primer technology often lacks UV resistance and a reliable moisture barrier, reducing surface longevity.
Application techniques and performance comparison show primers aren’t substitutes for finishes.
Think about environmental impact and aesthetic considerations before leaving primer exposed outdoors.
Surface Preparation Needs
Because exterior primers stay exposed to sun, rain, and temperature swings, you’ll need to prep the surface meticulously before deciding to leave them exposed. Do surface cleaning, dry thoroughly, and perform adhesion testing. If primer bonds and sealing are solid, you might leave it, but expect faster wear and recoat sooner.
| Task | Tool | Frequency |
|---|---|---|
| Cleaning | Brush/washer | Before priming |
| Testing | Tape peel | After cure |
| Sealing | Topcoat | Recommended |
Spot-Priming vs Full Priming: Does Each Need Paint?
Wondering whether you need to paint over every bit of primer you apply?
If you spot prime patches to hide repairs, you do need to paint over them so color and sheen match the surrounding finish.
With full priming, you’re preparing the entire surface and should also topcoat for durability and appearance.
Primer alone isn’t a final decorative or protective coat.
Specialty Primers: Stain-Blocking and Odor-Sealing Primers
When you’re dealing with tough stains or lingering smells, stain-blocking and odor-sealing primers can be real lifesavers.
They’re formulated to lock in tannins, water stains, smoke damage, and odors so they don’t bleed through your topcoat.
You’ll still paint over them, but choosing the right specialty primer makes the finish hold up and look clean.
Stain-Blocking Effectiveness
If you’re dealing with water stains, tannin bleed, smoke damage, or strong odors, stain-blocking and odor-sealing primers are designed to lock those problems in so topcoat paint won’t show through. You’ll assess stain resistance by testing a small area and use proper application techniques for even coverage.
| Primer Type | Coverage | Dry Time |
|---|---|---|
| Shellac | High | Fast |
| Oil | Medium | Moderate |
| Latex | Low | Slow |
Odor-Sealing Uses
Curious how to stop smells from coming back after you paint? You can use odor-sealing primers to trap contaminants and improve primer longevity.
Apply them where odors originate, and then paint. Remember these odor blocking techniques:
- Seal nicotine stains
- Block pet smells
- Treat kitchen odors
- Cover smoke damage
- Prime basements and garages
They’ll keep odors from bleeding through.
Oil-Based vs Latex Primer: Differences for Topcoating
Though both seal and prime, oil-based and latex primers behave differently under paint, so you’ll want to match the primer to your topcoat for best adhesion and finish. You’ll enjoy oil based benefits like stain blocking and durability, while latex versatility gives faster drying and easier cleanup. Choose compatible topcoats for lasting results.
| Primer Type | Strength | Best Topcoat |
|---|---|---|
| Oil-based | Stain block | Oil or enamel |
| Latex | Quick dry | Latex or acrylic |
| Shellac | Fast sealer | Both |
Bonding Primers and Adhesion Promoters: Do They Need Paint?
Wondering whether bonding primers or adhesion promoters need a paint topcoat? You’ll usually topcoat for durability and appearance, though some clear promoters can remain exposed briefly.
Consider bonding techniques and adhesion science when deciding.
Weigh bonding methods and adhesion principles to choose whether a topcoat is necessary.
- Promoters boost grip on slick surfaces
- Many are thin, not decorative
- Manufacturers often require topcoat
- Exterior exposure needs paint
- Test adhesion before skipping paint
Tinted Primers: How Far They Reduce the Need for a Topcoat
If you use a tinted primer, you’ll notice stronger tints can cut the number of topcoat coats needed by improving coverage and masking the original surface color.
Lighter tints may neutralize underlying tones but often won’t fully hide bold or dark substrates.
You’ll still need a true topcoat when you want a specific finish, durability, or color accuracy.
Tint Strength Versus Coverage
How much tint you add to a primer directly affects both coverage and how much topcoat you’ll need: stronger tints can mask underlying colors so well that a single lighter topcoat might do, while weak tints mainly cut down on bleed-through and still demand full-color coats.
- You’ll judge tint strength by opacity.
- Coverage efficiency rises with pigment load.
- Heavier tints lower coat count.
- Lighter tints save stain blocking.
- Match tint to final shade.
Surface Color Neutralization
Curious how much a tinted primer can neutralize a bold wall color before you even pick up a topcoat? You’ll see reduced coats if you handle surface preparation well and use precise color matching. Compare options quickly:
| Tint Strength | Expected Reduction |
|---|---|
| Light tint | 1–2 coats |
| Medium tint | 2–3 coats |
| Heavy tint | 3–4 coats |
When Topcoat Still Needed
When does a tinted primer actually let you skip a full topcoat? You’ll sometimes avoid a topcoat, but understand topcoat necessity and primer limitations first.
Consider:
- Use on low-wear walls
- Match tint to final color
- Flat finishes hide flaws
- High-traffic areas still need protection
- Budget vs. longevity trade-off
Decide case-by-case; tinted primer reduces coats but rarely replaces a protective finish.
Primer Sheen and Why Sheen Affects Whether You Must Paint
Ever wondered if the primer’s sheen matters? You’ll notice primer applications with higher sheen resist dirt and show fewer brush marks, so you might skip an extra coat in low-traffic areas.
Matte primers hide imperfections and usually need a topcoat for durability and washability. Sheen impacts adhesion and final appearance, so choose primer sheen based on surface use and desired finish.
Is It Safe to Leave Primer Uncoated? VOCs, Fumes, and Health
Can you leave primer uncoated without health risks? You shouldn’t assume safety—VOCs and off-gassing vary by type. Consider:
- Identify low-VOC or water-based primer
- Ventilate until fumes subside
- Keep exposure short for children/pets
- Monitor primer longevity on exposed surfaces
- Recoat when odor or wear returns
These steps reduce health risks while balancing primer longevity and indoor air quality.
Manufacturer Labels and Warranty Language to Check
Check the primer’s warranty so you know what’s covered if performance issues appear.
Note any specific application requirements the manufacturer lists, like recommended substrates or temperature ranges.
Also check the stated recoat window so you don’t void coverage by waiting too long or painting too soon.
Read Warranty Coverage
Before you paint over primer, read the manufacturer’s labels and warranty language so you know what conditions will keep the coverage valid.
Check warranty limitations and how primer effectiveness is defined. Look for:
- Required topcoat types
- Timeframe to apply paint
- Surface prep standards
- Coverage exclusions
- Claims procedure and proof needed
Follow these to avoid voiding coverage.
Note Application Requirements
Alongside warranty details, you should note the primer’s application requirements on the label so you meet both performance and coverage expectations.
Check recommended application techniques—brush, roller, spray—and surface prep, temperature, and film thickness. That guarantees primer benefits like adhesion and stain blocking perform as promised and keeps you within warranty language.
Follow directions to avoid voiding coverage or sacrificing results.
Check Recoat Time
When will your primer be ready for paint? Check the manufacturer label and warranty language to confirm recoat timing so paint adhesion isn’t compromised.
Follow instructions precisely:
- Note minimum and maximum recoat windows
- Record application time and conditions
- Don’t exceed max times without sanding
- Contact manufacturer if unclear
- Keep temperature and humidity within specs for ideal paint adhesion
How Long to Wait Before Topcoating
If you want a durable, smooth finish, you’ll need to let the primer dry to the proper degree before applying topcoat. Check product label for drying time and follow application tips: temperature, humidity, and primer type affect wait. Use this quick guide:
| Factor | Typical Wait |
|---|---|
| Latex primer | 1–4 hours |
| Oil primer | 24 hours |
| High humidity | Add time |
| Cold temps | Add time |
How to Test if a Primed Surface Is Ready for Paint
Want to know if your primer’s ready for paint? Check clear primer readiness indicators and use simple surface moisture testing before topcoating.
- Look for uniform sheen and dry-to-touch feel.
- Press lightly; no tackiness means drying.
- Use a moisture meter on porous substrates.
- Smell: no solvent odor remaining.
- Review manufacturer’s dry time for temperature/humidity.
Surface Prep After Priming: Sanding, Cleaning, and Tack Removal
Now that you’ve confirmed the primer’s dry and off-gassing is finished, prepare the surface for topcoat by sanding, cleaning, and removing any tacky residue.
You’ll use fine-grit sanding techniques, inspect via surface evaluation, then apply cleaning methods—vacuuming, tack cloths, mild solvent for tack removal.
Confirm uniformness before proceeding.
Consider finish options based on primer applications and substrate readiness.
Choosing the Right Topcoat After Your Primer Type
Which topcoat suits your project depends largely on the primer you used and the substrate underneath.
You’ll pick based on primer compatibility and desired finish.
Consider these topcoat options to match performance needs:
- Oil-based for durability over alkyd primer
- Latex for flexibility with acrylic primer
- Epoxy for high-wear surfaces
- Enamel for gloss and washability
- Polyurethane for floor and trim protection
Color-Matching Tips When Covering Primer With Paint
How do you make sure the paint you choose will hide the primer and give the true final color?
Test swatches over the primed surface in natural and artificial light, noting color contrast against adjacent walls.
Confirm primer compatibility with your chosen topcoat—oil vs. latex matters.
Adjust shade or sheen if swatches reveal unwanted undertones, and let samples cure before deciding.
Coverage and Number-of-Coats: Primer Plus Paint Strategy
After you’ve confirmed color and compatibility with sample swatches, plan how many coats you’ll need for full coverage—primer reduces the number, but it won’t always eliminate a second or third coat of paint.
Use these coverage techniques and coat recommendations to decide:
- Assess primer opacity on the surface
- Test one paint coat on primer
- Note color shift and bleeding
- Allow proper drying time
- Add coats until uniform
When a Clear Protective Topcoat Is Better Than Paint
When should you skip paint and use a clear protective topcoat instead?
Choose a clear coat when you want to preserve the substrate’s look—wood grain, metal finish—or when durability and moisture resistance matter.
Clear coat benefits include UV protection and easy cleaning.
Clear coats offer UV protection and make surfaces easier to clean, preserving appearance and durability.
Consider primer alternatives like sealing clear primers or adhesion-promoting clears for glossy or nonporous surfaces to avoid color coats.
Cost and Time Trade-Offs: Skip Painting or Finish It Right
Because skipping a paint topcoat can save you time and money up front, you should weigh those immediate gains against long-term costs like maintenance, durability, and appearance loss.
You’ll want a clear cost analysis and solid time management plan to decide. Consider:
- Initial material savings
- Project duration
- Expected upkeep frequency
- Resale value impact
- Aesthetic risks
Common Mistakes That Force Repainting After Priming
1 common mistake that forces a repaint is skipping surface prep—if you don’t clean, sand, and remove loose material, the primer won’t bond and paint will peel quickly.
You also risk applying incompatible primer texture or overthinning primer, which reduces primer longevity. Rushing between coats, contaminating surfaces with dust or oils, and ignoring manufacturer’s cure times all lead to premature failure and extra work.
Priming and Painting: One Day or Multiple Days?
If you rushed through prep and the primer didn’t bond, you’ll probably be facing a repaint—but another common question is whether you can prime and paint in a single day or need to spread the work over several days.
- Check priming techniques for surface and product.
- Follow manufacturer drying times.
- Test tackiness before topcoat.
- Faster with ventilation and thin coats.
- Slow down for porous or humid conditions.
When Pros Might Skip or Add Topcoats (And Why)
When pros decide to skip or add a topcoat, they’re balancing durability, appearance, and cost — and you should know the reasons behind those choices.
You might skip a topcoat on low-traffic, sealed surfaces where primer limitations are negligible, but pros add one for scratch resistance, color depth, and weather protection.
Weigh topcoat benefits against budget and expected wear.
Environment and Exposure: Humidity, Sunlight, and Wear Factors
Pros weigh topcoat choices against use and budget, but you also have to factor in the environment the finish will face.
You’ll assess humidity effects and moisture retention to prevent surface deterioration and boost paint longevity.
Consider environmental impacts like sunlight exposure and wear factors for weather resistance:
Consider environmental impacts—sunlight, humidity, wear, and other exposure factors—to ensure durable, weather-resistant finishes.
- High humidity: mold, moisture retention
- Direct sun: fading, UV damage
- Foot traffic: abrasion
- Coastal salt: corrosion
- Freeze/thaw: cracking
Fix Visible Primer Flaws Without Repainting
Although primer’s main job is adhesion, you can often correct visible flaws without stripping or repainting the whole surface; minor issues like drips, orange peel, or light sanding marks can be fixed with simple, targeted steps.
You can sand lightly, fill small pits, feather edges, and spot-prime before topcoating.
These quick fixing imperfections tactics are smart primer maintenance to save time and materials.
Checklist: Decide Right Now Whether Your Primer Needs Paint
Fixing small primer flaws can save time, but you still need to decide whether the primer itself needs a coat of paint.
Use this quick checklist to confirm primer application and primer benefits before painting:
- Surface texture even?
- Stains sealed?
- Adhesion test passed?
- Color blocking adequate?
- Manufacturer’s dry time met?
If any fail, paint over primer; if all pass, you might skip it.
Frequently Asked Questions
Can Primer Affect Indoor Humidity or Mold Growth if Left Unpainted?
Yes — unpainted primer can trap moisture and, if it’s porous or not mold-resistant, encourage mold growth; you should seal it because that helps mold prevention and preserves indoor air quality by reducing spores and dampness.
Will Leaving Primer Uncoated Void Homeowners Insurance Claims?
Generally you won’t void insurance coverage just by leaving primer uncoated, but you’ll want to document primer longevity and condition since insurers may deny claims if neglected surfaces caused damage, and they expect reasonable maintenance.
How Does Primer Interact With Wallpaper Adhesives or Wallcoverings?
About 70% of installers prefer sealed surfaces: you’ll find primer types affect wallpaper adhesion—oil or acrylic primers boost grip, high-absorbency primers can weaken paste, and vinyl wallcoverings need stable, non-sheening primed walls.
Can Pets or Children Damage Exposed Primer Differently Than Painted Surfaces?
Yes — exposed primer can get damaged more easily by pets or children. You’ll notice pet behavior like scratching or chewing and child safety concerns like rubbing or staining; paint adds tougher, easier-to-clean protection.
Are There Resale or Building Inspection Implications for Unpainted Primer?
Yes — leaving primer unpainted can hurt resale value and may fail building codes or inspections if paint is required for durability or fire/safety ratings, so you should finish surfaces to meet standards buyers and inspectors expect.
Conclusion
You usually do need to paint over primer — primer’s job is to prepare, not finish. If you’re prepping drywall or bright/porous surfaces, a topcoat gives durability, color, and UV protection. In a bathroom, for example, primer alone failed after a month from steam; adding a moisture-resistant paint solved peeling. Decide by surface, exposure, and primer type: if it’s exposed, high-traffic, or exterior, always apply a proper topcoat for lasting results.
