
Do You Need to Wash Walls After Sanding Before Painting?
Yes — you should remove sanding dust and contaminants before painting to guarantee good adhesion and a smooth finish. Dust and grit from sanding create a barrier that can cause peeling, uneven sheen, and short-lived paint. For light sanding a quick vacuum and tack-cloth wipe may suffice; for greasy or heavy-dust areas use a mild detergent or TSP substitute and let the surface dry fully. Keep safety gear on, and keep going to learn the right methods for each surface.
Do You Need to Wash Walls After Sanding? Quick Answer
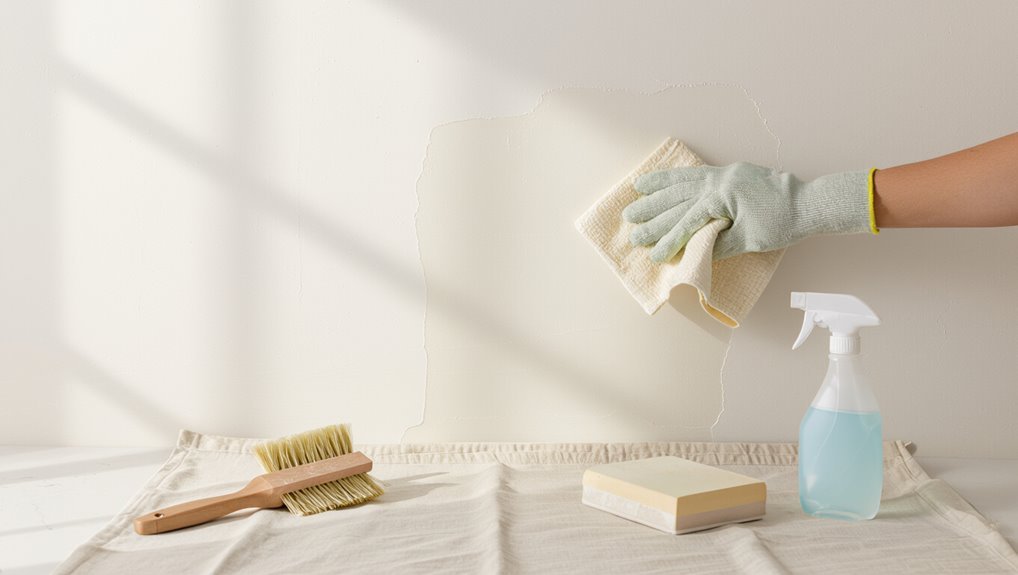
Yes — you should wash walls after sanding. You’ll remove dust and grit left by sanding techniques so paint goes on smoothly.
For efficient wall preparation, use a damp microfiber cloth or mild detergent solution, working top to bottom. Rinse, let dry completely, and inspect for remaining residue.
Skipping this step lets particles interfere with finish and texture.
Why Washing After Sanding Matters for Paint Adhesion
When you sand a wall, tiny particles and dust cling to the surface and create a barrier that prevents primer and paint from bonding properly; washing removes that residue so coatings can form a continuous, adherent film.
You’ll guarantee paint preparation is effective and maintain surface integrity, allowing primer and paint to anchor, last longer, and resist peeling or uneven sheen—so don’t skip this step.
How Sanding Creates Dust and Affects Adhesion
When you sand, you create a cloud of fine dust that settles into pores and crevices on the wall.
That dust contaminates the surface and prevents paint from making full contact. As a result, adhesion is compromised and paint can peel or fail to cure properly.
Fine Dust Generation
Although it’s a quick step, sanding kicks up a lot of fine dust that settles into every nook and clinging film on the surface. That invisible residue can prevent paint from bonding properly.
You’ll need proper sanding techniques to minimize airborne particles, use vacuums or tack cloths, and practice dust prevention like wet-sanding or containment so paint adheres evenly and lasts longer.
Surface Contamination Impact
Because sanding breaks down paint, primer, and substrate into microscopic particles, you end up with a thin, clingy film of dust that sits on every groove and glossy area. That film prevents new coatings from wetting out and bonding properly.
You’ll encounter different surface contamination types—powdery dust, oily residues, and debris—so use targeted cleaning techniques like vacuuming, tack cloths, and degreasing to prepare the wall.
Adhesion Compromise Mechanism
If you sand a wall, the abrasive action shreds paint and primer into fine, electrostatically charged particles that cling to the surface and block direct contact between new coatings and the substrate.
You’ll reduce mechanical keying and interfere with adhesion theory by leaving a particulate barrier.
Proper surface preparation—thorough cleaning or vacuuming—removes that dust so primers and paints can bond reliably to the substrate.
When a Quick Wipe Is Enough vs. Deep Clean
If the sanding left only a light, powdery film you can usually just wipe the walls with a damp cloth and be ready to paint.
If you see grease, heavy dust buildup, stains, or flaking paint you’ll need a deeper cleaning with a degreaser or TSP substitute and a scrub.
Check the surface by running your hand over it—if dust clings or the finish feels uneven, don’t skip the deep clean.
When A Quick Wipe Works
When you’ve only sanded a small area or lightly scuffed the surface, a quick wipe with a damp microfiber cloth usually does the trick—remove the dust, let the wall dry, and you’re ready to prime or paint.
For a quick clean, focus on dust removal from edges and corners, wipe in one direction, and check for stubborn particles before painting.
When Deep Cleaning’s Needed
A quick wipe handles light sanding, but there are times you’ll need a deeper clean before priming or painting.
If dust clumps, greasy residue, stains, or mold remain, do deep cleaning to guarantee adhesion and even finish.
Use a mild detergent or TSP substitute, rinse, and let walls dry fully.
Proper wall preparation prevents paint failure and saves time later.
How Drywall, Plaster, and Wood Change Cleaning After Sanding
Because drywall, plaster, and wood all shed different amounts and types of dust, you’ll need to change how you clean after sanding to match the material.
For drywall cleaning, wipe primer-ready panels gently; plaster residue may need damp rag passes to remove powder and loose bits.
Wood preparation calls for removing fine dust and checking grain for raised fibers.
Treat each type of wall surfaces accordingly.
Best Tools to Remove Sanding Dust (Vacuum, Microfiber, Tack)
Start by running a vacuum with a brush attachment over the walls to lift loose dust and grit.
Follow with microfiber cloths or pads to wipe surfaces without spreading particles around.
Finish with a tack cloth for a final pass to catch the finest dust before painting.
Vacuum With Brush Attachment
Grab your vacuum with a soft brush attachment and go over the walls methodically—you’ll remove most of the sanding dust without scratching the surface.
Use slow, overlapping strokes and empty the canister often to maintain suction. These vacuum techniques speed cleanup and improve wall preparation by capturing loose grit before you wipe or paint.
Check corners and trim where dust hides.
Microfiber Cloths And Pads
1 effective tool after vacuuming is a microfiber cloth or pad—you’ll lift and hold the fine dust sanding leaves behind without scratching paint or drywall.
You’ll notice microfiber benefits immediately: they trap particles via electrostatic pull and dense fibers.
Work in overlapping passes, rinse or replace pads often, and maintain cleaning efficiency by changing cloths when they dull to avoid smearing dust back onto surfaces.
Tack Cloths For Final Pass
Finish with a tack cloth to pick up the last stubborn dust particles your vacuum and microfiber left behind.
You’ll use tack cloth techniques for effective dusting, wiping in one direction and replacing cloths when saturated.
Follow these quick tips:
- Work top to bottom
- Use light, even pressure
- Fold cloth to fresh section
- Replace after heavy pickup
- Avoid over-rubbing painted areas
How to Vacuum Walls Safely After Sanding
After sanding, vacuum the walls to remove dust before any washing or priming—you’ll prevent grit from mixing into your cleaner or paint and get a smoother finish.
Use a soft brush attachment, work top to bottom, and keep steady suction to protect paint and guarantee wall safety.
Empty the canister often, seal collected dust, and wear a mask to aid effective dust removal.
Tack Cloth: Pros, Cons, Best Uses
When you’re prepping a sanded wall for painting, a tack cloth can quickly pick up the fine dust that vacuums miss, leaving a cleaner surface for primer or paint.
You’ll appreciate tack cloth benefits and know tack cloth limitations: it grabs dust but can leave residue or fail on heavy grime. Use it selectively.
- Quick dust removal
- Ideal for trim
- Not for greasy spots
- Single-use often
- Follow with inspection
Soap-and-Water Wash: Recipe and Step-by-Step
Start by mixing a mild degreasing dish soap with warm water—about a teaspoon per quart—to create a gentle cleaning solution that cuts dust and light grime without damaging drywall or fresh drywall compound.
Dip a sponge, wring well, wipe top-to-bottom, rinse with clean water, and dry with microfiber.
Choose appropriate soap types and keep consistent water temperature to avoid surface damage.
When to Use TSP or a Substitute Cleaner
If your walls have greasy residue, heavy stains, or old mildew that soap and water won’t remove, reach for TSP or a milder substitute to guarantee proper adhesion and a clean surface for paint.
You’ll choose cleaning agents based on surface types, testing a small area first, rinsing thoroughly, and wearing gloves.
- Test first
- Match cleaner to surface
- Dilute per label
- Rinse well
- Dry completely
Removing Grease, Fingerprints, and Smoke After Sanding
After sanding, you’ll want to spot any grease or oil that can repel paint and treat it with a degreaser.
Wipe away fingerprints and smudges with a mild cleaner so the finish goes on smooth.
For smoke residue, use a trisodium phosphate substitute or a vinegar solution to remove film and odor before painting.
Identify Grease And Oils
1 key step before you paint is finding and removing any grease, fingerprints, or smoke residue left from sanding, since these oils prevent paint from adhering and show through finishes.
You’ll perform grease identification by looking for shiny patches, dark streaks, or tactile slickness indicating oil residue. Check corners, switch plates, and trims.
- Visual inspection
- Touch test
- Smell for smoke
- Use bright light
- Note problem areas
Remove Fingerprints And Smudges
While you’ve already located greasy spots, removing fingerprints, smudges, and smoke residue is a hands-on step that guarantees paint will stick and finish evenly; focus on gentle cleaning.
Use a microfiber cloth with a mild degreaser or trisodium phosphate substitute, scrub fingertip marks, and rinse.
For fingerprint removal and smudge elimination, dry thoroughly before priming so paint adheres without blemishes.
Eliminate Smoke Residue
Now that fingerprints and smudges are gone, tackle smoke residue next—its oily film and fine soot can prevent primer and paint from bonding properly.
You’ll want effective smoke removal and residue cleaning: wipe with trisodium phosphate or degreaser, rinse, and dry. Prep thoroughly so paint adheres.
- Test cleaner first
- Work top to bottom
- Use microfiber cloths
- Rinse well
- Ventilate room
Cleaning Chalky or Powdery Surfaces Before Priming
Chalky or powdery residues left after sanding will prevent primers from bonding properly, so you need to remove them thoroughly before you prime.
Use a vacuum with a brush attachment, then wipe with a damp microfiber cloth or TSP substitute to lift remaining chalky residue.
Rinse, let dry, and inspect; proper surface preparation guarantees primer adhesion and a durable, even topcoat.
What to Do With Glossy or Semi-Gloss Surfaces After Sanding
If your walls are glossy or semi-gloss after sanding, start by cleaning them with a degreaser to remove oils and residue.
Then scuff the surface lightly with fine-grit sandpaper or a scuff pad to promote adhesion.
Finish by wiping the area with a clean, damp cloth so primer or paint will bond properly.
Clean With Degreaser
Tackle glossy or semi-gloss surfaces with a degreaser after sanding to remove sanding residue, oils, and any remaining sheen that can prevent paint from adhering.
You’ll rinse, dry, and inspect the surface to guarantee proper cleaning techniques and surface preparation before priming.
- Choose a mild degreaser
- Test a hidden spot
- Apply with a microfiber cloth
- Rinse thoroughly
- Let fully dry
Scuff, Then Wipe
After you’ve rinsed and dried the degreased surface, scuff the glossy or semi-gloss areas lightly with fine-grit sandpaper or a scuff pad to knock down the remaining sheen and give the new paint something to grab onto. Use gentle scuff techniques, then remove dust with recommended wipe methods before priming.
| Step | Tool | Purpose |
|---|---|---|
| 1 | Fine sandpaper | Scuff |
| 2 | Scuff pad | Blend |
| 3 | Microfiber | Wipe |
| 4 | Tack cloth | Detail |
How to Spot-Test Cleaners to Avoid Damage
Wondering how to make sure a cleaner won’t harm your wall finish? You’ll try small spot-tests using various cleaner types and simple testing methods before full cleaning.
Follow these quick checks:
- Pick an inconspicuous spot
- Apply diluted cleaner first
- Wait a few minutes, then blot
- Inspect for color change or softening
- Rinse and dry, then reassess
Drying Time Rules Before Priming and Painting
Once you’ve confirmed a cleaner won’t damage the finish and rinsed the wall, give the surface proper time to dry before priming or painting. You’ll respect drying time and use solid priming techniques so paint adheres well. Wait until no moisture remains; touch and visual checks work. Plan drying into your schedule to avoid failures.
| Fear | Relief |
|---|---|
| Worry | Confidence |
| Doubt | Certainty |
| Rush | Calm |
How Temperature and Humidity Affect Post-Sanding Cleaning
When you clean walls after sanding, temperature and humidity control how fast surfaces dry, how dust behaves, and how well cleaners rinse away residue.
You’ll manage humidity control and watch temperature effects to avoid streaks, slow drying, or trapped moisture that harms adhesion.
- Work in moderate temps
- Use dehumidifiers or fans
- Wipe from top down
- Rinse with clean water
- Allow full drying time
Fix Sanding Gouges Revealed by Washing
Spot the gouges as you rinse and mark them for repair so you don’t miss any low spots once the wall’s dry.
You’ll fill gouges with lightweight spackle, let it cure, then sand flush using proper sanding techniques to avoid creating new depressions.
This step’s essential for thorough wall preparation; it guarantees a smooth substrate so paint adheres evenly and hides repairs.
When to Sand Again and Gentle Scuffing Techniques
After washing and spotting any remaining imperfections, you’ll know whether you need to sand again—look for rough patches, raised edges, or stubborn gloss.
If you do resand, use fine-grit paper and light pressure to avoid gouging the surface.
For scuffing between coats, try a fine sanding sponge or 220–320 grit sandpaper rubbed gently in circular motions to promote adhesion without removing too much paint.
When To Re-Sand
If paint feels rough, shows drips, or doesn’t adhere evenly, you’ll need to sand again before repainting; gentle scuffing or targeted re-sanding will fix high spots and create the proper tooth for the new coat.
Use sanding techniques suited to wall textures and assess after cleaning.
- Check for drips
- Feel for roughness
- Inspect adhesion
- Focus high spots
- Re-clean before paint
Gentle Scuffing Methods
When paint feels rough, shows drips, or doesn’t take new coats evenly, you’ll want to scuff the surface lightly to create a uniform “tooth” without removing more finish than necessary.
Use fine-grit sandpaper, sanding blocks, or abrasive pads and work with gentle, even strokes across problem areas and seams.
Use gentle scrubbing techniques, cloth-backed pads, and minimal pressure application to avoid gouges, then wipe clean.
Choosing the Right Primer After Cleaning Walls
Because you’ve cleaned and sanded the walls thoroughly, choosing the right primer matters more than you might think: it seals residues, evens surface porosity, and improves paint adhesion so your finish lasts and looks uniform.
You should focus on primer selection and surface compatibility to prevent peeling and stain bleed-through.
- Match primer to substrate
- Use stain-blocking when needed
- Choose water- or oil-based wisely
- Consider drying time
- Check manufacturer’s specs
How Cleaning Improves Paint Coverage and Finish Uniformity
1 key benefit of cleaning your walls after sanding is that it gives paint a consistent surface to stick to, so you’ll get more even coverage with fewer coats.
When you remove dust and oils during surface preparation, paint application spreads uniformly, hides imperfections better, and reduces wasted primer or paint.
You’ll achieve a smoother, more durable finish with less rework and clearer color consistency.
Safety Gear for Washing Walls After Sanding
When you’re washing walls after sanding, you should wear a protective respiratory mask to avoid inhaling dust and residue.
Use goggles or a face shield to keep spray and particles out of your eyes, and put on chemical-resistant gloves plus coveralls to protect your skin and clothing.
Choosing the right gear and using it correctly keeps you safe and helps the cleaning go smoothly.
Protective Respiratory Masks
Choosing the right respiratory mask is essential when you’re washing walls after sanding, since dust and residue can carry fine particles and old paint contaminants into the air.
You should prioritize respiratory protection, know common mask types, and replace filters regularly to stay safe.
- N95 for dust
- P100 for heavy contamination
- Half-mask respirator
- Disposable masks
- Fit testing and seal checks
Eye And Face Protection
Even if you’ve got the right respirator, you still need eye and face protection—splashing water, dust, and old paint chips can irritate or injure your eyes during washing.
Wear snug safety goggles and a face shield as safety precautions so debris and cleaning solutions won’t reach your eyes or skin.
Choose anti-fog goggles and inspect protective gear for cracks before starting work.
Gloves And Protective Clothing
1 essential step is to protect your hands and body with the right gloves and clothing before you start washing walls after sanding.
You’ll follow safety precautions, choose durable nitrile or work gloves, and wear coveralls to keep grit and cleaner off skin. Use protective gear like knee pads and closed-toe shoes, and change contaminated clothing promptly.
- Nitrile gloves
- Disposable coveralls
- Long sleeves
- Knee pads
- Closed-toe shoes
How to Address Mold or Mildew Found After Sanding
If you find mold or mildew after sanding, don’t ignore it—treat it before you clean and paint so spores won’t keep returning.
If you discover mold or mildew after sanding, treat it first—don’t paint until the surface is clean and dry.
You should wear a mask and gloves, scrape loose growth, then apply a proper mold removal solution and follow mildew treatment instructions.
Rinse, dry thoroughly, and inspect for staining or damage.
Repair and prime only once the surface is fully clean and dry.
Eco-Friendly and DIY Cleaner Alternatives
Once you’ve removed mold or mildew and let the wall dry, you can use eco-friendly or DIY cleaners to finish the prep without harsh fumes.
You’ll want to choose solutions with eco-friendly ingredients and simple DIY cleaning mixes to remove dust and oils before priming.
- White vinegar and water
- Baking soda paste
- Castile soap solution
- Lemon juice rinse
- Rubbing alcohol spot-clean
Fast Ways to Wash Large Rooms Without Missing Dust
Because large rooms collect dust quickly, you’ll want a systematic, fast approach that covers floors, walls, and ceilings without backtracking.
Start top-down: vacuum ceilings and crown moldings with extension tools, then wipe walls with microfiber pads and mild cleaner.
Use long-handled squeegees for smooth surfaces and a HEPA vacuum for floors.
These effective cleaning techniques are practical time saving strategies to avoid missed dust.
Common Mistakes When Washing Walls After Sanding
When you rush through washing walls after sanding, you’ll often leave behind fine dust, residue, or streaks that ruin paint adhesion and finish; knowing the typical mistakes helps you avoid rework.
You should spot common washing mistakes and use proper wall cleaning techniques to get a smooth base.
- Skipping a dry dust wipe
- Using dirty water
- Overwetting drywall
- Ignoring corners and trim
- Rushing to paint
Clean-and-Prime Checklist After Sanding
If you’ve finished sanding, follow a focused clean-and-prime checklist to make sure paint adheres and looks right:
Wipe surfaces with a tack cloth, vacuum with brush attachment, and use a damp microfiber to remove residue.
Choose cleaning techniques suited to your surface, let it fully dry, apply primer compatible with existing substrate, and employ dust prevention like sealed vents and sticky shoe covers before painting.
Specialty Surfaces: Veneer, Wallpaper, Brick, and Tile
Specialty surfaces like veneer, wallpaper, brick, and tile each demand different prep and cleaning methods before you prime and paint, so knowing the right approach upfront saves time and prevents adhesion problems.
- For veneer care, wipe with a mild cleaner and scuff lightly.
- For wallpaper removal, strip fully and clean residue.
- For brick treatment, brush and rinse.
- For tile preparation, de-grease and etch if glazed.
- Spot-prime problem areas.
When You Might Skip a Wash : and the Risks
Although you can sometimes skip a full wash after sanding for small, low-traffic rooms, you should only do so when the surface is virtually dust-free and you’re using a paint and primer formulated to tolerate light dust.
You’ll rely on careful sanding techniques, tack cloths, and vacuuming to remove particles. Skipping a wash can leave residue that hurts adhesion, causes finish flaws, and undermines wall preparation.
Frequently Asked Questions
Can I Paint Immediately After Sanding Inside Cabinets and Closets?
You shouldn’t paint immediately after sanding inside cabinets and closets; you’ll want to wipe surfaces, remove dust, and use proper sanding techniques to guarantee good paint adhesion, otherwise your finish won’t stick or will look uneven.
How Do I Remove Sanding Dust From Light Fixtures and Outlets?
You wipe fixtures and outlets with a damp microfiber cloth and vacuum first; for stubborn dust, use compressed air and a soft brush. These dust removal techniques and fixture cleaning methods protect finishes and electrical components.
Should Baseboards and Trim Be Cleaned Differently After Sanding Walls?
Yes — you should clean baseboards and trim differently after sanding: depending on baseboard materials, you’ll vacuum, tack cloth, or wipe with mild cleaner; trim preparation may need finer sanding, degreasing, and primer touch-ups.
Will Washing After Sanding Affect Previously Painted Murals or Decals?
Yes — washing after sanding can affect murals or decals: you should test cleaning methods, use gentle sanding techniques and mural preservation steps, avoid harsh solvents, blot gently, and protect edges so artwork stays intact during prep.
How Long After Wallpaper Removal Should I Sand and Then Clean?
About 72% of DIYers rush too soon—sand after wallpaper removal once the surface’s dry and free of loose paper, usually 24–48 hours; use gentle sanding techniques, then clean thoroughly to remove wallpaper residue before priming.
Conclusion
You don’t have to deep-clean every wall after sanding, but you shouldn’t leave dusty, slick surfaces and expect paint to stick. A quick wipe often works on lightly sanded, smooth drywall; a thorough wash matters for plaster, bare wood, or heavy sanding. Skipping cleaning saves time but risks peeling, blotches, and uneven sheen. Pair cleaning with primer, and you’ll trade a small extra effort now for longer-lasting, professional-looking results.
