How Many Coats of Ceiling Paint Do You Need? Expert Answer
You’ll typically need one to two coats of ceiling paint. If your ceiling is clean, primed and close in color to the new paint, one quality coat can work. If you’re covering stains, repairs, dark colors or a textured surface, plan on two coats for even opacity and durability. Very severe stains or heavy patching may call for a third coat or a stain-blocking primer first. Keep drying time between coats and continue for tips on deciding.
Quick Answer: Typical Ceiling Paint Coat Counts
Most ceilings need one to two coats of paint: a single coat can work if you’re covering similar-color, well-primed surfaces, but you’ll usually apply a second coat for evenness and durability.
You’ll assess ceiling textures, primer quality, and paint opacity. For textured or patched surfaces, expect two coats; smooth, well-primed ceilings often need one.
Plan drying time and consistent paint application for best results.
Who This Guide Is For and What You’ll Learn
This guide is for homeowners, renters, and DIYers who want clear answers about ceiling paint.
You’ll learn how many coats are usually required, when a primer or extra coat is needed, and how to get even coverage.
No special skills are required—basic painting experience and a few common tools are enough.
Who Should Read
Wondering whether you need one coat or three? This guide fits you if you’re tackling a DIY ceiling, planning repainting between tenants, or handling touch-ups after repairs.
You’ll benefit from practical painting tips and basic ceiling maintenance advice. If you want clear, actionable steps without jargon, read on — you’ll save time, avoid common mistakes, and get reliable results.
What You’ll Learn
When you finish this guide, you’ll know how many coats your ceiling actually needs, how to pick the right paint and primer, and when extra coats are worth the time.
You’ll learn to assess surface condition, choose ceiling paint finish, plan coat application order, estimate coverage, and avoid common mistakes.
Use this to save time, materials, and achieve a uniform, durable result.
Skill Level Needed
Now that you know what the guide will cover, let’s clarify who should tackle a ceiling paint job and what skills you’ll actually need.
You’ll be fine with basic DIY experience: steady brushing, rolling, and ladder safety.
Use a quick skill assessment to confirm comfort with prep and taping. Good project preparation reduces errors, so follow steps and don’t rush.
When Is One Coat of Ceiling Paint Enough?
How do you know if a single coat will do the job? If your ceiling paint has strong coverage, the surface is clean, primed, and a similar color, one coat can suffice.
Small, even-textured rooms without stains or repairs are good candidates.
Test a discreet area first, verify uniform finish, and trust visual consistency before stopping after one coat.
When Two Coats Are Required
You’ll need two coats whenever the existing ceiling color, stains, or surface repairs would show through a single application.
After proper ceiling preparation—cleaning, priming and sanding—you’ll schedule a second coat application to fully hide flaws.
Pay attention to texture consideration: rough or popcorn ceilings increase paint absorption and may require more thorough first-coat coverage, so apply the second coat evenly for consistent color and finish.
When Three or More Coats Are Needed
If the ceiling has deep stains, a very dark previous color, or has been heavily patched, plan on applying three or more coats to achieve full, even coverage; the first coat will often act mainly as a tinting/priming layer while subsequent coats build opacity and uniformity. You’ll consider multiple factors: ceiling conditions, color selection, application techniques, moisture issues, surface preparation, paint types, sheen choices, lighting effects, repair considerations.
| Factor | Impact |
|---|---|
| Conditions | Coverage need |
| Color | Tinting layer |
| Technique | Opacity |
| Moisture | Adhesion risk |
| Prep | Finish quality |
How Ceiling Surface Condition Changes Coat Count
When a ceiling’s surface changes—smooth, textured, repaired, or water-stained—it directly affects how many paint coats you’ll need.
When a ceiling changes—smooth, textured, repaired, or water-stained—it alters how many paint coats you’ll need.
You’ll assess Ceiling texture and Paint absorption, adjust Coat thickness, and consider Light reflection for Coverage evaluation.
Focus on Surface preparation, Repair techniques, and Flaw hiding.
Choose Paint types that suit the finish and note Primer benefits.
- Smooth vs textured
- Stains present
- Recent repairs
- High absorption
- Finish sheen
Why Priming Cuts Coats and When to Prime
If your ceiling has stains, bare drywall, or dramatic color changes, you should prime before painting to seal and even the surface.
Priming bonds to porous patches and blocks stains so your finish coat covers better, which often cuts the number of paint coats you need.
When To Prime
Because a good primer seals porous surfaces and evens out color, you’ll often need fewer coats of ceiling paint overall.
You should prime when surfaces are raw, stained, repaired, or drastically color-shifted. Use proper priming techniques to get priming benefits like adhesion and uniformity.
Consider these cues:
- New drywall
- Water stains
- Exposed plaster
- Dark-to-light repaint
- Patch repairs
How Priming Saves Coats
Although priming adds a step, it often cuts the number of paint coats you need by sealing porous surfaces, blocking stains, and creating a uniform base for topcoat adhesion.
You’ll see priming benefits immediately: better coverage, truer color, and fewer touch-ups.
By reducing wasted paint and labor, you gain cost efficiency.
Prime when surfaces are raw, stained, patched, or highly porous.
Flat vs. Matte vs. Primer‑Paint: Coverage Differences
When you’re comparing flat, matte, and primer‑paint, the key difference you’ll notice is how they hide surface imperfections and how many coats they’ll typically require. Flat and matte finishes tend to mask flaws better but may need more coats for even coverage, while a true primer offers superior adhesion and stain-blocking so your topcoat covers in fewer passes.
- Consider coverage factors like porosity and paint formulation.
- Flat hides texture but may need extra coats.
- Matte balances hide and washability.
- Primer blocks stains, evens substrate.
- Primer reduces total coats required.
How Paint Sheen Affects Coverage and Hides Flaws
If you pick a higher-sheen paint, you’ll notice it reflects more light and makes imperfections like brush marks, roller stipple, and uneven texture stand out.
While lower sheens—flat and matte—scatter light and help hide those flaws; satin and eggshell sit in the middle, offering a compromise between washability and forgiveness.
Consider sheen impact when choosing for maximum flaw hiding and required maintenance.
How Color Changes Affect the Number of Coats
Curious how changing colors affects how many coats you’ll need? You’ll notice hue shifts, color psychology impacts perception, and paint opacity dictates coverage.
Consider these quick tips:
Consider these quick tips: color shifts affect coats, opacity matters, and always swatch before committing
- Dark to light needs more coats
- Light to dark may need fewer coats
- High-opacity hides better
- Bold colors show flaws
- Test swatch before full rollout
Does Previous Paint Quality Change Coat Count?
Because the quality of the paint already on your ceiling directly affects coverage, you’ll often need more or fewer new coats depending on what’s underneath. Check adhesion, sheen, and porosity to estimate coat count; poor paint quality usually means extra coats. Use this quick reference:
| Condition | Effect on coat count | Action |
|---|---|---|
| Flaky | Increase | Strip/prime |
| Glossy | Increase | Sand/prime |
| Matte | Neutral | Spot-prime |
| Stained | Increase | Seal/prime |
How Room Lighting and Size Change Perceived Coverage
When you paint a ceiling, lighting and room size change how many coats look necessary: bright, direct light highlights streaks and thin spots, making a single coat seem inadequate, while soft or dim lighting can hide uneven coverage and tempt you to stop too soon.
Consider lighting effects and room dimensions:
- Inspect under natural light
- Check corners closely
- Use task lighting
- View from different distances
- Factor ceiling height
Smooth vs. Textured Ceilings: Coat Needs Compared
Lighting and room size affect how many coats you think you need, but the ceiling’s surface actually plays a bigger role in coverage.
For smooth ceilings you’ll often need fewer coats and minimal surface preparation for good paint adhesion.
Textured ceilings create coverage challenges and usually require extra coats.
Textured ceilings resist even coverage, often demanding extra coats and careful application for a uniform finish.
Consider coat differences alongside aesthetic preferences and appropriate repair techniques to guarantee even results.
Handling Water Stains and Repaired Patches
If you’ve got water stains or patched areas on the ceiling, address them before rolling paint so the finish looks uniform and the stains don’t bleed through.
Use proper water stain treatment and patch repair techniques to prep surfaces, then prime sealed spots.
Follow these steps:
- Identify stains and leaks
- Clean and dry thoroughly
- Apply stain-blocking primer
- Smooth patched areas
- Sand and re-prime before painting
How Humidity and Temperature Affect Drying and Coverage
You’ll find that temperature changes how fast ceiling paint dries — warmer air speeds curing while cold can slow it and extend recoat times.
High humidity makes paint absorb moisture and stay tacky longer, which can thin coverage and increase the number of coats you need.
Consider your local climate when planning, because damp or cool conditions often mean slower drying and heavier application to get even coverage.
Temperature Effects On Drying
When the air’s warm and dry, paint dries faster and you can often get away with fewer thin coats; conversely, cold or humid conditions slow drying, cause sagging or poor leveling, and may force you to add another coat to achieve full, even coverage.
You should monitor temperature fluctuations and drying times and:
- Aim for stable temps
- Avoid drafts
- Use fast-dry formulas
- Allow extra cure time
- Keep heating steady
Humidity And Paint Absorption
Although high humidity and cool temperatures slow solvent evaporation, they also let water-based paint soak into porous ceilings longer. You’ll often need extra coats to get uniform coverage.
You’ll notice humidity effects in longer tack times and reduced opacity; monitor surface feel before recoating.
Improve results by using a primer, thin coats, and slightly warmer, drier conditions to limit paint absorption.
Climate Impact On Coverage
Because humidity and temperature directly change how paint behaves, they’re among the most important factors in predicting how many coats you’ll need and how long each coat will take to dry.
- Check climate considerations before starting.
- High humidity slows drying, risks drip marks.
- Low humidity can cause fast drying, poor leveling.
- Cool temps extend recoat time.
- Monitor weather effects to plan coats and ventilation.
Calculate Paint Needed Per Coat (Coverage Math)
Want to know how much paint you’ll need per coat? Measure ceiling area (length × width), subtract windows/doors, then check the paint coverage on the can (square feet per gallon).
Do the coat calculation: area ÷ coverage = gallons needed per coat. Always round up for safety, account for texture absorption, and add about 10% extra for touch-ups and waste.
Choosing Ceiling Paint for Best Coverage and Finish
Pick a ceiling paint that balances coverage, finish, and durability so you’ll need fewer coats and get the look you want.
Pick ceiling paint that balances coverage, finish, and durability so you takes fewer coats and achieve the look you want.
Choose among ceiling paint options that suit texture and light, and use smart coverage techniques to cut coats.
Consider:
- Flat for flaws
- Eggshell for slight sheen
- Stain-blocking for marks
- Low-splash for rollers
- High-hide for fewer passes
When to Use Separate Primer vs. Paint‑and‑Primer
Good primer selection can save you coats of ceiling paint and improve durability, so after choosing the right ceiling paint it’s worth deciding whether to use a separate primer or a paint‑and‑primer.
If walls are stained, porous, or repaired, use separate primer for better adhesion. For fresh drywall or light repainting, a quality paint‑and‑primer often suffices.
Consider primer types and application techniques for best results.
Pick the Right Sheen for Ceilings (Flat vs. Eggshell)
Pick the right sheen and you’ll control appearance and practicality: flat hides imperfections and minimizes glare, while eggshell is more durable and easier to clean.
You’ll also notice eggshell reflects more light, which can brighten a room but highlight texture.
Consider the room’s condition and lighting when choosing between the two.
Flat Finish Benefits
While both flat and eggshell sheens can work on ceilings, flat paint usually hides flaws better and gives a smoother, more uniform look—so you’ll often get away with one coat where eggshell might show brush marks or roller texture.
You’ll appreciate flat finish aesthetics in older homes.
It reduces glare.
It masks imperfections.
It offers good flat finish durability.
It’s forgiving during touch-ups.
Eggshell Finish Pros
An eggshell finish gives ceilings a soft, low-sheen luster that resists scuffs and cleans easier than flat paint, so you’ll get better durability in high-traffic rooms or homes with kids and pets.
You’ll appreciate eggshell durability when wiping marks; it hides minor imperfections better than glossy options.
Choose eggshell sheen if you want a balance of cleanability and subtle appearance without obvious reflections.
Light Reflection Differences
Whether you want a perfectly matte ceiling or a slightly lustrous one, sheen controls how much light bounces off the surface and shapes a room’s feel. You’ll choose based on light reflection and durability.
Consider:
- Flat absorbs light, hides flaws
- Eggshell reflects more, cleans easier
- Rooms with low light favor eggshell
- High ceilings suit flat
- Hallways need durable paint finish
Surface Prep That Reduces Required Coats
Good prep cuts the number of coats you’ll need and makes each one go on smoother.
You should clean dust and grease, sand gloss, and prime stained or porous areas. Proper surface preparation improves paint adhesion and helps coverage, so you’ll often skip extra coats.
Use a bonding primer on tricky surfaces and allow full drying before rolling to guarantee an even finish.
Repairing Cracks, Seams, and Joint Compound Before Painting
Prepping the surface helps, but you’ll still want to fix cracks, seams, and joint compound imperfections before you paint.
Tackle visible issues so the finish’s uniformity and durability improve.
- Inspect for hairline cracks and gaps
- Apply proper crack repair with flexible filler
- Treat taped joints with seam treatment
- Feather joint compound edges
- Allow full dry time before priming
Sanding and Cleaning for Best Adhesion
Start by sanding any patched areas and glossy surfaces lightly so paint will grip; you’re aiming for a smooth, slightly dull finish rather than perfect polish. Use proper sanding techniques, vacuum dust, and apply approved cleaning methods before priming. Be thorough but quick to avoid rework.
| Tool | Grit | Purpose |
|---|---|---|
| Sandpaper | 120–220 | Smooth |
| Vacuum | — | Dust removal |
| Towel | Microfiber | Final clean |
Masking and Protecting Fixtures to Avoid Rework
Before you start rolling, cover light fixtures with plastic bags or painter’s tape and paper to prevent splatters.
Seal HVAC vents with low-tack tape or removable film so paint doesn’t clog the grilles or spread through the ducts.
Taking these simple steps now saves time and prevents costly touch-ups later.
Covering Light Fixtures
1 simple step you shouldn’t skip is masking and protecting light fixtures so paint doesn’t ruin bulbs, shades, or wiring — and so you don’t have to rework the ceiling later.
You’ll save time with careful covering fixtures and minor light adjustments.
Quick tips:
- Turn power off
- Remove bulbs
- Cover shades with plastic
- Tape edges tightly
- Use disposable caps
Protecting HVAC Vents
While you’re prepping the ceiling, don’t forget to mask HVAC vents so paint won’t clog the grilles or coil openings and force you to clean or replace them later. Use plastic, painter’s tape, and tight seals for vent protection to avoid contaminating ducts. This saves time, preserves HVAC maintenance schedules, and prevents rework.
| Item | Purpose |
|---|---|
| Plastic | Cover |
| Tape | Seal |
| Filter | Protect |
| Inspection | Confirm |
Cutting In Ceilings Cleanly to Minimize Overlaps
When you cut in a ceiling, steady hands and the right brush make the difference between a crisp edge and a repaint job.
So work deliberately along the wall line and keep a light, even paint load on the brush to avoid drips.
Use these tips with cutting techniques and varied brush angles:
- Tape along trim
- Load less paint
- Hold brush steady
- Feather edges outward
- Clean spills fast
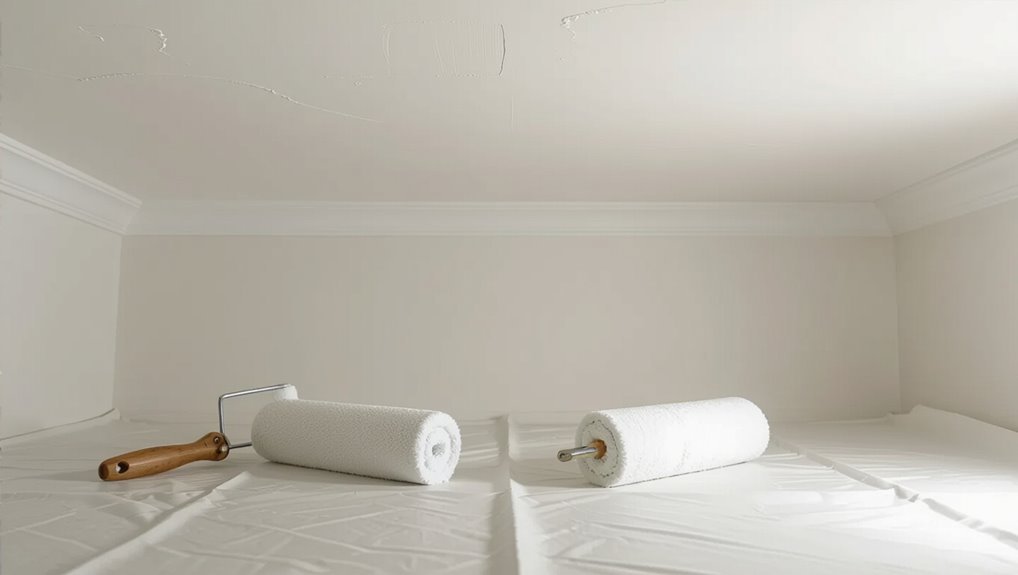
Rolling Ceilings Efficiently to Avoid Roller Marks
Start by rolling in 3-foot sections so you maintain a wet edge and avoid lap marks; keep a light, even load on the roller, work in a consistent direction, and finish each pass with a smooth, feathered stroke to blend new paint into the wet area. Use proper roller technique and check paint consistency to prevent streaks.
| Tip | Result |
|---|---|
| Light load | Even coverage |
| Consistent direction | Fewer marks |
| Feathered strokes | Seamless blend |
| Smooth roller | No texture changes |
| Monitor consistency | Uniform finish |
Maintain a Wet Edge When Painting Ceilings
Rolling in 3-foot sections helps you keep a wet edge, but you also need to work steadily so each new pass meets still-wet paint.
Keep the roller moving at a measured pace, overlap each pass by about a third, and reload before the roller runs dry to avoid visible lap lines.
- Work methodically
- Maintain consistent pressure
- Overlap by one third
- Reload regularly
- Check lighting
Use wet edge techniques to minimize avoiding lap marks.
How Coat Thickness Affects Appearance and Drying Time
Although a thicker coat can hide imperfections faster, it also takes longer to dry and risks sagging or uneven texture.
So you should balance coverage with manufacturer recommendations and the ceiling’s condition.
You’ll find that coat thickness changes sheen, hide, and drip risk; thinner coats dry faster and level better, while thicker coats boost coverage but extend drying time and may need careful application.
How to Tell When a Coat Is Dry Enough to Recoat
How do you know when a coat is ready for the next one? You’ll check surface tack, color evenness, and scent, using simple drying techniques to judge readiness and coat visibility.
How do you know a coat’s ready? Check tack, color evenness, scent — wait until surface feels dry and looks uniform.
- Light touch test
- Fingertip tack check
- Color uniformity look
- Smell for solvents
- Wait recommended time
If tack’s gone and visibility matches expected finish, recoat.
Inspecting Coverage and Spot‑Sanding Between Coats
Wondering whether the coverage is even enough to stop? Do a quick coverage inspection under good light, mark thin spots, and note drips or texture differences.
After the coat dries, use gentle sanding techniques with fine-grit paper to smooth raised fibers and feather edges of flaws. Clean dust, reassess, and determine if another coat’s needed before proceeding.
Handling Tricky Edges Near Walls and Trim
Once you’ve checked coverage and smoothed any rough spots, focus on the edges where ceiling meets wall and trim — these areas show mistakes first.
Use precise edge control techniques and trim protection strategies to get clean lines.
Master precise edge control and protect trim for flawless, professional-looking paint lines every time.
Tips:
- Tape crisp lines before cutting in
- Use angled brush for control
- Hold pad close to trim
- Remove tape while wet
- Touch up with small brush
Painting High and Vaulted Ceilings Safely and With Fewer Coats
Painting high or vaulted ceilings can feel challenging, but with the right safety setup and technique you can cover large areas quickly and often cut the number of coats needed. Use safety measures like goggles and mask, check ladder stability, and favor extension poles plus high-quality primer/paint to improve coverage.
| Tool | Tip | Benefit |
|---|---|---|
| Pole | Long reach | Fewer ladders |
| Primer | Tinted | Better hide |
| Roller | 18″ nap | Even coverage |
Best Approach for Popcorn or Acoustic Ceilings
First, check the popcorn or acoustic ceiling for damage, loose texture, or asbestos before you paint.
If it’s intact, use a thick-nap roller or an airless sprayer and choose a paint formulated for textured surfaces to get even coverage.
Take care with pressure and technique to avoid blasting off texture or creating drips.
Assess Ceiling Condition
Popcorn and acoustic ceilings need a careful look before you roll paint over them, because their texture can hide damage and contain hazardous materials like asbestos in older homes.
Use ceiling inspection tips when evaluating damage, and follow these quick checks:
- Look for cracks or sagging
- Check for water stains
- Test for loose texture
- Note patched areas
- Consider asbestos testing
Use Appropriate Application
1 smart approach for textured ceilings is to adapt your tools and technique to the surface — use a thick-nap roller (¾” to 1¼”) or a specialty texture roller, keep pressure light to avoid flattening the texture, and work in small sections while maintaining a wet edge so the finish stays consistent.
You’ll control application techniques and paint consistency, apply thin even coats, and avoid overworking the texture.
Repainting Over Glossy Ceilings Without Extra Coats
When you’re repainting a glossy ceiling and want to skip extra coats, proper surface prep and the right paint choice are critical.
You’ll focus on repainting techniques and ceiling preparation to guarantee adhesion and coverage.
Follow these concise steps:
- Clean thoroughly
- Sand lightly for tooth
- Use bonding primer
- Choose high-hide paint
- Roll evenly for uniform coverage
Cross‑Rolling and Other Techniques to Save Time and Paint
Start by cross‑rolling: roll one direction to lay down paint and then roll perpendicular while it’s still wet to blend and eliminate lap marks, which speeds coverage and reduces the need for extra coats.
Use cross rolling techniques with a quality nap and extension pole, work in manageable sections, and keep a wet edge.
These time saving methods cut touchups and conserve paint.
Use Lighting Tests to Reveal Missed Spots Before the Final Coat
Before you put on the final coat, inspect the ceiling with directional lighting so any thin or missed spots jump out.
Use portable work lights to sweep across the surface and highlight inconsistent coverage.
Walk around and check from multiple angles to catch areas you might’ve missed from one viewpoint.
Inspect Under Directional Lighting
Curious how to catch every thin spot? You’ll use directional lighting techniques to boost paint visibility and spot streaks.
Move a single lamp across the ceiling, scanning at low angles. Inspect systematically and mark thin areas. Repeat after touch-ups.
- Work from one corner outward
- Keep light at a low angle
- Look for sheen differences
- Mark missed spots lightly
- Recheck before final coat
Use Portable Work Lights
Bring portable work lights into the room and use them as your final inspection tool—set them low and sweep the beam across the ceiling to reveal thin spots, roller marks, and uneven sheen that normal overhead lighting hides.
You’ll adjust light placement to highlight flaws, move lights slowly across surfaces, and mark missed areas for touch-ups before committing to the final coat.
Check From Multiple Angles
Why not walk around the room and view the ceiling from several angles to catch problems your first pass missed?
Use varied lighting angles to reveal thin spots and inconsistent surface textures before the final coat.
Check with a flashlight, side light, natural light, low-angle lamp, and overhead lamp to confirm uniform coverage.
- flashlight
- side light
- natural light
- low-angle lamp
- overhead lamp
Estimating Cost Differences: One Coat vs. Two Coats
When weighing one coat versus two, you’ll want to compare both material and labor costs: one coat uses roughly half the paint and takes less time, but a second coat often prevents touch-ups and can cut long-term maintenance expenses. You’ll do a cost comparison factoring paint quality, labor rates, and lifespan to choose wisely.
| Item | Impact |
|---|---|
| Paint quality | Coverage, longevity |
| Labor | Time, cost |
| Maintenance | Touch-ups, durability |
How Professionals Estimate and Plan Coat Counts
Because they balance surface condition, paint type, and client expectations, professionals don’t guess coat counts—they calculate them:
Pros calculate coats—considering surface, paint, and client expectations—never guessing the finish.
You’ll learn coat estimation and planning techniques by seeing checklist steps and decision points:
- Inspect surface for stains and texture
- Test primer and first coat coverage
- Measure ceiling area precisely
- Factor drying times and room use
- Communicate client finish expectations
Ceiling Painting Tools That Reduce Coats and Improve Finish
A few smart tools can cut the number of ceiling coats you need and give you a more even, professional finish: a high-quality roller cover matched to your ceiling texture, an extension pole for steady pressure and reach, a good nap roller for primer and topcoat, angled brushes for edges, and a microfibre dust mop to remove particles before painting.
You’ll use Ceiling painting techniques for Efficient application, reducing touchups.
Use Tinted Primers to Cut Coat Count on Color Changes
If you’re switching to a darker or bolder ceiling color, tinting the primer to a mid-tone of your new paint will cut the number of topcoats you need and improve coverage.
Use tinted primers for color changes to speed the job, boost paint adhesion, and achieve coat reduction.
Tips:
- Match mid-tone
- Check compatibility
- Thin sparingly
- Roll evenly
- Let cure fully
How to Test Paint With Samples and Small Patches
Pick representative areas of the ceiling—corners, near vents, and the center—to see how the paint performs in different spots.
Apply small test patches of your chosen paint and let them dry fully before judging.
Evaluate the color and coverage under the room’s light at different times of day to decide if you need another coat.
Choose Representative Areas
Start by selecting a few representative spots across the ceiling—near seams, in the center of the room, and above high-traffic areas—so you’ll see how the paint performs on different surfaces and lighting conditions.
Choose areas considering ceiling texture and typical paint application.
Test spots:
- Near seams
- Center of room
- Above entryways
- Over vents
- By light sources
Apply Small Test Patches
Apply small test patches of each paint color and finish to the representative areas you chose so you can see real-world coverage and tone under different lighting and textures.
Use controlled test patching techniques: mark edges, label coats, and apply the same roller stroke direction.
Note paint drying times, wait between coats, and record coverage so you’ll know how many coats a full ceiling will need.
Evaluate Dry And Light
Once your test patches have fully dried, inspect them under the same lighting conditions you’ll have on the ceiling—daylight, artificial bulbs, and at different times of day—so you can see how color and sheen actually look when they settle.
Check dry time and light quality, then note results:
- Morning natural light
- Midday glare
- Evening artificial light
- Different bulb types
- Distance and angle effects
Troubleshooting Common Problems After Painting
When a freshly painted ceiling shows drips, streaks, or uneven coverage, you can usually fix it without ripping everything down; assess the problem, then decide whether spot-touching, a light sanding, or an extra coat will solve it.
Check paint adhesion and drying issues, address coverage gaps via proper surface preparation, match color and texture, consider environmental factors, choose the right finish selection, refine roller techniques and edge blending.
Fixing Lap Marks, Streaks, and Uneven Sheen
If you notice lap marks, streaks, or patches of uneven sheen on your ceiling, you can usually correct them without repainting the whole surface by addressing the root causes and blending the affected areas.
Use these quick steps for lap mark remedies, streak prevention, sheen consistency, and smart paint layering:
- Feather edges with a damp roller
- Work wet edges continuously
- Thin next coat slightly
- Match sheen before blending
- Lightly sand between layers
Is a Third Coat Cosmetic or Necessary? How to Decide
Wondering whether a third coat is cosmetic or necessary? You’ll assess third coat necessity by checking coverage, color depth, and sheen uniformity after two coats.
If imperfections, stains, or translucence remain, a third coat’s needed. If only slight visual refinement is desired, weigh cosmetic considerations against time and cost.
Trust your eyes and test a small area before committing.
Plan a Painting Schedule to Avoid Rushed Coats
Give yourself at least a full day between coats so paint can dry properly and you won’t feel forced to rush the next application.
Plan painting logistics and scheduling breaks to keep quality high. Consider:
- Assess room humidity and temperature
- Outline sections to paint each day
- Schedule breaks for ventilation
- Prep touch-up tools beforehand
- Track drying times and adjust plan accordingly
Storing Leftover Paint for Touch‑Ups and Documentation
Keep a small amount of your ceiling paint for touch-ups and label the container with the date, room, and color code so you’ll know exactly what it is.
Store cans tightly sealed in a cool, dry place away from temperature extremes and direct sunlight to keep the finish consistent.
For long-term preservation, strain and transfer paint to smaller airtight containers if needed and note the original can’s brand and sheen for future matching.
Properly Label Containers
Labeling leftover paint containers clearly lets you grab the right color and sheen for touch-ups without guessing.
Use simple labeling techniques and good container organization so you’ll find what you need fast.
- Paint color name and code
- Finish (matte/satin/semi-gloss)
- Date opened
- Room/location
- Mix batch or retailer info
Ideal Storage Conditions
When you store leftover ceiling paint for touch-ups and documentation, place containers in a cool, dry spot out of direct sunlight and temperature extremes so the finish and pigment stay stable; airtight lids and a small layer of plastic wrap over the surface help prevent skinning, and noting storage date and batch info on the label guarantees you can match and verify the paint later.
Maintain perfect temperature and humidity levels, use proper storage containers, consider climate considerations for long term stability, monitor paint expiration, and follow best conditions for preserving quality.
Long‑Term Paint Preservation
Although leftover ceiling paint may seem minor, storing it correctly makes future touch-ups painless and guarantees your documentation stays useful. Seal cans tightly, note the date and batch number, and protect the surface from skinning with plastic wrap beneath the lid.
- Label color, sheen, batch
- Keep cool, dry storage
- Use original airtight can
- Transfer to smaller container
- Record location and photos
This boosts paint longevity and simplifies ceiling maintenance.
Decide and Record the Final Coat Count for Future Reference
Decide on a final coat count now and jot it down so you don’t have to guess next time—note the number of coats, the paint type, sheens, and any primers or stains you used.
For coat documentation, record date, room, conditions, and drying times. Keep this file for future reference so you’ll repeat successful results, avoid unnecessary recoats, and communicate clear instructions to anyone who paints later.
Frequently Asked Questions
Can I Use Ceiling Paint on Walls to Match Finishes?
Yes — you can use ceiling paint on walls, but it’s limited: ceiling paint versatility helps match texture, yet it won’t mimic a typical wall paint finish. You’ll get flatter sheen and possibly less washability and coverage.
How Long Should I Wait Before Reinstalling Light Fixtures?
You’ll wait about 24–48 hours before reinstalling light fixtures—seriously, like waiting centuries feels shorter—so paint drying completes and light fixture safety’s guaranteed; always confirm surface is fully dry and follow manufacturer safety guidelines.
Will Low‑Voc Paint Affect Coat Count or Drying Time?
Yes — low‑VOC benefits won’t usually change coat count, but they can alter drying time; you’ll still need two coats for coverage often, and drying time factors like humidity, temperature, and ventilation will speed or slow curing.
Can Pets or Children Safely Occupy Room During Painting?
You shouldn’t keep pets or children in a freshly painted room; fumes linger like invisible smoke. For pet safety and child supervision, wait until paint’s dry, ventilate fully, use low‑VOC products, and monitor them closely when returning.
Do Ceiling Beams or Exposed Joists Need Different Coating Strategies?
Yes — you’ll treat beams and joists differently: for beam treatment you’ll sand, prime, and use stain or paint suited to wood; joist preparation often needs cleaning, filler, and a primer before your finish coat for even coverage.
Conclusion
You’ll usually need one to three coats of ceiling paint, depending on color change, surface condition, and paint quality. Notably, professional painters often apply two coats 72% of the time to guarantee even coverage and durability—so don’t feel overcautious if you do the same. Plan your schedule to let coats dry fully, label and store leftover paint for touch-ups, and note the final coat count and product details so future projects go quicker and cleaner.