
How to Cover Holes in Wall Without Painting: Easy Solutions
You can hide wall holes without painting by matching the fix to size and time: spackle or lightweight filler smooths pinholes and small dents; caulk fills narrow cracks; adhesive drywall patches or mesh with joint compound work for medium holes; replace drywall for large damage. For instant concealment, use art, mirrors, or decorative plates. Prep by cleaning stains and sanding rough edges. Follow renter rules and safety tips, and keep going to find step‑by‑step options and tool lists.
Cover Holes Without Painting: Quick Guide
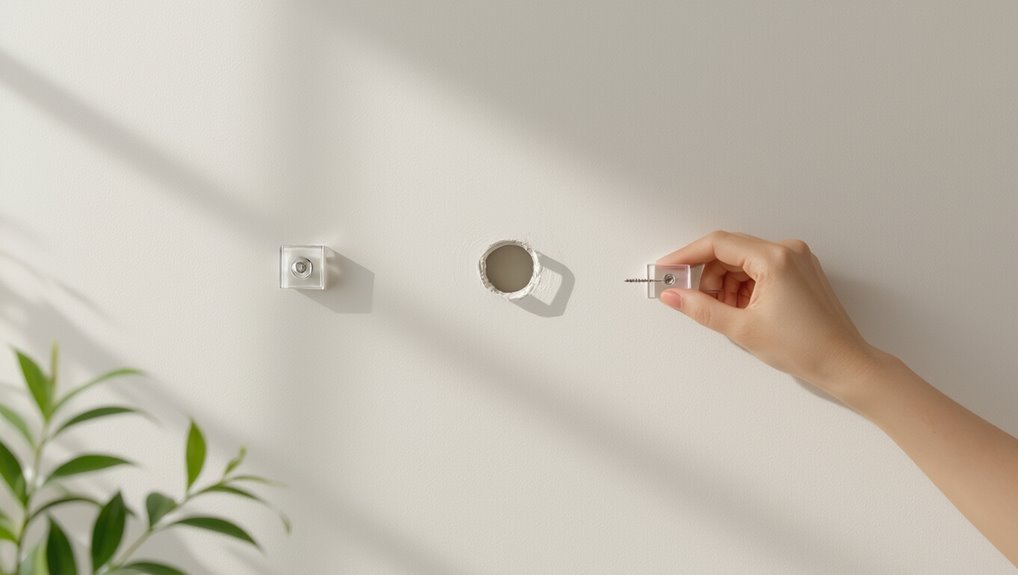
You don’t need paint to make wall holes disappear; several fast, durable options let you repair or conceal damage without matching color.
You can patch small dents with spackle and sand, cover larger gaps with adhesive mesh or patch kits, or use decorative plates and textured Wall Covering Techniques.
Consider Alternative Materials like cork, fabric panels, or peel-and-stick tiles to hide flaws quickly and cleanly.
Decide by Hole Size, Time, and Renters’ Rules
If you’ve chosen a no-paint fix, next decide based on the hole’s size, how much time you have, and any renter rules that apply.
You’ll perform a quick damage assessment, note hole types and wall materials, then weigh repair methods, product selection, cost factors, and time efficiency.
Follow renter guidelines, choose temporary solutions if needed, and balance aesthetic considerations with practicality.
Which Holes Need What Fix: Tiny to Large
Start by matching hole size to the simplest reliable fix: pinholes and tiny nail holes call for spackling.
Small dents and hairline cracks need lightweight filler or caulk.
Medium holes up to a few inches require patch kits or mesh and joint compound.
Large or irregular damage demands a drywall patch or replacing the affected panel.
Use tiny hole solutions and large hole strategies.
- Relief: quick wins
- Confidence: lasting repair
- Pride: neat finish
- Ease: renter-friendly
- Control: handle complexity
Fast Fixes for Pinholes and Nail Holes
A few quick tools—spackle, a putty knife, and a damp cloth—let you fix pinholes and nail holes in minutes with professional-looking results. Press spackle, smooth, let dry, sand lightly, wipe clean. For pinhole repair or a single nail hole, this is fast and tidy.
| Step | Tip |
|---|---|
| Prep | Clean area |
| Apply | Small amount |
| Finish | Sand & wipe |
Adhesive Patch Strips for Nail & Screw Holes
When you have larger nail or screw holes that spackle alone won’t hide smoothly, adhesive patch strips speed the job and give a flat, paint-ready surface.
You’ll press a self-adhesive patch over the hole, add compound, sand, and finish for seamless wall repair.
- Quick relief
- Clean look
- Low effort
- Instant confidence
- renter-friendly
Float-On Spackling: Quick Pinhole Fills
If you’re dealing with tiny pinholes, float-on spackling lets you smooth them out fast by applying a small dab of lightweight compound and dragging a flat tool across so it blends flush with the wall.
You’ll master float on applications with basic spackling techniques, keeping tools clean and pressure light.
These quick repairs are wall essentials for tidy, paint-free fixes.
Use Putty Sticks for Instant No-Paint Patches
After smoothing pinholes with float-on spackling, reach for a putty stick when you want a faster, paint-free fix for small dings and nail holes.
You’ll love quick putty stick applications and instant repair techniques that blend and dry fast. Apply, smooth, wipe excess — done.
Love fast putty-stick fixes—apply, smooth, wipe excess, and enjoy seamless, paint-free repairs in moments.
- Relief
- Pride
- Satisfaction
- Ease
- Confidence
Caulk Tricks for Narrow Cracks and Gaps
When you’re filling narrow cracks and gaps, pick a caulk formulated for walls—paintable acrylic latex works well for most indoor spots, while silicone is best for moisture-prone areas.
Cut the tip narrowly and apply steady pressure so the bead fills the gap without excess. Smooth the caulk with a wet finger or a damp tool for a clean, paint-ready finish.
Choosing The Right Caulk
Because narrow cracks need a different approach than wider gaps, choosing the right caulk matters—pick one formulated for fine lines and good adhesion so it fills without shrinking or cracking.
You’ll focus on choosing caulk, caulk types, caulk application, caulk benefits, caulk drying, caulk flexibility, caulk colors, caulk finishes, caulk tools, caulk preparation.
- Relief
- Confidence
- Satisfaction
- Calm
- Pride
Smooth Finishing Techniques
Smooth finishing on narrow cracks comes down to steady hands and the right tricks: load a minimal bead, press it gently into the gap, then tool it immediately with a damp finger or a flexible putty knife to smooth and remove excess.
Use consistent pressure, wipe the tool often, and feather edges for invisible joins. These smoothing techniques give crisp finishing touches without sanding or repainting.
Removable Wall Patches: When to Choose Them
If you’re fixing rental walls or covering temporary damage, removable wall patches are a smart choice because they let you restore the surface without permanent changes.
Use them for small to medium holes when you expect to remove the patch later or want an easy, fast solution.
For bigger repairs or long-term fixes, you’ll need a permanent patch and proper finishing.
When To Use Patches
Removable wall patches are best when you want a quick, low-commitment fix—think renter situations, temporary decor changes, or small damage that might be repaired differently later.
You’ll weigh damage assessment, wall textures, repair materials, repair tools, and patching techniques while avoiding common pitfalls and following rental guidelines.
Choose concealment strategies that feel reassuring.
- Relief
- Control
- Confidence
- Simplicity
- Freedom
Temporary Vs Permanent Fixes
You’ve already considered when patching makes sense for renters or short-term fixes; now weigh whether a temporary, removable patch will meet your needs or if a permanent repair is better.
Consider temporary solutions for renter preferences, ease of application, low cost implications, and minimal maintenance requirements.
Choose permanent solutions for repair longevity, aesthetic considerations, material compatibility, and tougher ceiling vs. wall repairs.
How to Install a Self-Adhesive Drywall Patch
One straightforward way to fix small-to-medium drywall holes is with a self-adhesive patch, which sticks over the damaged area and gives you a stable base for joint compound.
You’ll appreciate self-adhesive benefits and simple installation tips: clean, press, feather compound, sand, repaint.
- Relief
- Confidence
- Pride
- Calm
- Satisfaction
Mesh Tape and Compound for Medium Holes
For medium drywall holes, mesh tape combined with joint compound gives you a strong, low-profile repair that’s fast to apply and sands smooth.
You’ll press mesh tape benefits into the hole, cover with thin compound application, feather edges, let dry, then sand and repeat as needed.
Finish by wiping dust; the surface will be ready for texture or touch-up without full repainting.
Cut-And-Replace Drywall: When It’s Better
If mesh tape and compound can’t restore the wall because the damage is too large, irregular, or reaches the studs, it’s time to cut out the damaged drywall and replace the section.
You’ll need proper drywall installation steps and repair tools. You’ll feel relief and control as you:
- regain a smooth surface
- stop further damage
- protect insulation
- restore structure
- prevent mold
Drywall Repair Patches for 1–6 Inch Holes
For holes between 1 and 6 inches, you’ve got two reliable repair routes: pre-made patch kits and the mesh tape method.
Patch kits give you a simple, self-contained fix with a metal or adhesive patch and joint compound.
If you prefer a cleaner blend with the wall, you can use fiberglass mesh tape and compound to reinforce and feather the repair.
Pre-Made Patch Kits
When you’ve got a 1–6 inch hole, pre-made drywall patch kits save time and simplify the repair by giving you a ready-to-use patch, adhesive, and sometimes a finishing compound.
You’ll like how pre-made patch kits include patch kit materials and simple instructions so you can fix walls fast.
- Relief
- Confidence
- Pride
- Calm
- Satisfaction
Mesh Tape Method
Although it’s simple to grab a roll of self-adhesive mesh tape and a tub of joint compound, the mesh tape method gives you a durable, low-profile repair for 1–6 inch drywall holes by reinforcing the area and preventing future cracking.
You’ll clean the hole, apply mesh tape, spread compound in thin layers, sand smooth, and repeat as needed.
Mesh tape benefits include strength and ease; mesh tape application is quick.
Match Texture Without Painting: Simple Stippling
If you want to blend a patched area into the surrounding wall without repainting, simple stippling lets you match texture quickly using joint compound and a stipple brush or sponge.
You’ll use texture matching techniques and DIY stippling methods to press and lift compound until it mirrors the wall.
Try these quick tips to feel proud and relieved:
- Satisfying
- Encouraging
- Confident
- Calm
- Triumphant
Using Colored Putty to Blend With Paint
After you’ve matched texture, colored putty lets you blend the patched area to your wall’s paint without fully repainting the surface.
You choose a putty tone close to your wall, apply thin layers, and feather edges with a damp sponge.
Focus on colored putty application and subtle blending techniques to match hue and sheen.
Let each layer dry before evaluating color and touch-ups.
Sanding and Smoothing Small Fills for Invisible Results
When you’ve filled small holes and the compound has fully dried, sanding and smoothing are what make the repair disappear—use a fine-grit sanding block, light pressure, and short, even strokes to level the patch without gouging the surrounding wall.
After the compound dries, gently sand with a fine block—light, even strokes make the repair vanish seamlessly.
You’ll refine sanding techniques and smoothing methods for invisible repairs, then choose finish options to match texture and sheen.
- Relief
- Pride
- Calm
- Confidence
- Satisfaction
When to Use Spackle vs. Joint Compound
Because the size and location of the hole determine the best product, you’ll choose spackle for quick, small repairs and joint compound for larger, structural or taped seams.
For spackle applications, use fast-drying, small-batch fills and minimal sanding.
Use joint compound when layering, embedding tape, or finishing broad areas—its joint compound differences include longer work time and better feathering for seamless shifts.
Fixing Holes in Plaster Walls: What Works
Start by evaluating the damage to see if the plaster is hairline-cracked, loose, or missing in a larger section.
For small to medium holes, use a plaster patch or two-coat plaster repair rather than spackle for better adhesion.
Finish by matching and blending the texture so the repair disappears into the surrounding wall.
Assess The Damage
Before grabbing tools, take a close look at the damage so you know exactly what you’re up against: is the hole a small nail-sized puncture, a medium gouge with loose plaster around the edges, or a large area where lath or drywall backing shows through?
You’ll do a quick damage assessment and judge wall integrity.
Feelings matter—then act:
- Frustration
- Relief
- Urgency
- Hope
- Confidence
Use Plaster Patch
Now that you’ve assessed the damage and picked up a sense of what the wall needs, a plaster patch is usually the best fix for holes in plaster walls. You’ll choose plaster types, prep edges, apply base, and finish with thin coats. Use proper application techniques and sand between layers for a smooth repair.
| Step | Tip |
|---|---|
| Prep | Clean edges |
| Mix | Follow ratio |
| Apply | Thin layers |
Blend Texture Seamlessly
Once you’ve filled the hole and sanded the patch smooth, match the surrounding texture so the repair disappears into the wall.
You’ll use texture blending techniques and seamless repair methods to recreate patterns. Use tools and patience, then finish without repainting.
- Relief that looks whole
- Pride in a hidden fix
- Calm from subtlety
- Satisfaction in skill
- Confidence in lasting results
Dealing With Moisture or Mold Around a Hole
If you find moisture or mold around a hole, stop and assess the cause before you patch it: active leaks or high humidity will make any repair fail.
Identify leaks, dry the area thoroughly, and fix ventilation to help moisture management and mold prevention.
Remove loose mold with a detergent solution and a scrub brush, dry completely, then use a mold-resistant patching product before covering the hole.
Household Fillers: Wax, Soap, and Toothpaste-When They Work
After you’ve handled any moisture or mold, smaller cosmetic holes can often be fixed without visiting a hardware store.
You’ll use household fillers like wax applications, soap usage, and toothpaste effectiveness after proper surface preparation for quick fixes, color matching, temporary solutions, eco friendly options, and rental compliance.
- Relief
- Satisfaction
- Pride
- Ease
- Confidence
Peel-And-Stick Tiles to Cover Gouges (No Paint)
One simple way to hide gouges without painting is to apply peel-and-stick tiles, which stick directly over damaged drywall for an instant, low-effort cover-up.
You can measure and trim tiles to size, press firmly, and smooth seams. Peel and stick tiles offer easy installation, durability, and a decorative finish—ideal when you want a quick, mess-free patch without spackle or paint.
Temporary Wallpaper Patches for Patterned Walls
Peel-and-stick tiles work great for plain gouges, but patterned walls need a different approach when you want a quick, nonpermanent fix.
You can patch holes with temporary wallpaper patches that respect patterned designs, texture matching, and wall styles while offering removable solutions and adhesive options for easy removal.
Focus on design integration and color coordination to blend seamlessly.
- Relief
- Confidence
- Calm
- Pride
- Ease
Picture Frames and Artwork to Mask Damage
You can hide small holes by placing frames strategically so the damage sits behind the artwork instead of being the focal point.
Try layered arrangements—overlapping prints or a gallery wall—to cover larger or awkward spots without major repairs.
With a little planning, your art will look intentional and keep the wall flaws out of sight.
Strategic Frame Placement
Strategically placed frames and artwork can instantly disguise small holes and draw the eye away from repairs.
So assess your wall from multiple angles to choose the best spot. You’ll use frame aesthetics and wall decor to harmonize fixes with your room.
Consider mood and scale:
- Comforting colors
- Bold focal piece
- Soft textures
- Personal photos
- Balanced spacing
Layered Art Arrangements
One or two layered frames can turn a small wall blemish into a deliberate design feature, so plan your arrangement to both hide the damage and add depth.
You’ll use layered textures and artistic layering to mask holes while creating focal interest. Mix frame sizes, matting, and varied artwork, overlap edges slightly, and anchor pieces to an unseen stud for secure, clean coverage.
Wall Mirrors and Decorative Plates for Concealment
When a small hole interrupts your wall, hanging a mirror or a cluster of decorative plates quickly transforms the spot into intentional decor while hiding the damage; choose sizes and shapes that overlap the damaged area and balance the surrounding composition.
Turn a tiny wall flaw into intentional decor: layer mirrors or plates to conceal damage and elevate the composition.
Use mirror placement and plate selection for decorative layering, boosting wall aesthetics with reflective surfaces, artistic concealment, and functional decor.
- surprise
- warmth
- joy
- elegance
- comfort
Decorative Wall Decals and Stickers as Covers
You can hide small holes instantly with decorative wall decals and stickers that mask damage while adding style.
They’re peel-and-stick, so you’ll just press them over the spot and smooth out any bubbles.
Pick a design and size that fully covers the hole and matches your room’s look.
Instant Decorative Concealment
Although small holes can be annoying, decorative wall decals and stickers let you hide them instantly while adding style to the room.
You can mix decals with decorative fabrics or small wall art to create focal points that distract from damage. Choose designs that match mood and scale.
- playful motifs
- elegant florals
- bold graphics
- subtle textures
- themed scenes
Peel-and-Stick Options
Peel-and-stick decals offer a fast, low-effort way to hide small holes while updating your room’s look. You can use wall decals, decorative stickers, adhesive patches or peel and stick tiles as temporary coverings.
Combine removable wallpaper, self adhesive fabric or vinyl wraps to add surface textures. Pay attention to color coordination so patches blend with decor and you can remove them later without damage.
Command Hooks and Strips to Hide Holes
When you want a quick, damage-free fix for small holes, Command hooks and strips work well by covering the spot and providing a usable hook or hanging point.
You’ll use adhesive strips as functional covers that blend with wall decor, offering decorative solutions and temporary fixes.
Choose styles that match your room and remove cleanly when you’re ready.
- relief
- pride
- simplicity
- creativity
- calm
Shelves, Small Cabinets, and Floating Storage Tricks
Command hooks and strips are great for quick fixes, but if you want a more permanent way to hide holes and add storage, shelves, small cabinets, and floating solutions give you function and style.
You can use shelf styling and cabinet organization to conceal damage, combine floating decor with wall art and decorative accents, and create storage solutions that prioritize functional beauty and clever space optimization.
Fabric Hangings and Tapestries to Disguise Damage
If your wall has a cluster of small holes or a larger patch you’d rather not repaint, fabric hangings and tapestries offer an instant, stylish solution that hides damage while adding texture and color.
You can use varied fabric types and textile choices to create artistic textures, fabric layering, color contrasts, and design synergy that boost wall aesthetics and visual appeal.
- cozy warmth
- bold drama
- serene calm
- playful whimsy
- refined elegance
Cork and Bulletin Boards for Functional Coverage
You can pick cork boards in sizes that exactly cover the hole or create a multi-panel display for a larger area.
Mount them with picture-hanging hardware or heavy-duty adhesive strips depending on wall type and weight, and you can stagger edges for a cleaner look.
Use colorful or themed pins in patterns or grids to make the board both decorative and organized.
Cork Board Size Options
Several cork board sizes will suit different hole-covering needs, so pick one that matches both the damaged area and how you want to use the space.
Choose by Cork board sizes, Cork board colors, Cork board textures, Cork board styles, Cork board uses to fit mood and function.
Consider Cork board installation, Cork board durability, Cork board maintenance, Cork board aesthetics, Cork board accessories.
- Comforting
- Playful
- Practical
- Inspiring
- Calm
Mounting And Adhesives
After picking the right cork board size and style, you’ll want to think about how it actually sticks to the wall—proper mounting keeps the board functional and hides the damage neatly.
Choose adhesive types like command strips for lightweight boards, heavy-duty Velcro for thicker cork, or construction adhesive for permanent fixes.
Use mounting techniques that align, level, and distribute weight to prevent sagging.
Decorative Pin Arrangements
While arranging pins on your cork or bulletin board, think both about pattern and purpose so each cluster hides imperfections and stays useful.
Mix functional groupings—like calendar pins, photo corners, and note tacks—with decorative runs of color or shape to create coverage that looks intentional rather than patchwork.
You’ll use decorative pins for wall aesthetics, creative arrangements, artistic displays, visual balance, texture contrasts, color coordination, functional decor.
- Warm nostalgia
- Crisp order
- Playful whimsy
- Cozy texture
- Subtle drama
Switch Plates, Outlet Covers, and Larger Openings
Electrical fixtures are among the easiest ways to tidy up holes in your walls: swap out chipped switch plates and outlet covers or install oversized trim pieces to mask irregular openings and uneven drywall patches.
You can explore switch plate designs and outlet cover styles, use decorative patch options or wall art solutions for temporary fixes, and employ creative concealment, design integration, functional decor, aesthetic masking, and innovative coverings.
Magnetic Covers and Snap-On Plates for Metal Boxes
If your outlet covers or trim don’t fit metal electrical boxes neatly, magnetic covers and snap-on plates offer a fast, tool-free fix that looks clean and professional.
You’ll get easy installation, removable solutions, and improved wall aesthetics for DIY repairs. Choose decorative options to match décor, then enjoy a tidy result without repainting.
Enjoy easy, removable installation and decorative finishes for a tidy, repaint-free DIY wall upgrade
- Relief
- Confidence
- Satisfaction
- Pride
- Calm
Baseboard and Trim Tricks for Edge Damage
When trim edges get nicked or the baseboard takes a hit from furniture, you can fix the damage quickly with a few simple tricks that keep the line clean and the room looking finished.
For baseboard repair, use wood filler and fine sandpaper for seamless edge touch ups. Reserve trim replacement for severe cases, and install corner guards to aid damage prevention.
Use Furniture Placement to Hide Lower Wall Damage
Beyond patching trim and baseboards, you can also mask lower wall blemishes simply by rearranging furniture.
Beyond repairs, cleverly placed furniture and décor can disguise lower wall blemishes and shift focus elsewhere.
You’ll redirect attention with smart furniture arrangement and tasteful decorative elements, making damage disappear from sight and stress fade.
- Cozy sofa angled to conceal
- Tall plant adding life and height
- Console table hiding scuffs
- Rug drawing eye downward
- Art layered over flaw
How to Hide Cables and Cords Without Cutting Walls
You can hide cords without cutting into walls by running them through paintable cord covers that blend with your trim.
Tuck excess cable behind or under furniture like media consoles and bookshelves to keep lines out of sight.
These simple fixes keep walls intact while making the room look tidy.
Use Cord Covers
Cord covers give you a quick, noninvasive way to hide cables along walls and baseboards without cutting into drywall.
You’ll appreciate cord cover benefits: neatness, safety, and easy cord cover installation. Choose paintable or matching strips, measure carefully, and snap on.
You’ll feel relief seeing a tidy room.
- Calm
- Pride
- Safety
- Satisfaction
- Ease
Conceal With Furniture
When space allows, tuck cables behind and under furniture so they stay out of sight without any drilling or tools.
You can route cords along baseboards, clip them under a console, or bundle them behind a TV stand.
Smart furniture placement hides mess and supports decor layering—stack books or baskets to disguise power strips.
This keeps walls intact and rooms tidy without cutting or painting.
Tools You Actually Need for No-Paint Repairs
Start with a small, reliable kit: a putty knife, lightweight spackle or wood filler, fine-grit sandpaper, and a damp sponge will handle most no-paint repairs.
Start with a simple kit — putty knife, spackle, fine sandpaper, and a damp sponge for easy no-paint fixes.
You’ll want tool essentials and clear repair techniques, material options, quick fixes, DIY methods, cost considerations, project planning, surface preparation, safety measures, and rental tips.
- Relief
- Confidence
- Pride
- Calm
- Control
Best Products for Temporary Hole Concealment
If you need a quick, temporary fix that looks tidy, choose products designed for short-term concealment—adhesive wall patches, removable putty, and magnetic covers are reliable options that you can apply and remove without repainting.
You’ll find peel-and-stick fabric patches, command-style hooks with decorative plates, and soft putty tabs ideal for temporary wall coverings and creative concealment ideas that keep repairs invisible.
Eco-Friendly and Low‑VOC Repair Options
Because you’re likely sensitive to indoor air quality, choose low‑VOC spackles, water‑based primers, and natural fiber patches for hole repairs; they cut odors and chemical exposure while performing like conventional products.
If indoor air matters to you, use low‑VOC spackles, water‑based primers, and natural fiber patches—less odor, same performance.
You can pick eco friendly materials and low VOC options that heal walls and soothe your home.
- Safer for kids
- Minimal smell
- Quick cure
- Durable finish
- Cleaner conscience
Cost Comparison: Cover Without Painting vs. Repaint
After choosing low‑VOC materials for a cleaner repair, you’ll want to weigh whether to simply cover the patched area or repaint the whole wall—each approach has different costs and benefits. You’ll compare immediate expense, long‑term value, and aesthetic payoff based on material choices and cost benefits.
| Option | Upfront | Long‑term |
|---|---|---|
| Cover only | Low | Moderate |
| Repaint | Moderate | High |
| Blend/Touch‑up | Low–Mod | Moderate |
Time Estimates: Quick Fixes vs. Durable Repairs
When you’re choosing between a quick fix and a durable repair, consider how much time each step actually takes and how often you’ll need to revisit the work.
Weigh the minutes now against returns later—choose repairs by time, frequency, and lasting value.
You’ll weigh quick fixes against durable repairs by balancing time management, material selection, repair techniques, surface preparation, aesthetic considerations, cost effectiveness, temporary solutions, and long term strategies.
- Relief
- Frustration
- Confidence
- Anxiety
- Satisfaction
Rental-Friendly Options Landlords Will Accept
If you want repairs your landlord will accept, choose methods that leave the wall looking original and are easily reversible; simple spackle for small nail holes, removable adhesive patches for picture hooks, and paint-matched touch-ups for larger but shallow repairs usually meet lease standards.
| Method | Benefit |
|---|---|
| Spackle | compliance standards, patch aesthetics |
| Adhesive patches | non invasive methods, temporary solutions |
| Paint touch-up | wall materials, landlord approval |
| Consultation | damage assessment, repair guidelines |
| Rights note | rental restrictions, tenant rights |
Renters’ Checklist: Documenting and Reversing Fixes
Wondering how to make sure your temporary fixes won’t cost you at move-out? You should follow clear documentation tips and repair guidelines to protect tenant rights and meet maintenance obligations.
Keep photo records, log damage assessment details, and plan fix reversal steps. Communicate promptly with your landlord.
- Take dated photos
- Note materials used
- Save receipts
- Request written approval
- Schedule final inspection
Common Mistakes That Make Repairs More Visible
Although a quick patch might seem fine now, common mistakes can make repairs stick out and draw attention at move-out. You’ll overfill holes, skip sanding, or ignore texture mismatches.
Don’t use mismatched materials or visible tape, and avoid common repair misconceptions like “more compound hides everything.”
Learn simple visibility avoidance techniques: feather edges, match texture, and clean surfaces before patching for discreet results.
How to Test Concealments Before Guests or Inspections
Before guests arrive or an inspection happens, you should do a quick visual inspection under the room’s typical lighting to spot any mismatched texture or sheen.
Run your hand over the repair to check for firmness and that there’s no wobble or soft spots.
Finally, step back and take a photo from across the room (or use your phone at arm’s length) to see how the patch reads from a normal viewing distance.
Visual Inspection Under Lighting
Lighting tells you what guests will actually see, so test your patchwork under the same conditions it’ll be viewed: turn on overhead fixtures, aim a flashlight from different angles, and check at eye level and from across the room.
Use lighting techniques during a careful wall inspection to catch shadows, texture mismatches, or shine.
- Relief
- Relief
- Relief
- Relief
- Relief
Touch And Stability Check
Feel the repair with a gentle press and a few nudges to confirm it’s flush, firm, and free of hollow spots that could crumble later; a solid patch shouldn’t flex, crack, or move when you apply light pressure or run your fingertips across it.
For a quick stability assessment, repeat in different spots, note any give, and use a focused touch evaluation to decide if further reinforcement is needed.
Photo Test From Distance
You’ve already checked the patch by touch; now step back and take a photo from a few feet away to see how it reads at a normal viewing distance.
Use different photo angles to judge distance perception and lighting. Compare shots, then adjust filler or texture.
- Relief or worry
- Confidence restored
- Minor imperfection spotted
- Pride in fix
- Ready for guests
Maintenance Tips to Keep Concealed Repairs Looking Good
Keeping concealed repairs looking seamless over time means committing to a few simple checks and quick touch-ups you can do every few months.
You’ll inspect seams, dust edges, and tighten anchors, using maintenance techniques that preserve repair aesthetics.
Apply gentle cleaning compatible with wall finishes, retouch filler or adhesive as needed, and refine concealment strategies to prevent visible wear without repainting.
Preventing New Holes When Hanging Items
1 simple habit can cut down on new holes: plan before you drill. Use measured placement, proper anchors, and templates so you won’t guess.
These hole prevention tips and hanging techniques help you avoid repeat repairs and frustration.
- Picture-perfect alignment
- Confidence with anchors
- Pride in tidy walls
- Relief from fewer fixes
- Joy in finished displays
Safety Tips When Repairing Holes in Walls
Planning before you drill reduces mistakes, but when you do repair a hole you’ll want to work safely. Wear safety gear, use ventilation techniques, and apply dust protection. Prioritize injury prevention with tool safety, chemical awareness, and workspace organization. Cover floors with protective coverings and keep tools tidy.
| Tip | Action |
|---|---|
| PPE | Wear gloves, goggles |
| Ventilation | Open windows, fans |
| Dust | Use mask, vacuum |
| Tools | Inspect, unplug when not in use |
How to Match Repair Materials to Wall Color Without Paint
Although you’re not painting, you can still make patched areas blend by choosing repair materials that match your wall’s color and finish.
Assess the surface, compare tones in natural light, and pick a filler or compound whose base color and sheen will disappear once sanded and sealed.
Use color matching techniques and texture blending methods to finish.
- Relief
- Confidence
- Pride
- Calm
- Satisfaction
Stain and Smudge Removal Before Concealing Holes
Before you patch a hole, you should prep the surface by cleaning away dust and loose debris so filler will adhere properly.
Treat stains and smudges with an appropriate cleaner—grease needs a degreaser, while water stains may need a mild bleach solution—until the mark is gone.
If a stain bleeds through after drying, address it again before you conceal the repair.
Prep Surface First
If you want a seamless repair, clean the area around the hole first so compound and paint adhere properly.
You’ll do surface cleaning, a quick damage assessment, and gentle sanding to guarantee good contact.
Then dry and dust off before patching.
- Frustration eased
- Confidence restored
- Pride in results
- Calm control
- Satisfaction guaranteed
Remove Stains Thoroughly
Once the surface is clean and sanded, tackle any stains or smudges so they don’t bleed through patching and paint.
Use mild detergent, trisodium phosphate, or a commercial stain remover depending on the mark. Test a small area first. Rinse, dry, and repeat as needed.
These stain removal techniques are essential surface preparation tips to guarantee patches adhere and finish cleanly.
When to Call a Pro Instead of DIYing
When a hole in your wall threatens structural integrity, involves plumbing or electrical systems, or keeps getting worse despite your repairs, call a professional—these situations need trained assessment and tools you likely don’t have.
You should weigh professional assessment, cost implications, damage evaluation, project scope, rental agreements, skill level, time constraints, and material options.
- Fear of escalation
- Lease penalties
- Hidden hazards
- Overwhelmed DIYer
- Urgent deadlines
Quick Decision Flowchart: Pick the Best No‑Paint Fix
Wondering which no‑paint patch will work best for that hole in your wall? Use a simple flowchart: assess hole size, wall material, and visibility needs.
For tiny nail holes pick spackle strips; for medium drywall use adhesive patches; for large damage, consider a removable wall plate.
This decision making strategies approach pairs with clear visual aids so you’ll act fast and confidently.
Frequently Asked Questions
Can I Cover Holes Without Altering Wall Warranty or Insurance Coverage?
Yes — you can often cover holes without voiding wall warranty implications or altering insurance coverage details, but you’ll want to check your specific warranty and policy, document repairs, and use noninvasive, reversible methods to be safe.
Will These No-Paint Fixes Work on Exterior Walls?
Yes — they’ll work on many surfaces: like vinyl resisting rain, like stucco shrugging wind. You’ll check exterior wall materials, choose weather-resistant patches or sealants, test adhesion, and maintain seals to prevent leaks and deterioration.
How Do I Remove Temporary Covers Without Damage Later?
You’ll remove temporary cover techniques cleanly by peeling slowly, supporting the wall, and using adhesive removal tips like warm soapy water, rubbing alcohol, or a citrus-based remover; test first, use a plastic scraper, and avoid harsh scraping.
Can Pets or Kids Disturb Adhesive Patches Over Time?
Like loose wallpaper, adhesive patches can peel if pets or kids poke them; you’ll see pet behavior and adhesive durability clash. Choose heavy-duty patches, secure edges, and check often so playful hands or paws don’t undo fixes.
Are Any Concealment Methods Flame- or Heat-Resistant?
Yes — you can choose fireproof materials and heat resistant options like cement patch, plaster, metal plates, or ceramic tiles; you’ll avoid flammable adhesives and guarantee safe, durable concealment near heat sources or appliances.
Conclusion
So you’ve learned clever hacks to hide holes without breaking out paint—because who needs brushes when you’ve got putty, adhesive strips, and a generous supply of wall art? Depending on hole size, time, and rental rules, you’ll pick a fix that’s quick, cheap, and just tidy enough to fool guests. If it’s bigger than your patience, call a pro. Ironically, these “no‑paint” solutions often look so neat, you might miss the original imperfection.
