
How to Fix a Bad Paint Job on Walls Step by Step
Inspect the wall to pinpoint issues like drips, peeling, stains, or uneven sheen, then decide if spot repairs or a full repaint’s needed. Clean, sand, and remove loose paint, fill holes, and treat mold or water stains. Prime repaired areas for adhesion, apply thin even coats with proper brushes or rollers, feather edges to blend, and sand between coats for smoothness. Follow moisture control and quality paint choices for lasting results — keep going to learn step-by-step techniques and tips.
Identify the Main Problem With Your Paint Job
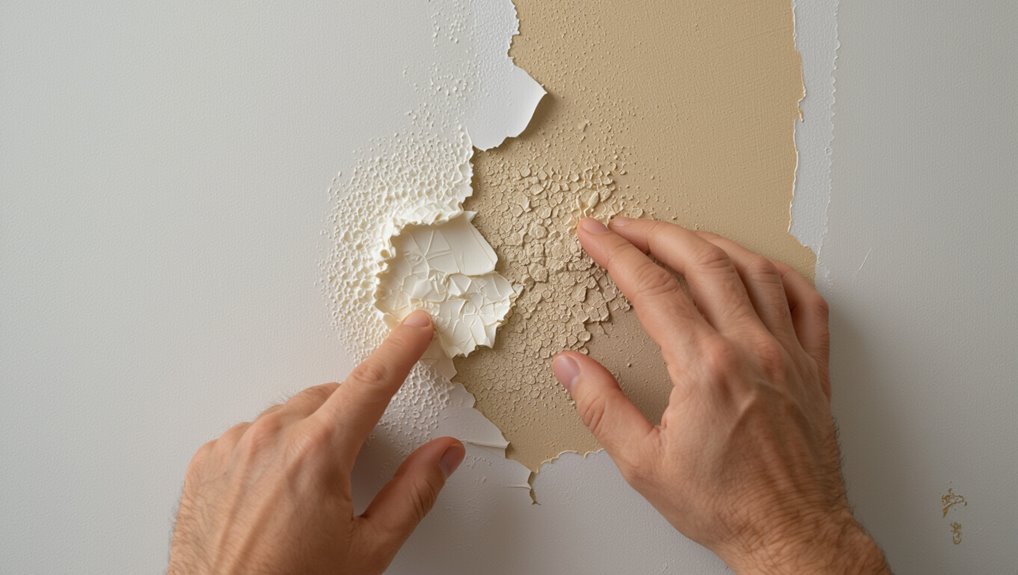
What’s gone wrong with the paint job? You inspect the surface, noting poor paint application, drips, and uneven sheen.
Check for underlying wall imperfections—cracks, bumps, or peeling—that caused flaws.
You’ll test adhesion and look for missed spots under different light angles.
Once you pinpoint the primary defect, you’ll choose the right prep steps and materials to correct it efficiently.
Quick Fixes to Fix a Bad Paint Job Fast
Start with quick surface prep to remove dust and grease so paint will stick.
Do spot sanding repairs on bumps or drips to create a smooth area for touch-ups.
Finish with fast touch-up techniques—feathering, small brushes, and light coats—to blend fixes with the surrounding finish.
Quick Surface Prep
Assess the trouble spots quickly and you can fix most bad paint jobs without a full repaint.
Use quick cleaning methods—damp microfiber, mild detergent, and a gentle scrub—to remove dirt, grease, and loose paint.
Gather essential tools: putty knife, spackling, small roller, brush, and tack cloth.
Spot-treat stains, smooth edges, and let surfaces dry before touching up.
Spot Sanding Repairs
Once the surface is clean and dry, tackle small imperfections with spot sanding to blend edges and prepare for touch-up paint.
You’ll use spot sanding techniques and effective sanding tools to feather edges without over-sanding. Follow these quick steps:
- Lightly sand raised drips with fine-grit.
- Smooth rough patches in circular motions.
- Wipe dust, inspect, repeat as needed.
Fast Touch-Up Techniques
Grab a small angled brush and your matched paint, because fast touch-ups are all about targeted fixes that blend in without redoing the whole wall.
Use quick brush techniques for edges and chips, feathering strokes outward. For larger spots, employ effective roller methods with a mini roller, light pressure, and overlapping passes.
Dry, inspect, and repeat tiny adjustments until seamless.
Repair vs. Repaint: How to Decide
How do you decide whether to repair problem areas or just repaint the whole surface? You weigh paint quality, extent of damage, and cost analysis to choose efficiently.
Consider:
- Small chips/cracks — repair and touch up.
- Widespread peeling or uneven color — full repaint.
- Structural/moisture issues — fix underlying problem before any paint.
Check Paint Type and Finish First
Before you scrape or sand, check what paint type and finish you’re working with so you match products and prep correctly.
Identify whether it’s latex or oil-based—use a solvent test if unsure.
Note sheen: flat, eggshell, satin, semi-gloss or gloss.
Matching paint type and finish options guarantees adhesion, uniform appearance, and proper sanding or priming choices before you proceed.
Gather the Tools and Materials You Need
Now that you know the paint type and sheen, gather the right tools and materials so the repair goes smoothly.
Now that you’ve identified the paint type and sheen, gather the correct tools and materials for a smooth repair.
You’ll need paint tools and essential materials for preparation techniques and repair techniques, plus safety gear. Consider paint types, wall textures, and color matching when choosing supplies.
- Brushes, rollers, trays
- Sandpaper, spackle, primer
- Masking tape, rags, respirator
Protect the Room, Floors, and Furniture
Start by clearing as much furniture as you can from the room and covering anything that stays with drop cloths or plastic sheeting; tape the coverings down so they won’t shift while you work.
Use paint protection methods like taped edges, plastic wrap for trim, and floor paper.
Employ furniture covering techniques—secure fitted sheets or moving blankets—to prevent drips, dust, and scuffs.
Test a Small Area Before You Start
Before you start repainting, test a small, inconspicuous area to check the old paint’s adhesion and see if it flakes or peels.
Use a color sample or swatch to confirm the new paint matches under your room’s lighting.
If the patch holds and the color looks right, you can proceed with confidence.
Check Paint Adhesion
One quick way to save time and avoid surprises is to test paint adhesion on a small, inconspicuous spot first. You’ll confirm bonds before committing.
Use simple paint adhesion techniques and quick testing adhesion methods:
- Press tape, pull sharply.
- Scratch with a coin.
- Apply a damp cloth, rub.
If paint peels, strip and prime before repainting.
Match Color Sample
A tiny swatch can save you a lot of frustration: test the color on a small, inconspicuous area to make sure it matches under the room’s light and over the existing finish.
You’ll compare tones at different times, use color matching techniques like side-by-side samples, and try blending strategies by feathering edges.
Approve the sample before committing to full repainting.
Remove Loose Paint, Dust, and Grease
Because loose paint, dust, and grease will keep new coatings from sticking, you need to remove them thoroughly before you start repainting.
Use paint scraping, surface cleaning, and grease removal with proper prep tools.
Follow these steps:
- Scrape loose paint, then sand edges.
- Wipe for dust elimination with a tack cloth.
- Degrease, rinse, dry, and consider primer application before painting.
Fix Peeling and Flaking Paint
First check how far the peeling and flaking go so you know whether you’re dealing with a small patch or a larger problem.
Then scrape and sand back to sound paint and clean the area so repairs will bond properly.
Fill cracks or gouges, prime bare spots, and only repaint when the surface is dry and stable.
Assess Damage Extent
Start by inspecting the surface for scale and pattern of peeling and flaking paint so you know how much work you’ll need to do.
Do a damage assessment and wall inspection noting paint condition, moisture issues, texture evaluation, and color uniformity.
List visible problems:
- Localized bubbles or lifting
- Widespread flaking
- Discoloration or damp spots
Prep And Repair Surface
Remove loose paint and address the root cause before you repaint: scrape or use a wire brush to knock off all flaking areas, sand edges smooth, and then clean the surface of dust, grease, and mildew so new coatings will adhere.
After surface cleaning, prime bare spots and fill cracks or gouges. Let primer cure fully to guarantee proper paint adhesion, then finish with your topcoat.
Fill Holes and Dents in Painted Walls
Patch dents and holes carefully so your repaired wall looks seamless under the paint.
You’ll start with wall cleaning, then use hole fillers for dent repairs and follow repair techniques that guarantee paint adhesion.
Match paint and focus on color blending and texture matching. Keep surface smoothing controlled.
- Clean
- Fill
- Match
Sand Patches and Feather Edges Smooth
Once the filler’s cured and you’ve matched the paint, sand the patched area so it blends with the surrounding wall.
Use progressive sanding techniques—start with medium grit, finish with fine—to remove ridges. Feather edges outward gently to avoid noticeable changes.
Start with medium grit, finish with fine; feather edges outward to remove ridges and avoid noticeable transitions.
Clean dust, inspect under raking light, and repeat light sanding if needed.
These smoothing methods guarantee seamless touch-ups before repainting.
Treat Water Stains and Mold Spots
If water stains or mold spots are visible, treat them before repainting so the blemishes don’t reappear through fresh paint.
You’ll handle water stain removal and mold treatment carefully:
- Clean mold with a mildew cleaner or diluted bleach, scrub, and rinse.
- Let area fully dry; fix leaks causing stains.
- Sand lightly, then spot-treat stains with a stain-blocking solution before painting.
Prime Repaired Areas for Adhesion
Before you prime, clean the repaired area thoroughly so dirt and oils won’t block adhesion.
Pick a primer suited to the patch material and the topcoat you’re using.
Feather the primer smoothly into surrounding paint so the final coat goes on even.
Surface Cleaning First
Start by thoroughly cleaning the repaired areas so primer can bond properly to the surface.
Use surface preparation techniques to remove dust, grease, and loose particles.
Compare cleaning products comparison for best results.
Follow these steps:
- Wipe with degreaser and rinse.
- Lightly sand and vacuum residue.
- Wipe with tack cloth and let dry thoroughly before priming.
Use Proper Primer
Now that the surface is clean and dry, choose a primer that matches the repair type and topcoat—latex-based primers work well for drywall and wood, while epoxy or etch primers suit metal and heavily damaged areas. You’ll select primer types, spot-prime repairs, and follow proper primer application. Use thin, even coats and allow recommended drying time.
| Area | Primer | Notes |
|---|---|---|
| Drywall | Latex | Quick-dry |
| Wood | Latex | Sand lightly |
| Metal | Epoxy/Etch | Rust prevention |
Feather Edges Smoothly
When you sand a repair down to a feathered edge, blend it so changes are imperceptible and the primer can bond evenly; feathering lets primer cover thin edges without buildup, preventing lap marks and visible ridges after the topcoat.
Use precise feathering techniques and blending methods to prep; then:
- Sand progressively finer.
- Clean dust thoroughly.
- Spot-prime thinly.
Match Color: Tips for Blending Old and New Paint
1 key to hiding a repair is matching the old color so your touch-up blends seamlessly with the surrounding surface.
You’ll use color blending techniques and paint mixing tips: sample the wall, compare in different light, create small test mixes, and adjust hue, value, and saturation.
Match sheen, thin coats, and reassess after drying to guarantee the repair disappears into the wall.
Feather Touch-Ups to Hide Repairs
After you’ve matched color and sheen, feathering lets you blend the repair edges so they disappear into the surrounding paint.
Use feather blending and careful touch up techniques to avoid hard edges. Follow steps:
- Load a small brush with thin paint.
- Lightly drag outward from the repair.
- Dab excess and soften with a dry brush until seamless.
Remove Brush Marks and Visible Strokes
Start by sanding and smoothing any ridges or drips so the surface feels even.
Feather the paint edges to blend the fixed areas into the surrounding finish.
Then recoat using long, consistent strokes and proper brush or roller technique to eliminate visible marks.
Sand And Smooth Imperfections
Feel for ridges and run a bright light along the surface to spot brush marks and visible strokes.
Then sand them down with a fine-grit paper to blend the paint into a smooth, even finish.
Use proper sanding techniques and smoothing methods to avoid over-sanding.
- Light sanding
- Clean dust
- Inspect under light
Feather Paint Edges
When you notice brush marks or visible strokes at a painted edge, blend them by feathering—the technique of thinning the paint outwards so the edge fades smoothly into the surrounding surface.
Use a slightly damp brush or dry-brush flicks to soften ridges, employing paint blending techniques and edge smoothing methods.
Work small, lift pressure, and overlap strokes until shifts disappear.
Recoat With Proper Technique
Once you’ve softened the edges by feathering, it’s time to recoat using techniques that eliminate brush marks and visible strokes.
You’ll use proper rolling, refined brush techniques, paint layering and attention to drying times for color blending and texture matching.
Follow:
- Roll full coats, then back-roll edges.
- Light cross-hatch brush pass.
- Inspect sheen for finish selection and do tool maintenance.
Smooth Roller Stipple and Texture Issues
Roller stipple and uneven texture usually show up after the paint dries, but you can fix them without stripping the whole surface. Assess surface, sand light peaks, use thin skim coat or glazing, then re-roll with correct roller technique and cross-hatch strokes for texture blending. Feather edges, allow proper drying, and inspect for uniform finish.
| Step | Tool | Outcome |
|---|---|---|
| Sand | Sandpaper | Smooth peaks |
| Skim | Joint compound | Even surface |
| Re-roll | Roller | Uniform texture |
Fix Drips, Runs, and Sagging Paint
After you’ve smoothed texture issues, you’ll still sometimes spot drips, runs, or sagging paint that mar the finish.
After smoothing texture, quickly fix drips, runs, or sags to restore a flat, even paint finish.
You tackle them quickly using drip removal techniques, run correction methods, and sagging paint solutions to restore flat, even walls.
- Sand and feather edges.
- Scrape high beads, fill, sand.
- Recoat thinly, blend for paint texture fixes.
Correct Lap Marks and Uneven Sheen
You’ll first learn how to spot what causes lap marks—too-fast drying, inconsistent overlap, or incorrect brush/roller technique.
Then you’ll correct application errors and feather edges so new and old paint blend.
Finally, you’ll even out sheen with proper sanding and a light recoat to match the finish.
Identify Lap Mark Causes
When lap marks or uneven sheen show up, they’ll usually trace back to application problems or environmental factors you can fix; identifying the cause first will stop you from chasing cosmetic symptoms.
Use lap mark identification for targeted fixes and lap mark prevention going forward.
- Fast drying from heat or wind.
- Uneven paint load or technique.
- Old or mismatched paint sheens.
Even Out Sheen
If lap marks or patchy sheen are ruining a fresh coat, correct them by blending edges and matching the paint’s wetness so the surface reflects light consistently.
Lightly mist and back-roll problem areas, feathering into surrounding paint using sheen blending methods. Work wet-to-wet, keeping a consistent roller pressure.
Use sheen correction techniques like gentle scuffing and a thin finish coat if blending alone won’t unify the gloss.
Stop Paint Bleed Around Trim and Edges
Because paint bleeding ruins crisp lines and draws the eye to mistakes, you’ll want to tackle it before glazing or topcoats go on.
Use paint bleed prevention and trim protection strategies:
- Apply painter’s tape pressed firmly, seal edges with a dry brush.
- Use caulk or sealant where gaps show.
- Remove tape at the right time to avoid lifting paint.
Repaint Trim and Corners for a Crisp Finish
Before you start repainting, prep trim surfaces by sanding, cleaning, and filling any gaps so the new coat will stick and look smooth.
Use a brush or angled sash tool to paint clean corners and run thin, controlled strokes for sharp lines.
Take your time—steady hands and proper prep give you a crisp finish.
Prep Trim Surfaces
Tackle trim and corners next to guarantee your repaired walls look finished and sharp.
Prep trim surfaces by evaluating paint types, trim materials, and surface textures, then plan painting schedules and protective measures.
Use painting tools and repair techniques for sanding, priming, and caulking. Match color matching and paint finishes to surrounding wall treatments.
- Sand
- Prime
- Caulk
Paint Clean Corners
1 clear pass along each edge will make your trim and corners look professional and crisp, so work steadily and keep a steady brush angle as you repaint those joints.
You’ll use precise paint edge techniques and patient corner brushwork to avoid drips and overlaps. Tape only if needed, feather edges for smooth shifts, and clean excess immediately for a sharp, factory-like finish.
Best Brushes and Rollers for Touch-Ups
When you’re fixing small blemishes or smoothing out edges, choosing the right brush or roller makes the job faster and leaves a cleaner finish.
Pick best brush types like angled sash for edges, a small foam brush for spots, and a mini roller for flats.
Use roller selection based on nap: short for smooth walls, medium for slight texture, long for heavy texture.
Thin Paint Safely and Adjust Consistency
Thinning paint correctly keeps it flowing smoothly, prevents brush marks, and helps it level without losing coverage.
You’ll thin paint sparingly—add manufacturer-recommended thinner or water in small increments, mix thoroughly, and test coverage on a scrap.
Watch paint consistency: it should coat without running. If it’s too thin, let it sit to thicken or gently stir; don’t over-dilute.
Apply Thin, Even Coats Every Time
Before you start painting, make sure the surface is clean, sanded, and free of dust or loose flakes so each coat can bond properly.
Use thin, controlled passes with your brush or roller and keep the paint moving to avoid drips and lap marks.
Let each thin layer dry fully before adding the next to build an even, professional finish.
Prep Surface Properly
Start by sanding and cleaning the surface until it’s smooth and free of dust, grease, and loose paint so each coat can adhere properly.
Focus on surface preparation and moisture control to prevent paint fading.
Choose tools for wall texture repair, apply repair techniques, and plan paint layering and finish options.
- Surface cleaning
- Tool selection
- Paint adhesion
Thin Layer Technique
With the surface prepped, move on to applying thin, even coats that let each layer dry and bond properly.
You’ll use thin layer application to avoid drips and uneven texture. Maintain proper paint consistency—thin slightly if it drags, don’t over-dilute.
Roll or brush smoothly, watch edges, and allow full drying time before a second coat to guarantee a flawless, durable finish.
When to Spray vs. Brush or Roller
Deciding whether to spray, brush, or roll comes down to the surface, the finish you want, and how much prep and cleanup you’re willing to do.
You’ll weigh spray technique for speed, brush selection for edges, and roller advantages for even coverage. Consider finish types and paint application consistency.
- Spray: large, smooth
- Brush: trim, detail
- Roller: walls, texture
Drying Times and How They Affect Blending
Because paint dries at different rates depending on type, temperature, and film thickness, you’ll need to plan blending moves so edges don’t set before you can feather them together.
Check product drying times, room conditions, and work in manageable sections.
Use quick, compatible blending techniques—feathering with a damp brush or light roller back-roll—so wet edges merge smoothly without lap marks or uneven sheen.
Sanding Between Coats: Grit and Technique
Once your blended edges have set enough to hold, you’ll move on to sanding between coats to smooth imperfections and promote adhesion.
You’ll use proper sanding techniques and grit selection to avoid cutting through. Follow steps:
- Lightly sand with 220 grit for latex.
- Use 320–400 for final feathering.
- Wipe dust, tack if needed, then apply next coat.
Fix Color-Match Problems After the First Coat
If the first coat looks off, start by evaluating exactly how the color differs—tone, warmth, or saturation.
Check the paint under the room’s normal lighting and natural light, since lighting can make the same color read very differently.
If it’s still wrong, get a proper color match from a sample or your paint store before recoating.
Assess Color Difference
Now that your first coat is down, take a close look at how the color actually reads in the room — not just on the wall but next to trim, furniture, and under the lighting you’ll use most.
Assess differences with attention to color psychology and lighting considerations:
- Compare wall vs. trim
- View near furniture
- Observe at peak use time
Decide if tinting or another coat is needed.
Identify Lighting Effects
How does the lighting in your room change the way that color looks? Check at different times and with varied lighting techniques—natural, overhead, and lamps—to see shifts.
You’ll notice how warm or cool light alters color perception and reveals undertones or flaws. Record observations and photos so you can correct mismatches before repainting, avoiding surprises from inconsistent lighting.
Choose Correct Paint Match
Start by comparing the wet and dry paint side-by-side to confirm the mismatch—wet paint often looks darker and more saturated, so wait until the coat fully dries before judging color.
Then:
- Check paint color psychology to match mood and room use.
- Compare paint finish types; sheen shifts perception.
- Test small swatches under different lighting before repainting.
Working With Textured Walls and Specialty Finishes
Textured walls and specialty finishes demand a different approach than flat surfaces, so you’ll need the right tools and a careful technique to avoid ruining the effect.
You’ll focus on wall preparation, surface compatibility and texture matching before paint application.
Use appropriate specialty techniques and repair methods, plan paint layering for finish restoration, and weigh design considerations so the result blends seamlessly with the original texture.
Solve Stubborn Gloss and Sheen Mismatches
When a patch or repair doesn’t match the surrounding gloss, you’ll need to diagnose whether the problem’s caused by surface prep, incompatible paint types, or application technique before you try cosmetic fixes.
You can resolve gloss differences with focused steps and simple sheen solutions:
- Test small areas.
- Wet-sand and dull high spots.
- Recoat with matching sheen or use a glaze to blend.
Prevent Future Paint Failures With Proper Prep
Because most paint failures trace back to poor preparation, you’ll prevent a lot of problems by getting the substrate right before you ever open a can of paint.
Inspect for dirt, grease, and loose material; sand glossy spots; repair cracks and fill holes.
Use appropriate primers and follow manufacturer prep techniques to guarantee consistent paint adhesion and long-lasting, professional-looking results.
Quick Renter-Friendly Touch-Ups and Temporary Fixes
If you’re renting and need a fast, low-impact fix, focus on small, reversible techniques that hide blemishes without altering the walls permanently.
Use renter tips, temporary solutions, budget friendly fixes and quick updates for paint maintenance and color coordination.
Try these DIY techniques after light wall preparation:
- Touch-up with matching sample paint.
- Use removable adhesive patches.
- Apply temporary wall decals.
Save Money: Tips for Professional-Looking Repairs
Save time and money by learning a few pro techniques that make repairs look seamless: pre-fill small holes, sand feathered edges, match sheen and color precisely, and use the right brushes and rollers for clean lines.
Use budget friendly techniques and resourceful tools, apply DIY repair tips with efficient painting methods, choose cost effective materials and economical color choices, and use paint mixing strategies and time saving hacks.
When to Call a Professional Painter and Final Checklist
Know when to call a pro: hire a professional painter for large-scale jobs, complex surface repairs (like water damage, extensive mildew, or crumbling plaster), tricky finishes (veneer, faux, or high-gloss work), or when you don’t have the time, tools, or steady ladder to get a safe, consistent result.
Get professional help and a paint consultation, then:
- Inspect damage.
- Confirm scope.
- Schedule work.
Frequently Asked Questions
Can I Paint Over Wallpaper Without Removing It First?
Yes — you can paint over wallpaper, but you’ll risk poor paint adhesion unless the wallpaper’s firmly attached. If you want better results, consider wallpaper removal or priming with a high-adhesion primer before painting.
How Long Should I Wait Before Washing Newly Painted Walls?
Patiently plan: prefer a 2-week waiting period before washing newly painted walls to protect paint durability. You’ll want to avoid scrubbing early; gentle wiping after a week can work, but full cleaning waits for curing.
Will Low-Voc Paint Prevent Paint Smell Completely?
No, low-VOC paint won’t prevent paint smell completely, but you’ll notice much less odor and quicker clearing. You’ll benefit from low voc benefits like reduced fumes, easier ventilation, and lower health irritation during and after painting.
Can Scented Candles or Air Purifiers Speed Paint Fume Removal?
Right off the bat: don’t count your chickens—scented candles mask odor but don’t help fume absorption; air purifiers with activated carbon boost fume absorption and reduce VOCs, while candles only provide scent masking.
How Do I Repair Nail Pops in Drywall After Repainting?
You pull the popped nail, sink a drywall screw, apply drywall patching compound, embed tape if needed, sand smooth, prime, repaint; this nail pop repair prevents recurrence and restores a seamless wall finish.
Conclusion
You’ve got the know-how to fix that bad paint job, and with the right prep and patience you’ll make the walls look like new. Tackle small flaws quickly, decide whether to repair or repaint, and use renter-friendly tricks when needed. Spend time on proper priming and sanding so mistakes don’t come back like a boomerang, and call a pro if the job’s beyond you. Follow the checklist and finish strong.
