
How to Fix Chipped Paint on the Corner of a Wall Seamlessly
You can fix chipped paint on a corner so it disappears: clean and sand away loose paint, fill the chip and rebuild the corner profile with spackling or setting-type joint compound in thin layers, sand and shape smooth, then prime the repair. Match the paint sheen and apply thin, feathered coats, blending outward for an invisible edge. Seal hairline gaps with paintable caulk and let each layer dry; keep going and you’ll find tips for matching, protection, and long-lasting results.
Quick Answer Fix Chipped Paint on a Corner Seamlessly
You can fix a chipped corner quickly with a few focused steps.
Sand the damaged area smooth, apply a thin layer of spackling or filler, then sand again and touch up with matching paint.
Let each layer dry and feather the edges so the repair blends seamlessly.
Short step-by-step summary for a fast fix
Grab a putty knife and a small brush—this quick, tidy method gets a chipped corner looking seamless in under 30 minutes.
You’ll follow simple steps for how to fix chipped paint on corner of wall and restore the edge cleanly.
- Scrape and sand loose paint.
- Fill, smooth, and let dry.
- Prime, paint, and blend edges.
Basic Understanding What Causes Chipped Paint on Corners
You’ll usually find corner chips caused by knocks or bumps, moisture intrusion, poor surface prep, or natural movement in joints.
Pay attention to how corner seams and trim are built, because gaps, loose joints, or incompatible materials make paint less likely to stick.
Understanding those causes helps you choose the right repair and prevention steps.
Common causes (impact, moisture, poor prep, joint movement)
Although corners look sturdy, they’re actually prime spots for paint to chip because they face repeated impacts, moisture exposure, poor surface prep, and small shifts where joints meet.
You can spot and address these causes quickly to prevent repeats.
- Impact: knocks and furniture bumps weaken paint.
- Moisture: humidity and leaks lift coatings.
- Poor prep/joint movement: bad bonding and tiny shifts cause flakes.
How corner seams and trim construction affect paint adhesion
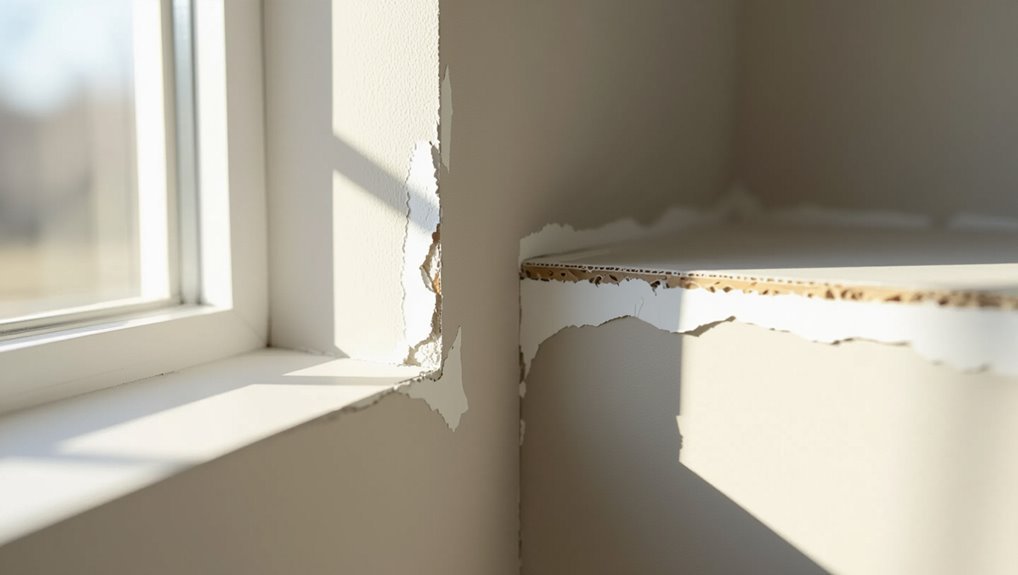
Corners take a lot of abuse, but the way seams and trim are built plays a big role in whether paint will stick or chip.
If seams aren’t taped or mudded flush, or trim isn’t nailed and caulked tightly, edges flex and paint loses bond.
You should inspect joint alignment, fastener spacing, and use flexible caulk plus proper primer to improve adhesion.
Tools and Materials You Need
You’ll want a few essential tools on hand: a scraper, sandpaper, a putty knife, a corner trowel, and a brush or roller.
Grab recommended materials too—spackling compound, caulk, primer, matching paint, and edge tape—to make clean, lasting repairs.
With the right kit, you’ll save time and get professional-looking results.
Essential tools (scraper, sandpaper, putty knife, corner trowel, brush/roller)
Tools make the job faster and neater, so gather a sturdy scraper, medium- and fine-grit sandpaper, a flexible putty knife, a corner trowel for tight joins, and a brush or roller suited to your paint finish.
You’ll use each tool to prep edges, smooth repair compound, and apply paint evenly. Pick comfortable grips and sizes that fit the corner.
- Scraper/knife
- Sandpaper set
- Corner trowel/brush
Recommended materials (spackling compound, caulk, primer, matching paint, edge tape)
Grab a few key materials before you start: spackling compound for filling chips, paintable caulk for hairline gaps, a primer to seal repairs, matching paint for a seamless finish, and edge tape to protect surrounding areas.
You’ll also want a putty knife and fine sandpaper. Pick paint that matches sheen and color, and use primer on bare spots.
- Choose quality materials
- Match sheen precisely
- Protect adjacent surfaces
Preparation Assessing Damage and Preparing the Surface
Start by inspecting the chip to see how deep it is, what substrate you’re dealing with (drywall, plaster, or wood), and whether the seam or corner bead is involved.
Gently remove any loose paint and dirt with a scraper and wire brush, then wipe the area clean so patches will adhere.
If trim or corner bead is damaged or the chip exposes framing, remove or replace those pieces; for minor surface chips you can usually repair without full removal.
Inspecting the chip: depth, substrate, and seam type
Before you patch, carefully inspect the chip to determine how deep it goes, what material lies beneath the paint, and whether any seams or joints are involved.
Check for underlying drywall, plaster, or wood; note seam type (butt, taped, or caulked); and assess if damage reaches joint compound or substrate.
- Depth
- Substrate
- Seam type
Safe removal of loose paint and cleaning the area
Now that you know the chip’s depth, substrate, and seam type, take steps to remove any loose paint and clean the area so repairs will stick.
You’ll work carefully to avoid widening damage, then prep for patching.
- Scrape flaky paint with a putty knife.
- Lightly sand feathered edges.
- Wipe with damp cloth and mild detergent, then dry.
When to remove trim or replace corner bead vs. simple repair
If the chip runs into trim or a corner bead, decide whether you can repair around it or need to remove and replace hardware. Small nicks and shallow chips usually call for simple filling and sanding, but deep damage, rusted or loose corner bead, or trim that’s warped or nailed through the damaged area means you’ll get a cleaner, longer-lasting result by taking the trim or bead off and reinstalling it.
- Repair: minor chips, stable bead.
- Replace: rust, severe bend, loose fasteners.
- Trim removal: warped or nailed-through damage; reinstall and finish for durability.
Step-by-Step Repair Process
Start by scraping away loose paint and feathering the edges so new material bonds cleanly.
Then fill chips and rebuild any corner profile with spackling or joint compound, sand and shape for a smooth shift, and add caulk to seams for flexibility.
Finish by priming the repaired area to guarantee proper adhesion and an even sheen.
Step 1 Remove loose paint and feather edges
Scrape away any loose paint and dust so you’re working on a firm surface—use a putty knife or paint scraper held at a low angle to lift flakes.
Then sand the edges until they feather smoothly into the surrounding paint. Keep the area clean and check for stability.
- Remove flakes gently.
- Sand to blend edges.
- Vacuum or wipe residue.
Step 2 Fill chips and rebuild corner profile with spackling or joint compound
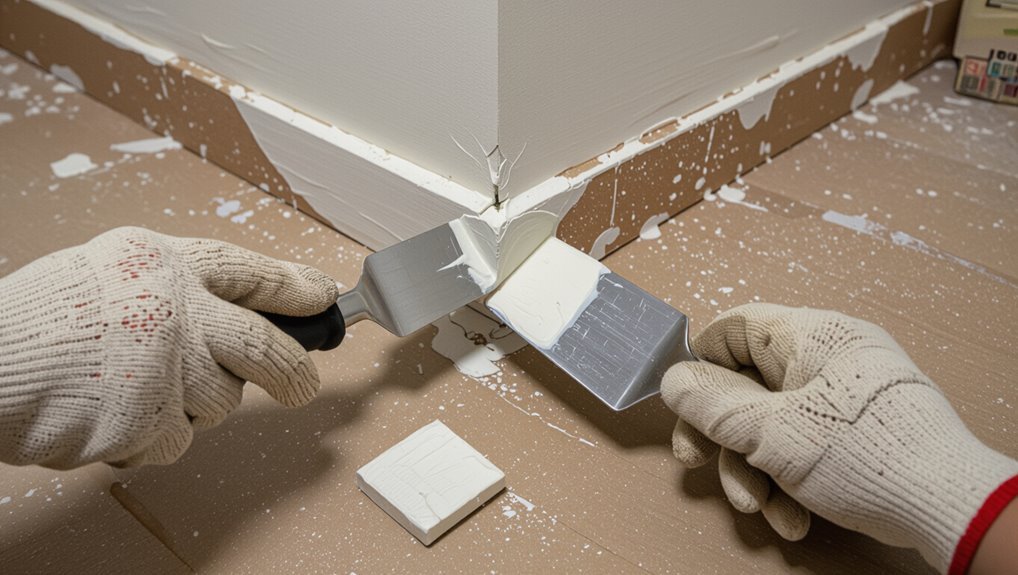
Apply spackling or joint compound to fill the chips and rebuild the corner profile, working from the smallest defects to the larger voids so each layer can set properly.
You’ll press material into gaps, smooth with a putty knife, and allow drying between passes.
- Pack small chips first.
- Build larger layers next.
- Check alignment as you go.
Step 3 Sanding and shaping the corner for a smooth transition
Once the compound’s fully dry and the corner profile looks rebuilt, you’ll move on to sanding and shaping so the repair blends with the surrounding wall.
Use a sanding block for even pressure, keep edges crisp, and check angles frequently. Finish with a fine-grit pass for paint readiness.
- Start with medium grit.
- Refine with fine grit.
- Clean dust thoroughly.
Step 4 Apply caulk or joint compound to seams and corners for flexibility
Now bring in caulk or a finishing joint compound to seal seams and corners so the repair moves with the wall and won’t crack later.
Smooth a thin bead, feather edges, and let it cure fully before sanding. Use flexible caulk where movement’s likely; compound for larger gaps.
- Apply thin bead
- Feather edges
- Cure fully before sanding
Step 5 Prime repaired area to ensure adhesion and uniform sheen
Prime the patched area to lock in the repair and give paint something consistent to stick to.
Let primer dry fully between coats, sanding lightly for smoothness. Use a stain-blocking primer if needed.
- Apply thin, even coat with brush or small roller.
- Wait manufacturer’s recommended dry time.
- Sand lightly, wipe dust, and recoat if coverage is uneven.
Step 6 Color match and paint techniques for invisible touch-up (cutting in, feathering, blending)
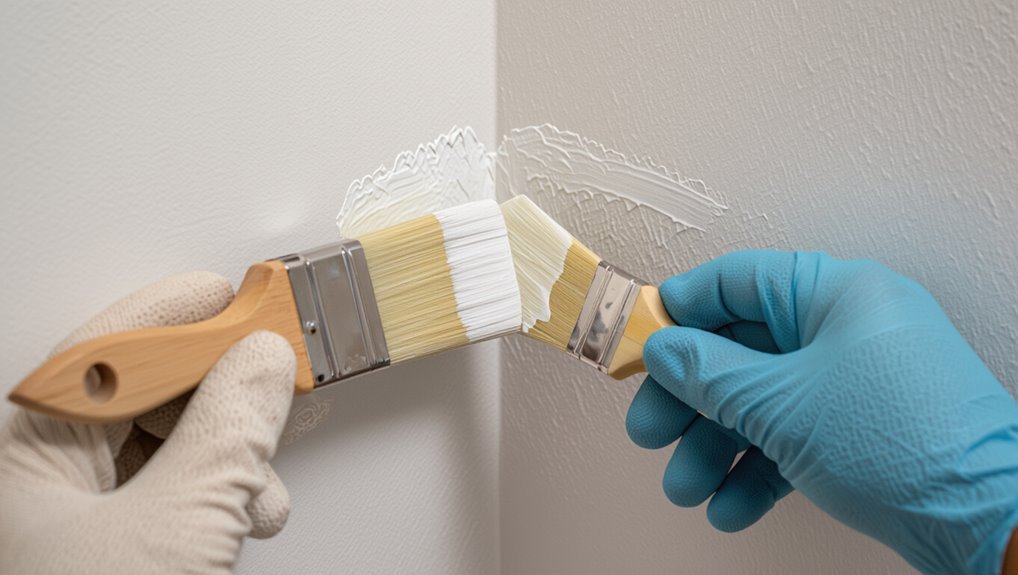
With the primer dry and smooth, it’s time to match the paint and apply techniques that make the repair disappear.
You’ll color-match by comparing paint chips under natural light and thin coats until tone aligns.
Use careful cutting-in, feather edges with a damp brush, and blend outward for seamless texture.
- Cut in precisely
- Feather edges
- Blend and thin coats
Alternative Methods and When to Use Them
You can choose quick cosmetic fixes like touch-up pens or small filler for tiny chips, or opt for professional-grade repairs such as replacing corner bead or skim-coating the entire wall for larger damage.
Consider how each method stacks up in durability, cost, and time so you pick what fits your budget and schedule.
Below we’ll compare the options and recommend when each makes sense.
Quick cosmetic fixes (touch-up pens, small filler, paint pens)
For small chips and nicks, quick cosmetic fixes like touch-up pens, tiny tubs of filler, and paint pens get your wall looking right without a full repaint.
You’ll prep, apply, and feather lightly for seamless results. Use these for minor damage, matching color carefully.
- Touch-up pens: precise, best for tiny spots.
- Small filler: fills shallow gouges.
- Paint pens: blend edges cleanly.
Professional-grade repairs (replace corner bead, skim coat entire wall)
When damage runs beyond tiny chips—like crushed corners, long gouges, or widespread texture wear, you’ll want professional-grade repairs such as replacing the corner bead or applying a skim coat to restore structural integrity and a uniform finish.
- Remove and replace bent or rusted corner bead for straight, durable edges.
- Skim coat to erase texture differences and prep for repainting.
- Hire a pro if framing or moisture damage exists.
Comparison of methods by durability, cost, and time
Depending on the scope of damage and your goals, pick a method that balances durability, cost, and time—quick spot repairs work for tiny chips, patch-and-sand approaches suit moderate gouges, and full corner-bead replacement or skim-coating is best for extensive or structural issues.
| Method | Durability | Time/Cost |
|---|---|---|
| Spot repair | Low | Fast/Low |
| Patch&sand | Medium | Moderate |
| Full repair | High | Slow/High |
Common Mistakes and How to Avoid Them
Don’t skip primer or you’ll likely see poor adhesion and flashing where the repair shows.
Be careful not to over-sand or use the wrong sheen, and always check for underlying damage before painting.
If you spot a visible seam, peeling, or texture mismatch after repair, troubleshoot by feathering edges, re-priming, or addressing the substrate.
Skipping primer, over-sanding, mismatched sheen, ignoring underlying damage
Although it might seem quicker to skip primer or rush sanding, those shortcuts often make chips look worse or reappear sooner; avoid them by prepping properly, matching sheen, and checking for hidden damage before you paint.
- Use primer on bare spots so paint adheres and hides stains.
- Sand lightly—don’t over-smooth or create depressions.
- Inspect and repair rot or loose drywall before finishing to prevent future failure.
Troubleshooting problems after repair (visible seam, paint peeling, texture mismatch)
When a repair doesn’t blend or holds up, you’ll spot it quickly—visible seams, new peeling, and texture mismatches are the most common giveaways.
- Sand seams smooth, feather edges, and reapply joint compound; prime before painting.
- Peel indicates poor adhesion—remove loose paint, clean, prime with bonding primer, then repaint.
- Match texture with the correct skim coat or spray, practice on scrap, and blend edges for an invisible finish.
Prevention and Best Practices for Durable Corners
When you’re repainting, start with proper prep—clean, sand, and use a good primer plus high-quality paint that’s rated for high-traffic areas.
Install protective corner guards or use reinforced corner bead to shield edges from knocks.
Also control humidity and drying times during application so the finish cures hard and resists chipping.
Proper prep and materials for new paint jobs
Because corners take the most wear, you should prep them carefully and pick materials designed for durability:
- Clean and sand the corner, removing loose paint and dust so new coatings bond.
- Use a high-quality primer compatible with your wall substrate to seal and level.
- Choose durable, washable paint and apply thin, even coats for proper adhesion and longevity.
Protective measures (corner guards, higher-quality paints, correct humidity during application)
Although corners naturally take hits, you can prevent most chips by combining physical protection with better materials and proper application conditions: install corner guards or molding for high-traffic areas, choose durable, washable paint formulated for impact resistance, and maintain correct humidity and temperature while priming and painting so coatings cure properly and bond tightly.
- Install guards where bumps occur.
- Use impact-resistant, washable paint.
- Paint in recommended humidity and temperature.
Tools, Materials, and Cost Checklist
You’ll want a short shopping list—putty knife, sandpaper, primer, matching paint, brushes or a small roller, and caulk if corners need sealing.
For a small spot you can finish in an hour or two and spend under $20, while larger patches or whole-wall touch-ups may take a few hours to a day and cost $50–$150 depending on materials.
I’ll walk you through which items are essential and how to estimate time and cost for your specific repair.
Quick shopping checklist for DIYers
1 simple shopping trip can save you time and frustration when fixing chipped paint—grab the right tools and materials, and you’ll be ready to patch, prime, and repaint without extra runs to the store.
- Sandpaper, patching compound, putty knife.
- Primer, matching paint, small brush or roller.
- Painter’s tape, drop cloth, disposable gloves.
Estimated time and cost for small vs. large repairs
Small touch-ups usually take under an hour and cost only a few dollars for sandpaper, putty, and a small sample of paint, while larger repairs can span several hours to a full day and run $30–$100 or more depending on primer, a quart of paint, and any specialized tools you need.
| Size | Time | Cost |
|---|---|---|
| Small | <1 hr | $5–$15 |
| Large | 3–8 hr | $30–$100+ |
FAQs Fast Answers to Common Questions
You probably have a few quick questions about timing, materials, and matching paint—let’s answer them.
I’ll cover how long corner repairs need to cure before repainting, when to use regular spackle versus a patching compound for deep chips, and how to match color and sheen for a seamless finish.
I’ll also explain whether you need to replace corner bead for minor damage and how to stop recurring chips in high-traffic areas.
How long does a repaired corner take to fully cure before repainting?
A repaired corner usually needs 24 to 72 hours to cure enough for light sanding and primer, though full hardness can take up to a week depending on the filler type, humidity, and temperature.
Check manufacturer cure times, feel the patch for firmness, and avoid heavy sanding or painting until it resists indentation.
Longer drying in cool, humid conditions is normal.
Can I use regular spackle for deep corner chips?
Can regular spackle handle deep corner chips?
You can use it for small shallow gouges, but regular spackle isn’t ideal for deep chips. It can crack or shrink when applied thickly.
For deep voids, build up with thin layers, letting each dry, or use a patching compound or setting-type (hot) spackle designed for full-depth fills.
Sand smooth before priming and painting.
How do I match paint color and sheen for a seamless repair?
How do you get a seamless look when repainting just a spot?
Match color by taking a paint chip to a hardware store or use leftover can labels for exact codes.
Test small samples on the wall and view in different light.
Match sheen by using the same finish (flat, eggshell, satin).
Feather edges and thin coats for an invisible blend.
Is it necessary to replace corner bead for minor chips?
If the chip sits on a corner, you don’t automatically need to replace the corner bead—most small dents and chips can be repaired in place.
Clean the area, sand lightly, and apply a setting-type joint compound or spackling to rebuild profile. Feather the edges, sand smooth when dry, prime, and repaint.
Replace the bead only if metal or plastic is cracked, loose, or severely warped.
How to fix recurring chips in high-traffic areas?
When chips keep appearing in high-traffic spots, you’ll need a tougher repair than just paint.
Patch with a strong, flexible joint compound or epoxy filler, sand smooth, prime with a high-adhesion primer, and use a scuff-resistant, washable paint.
Add corner guards or chair rails if needed, and address underlying causes like door impact or furniture contact to prevent recurrence.
