How to Fix Chipped Paint on Furniture for a Like-New Finish
You can restore chipped paint to a like-new finish by cleaning and degreasing the area, sanding loose edges, filling deep chips with wood filler or putty, and feathering the repair smooth. Prime exposed surfaces, match paint color and sheen, then apply thin, even coats while sanding lightly between them. Finish with a clear protective topcoat for durability. Follow sensible prep, tools, and matching techniques below to get professional-looking results and learn advanced tips for seamless blending.
How to Fix Chipped Paint on Furniture for a Like-New Finish
You can often repair small chips quickly with a little sanding, filler, and matching touch-up paint to make the piece look like new.
If chips are extensive, or the finish is uneven and worn, you’ll save time and get a better result by repainting the entire piece.
Below we’ll walk through when a quick repair is enough and when a full refinishing is the smarter choice.
Quick Answer Can You Repair Chipped Paint Quickly?
Wondering if chipped paint can be fixed quickly? Yes—you can often repair chips fast by cleaning the area, sanding lightly, applying matching paint or touch-up markers, and sealing with a clear coat.
For small spots on wood or painted furniture, these steps show how to fix chipped paint on furniture efficiently, restoring appearance without full refinishing when damage is minor.
When to Repair vs. When to Repaint Entire Piece
Quick fixes work well for small chips, but deciding between spot repairs and a full repaint depends on scale, surface condition, and your goal for the piece.
If chips are few and finish is sound, touch-ups preserve character.
Choose full repaint when damage is widespread, finish is peeling, or you want a new color/uniform look.
Consider time, budget, and desired durability.
Understanding Chipped Paint: Causes and Materials
Before you start repairs, you’ll want to understand why paint chips: wear, impact, moisture, and poor adhesion all play a role.
Different paints and finishes—latex, oil, chalk, lacquer, and polyurethane—behave differently and need compatible touch-up products.
Also note the substrate (solid wood, MDF, metal, or veneer) because it determines prep, filler choice, and how well repairs will hold.
Common Causes of Paint Chipping on Furniture
Paint chipping on furniture usually comes down to a few predictable causes: surface contamination, poor adhesion, physical wear, and environmental stressors.
You’ll see chips when grease, dust, or old finish prevent bonding, when paint isn’t applied or primed correctly, when edges and high-use spots get bumped, or when humidity, temperature swings, or sunlight weaken the film.
Address each cause to prevent recurrence.
Types of Paint and Finishes (Latex, Oil, Chalk, Lacquer, Polyurethane)
Different finishes behave and fail in different ways, so knowing what’s on your furniture helps you choose the right repair. You’ll spot latex (flexible), oil (durable), chalk (matte), lacquer (fast-drying), and polyurethane (clear coat). Match repair materials and sanding to finish type.
| Finish | Feel | Repair tip |
|---|---|---|
| Latex | Flexible | Light sanding |
| Oil | Hard | Solvent clean |
| Chalk | Matte | Gentle primer |
How Underlying Materials Affect Repair (Wood, MDF, Metal, Veneer)
One key thing to check when repairing chipped paint is what lies beneath the surface—wood, MDF, metal, or veneer each demand different prep and products.
If it’s solid wood, sand, stain-match, and seal; MDF needs filler and a primer that bonds; metal requires rust treatment and metal primer; veneer needs gentle sanding, wood filler for gaps, and thin coats to avoid peeling.
Tools and Materials You’ll Need
You’ll want a few essential tools—scrapers, sandpaper, brushes, and a putty knife—to remove loose paint and prep the surface.
Keep repair materials on hand like wood filler, primer, touch-up paint, and a clear coat to restore and protect the finish.
For cleaner, more professional results consider optional supplies such as a sanding sponge, blending marker, respirator, and tack cloth.
Essential Tools (scrapers, sandpaper, brushes, putty knife)
Tools make the job faster and the finish neater, so gather a reliable scraper, a few grits of sandpaper, a selection of brushes, and a straight-edged putty knife before you begin.
Use the scraper to lift loose paint, sand progressively from coarse to fine for smooth edges, choose brushes matched to paint type and size, and use the putty knife to apply and level repair compound neatly.
Repair Materials (wood filler, primer, touch-up paint, clear coat)
A small tub of wood filler, a can of primer, matching touch-up paint, and a clear coat are the core repair materials you’ll need to restore chipped furniture.
Use them to fill, seal, color-match, and protect for seamless results.
- Smooth wood filler shaping the void
- Fast-drying primer bonding paint
- Touch-up paint matched to grain and sheen
- Clear coat sealing and hardening finish
Optional Supplies for Professional Results (sanding sponge, blending marker, respirator, tack cloth)
While the core materials will repair the chip, a few optional supplies help you get a truly professional finish:
- Sanding sponge — evens edges and smooths filler for seamless paint.
- Blending marker — matches color and softens edges.
- Respirator — protects you from fumes and dust during prep and finish.
- Tack cloth — removes dust for a flawless, dust-free topcoat.
Step-by-Step Repair Process
Start by evaluating the damage and clearing the area so you know exactly what needs attention.
Clean and degrease the surface, scrape loose paint, and sand the edges to feather them for a smooth changeover.
For deep chips, fill and sand the repair, then prime any exposed areas and let the primer dry fully before painting.
Assess the Damage and Prepare the Area
Before you pick up any tools, closely inspect the chipped area and its surroundings so you know exactly what you’re dealing with: note the chip size, whether the paint is flaking or just cracked, any exposed bare wood or primer, and nearby hardware or finishes that need protection.
Mark edges, remove loose paint, plan masking for adjacent surfaces, and gather appropriate protective materials before starting.
Step 1 Clean and Degrease the Surface
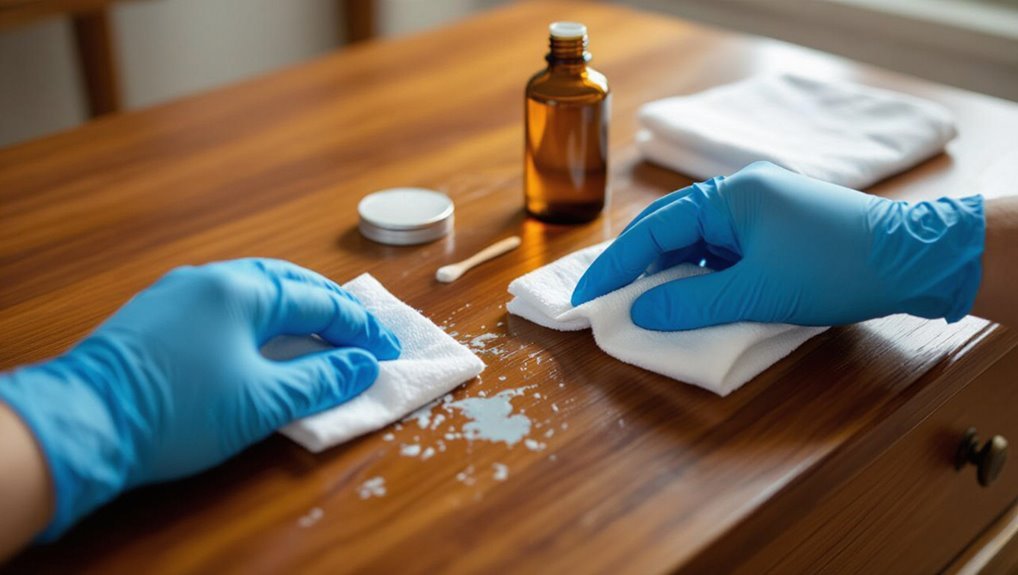
Wipe the chipped area and surrounding surface thoroughly to remove dust, dirt, and oils that will prevent good adhesion.
Use a lint-free cloth and mild detergent or a degreaser designed for painted surfaces.
Rinse with clean water, dry completely, and tack cloth any remaining dust.
Proper cleaning guarantees primer and paint bond well and avoids peeling or uneven finish later.
Step 2 Remove Loose Paint and Sand Edges for Feathering
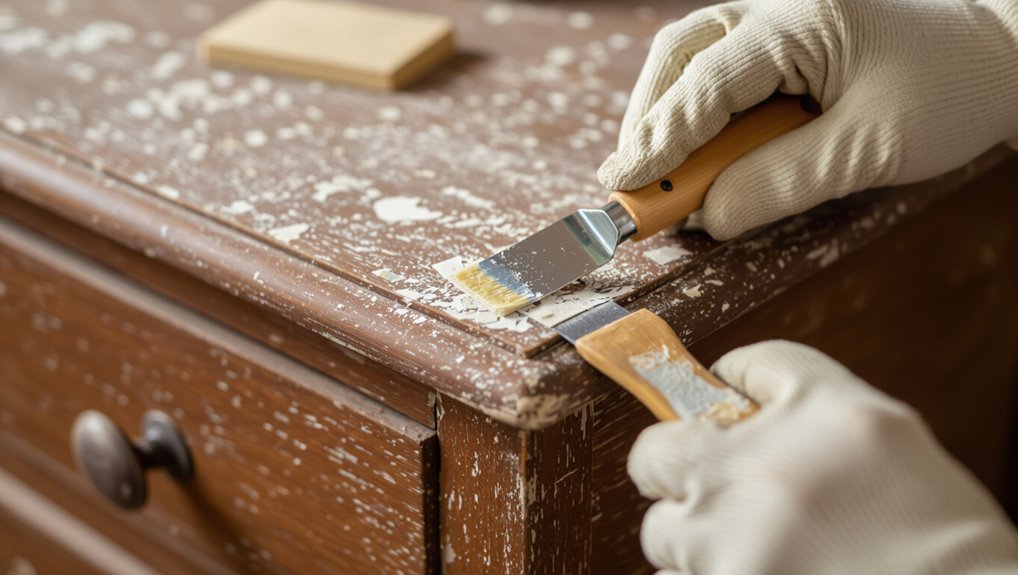
Scrape away any loose or flaking paint with a putty knife or stiff brush so you’re left with a stable edge.
Then sand the perimeter of the chip lightly with fine-grit paper to feather the old paint into the surrounding finish—this creates a smooth changeover that helps primer and new paint blend seamlessly.
Wipe dust with a tack cloth, inspect edges, and re-sand any high ridges for uniform smoothness.
Step 3 Fill Deep Chips and Gouges with Filler; Sand Smooth
Mix a small batch of wood filler or epoxy putty according to the manufacturer’s directions, then press it firmly into any deep chips or gouges until it’s slightly overfilled to allow for shrinkage.
Let the filler cure fully, then use medium- to fine-grit sandpaper to level it flush with the surrounding surface.
Wipe away dust and inspect for low spots; repeat filling if needed.
Step 4 Prime Exposed Areas and Allow Proper Drying
Once your filler’s sanded smooth and any low spots are corrected, you’ll want to prime any bare wood or exposed filler before repainting.
Use a quality bonding primer, apply thin even coats, and feather edges to avoid ridges.
Let each coat dry fully per label instructions—usually an hour or more—then lightly sand between coats for a uniform surface ready for paint.
Step 5 Match and Apply Paint for Seamless Blending
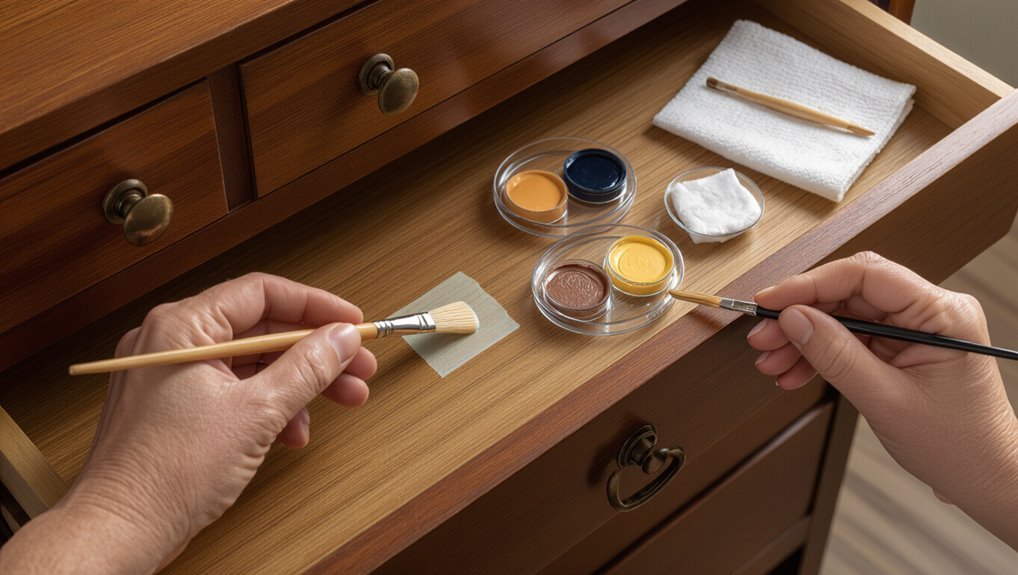
Before you paint, match the color and sheen carefully so the repair disappears into the surrounding finish; test swatches on an inconspicuous area or a scrap piece until you get a perfect match.
Use a fine brush or cotton swab to apply thin, even coats, feathering edges into the surrounding paint. Let each coat dry fully before adding another to avoid ridges.
Step 6 Apply Protective Topcoat and Cure Time
Step 6 covers sealing your repair with a protective topcoat and allowing proper cure time so the finish is durable and blends in—apply a thin, even coat of clear varnish, polyurethane, or lacquer that matches the sheen you used for the paint, brushing or spraying lightly and feathering the edges into the surrounding surface.
Let it dry per manufacturer instructions, avoiding use until fully cured for maximum hardness.
Finishing Touches: Light Sanding Between Coats and Polishing
After the topcoat’s dried enough to handle, lightly sand between coats with fine-grit paper (320–400) to knock down any dust nibs and to help the next layer adhere.
You’ll want gentle, even strokes and to wipe away residue with a tack cloth before recoating.
After final cure, buff with a soft cloth or ultra-fine pad; apply paste wax or polish sparingly for consistent sheen and protection.
Advanced Techniques for a Flawless Match
Now you’ll learn advanced techniques to get an invisible repair, starting with precise color-matching using labels, swatches, or custom mixing.
You’ll also practice blending small repairs into the surrounding finish so edges disappear.
Finally, you’ll replicate special finishes—distressed looks, lacquer shine, or chalk-paint matte—so the repaired spot matches texture and sheen.
Color Matching Methods (labels, swatches, custom mixing)
Matching paint color precisely can make a repaired chip disappear, and you’ve got three reliable approaches: checking manufacturer labels and codes, comparing physical swatches under the same light, or creating a custom mix by tinting base paint.
Start with labels for exact formulas, verify swatches in the room’s lighting, and when mixing, add small tints incrementally, testing on scrap until the hue, sheen, and opacity align.
Blending Small Repairs into Existing Finish
A few careful steps will help you blend a small paint repair so it disappears into the surrounding finish.
Feather the paint edge with fine sanding, apply thin layers of matched paint, and dry between coats.
Lightly scuff surrounding sheen, then use a tiny brush or sponge to stipple for texture.
Finish with the appropriate clear coat and polish to unify gloss.
Replicating Special Finishes (distressed, lacquer shine, chalk paint matte)
If you’ve blended small chips successfully, you’ll next tackle finishes that show character beyond flat color—distressed edges, high-gloss lacquer, or velvety chalk paint each demand different techniques to match their look and wear.
For distressed pieces, sand and layer paints, then reveal undercoats.
For lacquer shine, use thin coats and polish.
For chalk matte, scuff, feather, and seal with wax.
Common Problems and How to Fix Them
You’ll run into a few common setbacks like visible brush strokes or texture mismatches, paint that peels again, imperfect color matches, and bubbles or runs in fresh coats.
For each issue, I’ll show what causes it and the quick fixes that actually work.
Follow the tips below and you’ll get a smooth, lasting repair.
Problem: Visible Brush Strokes or Texture Mismatch
Wondering why your freshly touched-up piece looks streaky or oddly textured? You likely used the wrong brush, applied too-thick coats, or didn’t sand between layers.
Lightly sand the repair to blend edges, switch to a high-quality synthetic brush or foam roller for smooth application, and thin paint slightly for even flow.
Finish with a light topcoat to unify sheen and texture.
Problem: Paint Peels Again After Repair
Because the old paint didn’t properly bond to the substrate, your repair can lift again even after it looks finished. You’ll need to identify whether poor adhesion, surface contamination, or inadequate priming caused the failure before redoing it.
Strip loose paint, sand to sound edges, clean with degreaser, then use a quality primer suited to the material.
Recoat only after full cure and follow manufacturer drying times.
Problem: Color Doesn’t Match Exactly
If the repaired area looks off, it’s usually due to differences in paint batch, sheen, or the underlying color showing through—so don’t assume a single coat will blend perfectly.
Test blend on an inconspicuous spot, use primer or tinted sealer to neutralize substrate, match sheen, and apply thin feathered coats.
If needed, bring a sample to match color at the store.
Problem: Bubbles, Runs, or Drips in New Paint
When paint forms bubbles, runs, or drips, it usually means the surface, technique, or paint consistency wasn’t right — and you can fix it without redoing the whole piece.
Let paint fully dry, sand imperfections smooth with fine-grit paper, clean dust, then spot-prime.
Thin future coats, use even strokes, and keep wet edges.
Repaint thin layers; inspect between coats.
Prevention and Best Practices to Avoid Future Chipping
To avoid future chipping, you’ll want to start with proper surface prep and a good primer so paint adheres well.
Pick durable paints and add a protective finish to stand up to wear.
Keep up simple maintenance like gentle cleaning, felt padding on contact points, and steady indoor humidity to protect the surface.
Surface Preparation and Proper Priming
Because paint only sticks to a clean, stable surface, you’ll need to remove loose flakes, sand smooth, and degrease before priming.
After cleaning, fill gaps with wood filler, sand again, and wipe dust.
Choose a primer suited to the substrate, apply thin even coats, and dry fully.
Proper priming creates a stable base that helps new paint adhere and resist future chipping.
Choosing Durable Paints and Protective Finishes
Although the right products won’t guarantee zero wear, choosing high-quality paints and protective finishes will dramatically reduce future chipping and make maintenance easier.
Pick durable acrylic or enamel paints designed for furniture, match sheen to use (eggshell/satin hides wear; semi-gloss cleans easier), and apply a clear protective topcoat—polyurethane for hard surfaces, water-based poly for less yellowing.
Follow manufacturer cure times.
Maintenance Tips (cleaning, padding, climate control)
One simple habit will extend your furniture’s finish: regular, gentle maintenance.
Wipe dust with a soft microfiber, avoid harsh chemicals, and clean spills promptly.
Use felt pads under legs, coasters for drinks, and protective runners on high-traffic surfaces.
Keep humidity steady (ideally 40–55%) and out of direct sunlight to prevent cracking and peeling.
Inspect periodically and address wear immediately.
When to Call a Professional or Refinish Entire Piece
If the damage goes beyond surface chips—large gouges, structural issues, or widespread flaking—you’ll want a pro to assess it.
Compare the cost of repair versus a full refinish or replacement by factoring labor, materials, and the piece’s sentimental or market value.
If the repair costs approach half the price of refinishing or replacing, refinish or replace instead of patching.
Signs the Damage Requires Professional Repair
When should you call a pro instead of patching the chip yourself?
If chips expose raw wood, widespread flaking, structural damage, or veneer lifting, get help.
Also call a professional when matching complex finishes, restoring antiques, or when previous repairs failed.
Professionals handle hidden moisture, rot, intricate inlays, or safety concerns you can’t resolve with basic tools and touch-up kits.
Cost vs. Value: Repair vs. Full Refinish vs. Replacement
After you’ve decided a pro is needed for complex damage, the next question is whether to repair, refinish, or replace the piece—and how much that choice will cost you. You’ll weigh sentimental value, budget, and long-term use. Quick repair costs less; full refinish restores value; replacement solves wear. Decide by comparing cost, time, and emotional attachment.
| Cost | Time | Feeling |
|---|---|---|
| Low | Fast | Relief |
| High | Slow | Pride |
Tools and Product Recommendations (Beginner to Pro)
You’ll want the right fillers and primers for a smooth, lasting repair, plus paint formulas matched to the finish you want.
I’ll recommend specific paint types and trusted brands for matte, satin, and glossy looks, and point out the best brushes, rollers, and applicators for clean results.
With the proper tools and products, your touch-ups will blend in and hold up over time.
Best Fillers and Primers for Furniture
Because a clean, compatible filler and the right primer determine whether repairs vanish or reappear, you should choose products that match the material, level of wear, and your skill.
For wood, use stainable wood filler or epoxy for deep gouges. For veneer, use thin wood putty.
Use a high-adhesion, sandable primer for smooth blending; shellac-based primer for tannin bleed.
Recommended Paint Types and Brands by Finish
When choosing paint for a repaired spot, match the finish to the original surface and pick a brand known for durability and coverage; latex paints work well for cabinets and high-traffic pieces.
Oil-based enamels give a hard, glossy finish for trim, and acrylic enamel/alkyd hybrids offer a good middle ground for furniture.
Pick reputable lines like Benjamin Moore, Sherwin-Williams, Rust-Oleum, or Valspar.
- Smooth satin examples
- Durable semi-gloss examples
- Tough gloss examples
- Touch-up-friendly matte examples
Best Brushes, Rollers, and Applicators
One good brush or roller can make a small repair look professional, so pick tools that suit the paint type and the scale of the job.
Use synthetic bristle brushes for water-based paints, natural bristles for oil-based. Mini foam rollers speed coverage on flat surfaces; angled sash brushes handle edges.
Keep a fine artist’s brush for touch-ups and a foam applicator for smooth blending.
FAQ
You’ll have common questions about cure times, color matching, and whether touch-ups will hurt antiques or veneers.
I’ll explain how long repaired areas need to cure, when to choose spray versus brush-on paint, and how to match colors without the original can.
You’ll also get tips for fixing painted veneer without causing damage.
How long does a repaired area take to fully cure before use?
How long a repaired spot needs to fully cure depends on the materials and conditions, but you can generally expect at least 24–72 hours before light handling and up to 7 days for full hardness.
Oil-based paints and strong primers take longer; water-based dries faster.
Keep temperature and humidity moderate, avoid heavy use, and test a small area gently before restoring full function to the piece.
Can I fix chips on vintage or antique furniture without lowering value?
If the piece is truly antique or has collectible value, proceed carefully—repairs can help preserve function but also alter originality and reduce value if done improperly.
You should assess provenance, document damage, and favor reversible, minimal interventions. When in doubt, consult a qualified conservator or appraiser.
Avoid overpainting or removing original patina; tasteful, documented stabilization preserves both appearance and market worth.
Is it better to use spray paint or brush-on paint for touch-ups?
Wondering whether to grab a spray can or a brush for touch-ups?
You’ll pick spray paint for even coverage on smooth, large areas and for faster work, but it can overspray and needs ventilation.
Use brush-on for small chips, textured surfaces, or precise control; it’s easier to feather edges and build thin layers.
Choose based on size, texture, and workspace.
How do I match paint color if I don’t have the original can?
Need a perfect match? Bring a small paint chip or removable trim piece to a paint store for color-matching; they’ll scan and mix a close formula.
Test samples on an inconspicuous area, let them dry, and view in different light.
If needed, blend two nearby shades or lightly feather edges for a seamless repair.
Can I repair chipped paint on painted veneer without damaging the veneer?
Yes—you can repair chipped paint on veneer without ruining the veneer itself, but you’ll need to work gently, use the right products (thin touch-up paint, wood filler designed for veneer, and fine grit sandpaper), and keep repairs minimal to avoid peeling or swelling the thin wood layer.
Clean area, remove loose paint, fill sparingly, sand lightly, and apply thin coats, feathering edges for an invisible repair.