How to Tape a Popcorn Ceiling for Painting Without Tearing It Apart
You can tape a popcorn ceiling without tearing it if you go slow and use low‑tack materials. First inspect and gently clean loose bits, then stabilize flaky areas with adhesive. Use painter’s tape for edges and self‑adhesive mesh or paper tape with a thin coat of compound for seams, pressing very lightly and working in small sections. Let each coat dry fully and sand sparingly. Keep going and you’ll find detailed steps, tools, and fixes ahead.
Quick Answer Can You Tape a Popcorn Ceiling Without Tearing It?
Yes—you can tape a popcorn ceiling without tearing it, but only in certain cases and with care.
If the texture is firmly adhered and you use low-tack painter’s tape applied gently, you’ll usually be fine; avoid taping if the texture is crumbly, water-damaged, or contains asbestos.
When in doubt, test a small area or skip taping and use careful cutting-in with a brush instead.
Short, direct recommendation
You can tape a popcorn ceiling without tearing it if you use the right materials and a gentle touch: use low-tack painter’s tape, test a small area, press lightly with a soft tool, and peel slowly at a steep angle.
For clear guidance on how to tape popcorn ceiling for painting, work in short sections and replace tape frequently to avoid pulling texture.
When taping is appropriate vs when to avoid it
When the popcorn texture is fresh, loosely adhered, or already flaking, skip full-width taping and use minimal, low-tack strips only where necessary; otherwise, you can tape carefully by testing a small patch, working in short sections, and peeling slowly to avoid damage.
If the texture’s stable and bonded, tape for crisp seams; if not, patch or skim coat instead of risking tears.
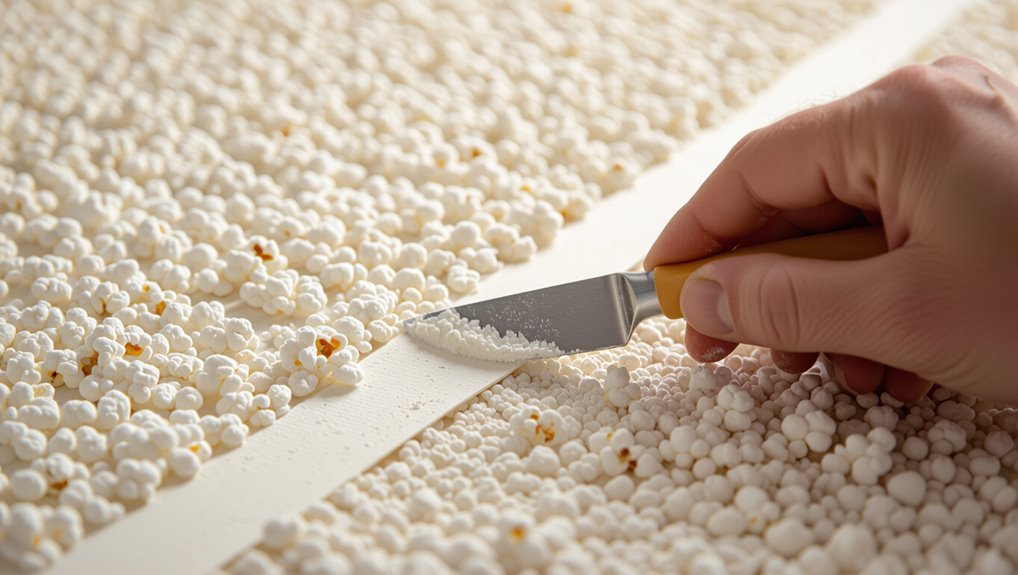
Basic Understanding What Is a Popcorn Ceiling and Why Taping Is Tricky
Popcorn ceilings are made from a spray-on mix of drywall compound, stucco, or sometimes cellulose and fibers that create a bumpy finish.
You’ll find the texture can crumble or delaminate when tape pulls against loose bits or weak bonding.
Age, moisture exposure, and multiple paint layers all reduce adhesion and make taping more prone to failure.
What “popcorn” texture is made of
Think of popcorn texture as a spray-on mix of binder and lightweight aggregates that creates a bumpy, sound-dampening ceiling finish.
You’ll find materials like stucco or gypsum binders combined with vermiculite, perlite, cellulose, or small mineral flakes. Additives control adhesion and drying.
The result’s lightweight, porous surface gives texture and acoustics but requires gentle handling when prepping or taping for paint.
Why the texture can crumble or delaminate when taped
Because the spray-on mix is mostly lightweight aggregates held together by a thin binder, it doesn’t take much force or moisture to break the bond.
That’s why the texture can crumble or pull away when you try to tape it. When you press tape, adhesive grabs loose particles; lifting or smoothing strips the binder.
Even gentle pressure can shear fragile pieces from the substrate.
Common conditions that affect adhesion (age, moisture, paint layers)
When you prep a popcorn ceiling for taping, three main conditions — age, moisture history, and existing paint layers — determine how well tape and joint compound will stick.
Older texture often crumbles; prolonged humidity or past leaks weaken adhesion and promote mold.
Multiple paint coats, especially oil-based or glossy finishes, repel wet compound.
Test adhesion, scrape loose bits, and sand or prime stubborn areas before taping.
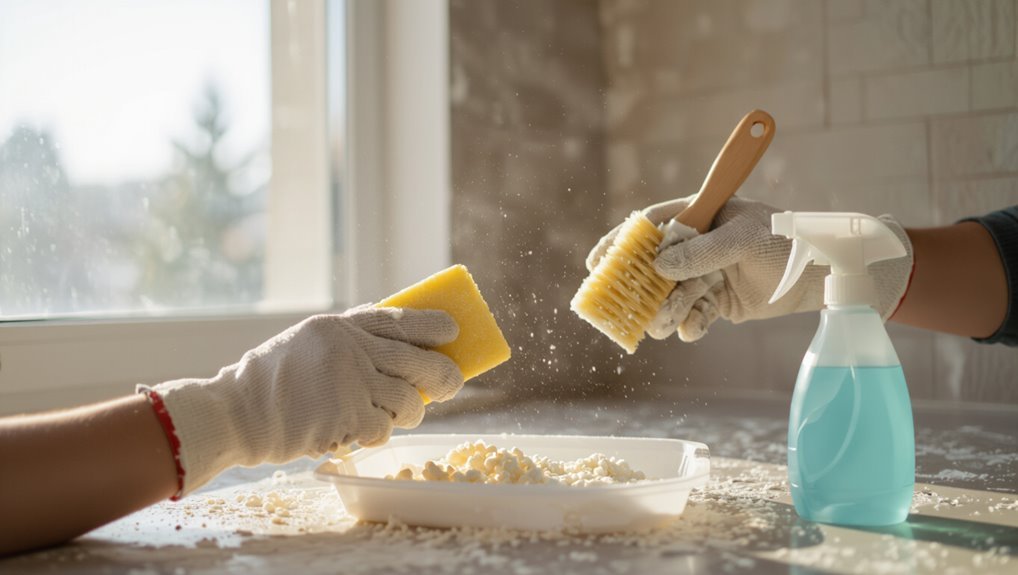
Required Materials and Tools
Before you start, gather the right tapes—painter’s tape for edges, paper joint tape or mesh tape for seams—and choose putty, primer, and any paint-compatible products you’ll use.
Get the proper tools: knives, scrapers, sanding blocks, sprayers or brushes.
Don’t forget safety gear—masks, goggles, and drop cloths—to protect yourself and the room.
Tape options (painters tape, paper joint tape, mesh tape)
Choosing the right tape makes the difference between clean lines and a messy cleanup.
You’ll pick tape based on texture and adhesion: painter’s tape shields edges, paper joint tape reinforces seams, and mesh tape bridges gaps without soaking the popcorn.
Use low-tack painter’s tape for fragile texture, paper for smooth joints, and mesh for reinforcing cracks before skim-coating.
- Painter’s tape
- Paper joint tape
- Mesh tape
Putty, primer, and paint-compatible products
Tools and materials matter: you’ll need a compatible putty, a primer designed for textured surfaces, and paint that bonds to popcorn ceilings.
Choose lightweight, acrylic-based spackle for small repairs, a high-adhesion primer labeled for textured or gypsum surfaces, and a paint with good hide and flexible adhesion.
- Acrylic spackle
- High-adhesion textured primer
- Ceiling-grade latex paint
Tools: knives, scrapers, sanding blocks, sprayers, brushes
You’ll need a handful of sharp, reliable tools to get clean repairs and smooth taping on a popcorn ceiling: a 6–8″ flexible putty knife for applying spackle, a stiff metal scraper for removing loose texture, a corner or drywall knife for tight spots, fine-grit sanding blocks to level repairs without knocking off texture, and a spray system or high-quality brush/roller for primer and paint application.
- Select thin, stiff blades.
- Use soft sanding pressure.
- Choose sprayer for even coverage.
Safety gear (masks, goggles, drop cloths)
A few key pieces of safety gear will keep you protected while you work on a popcorn ceiling.
You’ll want gear that blocks dust, protects eyes, and shields floors and furniture.
Wear a NIOSH-rated respirator, snug goggles, and use heavy-duty drop cloths or plastic sheeting.
Follow these essentials:
- NIOSH-rated respirator
- Snug safety goggles
- Heavy-duty drop cloths
Step-by-Step Guide How to Tape a Popcorn Ceiling Safely
Before you start taping, inspect the ceiling for damaged or loose texture and gently clean any dust or debris.
If you find flaky areas, stabilize them with a recommended adhesive or stabilizer and pick a tape and application method that suits the texture.
Apply tape carefully without pulling or stretching so you disturb the popcorn as little as possible.
Step 1 Inspect and prepare the ceiling surface
Start by thoroughly inspecting the ceiling for loose texture, cracks, stains, or water damage so you know exactly what repairs and cleaning you’ll need before taping.
Mark damaged areas, note seams and joints, and check light fixtures or vents.
Gather patching compound, joint tape, primer, and safety gear.
Plan access with a stable ladder and bright lighting to work precisely.
Step 2 Clean and remove loose texture gently
Gently scrape any loose or crumbling popcorn texture with a wide drywall knife or ceiling texture scraper, working in small sections so you don’t damage the underlying drywall.
Wear eye protection and a dust mask, keep a drop cloth below, and vacuum debris frequently with a brush attachment.
Tap lightly to test for stability, and remove only what easily comes away without forcing or gouging the surface.
Step 3 Stabilize loose texture with appropriate product (adhesive/stabilizer)
Secure loose popcorn texture by applying a suitable adhesive or stabilizer so the ceiling will hold tape and joint compound without shedding.
Choose a product labeled for popcorn/stucco texture, mix per instructions, and work in small sections.
Use a low-pressure sprayer or brush, saturating but not over-wetting.
Let fully dry and recheck for loose areas before proceeding to taping.
Step 4 Choose the right tape and application method
1. Choose a soft, paper-based drywall tape or lightweight fiberglass tape—avoid heavy, rigid options that stress texture.
Use premixed joint compound or a bonding adhesive compatible with your stabilizer. Cut manageable lengths, press gently with a wide, flexible taping knife, and smooth without dragging.
Test a small area first to confirm adhesion and minimal disturbance before continuing across the ceiling.
Step 5 Apply tape without pulling or stretching techniques for minimal disturbance
With your tape and compound ready from the previous step, work in small sections so you don’t disturb the texture.
Align tape gently along the joint, pressing lightly with a flat tool. Don’t pull or stretch—let the tape relax naturally.
Cut excess, smooth out bubbles with minimal strokes, and reapply compound immediately to secure the tape without tugging the popcorn finish.
Step 6 Feathering joint compound over tape without flattening texture
Begin feathering the compound by applying thin, even strokes outward from the tape so the joint blends without pressing down the popcorn texture.
Work in short passes, keep the knife at a low angle, and leave a slight ridge that matches surrounding bumps.
Let each coat dry fully, then add a finer skim if needed.
Avoid heavy pressure that crushes the texture.
Step 7 Sanding and touch-up methods that preserve texture
Tackle sanding and touch-ups gently so you preserve the popcorn texture while smoothing the taped seams; use fine-grit sanding pads, light pressure, and short, controlled strokes to remove high spots without crushing the bumps.
Inspect under raking light, spot-sand only where needed, then apply tiny skim fills with a soft knife.
Let dry, recheck, and sand minimally to maintain texture.
Step 8 Priming and painting after taping
Now that your seams are smooth and any touch-ups have dried, prime the taped areas and the rest of the ceiling to seal joint compound and guarantee even paint adhesion.
Choose a stain-blocking, high-quality primer formulated for textured surfaces, apply it thinly with a nap roller designed for popcorn ceilings, and let it fully cure before painting.
After curing, use a light, even coat of flat or eggshell ceiling paint.
Alternative Methods When Taping Is Not Feasible
If taping turns out to be impractical, you can use caulk or flexible fillers to seal seams and small cracks quickly.
For larger damage, consider skim-coating the entire ceiling or doing targeted spot repairs depending on the finish you want and your budget.
You can also weigh re-texturing or removing the popcorn—each has trade-offs in time, cost, and mess.
Use of caulk or flexible fillers instead of tape
When taping a popcorn ceiling isn’t practical, caulk and flexible fillers offer a fast, reliable alternative for sealing seams and gaps; they adhere well to textured surfaces and flex with small movements so cracks stay closed.
You’ll choose paintable, mildew-resistant acrylic or silicone blends, apply with a narrow bead, tool smooth lightly, and allow full cure before priming and painting for an invisible, durable repair.
Skim-coating the entire ceiling versus spot repairs
Although skim-coating the whole ceiling takes more time than spot repairs, it gives a uniform finish that hides texture irregularities and makes painting much easier.
You’ll decide based on damage extent, budget, and time. Skim-coating reduces visible seams and sanding.
Consider these points:
- Damage level: widespread versus isolated.
- Cost/time: full skim versus quick spots.
- Finish: seamless, easier paint adhesion.
Re-texturing or removing popcorn texture pros and cons
Skim-coating can solve many seam and finish issues, but you might run into ceilings where taping and skim-coating aren’t practical — heavy texture, asbestos concerns, or a desire for a different look. You can re-texture, skim-sand, or remove texture; each choice trades cost, time, and risk.
| Option | Trade-off |
|---|---|
| Re-texture | Faster, hides flaws |
| Remove | Smooth finish, dust |
| Encapsulate | Safer with asbestos |
| Replace | Best result, expensive |
Common Problems and How to Fix Them
You’ll run into a few common issues when taping a popcorn ceiling, so it helps to know quick fixes and longer-term repairs.
If the texture tears, reattach loose pieces with a thin layer of adhesive and press gently; if the tape shows through after painting, skim with drywall compound and sand smooth before repainting.
For visible patch edges or adhesion failures, feather the compound into the surrounding texture and use adhesive injection to secure any loose sections.
Problem: Texture tears when taping immediate fixes
When the popcorn texture rips as you press tape into seams, stop and reassess before you keep going—patching tears on the fly usually makes the damage more obvious.
Let the area dry, gently lift tape, and trim loose texture with a sharp blade.
Patch with a thin skim of joint compound, feather edges, and let it cure before reapplying tape carefully to avoid further pulling.
Problem: Tape shows through after painting corrective steps
If tape starts showing through after painting, don’t panic — it’s usually fixable without redoing the whole ceiling.
Lightly sand the visible strip, remove loose tape bits, then apply a thin skim of joint compound or texture mix to match surrounding popcorn.
Feather edges, let dry, sand very gently, prime the spot, and repaint with the same finish.
Check in good light; repeat if needed.
Problem: Patch edges visible blending techniques
Although a small patch can fix damage, its edges often stand out against the surrounding popcorn texture and paint, making the repair obvious.
Feather the joint compound outward, stipple to mimic the popcorn pattern, and sand minimally once dry.
Prime the patch with a texture-friendly primer, then spray or roll matching paint.
Check under different lighting and adjust texture until seamless.
Problem: Adhesion failures how to reattach loose texture
Patch repairs can blend visually but still fail if the popcorn texture isn’t firmly attached; loose or flaking bits will keep paint from sticking and make the ceiling look patchy.
Remove loose material, clean dust, and brush a thin layer of bonding primer into the texture.
Press displaced pieces back gently with a damp sponge, add adhesive or joint compound where needed, then let cure before repainting.
Prevention and Best Practices
Before you start, make sure you prepare the room and protect walls, floors, and furniture so dust and tape don’t create more work.
Pick tapes, primers, and paints that are compatible with your existing texture and finish to avoid peeling or staining.
If you see extensive damage, asbestos concerns, or won’t get a smooth seam, call a pro—those are signs the job’s beyond DIY.
Preparing rooms and protecting adjacent surfaces
Start by clearing the room and creating a clean workspace: move furniture out or to the center, cover larger items with drop cloths, and remove light fixtures or outlet covers you’ll be working near.
Then seal and protect: tape plastic to walls, cover floors with rosin paper, and mask trim.
Keep tools organized and pathways clear to avoid brushing or tearing the texture.
- Tape edges
- Protect floor
- Organize tools
Choosing products compatible with existing paint and texture
When you’re matching products to an existing popcorn ceiling, pick primers, patching compounds, and paint that are specifically rated for textured surfaces and the ceiling’s current finish (flat, eggshell, or semi-gloss).
This is important because compatibility prevents adhesion problems, visible sheen differences, and texture collapse.
Test on a small, inconspicuous area first, use high-solids products for coverage, and avoid overly heavy primers that can flatten the texture.
When to call a pro signs the job is beyond DIY
Matching products to your existing ceiling helps prevent many problems, but some situations still call for a pro: if the popcorn contains asbestos, the texture is crumbling across large areas, there’s extensive water damage or mold, or your ceiling has uneven structural sagging.
Call an expert if you lack safe testing, need structural repairs, or the job requires specialized containment and remediation techniques.
Quick Comparison Tape Types and When to Use Each
You’ll choose between paper tape, mesh tape, and painter’s tape based on the repair type and finish you want.
Paper tape’s best for smoothing seams.
Mesh tape works well for quick patching over thin cracks.
Painter’s tape protects edges and texture during prep.
Know what each does so you pick the right one and avoid extra sanding or visible joints.
Paper tape vs mesh tape vs painter’s tape
Choosing the right tape can save you time and give cleaner seams when repairing or prepping a popcorn ceiling—paper tape, mesh tape, and painter’s tape each serve specific jobs. You’ll use paper tape for flat seams, mesh for gaps and quick fixes, and painter’s tape to protect textured edges during painting.
| Tape | Best for | Notes |
|---|---|---|
| Paper | Flat seams | Requires joint compound |
| Mesh | Gaps/repairs | Self-adhesive, stronger |
| Painter’s | Masking edges | Removes cleanly |
FAQ
You probably have a few quick questions about taping a popcorn ceiling — like whether regular drywall tape will work or if taping and mudding will hide the texture.
You’ll also want to know timing between taping, mudding, and painting, how to hide seams without ruining the texture, and whether it’s safe to sand given lead or asbestos risks.
I’ll answer those concerns and give clear, practical steps so you can proceed safely and get a smooth result.
Can I use regular drywall tape on a popcorn ceiling?
Can you use regular drywall tape on a popcorn ceiling? You can, but choose your method carefully.
Paper or fiberglass tape sticks, yet paper needs a flat surface and can bulge over texture. Fiberglass self-adhesive tape often works better on uneven areas.
Apply thin joint compound, embed tape gently, and feather edges. Test a small patch first to avoid lifting or visible ridges.
Will taping and painting remove the popcorn texture appearance?
If you tape and paint a popcorn ceiling, you shouldn’t expect the texture to disappear — the tape will bridge some peaks and the paint may darken or slightly flatten the appearance, but the bumpy surface will still be visible unless you remove or skim-coat the texture.
You can minimize contrast by feathering joint compound thinly and using flat paint, but texture remains perceptible.
How long should I wait between taping, mudding, and painting?
Wondering how long to wait between taping, mudding, and painting?
Let each coat dry fully: joint compound usually needs 24 hours per coat in normal conditions. Light sanding can follow once dry.
Apply primer after final sanding and tack-cloth; allow primer to dry per label (typically 2–4 hours) before painting.
Longer waits help adhesion in humid or cool environments.
Is it safe to sand popcorn ceilings (lead/asbestos concerns)?
Before you start sanding, remember that older popcorn ceilings can contain hazardous materials like asbestos or lead paint, so you’ll want to confirm what’s in yours.
Don’t sand or disturb textured ceilings if they’re pre-1980s without testing. If tests show asbestos or lead, hire certified abatement pros.
For safe, nonhazardous ceilings, use low-dust sanding methods and proper PPE to minimize exposure.
How do I hide seams without damaging the texture?
When you need to hide seams without ruining the popcorn texture, use light, targeted techniques that preserve the bumps: press joint tape into a thin layer of compound, feather edges outward, then stipple gently with a damp sponge or popcorn spray to match texture.
Let compound dry fully, sand only high ridges, and repaint with a roller to blend seams discreetly.