Does Water Stain Paint? How to Prevent and Fix Water Damage on Walls
Yes—water can stain your paint and, if you don’t stop the leak and dry the area, those stains often return or lead to bubbling, mold, and structural damage. Different paints react differently: latex may show temporary marks, while oil or older finishes can yellow or blister. Find and fix the source, dry thoroughly, clean or treat mold, use a stain-blocking primer, then repaint with mildew-resistant paint. Keep going to learn practical prevention and repair steps.
Quick Answer Does Water Stain Paint?
Yes — water can stain painted walls, leaving visible rings or discoloration.
If the mark dries and the paint looks intact, it’s often a temporary cosmetic issue you can clean or repaint.
If the stain stays dark, spreads, or the paint bubbles or peels, you should worry about underlying moisture and structural damage.
Short, direct conclusion about water stains on painted walls
Water itself usually won’t permanently stain intact paint, but it can leave temporary discoloration, cause bubbling or peeling, and promote mold or mineral deposits that do stain—so address leaks and dry the area quickly to prevent lasting damage.
In short, does water stain paint? Rarely permanently if you act fast; fix leaks, dry, clean, and repaint or seal only when the surface is fully dry.
When to worry: temporary mark vs. long-term damage
If the discoloration vanishes after the area dries and there’s no bubbling, soft spots, or musty smell, you probably have only a temporary mark—not long-term damage.
Check for peeling, texture changes, or recurring stains after drying; those signal deeper issues.
Test by pressing a dry paper towel for moisture and monitor for mold.
If problems persist, call a pro to inspect and repair.
How Water Interacts with Different Types of Paint
You’ll first want to know what a water stain looks like and why it forms, since that affects how paint reacts.
Water-based (latex) paint tends to blister and lose adhesion, while oil-based paint can darken or show rings but sometimes resists short exposures better.
Finish and prep matter too—flat sheens absorb more, glossier finishes shed water, and proper primers or sealers greatly improve resistance.
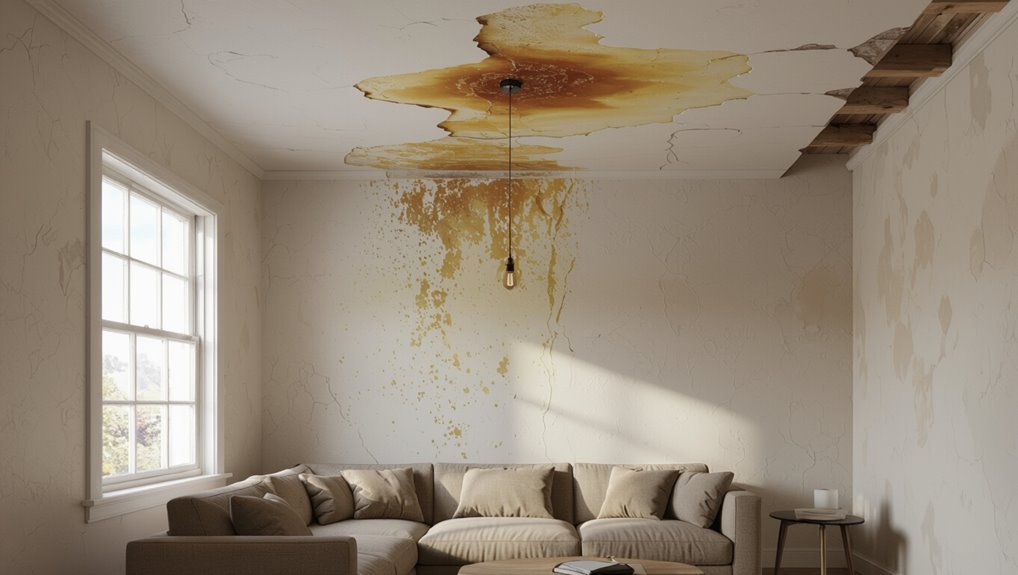
What is a water stain?

A water stain is a visible discoloration that forms when moisture soaks into a wall, carrying minerals, dirt, or mold spores that alter the paint’s appearance and texture.
You’ll notice ringed, uneven patches, peeling, or dulling where water disrupted pigment or binder.
Stains signal underlying moisture problems; addressing the source is essential before cleaning or repainting to prevent recurrence.
Water effects on latex (water-based) paint
How does water interact with latex paint, and what should you expect when moisture reaches a painted wall?
You’ll see softening, bubbling, or peeling as latex rehydrates and loses adhesion. Mildew can discolor surfaces.
Small damp areas might dry without lasting harm, but repeated or prolonged exposure will cause flaking, chalking, and bond failure.
Address leaks and dry thoroughly before repainting with mildew-resistant latex.
Water effects on oil-based paint
While latex softens and peels as it rehydrates, oil-based paint reacts differently when moisture reaches it. You’ll notice discoloration, blistering, and a solvent-like breakdown where oil films lift or yellow.
Water trapped beneath the finish can cause adhesion failure and tannin bleed-through from wood. You should dry surfaces thoroughly, address leaks, sand loose areas, and repaint with suitable primers and oil-compatible topcoats.
Effects on different finishes: flat, eggshell, satin, semi-gloss, gloss
Because finish sheen changes film thickness and flexibility, water interacts differently with flat, eggshell, satin, semi-gloss, and gloss paints.
You’ll find flat absorbs and shows stains easily; eggshell resists slight moisture but can discolor; satin handles splashes better and cleans well; semi-gloss sheds water, limits staining, and cleans easily; gloss provides the strongest surface resistance yet still can blister if water sits beneath.
Role of primers and sealers in resisting water
When you prep a wall with the right primer or sealer, you give paint a much better chance of keeping water out and preventing stains, peeling, or blistering.
You should choose a moisture-blocking primer for damp areas and a stain-blocking sealer for tannin or water marks.
These products bond to substrate, reduce porosity, and let topcoats perform, extending durability and easing cleanup.
Common Causes of Water Stains on Walls and Ceilings
You’ll most often see stains from internal plumbing leaks, roof or exterior water intrusion, and condensation from high humidity.
Flooding, foundation seepage, and appliance failures like broken HVAC units or water heaters can also cause noticeable discoloration.
Knowing which source is responsible helps you pick the right fix and prevent recurrence.
Internal plumbing leaks
If an unseen pipe inside your wall starts to drip, you’ll often first spot a dark, spreading stain or a patchy ceiling discoloration.
Internal plumbing leaks can soak drywall, warp paint, and promote mold.
You should shut off water, dry the area, and inspect pipes.
Call a licensed plumber for repairs, replace damaged drywall, and repaint with stain-blocking primer to prevent recurrence.
Roof leaks and exterior water intrusion
Leaks from the roof and other exterior points can produce the same dark, spreading stains you see from internal plumbing, but they usually show up after heavy rain or melting snow and often track down from rooflines, chimneys, flashing, or deteriorated siding.
Check attic and exterior for damaged shingles, clogged gutters, failing flashing, or gaps around vents.
Repair promptly to stop staining and mold.
Condensation and high humidity
When indoor air stays warm and moist and hits a cool wall or ceiling, condensation forms and leaves damp patches or dark staining that can mimic leaks.
You’ll notice this in bathrooms, kitchens, or poorly ventilated rooms.
Reduce humidity with exhaust fans, dehumidifiers, and improved ventilation.
Wiping surfaces, insulating cold spots, and repairing vapor barriers prevents recurring stains and mold growth.
Flooding and seepage from foundation
Condensation and poor ventilation aren’t the only sources of water staining; groundwater and surface water can push through foundation walls and floor slabs, leaving larger, often recurring stains at the base of walls or in basements.
You should inspect grading, gutters, downspouts, and exterior drainage, seal cracks, install interior or exterior drains if needed, and consider a sump pump to keep water away.
Appliance failures (HVAC, water heater)
If an HVAC unit, water heater, or other appliance fails, you’ll often see water stains spreading from ceilings, closets, or utility rooms where the equipment sits.
Act quickly: shut off power and water, contain leaks with buckets or towels, and call a licensed technician.
After repairs, dry the area thoroughly, check for mold, and replace damaged drywall or insulation to prevent recurring stains and odors.
How to Identify Water Stains vs. Other Marks
Look for color differences and telltale shapes—water stains are often brownish or yellow with irregular edges, while other marks may be smudges or paint scuffs.
Check the surface for texture changes like bubbling, peeling, or soft spots, and use a moisture meter or feel for dampness and condensation to confirm active moisture.
If stains are spreading, the wall stays damp, or you find moldy odors, call a professional.
Visual signs and color differences
When you inspect a wall, focus on shape, edges, and color shifts to tell water stains from dirt, paint bleed, or mold.
Water stains usually appear as irregular, tan to brown rings with diffuse edges; dirt is streaky and localized; paint bleed shows uniform discoloration following brushwork; mold often has speckled dark patches with green or black hues.
Texture changes: bubbling, peeling, soft spots
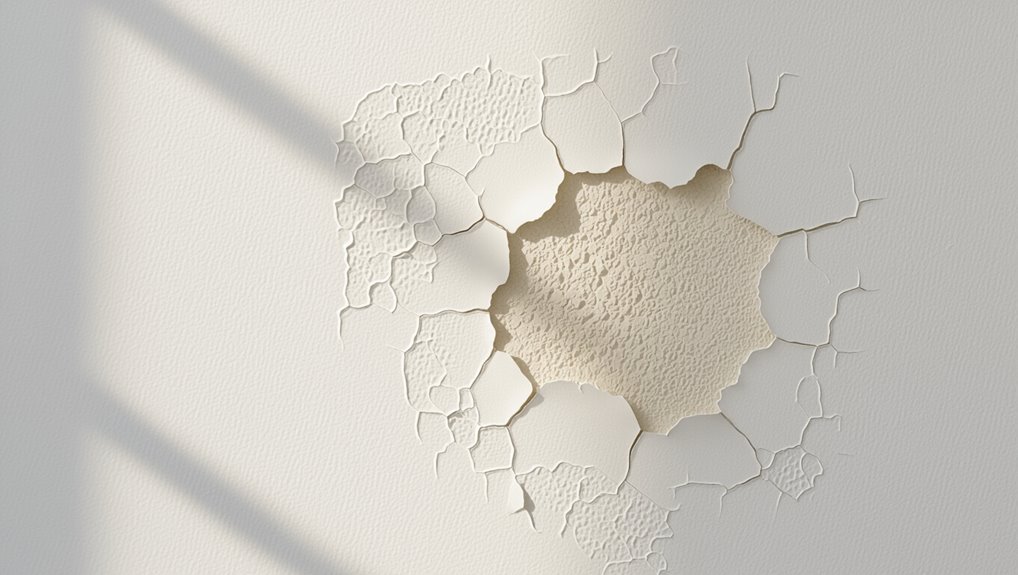
After checking color and edge patterns, feel the surface for changes in texture—bubbling, peeling paint, or soft drywall are strong indicators of moisture behind the finish.
Press gently; spongy spots or crumbling paper facing mean the substrate’s compromised. Flaking paint often follows trapped water, and raised bubbles show finish separation.
Note locations near ceilings, windows, or plumbing for likely sources.
Moisture testing methods (moisture meter, touch, condensation)
Start by confirming whether a mark is from moisture or something else—use a moisture meter for quick, objective readings, but also trust touch and visible condensation clues.
Tap the area: damp feels cool and soft. Look for recurring condensation on windows or nearby pipes.
Record meter percentages and compare surrounding drywall.
Combine tools and observation to distinguish true water damage from stains, dirt, or paint defects.
When to call a professional
How can you tell if a stain needs a pro? Look for spreading, recurring dampness, musty odor, bubbling paint, or soft drywall—these suggest active leaks or mold.
If stains persist after drying, cover large areas, affect structural parts, or you smell sewage, call a professional.
For safety and lasting repair, don’t ignore signs beyond simple cosmetic discoloration.
Step-by-Step: How to Fix Water-Damaged Paint and Stains
First, you’ll stop the leak and assess the source so no more water comes in.
Then dry the area thoroughly with ventilation, fans or a dehumidifier before inspecting and repairing any damaged plaster, drywall, or insulation.
Finally, clean stains with detergent or a bleach solution for mold, then seal with a stain-blocking primer before repainting.
Step 1 Assess the source and stop further water intrusion
Before you touch paint or drywall, find where the water’s coming from and stop it, because repairing cosmetic damage won’t help if moisture keeps returning.
You’ll inspect, isolate, and act quickly:
- Check roofs, gutters, and flashing for leaks.
- Inspect plumbing, fittings, and appliance connections.
- Seal gaps, tighten fittings, or shut off affected supplies until you can repair.
Step 2 Drying the affected area (ventilation, dehumidifiers, fans)
Start drying the area as soon as the leak’s stopped so mold and staining don’t set in.
You’ll speed drying with targeted airflow and moisture control. Use:
- Fans to circulate air across wet spots.
- A dehumidifier to lower humidity and extract moisture.
- Open windows and vents when weather allows for cross-ventilation.
Check progress daily until surfaces feel dry to the touch.
Step 3 Inspect and repair underlying damage (plaster, drywall, insulation)
Once the surface feels dry, inspect the wall to find what’s actually damaged—plaster crumbling, soft or sagging drywall, or wet insulation tucked behind the wallboard.
Remove loose plaster or drywall, cut out soaked sections back to dry material, and replace insulation.
Patch with appropriate materials, tape joints, and mud seams.
Sand smooth, prime repaired areas, and guarantee the cavity stays dry before repainting.
Step 4 Clean stains (detergent, bleach solution for mold/mildew)
Scrub away visible stains using a mild detergent and warm water, then treat any mold or mildew with a diluted bleach solution (1 part bleach to 10 parts water) while wearing gloves and eye protection.
Follow these steps:
- Test a small area for colorfastness.
- Apply detergent, scrub gently, rinse thoroughly.
- Dab bleach solution, let sit 10–15 minutes, rinse and ventilate.
Step 5 Treat stains with stain-blocking primer
Seal stubborn discoloration with a stain-blocking primer before repainting so the old water marks don’t bleed through your new finish.
Choose a shellac- or oil-based primer for tough tannin or water stains.
Follow these steps:
- Sand and clean the area.
- Apply one thin, even coat; let cure.
- Inspect and repeat if stain shows through.
Step 6 Repaint: choosing compatible paint and finish
6. When you repaint, pick compatible paint and finish to guarantee adhesion and durability. Consider:
- Match base: use latex over latex, oil over oil or prime between.
- Finish choice: eggshell or satin for walls; semi-gloss for trim in damp areas.
- Color and sheen: test a small patch after primer to confirm coverage and appearance before finishing the entire surface.
Step 7 Post-repair monitoring and follow-up checks
Now that repairs and repainting are done, you should monitor the area regularly to catch any recurring leaks, staining, or paint failure early.
Check weekly for the first month, then monthly for six months.
Look for discoloration, bubbling, peeling, damp smells, or new soft spots.
Document findings, photograph changes, and address issues promptly to prevent larger repairs or mold growth.
Prevention Strategies and Best Practices
To keep water damage from happening again, you’ll want a simple checklist of regular maintenance tasks and seasonal inspections that catch problems early.
Pay attention to humidity control and ventilation in bathrooms and kitchens, keep gutters, roof and grading in good repair, and choose paints and primers rated for high-moisture areas.
Noticing small warning signs—stains, musty smells, or peeling paint—lets you act before repairs get costly.
Regular home maintenance checklist to prevent water intrusion
While you can’t stop every storm, a simple, regular maintenance checklist can keep small issues from turning into major water intrusion problems.
Inspect roof, flashing, and gutters quarterly for debris or damage. Check exterior caulking and paint for cracks. Monitor basement and crawlspace for dampness.
- Clean gutters
- Seal gaps
- Test sump pump and exterior drainage
Humidity control and ventilation tips for bathrooms and kitchens
Because moisture builds up fast in bathrooms and kitchens, you should control humidity and ventilate consistently to prevent mold and wall damage.
Install and use exhaust fans during and after showers or cooking, set fans to run 10–20 minutes post-use, open windows when possible, fix leaks promptly, use a dehumidifier in damp spaces, and keep doors ajar to improve airflow and dry surfaces quickly.
Proper exterior maintenance: gutters, roof, grading

If you keep your roof, gutters, and soil grading in good repair, you’ll prevent most exterior water from reaching and damaging your walls.
Regular inspections, timely cleanouts, and proper slope away from the foundation form the backbone of exterior moisture control.
Check shingles and flashing for leaks, clean gutters twice yearly, guarantee downspouts discharge several feet from the house, and regrade soil to direct water downhill.
Paint and primer selection for high-moisture areas
Paint and primer choices play a major role in keeping high-moisture walls dry and mold-free, so pick products designed for damp environments.
Use a high-quality mold-resistant primer, then a semi-gloss or satin acrylic paint for washability and moisture resistance.
Look for mildew inhibitors and breathable formulations that let trapped vapor escape.
Follow manufacturer’s prep and recoat guidelines for lasting protection.
Seasonal inspections and early-warning signs to watch
When seasons change, schedule quick inspections of interior and exterior walls to catch small problems before they turn into leaks or mold.
Check for peeling paint, bubbling or discoloration, musty odors, soft or spongy drywall, and new stains around windows, doors, or rooflines.
Note hairline cracks, failing caulk, clogged gutters, attic condensation, and basement damp spots; address issues immediately to prevent worsening damage.
Common Mistakes to Avoid When Repairing Water Stains
Don’t paint over stains that are still damp—you’ll trap moisture and the spot will reappear.
Always use a stain-blocking primer and don’t ignore possible structural damage or mold before repairing.
Also pick a paint type and finish suited to the room’s humidity and traffic so your fix actually lasts.
Painting over wet or not-fully-dried stains
Although it may seem faster, painting over stains that are still damp or not fully dry usually causes worse problems down the line; the trapped moisture can lift paint, cause blistering, and allow mold to grow beneath the finish.
You should fully dry and confirm no active leak before repainting. Use fans, dehumidifiers, and time; test dryness with touch and a moisture meter.
Skipping stain-blocking primer
If you skip a stain-blocking primer, that brown or yellow discoloration will likely bleed back through your new paint, ruining the finish and forcing you to redo the work.
Don’t assume regular primer or extra coats will stop it. Use a dedicated stain-blocking primer matched to the stain type, let it cure fully, then topcoat for reliable coverage and long-lasting results.
Ignoring underlying structural or mold issues
While using a stain-blocking primer fixes appearance, it won’t stop the problem if there’s rot, a leak, or mold hiding behind the wall.
You should inspect and fix leaks, replace compromised drywall or framing, and remediate mold before repainting.
Otherwise stains return and health risks persist.
Call a pro for structural damage or extensive mold to guarantee the repair is thorough and lasting.
Using wrong paint type or finish for the room
When you pick the wrong paint type or finish for a room, you’ll undermine your stain repairs and invite future problems—flat paints can’t handle moisture in bathrooms or kitchens, and high-gloss choices may highlight imperfections you just repaired.
Choose mildew-resistant, semi-gloss or satin for wet areas, durable eggshell for living spaces, and follow primer recommendations so stains won’t bleed through or recur.
Cost and Time Estimates for Repair
You’ll want to weigh DIY versus professional repair costs—simple patching and paint can be under a few hundred dollars, while pros and major fixes run into the thousands.
Expect drying, repairs, and repainting to take anywhere from a few days to several weeks depending on moisture levels and scheduling.
Be aware that mold remediation, structural or ceiling work, and hidden damage will add time and greatly increase costs.
DIY vs. professional repair cost ranges
Although tackling minor wall water damage yourself can save money upfront, knowing realistic cost and time ranges helps you decide whether to DIY or hire a pro. You’ll weigh materials and labor: DIY kits and paint cost less, pros handle mold and structural fixes. Compare estimates, warranty, and risk tolerance before choosing.
| Option | Typical Cost | Typical Time |
|---|---|---|
| DIY patch & paint | $20–$150 | 1–2 days |
| Handyman small job | $150–$500 | 1–3 days |
| Contractor repair | $500–$3,000+ | Several days |
Typical timelines for drying, repairs, and repainting
Estimating how long each step takes helps you plan and avoid costly shortcuts—drying, repairs, and repainting all have their own timelines that often overlap.
Typically, drying takes 24–72 hours with dehumidifiers; repairs (patching, skim coats) take 1–3 days including curing; priming and repainting need 24–48 hours between coats.
Plan a week for straightforward jobs; allow longer for multiple layers.
Factors that increase cost (mold, structural damage, ceiling work)
When water damage goes beyond surface stains, costs climb quickly—mold remediation, structural repairs, and ceiling work each add specialty labor, materials, and inspection time that can double or triple a simple repainting bill.
You’ll pay more if mold testing, containment, and HEPA cleanup are required, joists or drywall need replacement, or ceiling scaffolding and plaster repair are involved.
Expect permits and longer timelines.
FAQ Frequently Asked Questions
You probably have a few quick questions about stains, mold, and timing, so let’s answer the essentials.
I’ll explain whether stains disappear on their own, when bleach is safe for mold, how long to wait before repainting, when drywall needs replacing, and which primers and paints work best in bathrooms and basements.
Read on for concise, practical answers you can use right away.
Will water stains go away on their own?
Will water stains disappear on their own? Usually they won’t fully vanish without intervention.
Surface discoloration may lighten as materials dry, but mineral deposits, tannins, or mold can leave lasting marks.
You should identify and fix the leak, dry the area thoroughly, and clean stained surfaces.
After remediation, repainting or sealing may be needed to restore appearance and prevent recurrence.
Can I use bleach to remove water stains and mold?
Can bleach remove water stains and mold? You can use a diluted bleach solution (1 cup bleach to 1 gallon water) to kill surface mold and lighten stains on nonporous painted walls.
Test a hidden spot first, wear gloves and ventilation, and rinse thoroughly.
Bleach won’t fix deep staining or porous drywall—those may need primer, repair, or replacement.
How long should I wait after drying before repainting?
After you’ve cleaned and treated stains or mold, wait until the wall is completely dry before repainting—moisture trapped under new paint causes bubbling, peeling, and mold regrowth.
Drying usually takes 24–72 hours for surface moisture, longer for thicker drywall or humid conditions.
Use a moisture meter or touch test; repaint only when readings match surrounding walls and no dampness remains.
Do water stains mean I need to replace drywall?
Even though water stains look alarming, they don’t always mean you have to replace the drywall; many stains are cosmetic and can be cleaned, sealed, and painted once the source of moisture is fixed and the board is dry.
Replace drywall if it’s soft, crumbling, moldy, or has a persistent odor. When in doubt, cut a small inspection hole or consult a pro.
What paint and primer are best for bathrooms and basements?
If your drywall survived the leak and is dry and sound, the next step is choosing paint and primer that resist moisture and mold for bathrooms and basements.
Use a high-quality mold-resistant primer (shellac or latex with mildewcide).
Topcoat with a satin or semi-gloss acrylic latex paint for washable, water-shedding finish.
Confirm ventilation and address leaks before painting to prevent recurrence.
Quick Checklist: Inspect, Stop, Dry, Repair, Repaint
Start with a quick, focused walkthrough: inspect the area to find the leak and soft spots, stop the water source, dry everything thoroughly, make necessary repairs, and repaint to protect the surface.
Start with a quick walkthrough: find the leak, stop the water, dry thoroughly, repair and repaint.
Then follow this short checklist to act fast and avoid mold:
- Locate leak, assess damage.
- Stop leak, remove wet materials.
- Dry, repair drywall, prime and repaint.