
How to Fix Peeling Paint on a Plastic Bumper at Home
You can fix peeling paint on a plastic bumper at home by removing loose paint, sanding and feathering the edges, cleaning with a degreaser, then applying an adhesion promoter and a plastic-specific primer. Use flexible automotive basecoat applied in light, even passes and finish with a clear coat for protection. Work in a clean, ventilated area and use a respirator and gloves. Follow cure times carefully, and keep going for more tips on tools, products, and troubleshooting.
Quick Answer Can You Fix Peeling Paint on a Plastic Bumper at Home?
Yes—you can often fix peeling paint on a plastic bumper at home by sanding the damaged area, using a plastic primer, and applying matching paint and clear coat for a quick, reliable result.
Try DIY when the peeling is localized, the bumper isn’t cracked, and you’re comfortable with basic prep and spray techniques.
If the damage is widespread, the plastic is warped or cracked, or you need a perfect color match, see a pro.
Short summary of the fastest reliable fix
You can fix peeling paint on a plastic bumper at home quickly and reliably by sanding away loose paint, scuffing the surface, applying a plastic adhesion promoter, and then priming and painting with plastic-friendly products.
For a fast, reliable result, follow steps for how to fix peeling paint on a plastic bumper: clean, sand, promote adhesion, prime, paint, and cure fully before reinstallation.
When DIY is appropriate vs. when to see a pro
If the peeling is limited to a small area and the bumper’s plastic isn’t cracked or warped, you can usually fix it yourself with basic tools and a few hours of work.
Do it yourself when damage is cosmetic, you’re comfortable with sanding, priming, and matching paint.
See a pro if cracks, extensive delamination, structural damage, or color-matching difficulties risk safety or resale value.
Understanding the Problem Why Paint Peels on Plastic Bumpers
You’ll first want to know what kind of plastic your bumper is made from—ABS, polypropylene, and TPO all hold paint differently, so that affects your repair options.
Paint peels for predictable reasons like age, impact damage, poor surface prep, UV degradation, incompatible paint, or botched previous repairs.
Check whether the finish is just lifting at the surface or shows deep delamination, because that determines whether you can spot-fix or need to replace the panel.
Types of plastic used in bumpers and how they affect paint adhesion
Because bumper shells are made from several different plastics—like polypropylene (PP), thermoplastic olefin (TPO), acrylonitrile butadiene styrene (ABS), and polycarbonate blends—their surface chemistry and flexibility change how paint bonds and holds up.
You’ll need to match prep and primers to the substrate. Consider:
- PP/TPO: very flexible, needs adhesion promoter.
- ABS: accepts paint well after sanding.
- PC blends: may need plastic-specific primers and careful curing.
Common causes of peeling (age, impact, poor prep, UV, incompatible paint, previous repairs)
Knowing the plastic type helps you choose the right prep and primer, but paint still won’t stay if other factors work against adhesion.
Age makes plastics brittle and paint fail. Impacts and flexing crack coatings. Poor cleaning or skipped primer prevents bonding.
UV degrades both plastic and paint. Incompatible paints or sloppy previous repairs create layers that won’t properly adhere, causing peeling.
How to assess severity: surface lift vs. deep delamination
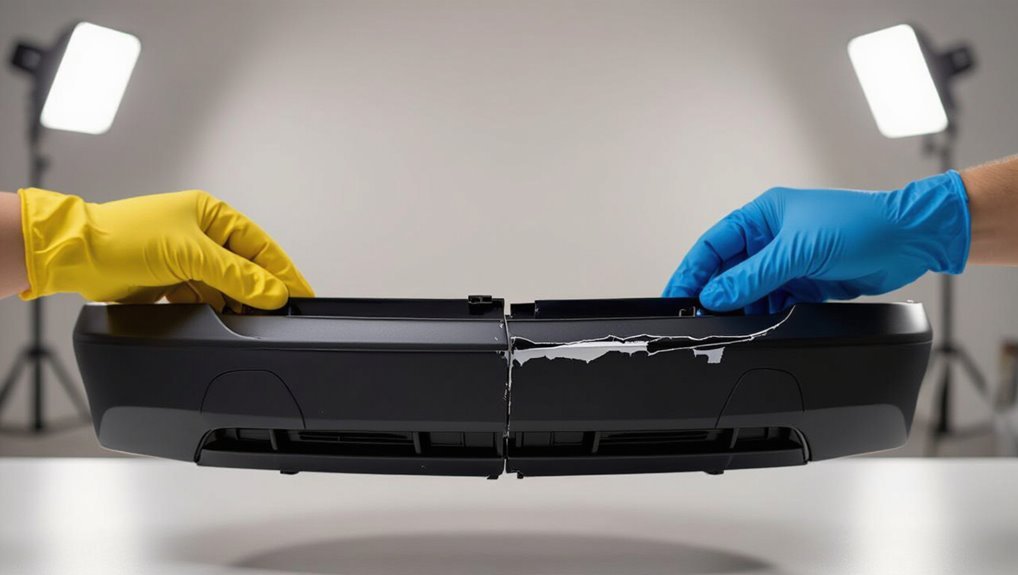
When you inspect peeling paint, start by deciding whether the issue is a surface lift or deeper delamination, because the repair method and how much work you’ll need depend on that distinction.
Gently press and try to lift edges: surface lift peels cleanly and re-adheres after sanding and primer; delamination shows separation from substrate, cracking, or bubbling and usually requires stripping, plastic prep, filler, and repainting.
Tools, Materials, and Safety You’ll Need
Before you start, gather the right tools—sanders, a heat gun, masking supplies, and either a spray gun or quality paint cans—to make the job efficient.
Pick proper materials: a plastic primer and adhesion promoter, flexible automotive paint, and a clear coat formulated for plastic.
Wear respiratory protection, gloves, and eye protection, and set up a well-ventilated, dust-free workspace.
Essential tools (sanders, heat gun, masking supplies, spray gun/paint cans)
You’ll need a handful of reliable tools to strip, prep, and refinish a plastic bumper properly: sanders (or sanding blocks), a heat gun for softening peeling paint, masking supplies to protect trim and adjacent panels, and either a spray gun or quality aerosol paints for the final coats.
- Orbital or sanding blocks for even abrasion
- Heat gun to lift and remove loose paint
- Masking tape, paper, and plastic sheeting to block overspray
Recommended materials (plastic primer, adhesion promoter, flexible automotive paint, clear coat)
A few right materials make the difference between a short-lived touch-up and a lasting repair: choose a plastic primer to promote adhesion, an adhesion promoter for stubborn substrates, a flexible automotive basecoat formulated for plastic, and a UV-resistant clear coat to lock in color and durability.
- Use primer first for reliable bonding.
- Apply adhesion promoter on difficult plastics.
- Finish with flexible paint and UV clear coat.
Safety gear and workspace setup
Now that you’ve picked the right primer, promoter, paints, and clear coat, make sure your workspace and personal protective gear match the job—good materials won’t help if you breathe fumes or contaminate wet paint.
Work in a well-ventilated area or outdoors, use an N95 or respirator with organic vapor cartridges, wear nitrile gloves, safety glasses, and disposable coveralls, and keep tack cloths and clean rags nearby.
Step-by-Step Repair Process
Start by carefully inspecting the bumper and documenting every area where paint is lifting or the plastic is damaged.
You’ll then remove loose paint, clean and decontaminate the surface, and sand and feather edges progressively to create a smooth shift.
If you find deep gouges or structural damage, repair them next with plastic welds or appropriate fillers before priming and repainting.
Step 1 Inspect and document damage
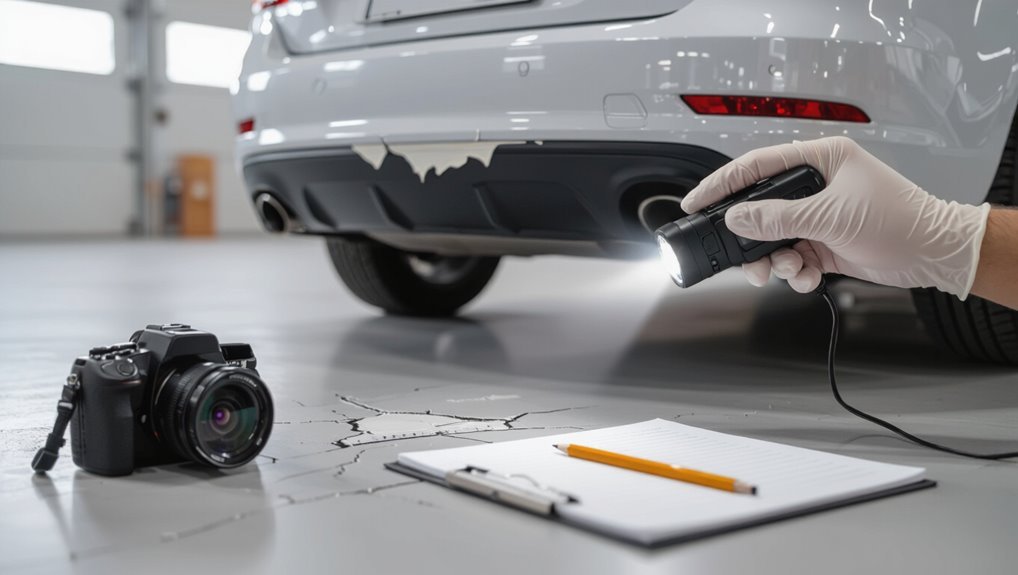
Begin by thoroughly inspecting the bumper for all peeling, cracking, bubbling, or flaking paint, and photograph each damaged area from multiple angles so you have a clear record before you touch anything.
Note paint boundaries, substrate exposure, and any dents or plastic deformities.
Record location, size, and severity in a simple checklist. This helps plan materials, estimate time, and document pre-repair condition.
Step 2 Remove loose/peeling paint safely (manual scraping, sanding techniques)
Lift away all loose paint and degraded edges before you do anything else: use a plastic scraper or putty knife to gently pry up flakes, then follow with progressively finer sanding to feather the paint into solid edges.
Work patiently to avoid gouging the plastic.
- Start with 80–120 grit to remove bulk.
- Move to 220–320 grit to blend.
- Finish with 400–600 grit for smoothness.
Step 3 Clean and decontaminate the surface (degreasing, plastic prep solutions)
With the loose paint removed and edges feathered, you’ll need to clean and decontaminate the bumper so new coatings will adhere properly.
Wipe with a microfiber cloth and a mild degreaser, then rinse.
Use a plastic prep solution or isopropyl alcohol to remove wax, silicone, and oils.
Let it fully air-dry before priming or painting to guarantee proper adhesion.
Step 4 Sanding and feathering edges for smooth transition (grit progression and methods)
Sand the repair area so the old paint and the surrounding surface blend smoothly into the bare plastic; you’ll start coarse to remove high edges, then work through progressively finer grits to feather the shift without creating low spots.
Use a sanding block for even pressure and keep surfaces clean.
- Start 180–220 grit to level edges
- Move to 400–600 grit to feather
- Finish 800–1200 grit for smoothness
Step 5 Repair structural damage or deep gouges (plastic weld, filler options)
Assess the damage carefully before you start: small scratches and surface gouges usually only need filler, but cracks, splits, or deep gouges require structural repair like plastic welding or a reinforced backing.
For deep damage, clean and clamp, then plastic-weld or epoxy with mesh backing.
For shallow hollows, use a flexible automotive plastic filler, cure, sand smooth, and check alignment before priming.
Step 6 Apply adhesion promoter and plastic primer (products and application tips)
1. You’ll clean the repaired area, mask surrounding panels, then spray a plastic adhesion promoter in light, even passes—let it flash per instructions.
Follow with a plastic-specific primer, applying thin, uniform coats to build tooth and corrosion resistance.
Sand between primer coats if needed with fine grit, keep temperatures and humidity in spec, and follow product cure times before moving on.
Step 7 Paint application: basecoat, color matching, spray technique (multiple thin coats)
With the adhesion promoter and plastic primer fully cured and smoothed, you’re ready to apply the basecoat and match the bumper’s color.
Spray light, overlapping passes, keeping the can 6–8 inches away. Let flash time between coats and build color with several thin layers.
- Test color on scrap plastic first.
- Keep movement steady and even.
- Avoid heavy wet coats.
Step 8 Clear coat and curing: types, timing, and polishing
Once you’ve built the base color, apply clear coat to protect the finish and give it depth—choose a 1K acrylic or a 2K urethane clear depending on durability needs and product compatibility.
Spray two to three light, even coats, allowing tack time between passes.
Let the clear cure per manufacturer times before wet-sanding with fine grit and polishing to remove orange peel and restore gloss.
Step 9 Reassembly, inspection, and final touch-ups
Start reassembling the bumper by carefully reversing your removal steps, aligning clips and fasteners, and tightening bolts to the manufacturer’s torque specs; don’t rush—check fitment gaps as you go and make small adjustments so panels sit flush.
Inspect seals, lights, and trim for damage or misalignment.
Do final touch-ups with matching paint, blend edges, and polish cured clear coat for a seamless finish.
Quick Fixes and Temporary Remedies
For small chips and scratches you can use touch-up pens, aerosol fillers, or edge-sealing to mask damage quickly and keep moisture out.
These fixes are fast and inexpensive, but they’re temporary and usually last from a few weeks to a year depending on exposure and prep.
Use them when you need a short-term cosmetic fix or to protect the area until you can do a full repair.
Touch-up pens, aerosol fillers, and edge-sealing for small chips
When you need a fast, affordable fix for small chips on a plastic bumper, touch-up pens, aerosol fillers, and edge-sealers can get you back on the road quickly; each option fills and protects tiny damaged areas without a full repaint.
- Use touch-up pens for pinpoint color correction and minimal prep.
- Apply aerosol filler for shallow gouges; sand smooth.
- Edge-seal chipped edges to prevent moisture and peeling.
When temporary fixes are acceptable and how long they last
If you only need a quick cosmetic fix or are keeping the car short-term, temporary remedies like touch-up pens, aerosol fillers, and edge-sealers can be perfectly acceptable and cost-effective; they’ll hide damage, slow water ingress, and delay further peeling.
Use them for leased cars, pending repairs, or winter storage. Expect results to last weeks to a year depending on prep, exposure, and product quality.
Common Mistakes to Avoid
Don’t skip an adhesion promoter or use the wrong primer, because paint won’t stick properly to plastic without the right prep.
Avoid painting over grease, wax, or over-thinning your paint, and don’t use rigid coatings on a flexible bumper.
Also follow recommended drying times and work in suitable temperature and humidity to prevent failures.
Skipping adhesion promoter or improper primer
Because plastic doesn’t bond like metal, skipping an adhesion promoter or using the wrong primer is one of the fastest ways to ruin a repaint job; you’ll see flaking and peeling far sooner than you expect.
Use a plastic-specific adhesion promoter, then a compatible primer designed for flexible plastics.
Apply thin, even coats, let proper flash times pass, and sand between coats for a lasting bond.
Painting over contaminants or over-thinning paint
When you paint over grease, wax, road grime, or oversanded dust—or thin your paint down too much—the finish won’t adhere and will fail prematurely.
Clean thoroughly with a plastic-safe degreaser, wipe with solvent, and let dry.
Follow manufacturer thinning ratios and test spray on scrap plastic.
Proper surface prep and correct viscosity prevent lifting, blistering, and wasted time or materials.
Using rigid paints on flexible plastic
If you use a hard, non-flexible paint on a bumper that bends, the coating will crack, chip, or peel as the plastic flexes.
Don’t pick rigid enamel or lacquer for pliable trim. Choose flexible, plastic-specific primers and topcoats formulated to stretch.
Test on a scrap, follow manufacturer compatibility, and avoid brittle finishes so your repair stays intact during normal driving and impacts.
Incorrect drying times and environmental mistakes
Although rushing through drying or ignoring temperature and humidity can seem harmless at the time, you’ll almost always pay for it with runs, tackiness, or poor adhesion.
Don’t paint in extreme heat, cold, or high humidity. Follow product dry and cure times, use thin coats, and allow full cure before handling.
Controlled conditions and patience prevent peeling and save rework.
Comparison: DIY vs. Professional Repair
You can save money and time by doing minor paint touch-ups yourself, but expect trade-offs in finish quality and durability.
Professional repair costs more and takes longer, yet it usually delivers a longer-lasting, factory-quality result.
If the bumper has large damage, color-matching needs, or structural issues, you should choose a pro.
Cost, time, and quality trade-offs
When you weigh DIY against professional repair, you’re balancing cost, time, and finish quality: doing it yourself saves money upfront but takes longer and risks a less durable result, while a pro costs more but delivers faster, longer-lasting results and a factory-like appearance.
| Option | Cost | Time |
|---|---|---|
| DIY | Low | Longer |
| Pro | Higher | Faster |
Situations where professional work is recommended
If the damage is extensive, involves structural cracks, or the bumper’s paint has bubbled and delaminated across large areas, hire a pro—they’ve got the tools and materials to restore strength and guarantee a seamless, long-lasting finish.
You should also call a professional if you lack experience, the color match needs precision, insurance is involved, or repairs require specialized fillers, welding, or paint booth conditions.
Prevention and Long-Term Care to Avoid Future Peeling
To keep your repaired bumper from peeling again, follow simple routines for washing, waxing, and UV protection that preserve adhesion and finish.
When you prep a newly painted bumper, cure the paint fully, use compatible primers and clear coats, and avoid harsh cleaners for the first few weeks.
Add a seasonal checklist—inspect for chips, reapply UV protectant in summer, and touch up damage before winter road salt can worsen it.
Best practices for washing, waxing, and UV protection
Though routine cleaning might seem minor, doing it right is the single best way you’ll prevent future peeling and keep a plastic bumper’s finish intact.
Wash gently, dry fully, and apply protection regularly. Key steps:
- Use pH-neutral car shampoo and a soft mitt.
- Apply a plastic-safe wax or sealant every 3–4 months.
- Use a UV protectant spray after waxing to block sun damage.
How to prep newly painted bumpers to last longer
When you finish painting a plastic bumper, the work isn’t done—you’ve got to cure, protect, and maintain the finish so it won’t peel later.
Let paint fully dry per product instructions, avoid immediate heavy handling, and use a quality clear coat designed for plastic.
After curing, apply a plastic-safe sealant and keep the surface clean; minor chips should be touched up promptly to prevent lifting.
Seasonal maintenance checklist
If you want your bumper’s paint to last through sun, salt, and temperature swings, follow a simple seasonal checklist that targets the causes of peeling before they take hold.
Wash and inspect monthly, touch up chips promptly, apply UV-safe sealant each spring, wax before winter, remove road salt after icy drives, and store or cover the car during prolonged harsh weather to prevent moisture and UV damage.
Materials and Product Recommendations
You’ll want to use a plastic adhesion promoter, a primer formulated for flexible plastics, a compatible automotive spray paint, and a durable clear coat to guarantee the repair lasts.
Pick brand-name adhesion promoters and primers (like 3M or SEM) and automotive paints matched to your car’s finish, then seal with a UV-resistant clear coat.
For tools, buy a quality dual-action sander and good spray guns or aerosol guns for frequent work, but rent a paint booth or large compressor only if you don’t have space or need.
Recommended adhesion promoters, primers, paints, and clear coats
Because plastic needs a chemical bridge to hold paint long-term, you’ll want to choose products made specifically for automotive plastics: a plastic adhesion promoter, a flexible primer designed for plastic, a durable acrylic or urethane topcoat, and a compatible clear coat.
- Use a dedicated plastic adhesion promoter (e.g., SEM or Dupli-Color).
- Pick a flexible, sandable plastic primer.
- Choose a two-stage acrylic/urethane paint and a UV-resistant clear coat.
Tools worth investing in vs. rental options
1 clear, reliable sander and a quality spray gun are the two tools that pay off most when repairing plastic bumpers.
But you can rent larger items like an air compressor, spray booth time, or an orbital buffer if you only need them occasionally.
Invest in good sanding discs, masking supplies, and a respirator.
Rent specialty gear to save money and garage space.
Troubleshooting Problems You May Encounter and Fixes
When you run into issues like orange peel, runs, or sags, you’ll want to know what caused them and how to correct your technique.
If paint cracks or starts peeling again after a repair, check adhesion, surface prep, and curing times so you can fix the root problem.
For color mismatch or blending problems, learn tips for feathering, tinting, and clearcoat blending to get a seamless finish.
Orange peel, runs, or sags: causes and corrections
If your plastic bumper shows orange peel, runs, or sags after painting, don’t panic — these surface defects usually come from application errors like spraying too close, using too high a pressure, or applying heavy coats too quickly.
Let paint fully cure, sand defects with fine grit, clean off dust, then feather and reapply thin even coats at proper distance and pressure.
Paint cracking or re-peeling after repair
Although you followed the steps, paint can still crack or peel again when underlying issues persist; you’ll need to diagnose the cause before redoing the repair.
Check for poor adhesion from inadequate sanding, contamination, or incompatible primers/paints. Confirm flexible plastic primer, proper curing times, and thin coats.
Fix any remaining surface damage, clean thoroughly with solvent, and test on a small area before repainting.
Color mismatch and blending issues
Because factory finishes use precise pigment formulas and clearcoat layering, matching a repaired bumper to the rest of the car can be tricky—you’ll need to manage color, sheen, and feathered shifts to avoid obvious seams.
Test spray on scrap, compare in daylight, and adjust tint or translucent toners.
Blend into adjacent panels with fine feathering, clearcoat, and light polishing to unify appearance.
FAQ
Got questions about fixing a peeling bumper?
You’ll get quick answers on whether you can repaint it on the car, how long DIY repairs typically last, and if a heat gun or household spray paint is safe to use.
You’ll also learn how to match the factory trim’s texture and sheen for a professional look.
Can I repaint a bumper without removing it from the car?
Yes—you can repaint a bumper without removing it from the car, but doing so demands careful masking, proper surface prep, and the right spray technique to avoid runs, overspray, and poor adhesion.
You’ll sand, clean, and scuff the plastic, use plastic adhesion promoter and primer, and apply thin, even coats.
Mask nearby panels thoroughly and cure paint per instructions for a durable finish.
How long will a DIY repair on a plastic bumper last?
How long your DIY repair lasts depends on prep quality, materials used, and how you drive and store the car.
With proper sanding, plastic primer, flexible paint, and clear coat, expect 3–7 years under normal conditions.
Poor prep or cheap products can fail within months.
Regular washing, avoiding harsh chemicals, and parking in shade extend longevity.
Touch up chips promptly.
Is heat gun removal safe for painted plastic?
Curious whether a heat gun can safely remove paint from a plastic bumper? You can, but you must be careful: use a low heat setting, keep the gun moving, and hold it several inches away to avoid warping or melting the plastic.
Test on a hidden spot first, wear gloves and eye protection, and stop if the surface softens or discolors.
Can I use household spray paint on a bumper?
Can you use household spray paint on a bumper? You can, but it’s not ideal.
Household paints lack proper adhesion, flexibility, and UV resistance for automotive plastic. If you must, prep thoroughly: clean, scuff, and use a plastic primer designed for automobiles.
Expect shorter lifespan and increased risk of cracking or peeling compared with automotive-grade paints and primers.
How do I match factory trim texture and sheen?
Want the painted bumper to look like it rolled off the factory line? You’ll need to match texture and sheen by testing.
Use matching OEM paint codes, choose satin/matte or gloss clear coat accordingly, and spray light, even passes.
For textured trim, use a texture spray or stipple while wet.
Always test on scrap, then blend edges for a seamless finish.
