How to Fix Peeling Paint on Plaster Walls Effectively
You can stop peeling paint and restore plaster by finding moisture or adhesion problems, fixing loose plaster, and using the right primer and paint. Start by removing loose flakes, test for dampness, reattach or fill delaminated sections, sand and dust the area, then apply a bonding or breathable primer before two finish coats. Use breathable paints where needed to avoid trapping moisture. Keep going and you’ll get step‑by‑step prep, repair, and product choices to complete the job.
Who This Guide Is For and What You’ll Learn
If you’re tackling flaking or bubbling paint on older plaster, this guide is for you—whether you’re a DIY homeowner, a renter getting ready to move, or a property manager overseeing maintenance.
You’ll learn practical plaster wall maintenance steps, surface prep priorities, and proven paint adhesion techniques to prevent recurrence.
Expect clear guidance, tool lists, troubleshooting tips, and when to call a professional.
Quick Fix: 5‑Step Repair Summary
Follow these five quick steps to stop peeling and get your plaster wall ready for a lasting repaint: clear loose paint, clean the surface, repair and feather the edges, prime with a bonding primer, and topcoat with quality paint.
Use quick fixes for small areas, follow proven repair strategies for larger damage, sand smoothly, guarantee adhesion, and let coats cure fully before judging results.
How to Tell Plaster From Drywall
When you’re deciding whether a wall is plaster or drywall, look for telltale clues in thickness, texture, and how the seams and edges were finished.
Check thickness: plaster is thicker over wood lath; drywall types are thinner, panelized.
Check thickness: plaster is thicker over wood lath; drywall is thinner and comes in panelized sheets.
Tap for density; plaster sounds solid.
Inspect seams: plaster often has keying, drywall types show taped joints.
Surface texture and fastener patterns reveal plaster characteristics.
Why Paint Peels on Plaster: The Main Causes
Before you start scraping, know why paint peels on plaster so you can fix the real problem.
Often it’s moisture or water damage pushing paint off, poor surface prep that prevents adhesion, or using paint that’s incompatible with the plaster.
I’ll show how to spot each cause and what to do about it.
Moisture And Water Damage
Although plaster’s hard surface looks durable, trapped moisture is one of the most common reasons paint peels — and you’ll want to identify the source quickly.
You should locate moisture sources, dry areas, and plan water extraction if needed. Fix leaks, improve ventilation, and repair damaged lath to prevent recurrence.
- leaking pipes
- roof or flashing failure
- rising damp
- condensation hotspots
Poor Surface Preparation
Skimping on surface prep is a fast way to invite peeling — paint needs a clean, stable substrate to stick to, and anything left on the plaster (dust, old loose paint, wallpaper paste, or glossy finishes) stops proper adhesion.
You should remove loose material, sand away surface imperfections, clean thoroughly, and use a suitable primer so paint adhesion is consistent and long-lasting.
Incompatible Paint Types
Getting the surface ready only takes you so far if the paint itself fights the plaster. You’ll cause incompatible paint types and paint adhesion issues if you mix oil over water-based finishes or skip primers.
Choose compatible systems and prepare surfaces properly to prevent peeling.
- Use like-for-like paint systems
- Apply bonding primer when needed
- Remove incompatible layers
- Test a small patch first
How Moisture Causes Plaster Paint to Peel
When moisture gets into plaster, it breaks the bond between the paint and the substrate. You’ll see bubbling, flaking, or whole sections sliding away from the wall.
You’ll trace peeling to moisture sources like leaks, high humidity, or poor ventilation. Moisture softens plaster, weakens paint adhesion, and creates salts that push coatings off.
How Old Paint and Poor Adhesion Lead to Failure
Although age alone doesn’t always cause failure, old paint loses flexibility and adhesion over time, so it cracks, chalks, and eventually peels away from plaster.
As paint ages it loses flexibility and adhesion, leading to cracking, chalking, and eventual peeling from plaster.
You’ll notice reduced paint durability and visible adhesion issues that let layers separate. Addressing substrate prep and proper primers restores bonds and extends life.
- inspect layers
- sand and clean
- use a bonding primer
- choose durable finish
How Cracks and Movement Weaken Paint Bonds
If plaster shifts or cracks, paint loses its continuous contact with the surface and the bond breaks along those gaps.
You’ll see crack formation where movement concentrates stress, creating tiny separations that undermine paint adhesion.
As walls expand, contract, or settle, those microgaps grow, letting moisture and air weaken the film.
Fixing movement sources and stabilizing plaster restores a reliable surface for repainting.
When Previous Repairs or Incompatible Coatings Fail
If paint keeps peeling despite your patchwork, you may be dealing with an incompatible coating like gloss over flat or oil over latex.
You’ll need to identify those layers and strip or sand them back to sound substrate.
Don’t leave failed repairs in place—remove loose patches and redo the repair with compatible materials so new paint will stick.
Identify Incompatible Coatings
When paint keeps peeling even after repairs, you’re likely dealing with incompatible coatings—layers that won’t bond because their chemistry, flexibility, or porosity don’t match.
You should inspect layers, test adhesion, and confirm paint types before repainting.
Look for emulsions over oil, glossy over porous, or flexible over brittle layers.
- oil vs. latex
- glossy vs. matte
- alkyd vs. waterborne
- flexible vs. brittle
Remove Failed Previous Repairs
Start by stripping out any previous repairs that haven’t bonded—loose patching compound, flaking paint, and delaminated skim coats all need removal before you can get a lasting finish.
Use gentle chisels, oscillating tools, and sanding to expose sound plaster. Choose removal techniques that minimize damage, then apply compatible repair strategies: bond primer, proper patch mix, and controlled drying to guarantee new coatings adhere and last.
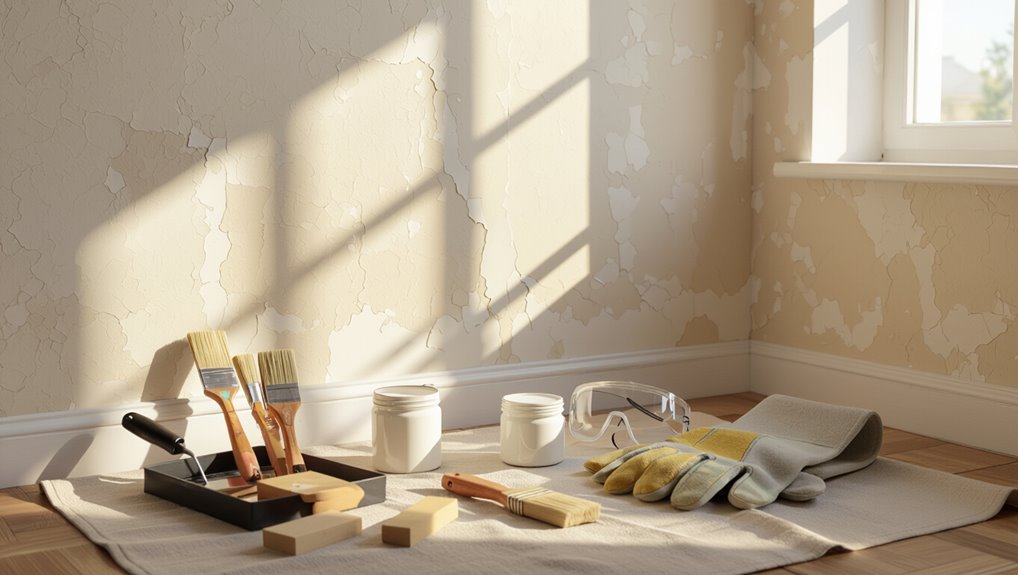
Tools and Supplies for Plaster Paint Repair
Gathering the right tools and supplies makes plaster paint repair faster and gives you a longer-lasting result.
You’ll need materials that support common plaster repair techniques and paint adhesion strategies so patched areas bond and finish smoothly.
- Joint compound or plaster patch
- Sanding block and abrasive sheets
- Primer formulated for plaster
- Quality brushes and rollers
Safety Gear and Dust Control for Plaster Work
Before you begin sanding or mixing patch compounds, put on proper safety gear and set up dust control so you and your home stay protected. Wear dust masks, goggles, gloves; cover floors and vents; isolate the area. Keep workspace organization tight to limit spread.
| Item | Purpose | Tip |
|---|---|---|
| Mask | Filter dust | N95 |
| Goggles | Eye protection | Seal edges |
| Plastic | Containment | Tape seams |
| Vacuum | Cleanup | HEPA filter |
How to Test Plaster for Moisture
Before you start repairs, check the plaster for signs of moisture by looking for staining, blistering, or soft spots.
Use a moisture meter to get objective readings across the wall, and compare them to normal levels for your climate.
For a quick DIY check, tape a piece of plastic to the surface overnight and look for condensation under the film in the morning.
Visual Surface Inspection
Start by closely examining the plaster’s surface for obvious signs of moisture: discoloration, dark or damp patches, peeling or bubbling paint, efflorescence (white powdery deposits), and mold or mildew streaks.
Use visual indicators and check surface texture by touch; note softness, flaking, or powdering. Compare affected areas to nearby dry plaster.
- discoloration patterns
- tactile softness
- flake distribution
- mold streaks
Moisture Meter Readings
A moisture meter gives you objective, quantitative data to confirm whether the plaster is damp and how wet it is: hold the probe or pin pads against clean, exposed plaster and take several readings across the problem area and nearby dry sections to compare relative values. Use proper moisture measurement techniques and careful interpreting meter readings.
| Location | Reading |
|---|---|
| Problem area | 18% |
| Nearby dry | 6% |
Simple DIY Tape Test
If you suspect hidden damp but don’t have a meter, try the simple tape test: press a square of clear tape onto the plaster, leave 24 hours, then check for condensation or softened paper.
It’s a quick, cheap paint testing method to gauge moisture. Note tape adhesion failure as a sign of poor bond or damp.
- Clean surface
- Apply tape
- Wait 24 hours
- Inspect for moisture
How to Check Paint Adhesion With a Tape Test
Before you scrape or sand, try a simple tape test to see whether the paint is firmly adhered or coming loose.
Press a strong adhesive tape onto a small section, smooth it down, then pull sharply. If flakes lift, paint adhesion is poor and that area needs removal and proper prep.
Repeat across the wall to map loose spots before repairing.
DIY or Hire a Pro?
Wondering whether you should tackle peeling plaster paint yourself or call a pro? Weigh DIY techniques against Professional advice by evaluating Skill assessment, Time considerations, Cost comparison, and Project scope.
Choose DIY for small, simple jobs if you’re confident; hire pros for complex, time-sensitive, or high-risk repairs.
- DIY techniques and tools
- Professional advice availability
- Cost comparison breakdown
- Time considerations and scope
Spot Repair vs. Redoing the Whole Wall
Decide whether to patch a few trouble spots or redo the whole wall by evaluating the extent of the damage: small, isolated flakes and loose edges usually call for targeted spot repairs, while widespread bubbling, multiple failing layers, or large areas of moisture damage mean you should strip and refinish the entire surface.
If limited, use spot repair techniques: scrape, stabilize, skim and touch up.
For extensive issues choose wall resurfacing.
How to Prep the Room: Covers, Furniture, Ventilation
When you’re ready to work, clear the area and move furniture to the center of the room or out entirely. Then cover anything that stays with drop cloths or plastic sheeting to catch dust and paint chips.
You’ll follow basic room preparation, focus on furniture protection, plan ventilation strategies, and guarantee thorough covering surfaces.
- Seal vents and doorways
- Use breathable drop cloths
- Tape plastic to trim
- Place fans for airflow
How to Safely Remove Loose, Flaking Paint
Before you touch the wall, put on safety gear—gloves, a dust mask or respirator, and goggles—to protect yourself from dust and old paint chips.
Use a soft scraper or putty knife and gently lift only the loose, flaking paint to avoid gouging the plaster.
Work from top to bottom and keep a damp cloth or plastic sheeting handy to catch debris and minimize dust spread.
Safety Gear First
Suit up: you’ll want eye protection, a respirator rated for paint/lead dust, gloves, and a disposable coverall before you touch flaking paint.
Follow safety precautions and use proper protective equipment to limit exposure and contamination. Keep bystanders out and ventilate the area.
- Seal the work zone
- Use HEPA-filter vacuum
- Wet methods only when safe
- Dispose of debris properly
Soft Paint Removal
If paint is soft, flaky, or failing to stick, you’ll want to remove it carefully to avoid damage and dust spread.
Use a flexible scraper and gentle sanding sponge to lift loose areas, testing small patches.
Apply soft paint techniques: dampen paper, peel with minimal force, and clean residue.
Then assess surface for paint adhesion methods like priming or bonding primer before repainting.
Prevent Dust Spread
When paint is loose or flaking, contain the work area and minimize dust by sealing doors, vents, and floors with plastic sheeting and high-adhesion tape.
Wear a properly fitted N95 respirator, eye protection, and disposable gloves to protect yourself.
Use gentle hand-scraping, mist surfaces, and vacuum with HEPA filter while following dust containment methods for preventing dust.
- Mist before scraping
- Hand-scrape gently
- HEPA vacuum debris
- Seal and remove sheeting carefully
Scraping and Sanding: Feathering the Edges Correctly
Start by scraping away any loose paint until you reach a firm edge. Then sand the surrounding area so the old and new surfaces blend smoothly.
Use progressive grit sanding and gentle pressure to avoid gouging. Practice feathering techniques to thin remaining paint to the plaster, ensuring consistent edge blending.
Wipe dust, inspect for hollows, and repeat light sanding until junctions are invisible.
Identifying and Handling Oil‑Based or Lead Paint
Because many older homes used oil-based or lead-containing paints, you should test and treat suspected areas before any sanding or scraping.
You’ll use a test kit or hire a pro if you find lead paint. For oil-based coatings, select compatible removers and primers, and contain dust and debris.
- test with kit or lab
- hire certified abatement
- use oil-based strippers
- seal and dispose safely
How to Clean Plaster Before Patching or Priming
After you’ve addressed any oil‑based or lead paint concerns, clean plaster thoroughly so patching compounds and primers will bond properly.
Wear gloves, goggles, and a dust mask for plaster safety. Remove loose paint with a putty knife, dust with a soft brush, then wash with mild detergent and water.
Rinse, dry fully, and vacuum residue. Use gentle cleaning techniques to avoid damage.
Repairing Hairline Cracks and Small Holes
Tackle hairline cracks and small holes with lightweight filler that bonds to plaster and won’t shrink or crack later.
You sand, dust, and apply thin coats, keeping edges feathered. For hairline crack repair and small hole solutions, finish with primer and paint.
- Clean and dust
- Apply lightweight filler
- Sand smooth, feather edges
- Prime before painting
Fixing Larger Cracks and Delamination
First, you’ll assess the crack severity by tapping and measuring how deep and wide the splits are.
If plaster has pulled away from the lath or the wall shows bubbling and soft spots, you’ll need to address delamination before anything else.
Once you’ve identified unstable areas, you’ll remove loose material and secure or replace the backing so repairs will hold.
Assess Crack Severity
When you spot larger cracks or areas where plaster’s pulling away from the lath, don’t assume it’s just cosmetic — assess how deep and wide the damage is so you know whether to patch, reattach, or replace sections.
Use crack assessment and severity determination to decide next steps, noting structural risk and moisture.
- measure depth and width
- probe for hollow sound
- check surrounding plaster
- document spread over time
Repair Delamination Areas
If the plaster is pulling away in patches or along seams, you’ll need to remove loose material, reattach the sound plaster, and fill gaps so the wall’s structural bond is restored.
Identify delamination causes like moisture or impact, then use proper repair techniques: undercut edges, inject bonding adhesive, pin or plasterstop loose sections, pack with setting compound, sand, prime, and repaint for durable results.
Reattaching Loose Plaster With Adhesive and Screws
Gather your adhesive, screws, and a drill, and you can start reattaching loose plaster so it stays secure.
Use adhesive techniques to bond back gaps, then follow with screw installation to pull the plaster tight to lath or backing. Countersink screws slightly and avoid overdriving.
- Inject adhesive into voids
- Position plaster firmly
- Drive screws at spacing
- Clean excess adhesive
Applying Plaster Patching Compound for a Smooth Finish
Start by mixing a vinyl- or gypsum-based patching compound to the manufacturer’s recommended consistency so it spreads smoothly and holds its shape.
Apply in thin layers using a flexible blade, pressing firmly to fill voids and feather edges.
Choose patching compound types suited to depth and setting time, and follow plaster application techniques to build durable, even repairs before finishing.
Sanding Patched Plaster for Seamless Blending
After the patch cures, you’ll sand it with a light touch to feather the edges into the surrounding plaster.
Use progressively finer grit and long, even strokes so the changeover is smooth and invisible.
Check your work by running your hand over the area and holding a low-angle light to catch any ridges.
Feathering The Patch
Once the patch has cured, you’ll sand the edges so the repair blends smoothly into the surrounding plaster. Feathering removes the ridge between old and new surfaces and prevents a noticeable outline after painting.
Use gentle pressure and progressive grits, focusing on feathering techniques and blending edges so the shift reads flat and even.
- Start with medium-grit
- Finish with fine-grit
- Check from low angles
- Clean dust thoroughly
Achieving Smooth Transitions
Although the patch has cured and been roughly feathered, you’ll need careful sanding to make the repair disappear into the surrounding plaster; use steady, even strokes and work progressively from coarser to finer grits so the edges blend without gouging.
Focus on smooth surface techniques, check your progress with flashlight grazing, and finish with fine grit to guarantee seamless blending paint shifts before priming and repainting.
Best Primers for Plaster and Peeling Paint
When you’re dealing with plaster and peeling paint, choosing the right primer makes the rest of the repair work possible: it bonds loose edges, seals porous plaster, and creates a stable surface for new paint.
You should know primer types and proper primer application to guarantee adhesion and stain blocking.
- Oil-based bonding primer
- Acrylic latex primer
- Shellac primer
- Stain-blocking sealer
Choosing Paints That Adhere to Plaster
When you repaint plaster, choose breathable paints so moisture can escape and you won’t trap damp behind the finish.
Pair those paints with a quality bonding primer on any repaired or previously flaking areas to guarantee adhesion.
Together they help prevent future peeling and keep the surface stable.
Pick Breathable Paints
If you’ve got plaster walls, pick paints that breathe—meaning they let moisture pass through the surface instead of trapping it behind the plaster where it can cause peeling and damage.
You’ll get breathable paint benefits like reduced blistering and longer-lasting finishes.
When selecting breathable options, choose mineral or acrylic-lime formulations and low-VOC products.
- mineral paints
- acrylic-lime blends
- low-VOC options
- check permeability ratings
Use Bonding Primers
1 essential step is applying a bonding primer before you paint, because it creates a stable, adhesive layer that helps new paint cling to old, flaky, or chalky plaster.
Choose primer types suited for plaster—latex-based or high-adhesion formulas—and follow bonding techniques like cleaning, sanding, and spot-filling.
You’ll improve longevity and reduce future peeling when you prepare surfaces properly and apply recommended primers evenly.
Matching Sheen and Color on Touch‑Ups
Although matching sheen and color can feel tricky, you can make touch-ups nearly invisible by controlling light, finish, and paint application.
Focus on sheen matching and careful color mixing: feather edges, test samples in different light, and apply thin layers to blend. Use matching finish and same base paint for consistency.
- Feather edges
- Test samples
- Thin layers
- Match finish
How to Prime and Seal Repaired Plaster
Once your plaster repairs are dry and sanded, you’ll want to choose the right primer—use a bonding primer for wear-prone areas or a stain-blocking primer if there’s discoloration.
Apply the primer evenly and let it fully cure before painting to guarantee good adhesion.
Finish with a quality sealer or topcoat to protect the repair and match the sheen of the surrounding wall.
Choose The Right Primer
Picking the right primer matters because it seals repaired plaster, promotes adhesion, and prevents future peeling; choose a high-quality, breathable primer formulated for plaster or lime-based substrates, and look for stain-blocking, alkali-resistant labels if you’ve patched with joint compound or fresh plaster.
You should match primer types to substrate, follow recommended application techniques, and let proper drying times cure adhesion.
- Water-based acrylic
- Oil-based/shellac
- Masonry/lime-compatible
- Specialty stain blockers
Seal With Quality Coat
After you’ve selected and applied the right primer, it’s time to seal the repaired plaster with a quality top coat that locks in adhesion and protects the surface.
Choose sealant options suited to room humidity and finish—acrylic for durability, enamel for sheen.
Use proper application techniques: thin, even coats, brush or roller matched to paint type, light sanding between coats for a smooth, long-lasting result.
Cutting In and Painting Repaired Plaster Like a Pro
Tackle cutting in and painting repaired plaster with a steady hand and the right tools to get crisp edges and an even finish.
You’ll use precise cutting techniques and quality painting tools, feathering shifts and keeping a wet edge for seamless blends. Work from repaired patches outward, remove dust, and check light angles as you go.
- angled brush
- small roller
- painters tape
- clean rag
How Many Paint Coats You Really Need
One coat usually won’t hide repairs or provide lasting coverage on plaster, so you shouldn’t rely on it.
Start with a good primer and plan on two finish coats for even color and durability.
Rather than one very thick layer, you’ll get better results from multiple thin coats that dry and bond properly.
One Coat Often Insufficient
Because plaster soaks up primer and paint unevenly, a single coat rarely gives you the uniform coverage you want; plan on at least two topcoats—sometimes three—depending on color change, paint type, and surface condition.
You’ll improve paint adhesion and account for surface moisture. Inspect between coats and add another if coverage or sheen is uneven.
- Check absorption
- Monitor moisture
- Test coverage
- Add coats as needed
Primer Plus Two Coats
Start with a quality primer, then plan for at least two topcoats to get durable, even coverage on plaster; the primer seals the porous surface and helps subsequent coats bond, while the two finish coats build color depth and a consistent sheen.
You should follow proper primer application, allow recommended dry times, and apply two thin, even coats for ideal coat durability and long-lasting results.
Thick Vs Multiple Layers
Think of paint coverage like building a wall: you can either pile on a thick single coat or apply several thin layers, and the latter almost always gives better, longer-lasting results on plaster.
You should prefer multiple thin coats to control layer thickness and improve paint adhesion.
Apply primer, then two thin finish coats, letting each cure fully before the next.
- thin coats
- controlled layer thickness
- better paint adhesion
- faster repairs
Painting Textured vs. Smooth Plaster Surfaces
When you’re deciding between textured and smooth plaster, consider how each surface affects paint adhesion, coverage, and technique. You’ll choose primers, tools, and repair techniques based on textured surfaces or smooth surfaces and guarantee proper surface preparation for paint compatibility and lasting finish.
| Surface | Prep | Best paint |
|---|---|---|
| Textured | Clean, prime | Thick latex |
| Smooth | Sand, prime | Satin/eggshell |
| Repairs | Fill, skim | Match finish |
How to Avoid Brush Marks and Roller Stipple
Once your plaster is prepped and primed correctly, you’ll want to focus on application techniques that prevent brush marks and roller stipple so the finish looks smooth and uniform.
Use proper brush techniques and roller methods:
- Load brushes evenly, avoid overworking edges
- Use a high-quality nap roller and maintain wet edge
- Light, consistent strokes
- Sand lightly between coats and remove dust
Fixing Common Repainting Problems (Laps, Sags)
Catch laps and sags quickly to keep a repaint job from looking sloppy: if paint starts to dry unevenly you’ll see overlapping streaks (laps) or drops of paint that sag before they set.
Work small sections, maintain a wet edge, and adjust roller pressure and speed to prevent lap marks.
Smooth sagging paint with a brush or light sanding, then feather in new coat.
Fixing Leaks and Damp Sources Before Repainting
Before you repaint plaster, stop the moisture at its source: track down and repair leaks, improve ventilation, and eliminate rising damp so new paint won’t peel again.
Use Leak detection and Plumbing checks, schedule Roof maintenance, and plan Foundation repairs.
Prioritize Damp prevention with Moisture barriers, Insulation upgrades, Drainage solutions, Water management, and active Humidity control.
- Leak detection
- Moisture barriers
- Drainage solutions
- Insulation upgrades
Improving Ventilation to Prevent Future Peeling
Once you’ve fixed leaks and dried the walls, improve air circulation to keep moisture from building up.
Use exhaust fans, open windows when weather allows, and consider a ceiling fan or air exchanger to move stale air.
Controlling indoor humidity with a dehumidifier or HVAC settings will help prevent paint from peeling again.
Improve Air Circulation
If your rooms stay stuffy or trap moisture, improving air circulation will help prevent future paint peeling by keeping plaster dry and reducing condensation.
Use practical airflow solutions and circulation methods to move air, prevent pockets of dampness, and dry surfaces quickly.
- Install window fans or trickle vents
- Use ceiling or portable fans
- Open doors between rooms
- Keep vents unblocked
Control Indoor Humidity
Good air movement helps, but controlling humidity levels is what really stops plaster paint from bubbling and peeling over time.
You should monitor indoor air with a hygrometer, run exhaust fans during showers and cooking, and use dehumidifiers where needed.
Maintain relative humidity around 40–50% to prevent moisture buildup.
Consistent humidity control protects paint and plaster and reduces mold risk.
Diagnosing Hidden Water Sources Beneath Paint
Before you start scraping paint, check for concealed moisture sources that could keep the problem coming back.
You’ll use inspection techniques to spot water damage, hidden leaks, and mold growth that threaten wall integrity.
Identify moisture sources, document locations, and plan repair methods. Then implement preventive measures to stop recurrence.
- Probe plumbing lines
- Scan roof and flashing
- Test for damp spots
- Inspect exterior grading
How Seasonal Changes Affect Paint Adhesion
Because temperature and humidity swing with the seasons, they directly change how paint bonds to plaster: cold slows curing and reduces adhesion, while heat and high humidity can prevent proper drying and trap moisture under the film.
You should plan painting during stable seasonal humidity and avoid extreme temperature fluctuations. Work when substrates are dry, follow manufacturer conditions, and let coats cure fully to prevent future peeling.
Routine Inspection and Maintenance Checklist
When you inspect plaster-painted surfaces regularly, you’ll catch small problems before they become peeling, saving time and money; a quick monthly walk-through should look for bubbling, hairline cracks, damp spots, and loose or flaking edges, and note their locations so you can prioritize repairs.
Inspect plaster-painted surfaces monthly for bubbling, cracks, damp spots, and flaking edges to prevent peeling.
Use routine checks and simple maintenance tips.
- Check for moisture sources
- Note cracking patterns
- Test adhesion at edges
- Record locations and dates
Touching Up Small Peeling Spots Without Full Repaint
If you spot a few small peeling areas, you don’t need to repaint the whole wall — you can patch and blend them quickly to restore appearance and prevent further damage.
Start with proper surface preparation: clean, sand loose edges, and prime exposed plaster.
Use targeted touch up techniques: fill, feather edges, match paint, and apply thin coats.
Blend carefully for an invisible repair.
Estimating Time and Cost for a DIY Repair
Time and cost estimates help you plan the repair and avoid surprises. You can usually finish a small patch job in an afternoon.
Plan repairs with time and cost estimates—small patch jobs often finish in an afternoon, avoiding surprises.
You’ll do basic cost estimation for materials and allocate time for prep, drying, and touch-up. Use simple time management to avoid rushing.
- Materials cost (patch, primer, paint)
- Prep time
- Drying/curing time
- Contingency budget
Choosing a Contractor for Large Plaster Jobs
Because large plaster jobs involve structural work, extensive prep, and longer warranties, you’ll want a contractor with specific plaster experience and solid references.
Ask about contractor qualifications, insurance, and licensing.
Request detailed bids that list materials, scope, and clear project timelines.
Compare at least three bids, check past job photos, and get a written contract outlining payment schedule and warranty.
How to Check Repair and Repaint Quality
When the contractor finishes, inspect the work before you sign off or make final payments.
Check that the paint finish is even, edges are crisp, and repairs blend with surrounding plaster.
Test surface durability gently and confirm proper priming.
- Even paint finish without brush marks
- Seamless repair blending
- Firm surface durability under light pressure
- Clean, protected surrounding areas
Caring for Historic Plaster and Preservation Tips
When you’re working with historic plaster, choose paints that are breathable and reversible so moisture can escape and future conservators can undo changes.
Use gentle repair methods—like lime-based fillers and minimal sanding—to keep original texture and avoid harming the substrate.
If you’re unsure, consult a preservation specialist before making major alterations.
Preservation-Friendly Paint Choices
Choosing paint for historic plaster means balancing aesthetics, breathability, and reversibility so you protect the wall’s fabric while keeping its character.
You’ll prefer limewash or breathable mineral paints, avoid impermeable modern coatings, and seek eco-friendly options that support historic preservation.
Consider these choices:
- Limewash for vapor permeability
- Casein or silicate paints
- Low-VOC formulations
- Test patches before full application
Gentle Surface Repair Techniques
After you’ve picked a breathable, reversible paint, you’ll want to handle surface repairs in ways that protect the original plaster and let it keep working—breathing and moving with the building.
Use lime-based fillers for gentle patching, apply thin layers, and sand lightly for subtle surface smoothing.
Test compatibility, avoid hard-setting compounds, and keep repairs minimal so the plaster stays intact and flexible.
Managing Lead Paint on Older Plaster Safely
Because older plaster often contains lead-based paint, you need to treat peeling or disturbed surfaces as a health hazard and act carefully to avoid spreading dust or chips.
Older plaster can contain lead paint—treat peeling or disturbed areas as hazardous and avoid spreading dust or chips.
You should follow lead paint safety and old plaster management steps:
- Wear NIOSH-approved respirator and disposable coveralls
- Wet-sand or mist; avoid dry scraping
- Contain work area with plastic sheeting
- Clean with HEPA vacuum and wet wipes
When to Use Breathable Paints on Old Plaster
If your old plaster still breathes—meaning it lets moisture move through rather than trapping it—use a breathable paint to prevent trapped moisture from causing blistering, peeling, or mold. You’ll gain breathability benefits and avoid incompatibility by checking paint compatibility with lime or cement-based plaster. Choose breathable formulations and follow prep guidelines.
| Feature | Benefit | Note |
|---|---|---|
| Vapor permeability | Reduces trapped moisture | Check compatibility |
| Flexibility | Resists cracking | Use proper primer |
| Mold resistance | Healthier indoor air | Maintain ventilation |
Common Mistakes That Make Peeling Return
When you rush prep, skip compatibility checks, or use the wrong primer, peeling often comes back; you’ll need to address those root errors to stop the cycle.
You should avoid common misconceptions, follow preventive measures, and fix adhesion, moisture, and surface issues properly.
- Poor surface cleaning
- Ignoring substrate compatibility
- Skipping moisture checks
- Using wrong primer
Pre‑Finish Checklist Before You Close Up the Job
Before you call the job done, walk the room and inspect the final surface for missed spots, drips, or uneven texture.
Check trim and edges carefully so seals are tight and lines are clean.
Finish by cleaning up debris, removing dust, and running ventilation until the paint is fully cured.
Final Surface Inspection
As you prepare to close up the job, do a focused walk‑through of every repaired area to confirm surfaces are smooth, firmly adhered, and free of dust or debris that would interfere with finish coats.
Perform a final inspection and concise surface evaluation, noting any hollows, ridges, or loose patch edges you must fix before priming.
- Check adhesion
- Verify smoothness
- Remove dust
- Mark touchups
Trim And Edge Checks
Check every trim piece and painted edge for clean lines, tight seams, and consistent coverage so your finish looks professional and holds up over time.
During trim inspection, press joints, confirm caulked gaps are smooth, and touch up missed spots.
For edge preparation, sand feathered connections, remove stray brush marks, and verify paint overlaps are even so doors and baseboards meet walls neatly.
Cleanup And Ventilation
When you’re wrapping up, clear dust, debris, and paint flecks from floors, fixtures, and window sills so the room looks finished and nothing will mar the new finish.
Use proper cleaning techniques, HEPA vacuums, and tack cloths, and run air filtration to remove fine particles before reinstalling trim.
Don’t rush final inspection.
- HEPA vacuum
- Tack cloth
- Air filtration
- Final inspection
Long‑Term Care Plan to Keep Paint From Peeling Again
To keep paint from peeling again, make a simple maintenance routine and stick to it: inspect walls every few months for small cracks or moisture stains, address humidity and ventilation issues promptly, and touch up minor chips with compatible primer and paint before they spread. Use preventive measures and routine maintenance to protect finish and peace of mind.
| Action | Feeling |
|---|---|
| Inspect | Relief |
| Repair | Pride |
| Prevent | Calm |
Frequently Asked Questions
Can Humidity in Winter Cause Previously Fixed Peeling to Return?
Yes — humidity effects in winter can make previously fixed peeling return. You’ll see moisture swell plaster, weaken paint adhesion, and promote flaking, so you’ll need proper drying, vapor barriers, and heating to prevent recurrence in winter conditions.
Will Wallpaper Over Repaired Plaster Stop Paint From Peeling?
Yes — wallpaper over repaired plaster can prevent peeling if you choose the right wallpaper types and guarantee proper substrate prep; you’ll improve paint adhesion under non-woven or vinyl-backed papers, priming and smoothing so moisture won’t lift finishes.
Can Household Dehumidifiers Replace Structural Moisture Repairs?
About 60% of home moisture issues persist without fixes, so no — you can’t rely on dehumidifiers alone. They’ll help short-term, but you must address moisture sources and use proper repair methods to prevent recurrence.
How Long Should New Paint Fully Cure Before Hanging Artwork?
You should wait about two to four weeks for full curing time before artwork placement; lighter items can go up after a week, but heavier or varnished finishes need the longer cure so frames won’t shift or stick to paint.
Are Specialty Elastomeric Coatings Suitable for Interior Plaster?
“Don’t put all your eggs in one basket.” You can use elastomeric coatings indoors, but they’ll vary; coating benefits include crack bridging and moisture resistance, and application techniques must control thickness, ventilation, and compatibility with plaster primers.
Conclusion
Think of your plastered wall as an old garden wall: if you clear loose vines, mend cracks, and choose plants that breathe with the soil, the wall lasts. You’ve learned to scrape, prime, and patch, control moisture, and pick the right paint so new growth won’t pry stones loose. Do the prep, follow the checklist, and water wisely—your painted garden will stay tidy for years, not just a season.