
How to Fix Wallpaper Bubbles After Painting Over Them
You can usually fix wallpaper bubbles after painting by re‑adhering or replacing the affected areas; start by inspecting for soft spots, moisture, and loose seams, then gently cut a small slit, inject wallpaper adhesive, press and smooth, let dry, sand lightly, prime, and touch up paint to match. For large or recurring bubbles you may need to replace strips or address leaks. Keep going to learn step‑by‑step methods, tools, and when to call a pro.
Quick Answer Can You Fix Wallpaper Bubbles After Painting Over Them?
If you painted over wallpaper bubbles, you can sometimes fix them by cutting a tiny slit, squeezing in adhesive, and smoothing the paper before repainting.
Repair when bubbles are small and the paper’s still sound; replace if the paper’s loose across large areas or the pattern’s ruined.
You’ll save time and get better results by evaluating the extent before you start.
Short, actionable solution summary
Yes — you can often fix wallpaper bubbles even after they’ve been painted over, but the method depends on how much paint and adhesive are involved.
For small bubbles, prick, inject adhesive, press flat, and wipe excess.
For larger or paint-sealed blisters, score, apply adhesive under the seam, clamp, and touch up paint.
These steps explain how to fix wallpaper bubbles after painting.
When to repair vs. when to replace wallpaper
When bubbles appear after you’ve painted over wallpaper, decide quickly whether to repair or replace based on size, location, and how much paint or adhesive is involved.
Small, isolated bubbles can be patched: cut, inject adhesive, press, sand, and touch up.
Replace if bubbles are widespread, seams lift, paper delaminates, or paint prevents proper adhesion—replacement saves time and prevents recurring problems.
Basic Understanding What Causes Wallpaper Bubbles After Painting?
You rely on wallpaper adhesive and a clean, flat surface to keep paper sealed to the wall, so any gap lets bubbles form.
Moisture, trapped air, poor surface prep, and failing adhesive are common causes, and paint can seal in those imperfections or lift weakened glue, making bubbles more noticeable and harder to fix.
Before you start repairs, you’ll want to identify which cause is at work so you can choose the right method.
How wallpaper adhesion works
Although wallpaper seems simple, its adhesion depends on chemistry, surface prep, and timing, and if any of those fail you’ll get bubbles.
You need proper adhesive formulation, even contact with the wall, and correct drying time.
You should match adhesive type to wallpaper and substrate, apply consistent pressure, and avoid premature handling so the bond forms uniformly and resists later stresses.
Common causes of bubbles (moisture, poor prep, old adhesive, trapped air)
If moisture, poor prep, old paste, or trapped air show up after painting, they’ll all cause the same symptom: bubbles under the wallpaper.
You’ll usually see raised blisters where adhesive failed. Moisture from leaks or humidity lifts paper; poor prep leaves dust or uneven surfaces; old adhesive loses tack; trapped air from smoothing seals pockets.
Identify the cause before repairing.
Why paint can make bubbles worse
When paint soaks into wallpaper or the wall beneath, it can weaken adhesive bonds and trap moisture, making existing bubbles swell or new ones form; you’ll often notice this where porous paper or a thin primer lets solvents penetrate and soften old paste.
You’ll also create steam pockets when paint seals damp areas, and thick coatings can hide but worsen delamination until bubbles burst or peel away.
Assess the Damage How to Inspect Painted Wallpaper
Start by looking for soft spots, lifting or peeling edges, and visible seams where paint may have caused bubbles.
Tap and press gently to determine if the issues are superficial bubbles you can reattach or signs of structural failure that need removal.
Keep a tape measure, utility knife, putty knife, moisture meter (if available), and a flashlight handy for a thorough inspection.
Signs to look for (soft spots, peeling edges, visible seams)
Although painted wallpaper can look fine at a glance, you’ll want to inspect closely for soft spots, peeling edges, and visible seams—these are the key signs that moisture, adhesion failure, or shifting backing are compromising the surface.
Press gently to find spongy areas, lift corners to check adhesive, and run your hand along seams for separation or raised paint—note location and size for repair planning.
Severity levels: superficial bubbles vs. structural failure
If you spot bubbles in painted wallpaper, you’ll want to judge whether they’re cosmetic or a sign of deeper failure. Superficial blisters are usually small, isolated, and caused by trapped air or paint drying too quickly, while structural issues show larger, soft, or expanding areas that indicate adhesive breakdown, moisture intrusion, or failing backing.
Treat cosmetic bubbles with localized repairs; suspect structural ones need removal and wall assessment.
Tools and materials for inspection
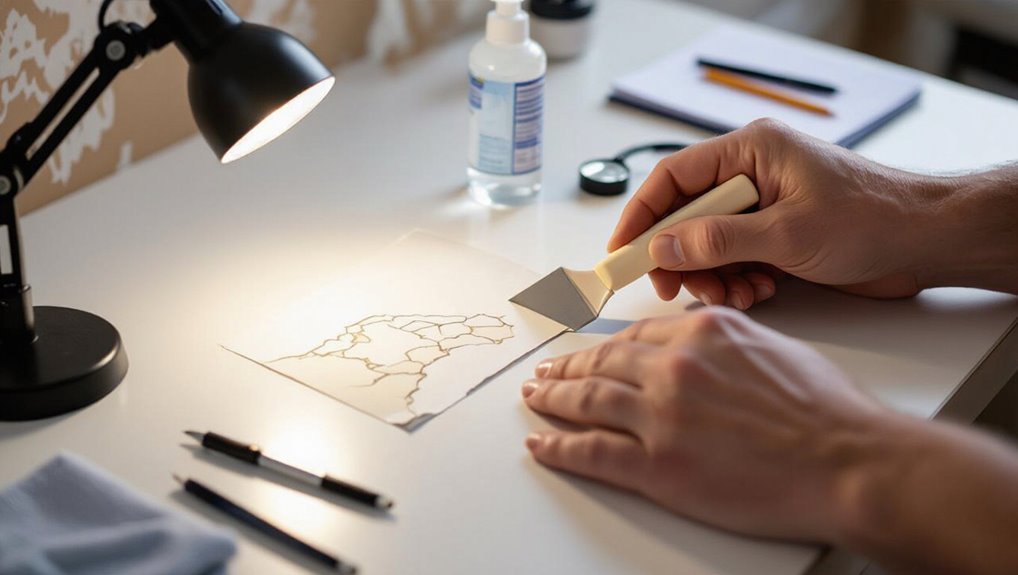
You’ll need a handful of simple tools and materials to inspect painted wallpaper thoroughly:
- Utility knife or pin to probe bubbles.
- Small flashlight to spot lifting and seams.
- Moisture meter or damp cloth to test adhesion.
- Putty knife and magnifying glass for scrapes and close inspection.
Use these to map damage, note locations, and decide if repair or removal is best.
Direct Repair Methods Step-by-Step Fixes for Painted Wallpaper Bubbles
Before you start, protect floors and ventilate the room, and put on gloves and eye protection so you work safely.
Test a small, hidden spot first to make sure the paint and paper tolerate the repair.
Then follow a simple sequence: puncture and re-adhere with the right glue, inject adhesive under the painted paper, and smooth and blot to remove trapped air and excess glue.
Step 1: Prepare the area safely (protect floors, ventilation, safety gear)
Start by clearing the workspace and laying down drop cloths or plastic sheeting to protect floors and nearby surfaces from dust, adhesive, and paint splatter.
Open windows or run a fan for ventilation, and wear gloves, eye protection, and a mask.
Keep tools organized and a trash bin handy.
- Drop cloths/plastic
- Ventilation/fan
- Gloves/eye mask
- Tools/trash bin
Step 2: Test a small inconspicuous area
Once the area is protected and you’re set up, pick a small, out-of-the-way spot to test your repair method on the painted wallpaper bubbles.
Check how the paint reacts, whether texture or color lifts, and confirm adhesives or cleaners won’t stain.
Let any test dry fully, inspect under different light, and only proceed if the result matches your expectations.
Step 3: Puncture and re-adhere method (tools, glue types, technique)
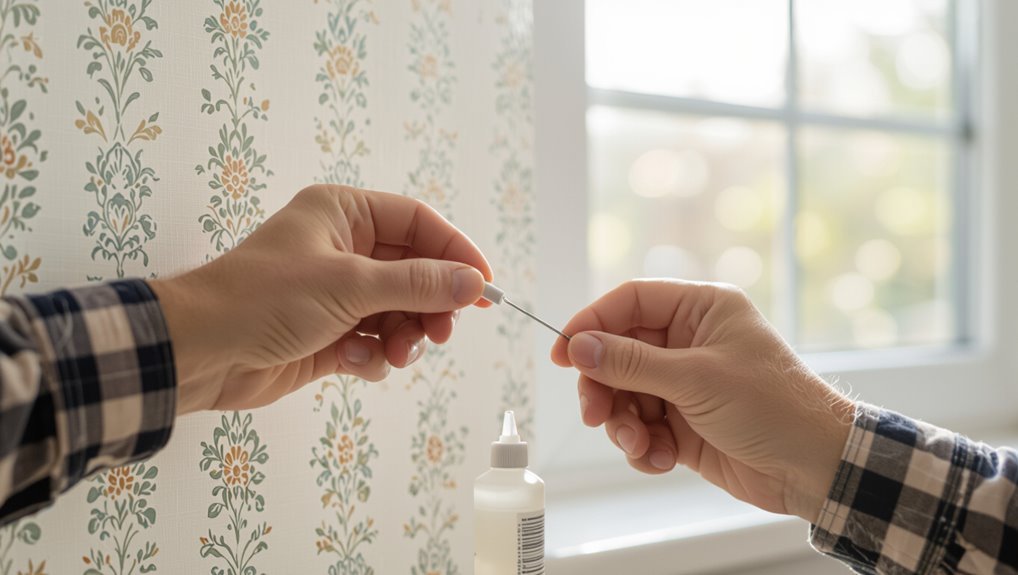
If the test patch went well, you’ll move on to the puncture-and-re-adhere method, which lets you flatten bubbles without removing whole sheets.
It’s quick, minimally invasive, and works best with small to medium blisters. You’ll puncture tiny holes, inject thin wallpaper adhesive or PVA, press out air, and smooth with a roller.
- Pin or needle
- Syringe or fine nozzle
- Thin PVA or ready-mix
- Seam roller
Step 4: Injecting adhesive under painted paper (recommended adhesives, application tips)
3 simple ingredients and a careful hand will get the job done: choose an adhesive suited to painted wallpaper, thin it to flow easily, and inject it beneath the bubble so the paper lays flat again.
Use acrylic or wallpaper paste diluted per label, a syringe with a fine needle, and apply small amounts.
Work from the edge toward the center and wipe any squeeze-out immediately.
Step 5: Smoothing and blotting to remove trapped air and excess glue
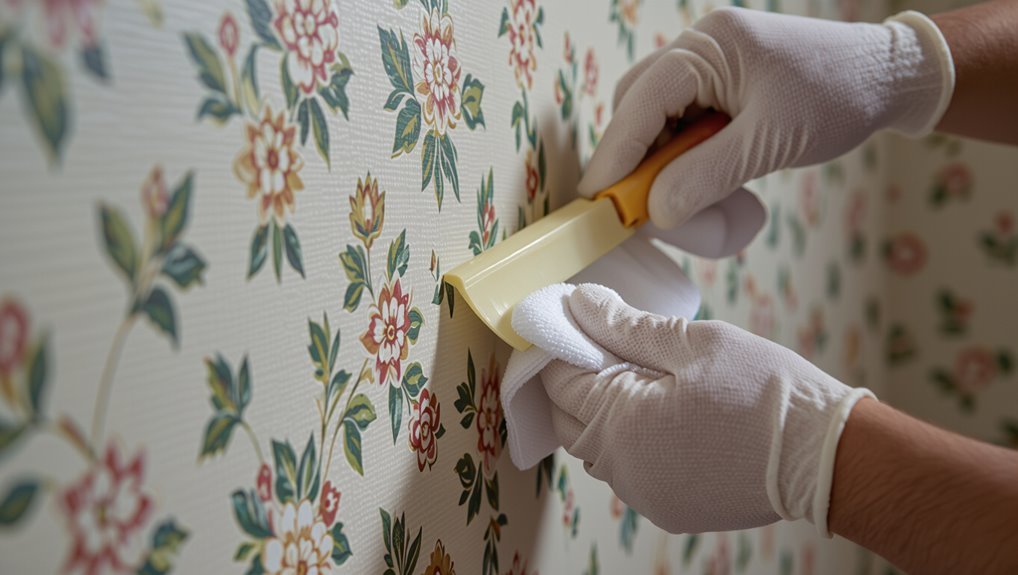
Gently press the patched area from the outer edge toward the center to force out trapped air and excess glue, using a clean damp sponge or a soft cloth wrapped around a flat tool (like a plastic card) for even pressure.
Blot residual moisture with a dry microfiber cloth, repeat gentle strokes until the paper lies flat, and let adhesive set per product directions before moving on.
Step 6: Repairing surface texture and repainting (skim, sand, paint-touch techniques)
Smooth the repaired area with a thin skim of joint compound or wallpaper primer-filler, feathering the edges so the texture matches the surrounding wall.
Let it dry, sand lightly with fine-grit paper until smooth, then wipe dust.
Prime the spot, match paint sheen and color, and apply thin coats, blending outward.
Touch up until the repair disappears into the surrounding finish.
Step 7: When to remove a section of wallpaper and replace strips
When a painted wallpaper bubble won’t re-adhere or the paper’s damaged beyond a cosmetic patch, it’s time to remove and replace that strip so you don’t keep masking a larger problem.
Cut a vertical seam beside the damaged area, peel carefully, clean adhesive residue, and dry thoroughly.
Measure, trim, and paste a matching replacement strip, smoothing seams and sealing edges for a seamless finish.
Alternative Solutions When Repair Isn’t Viable
If repairs won’t hold, you’ll need to contemplate fuller options like stripping the paper using softening solutions, scoring, or steam and solvent methods.
You can also weigh installing new wallpaper over the old versus removing it first—each has pros and cons for adhesion and prep time.
As a quicker alternative, you might cover the wall with paneling or beadboard to hide bubbles and get a clean finish.
Full wallpaper removal steps (softening, scoring, steam vs. solvent)
Because sometimes bubbles mean the damage’s too extensive to patch, you’ll want to remove the wallpaper completely before redoing the wall.
- Score paper lightly to let remover penetrate.
- Apply a softening solution or steamer per instructions.
- Peel strips gently with a scraper, working top-down.
- Clean residue with solvent, rinse, and let drywall dry before repairing or repainting.
Installing new wallpaper over old vs. removing first (pros and cons)
Although skipping removal can save time, you’ll want to weigh the trade-offs before papering over old wallpaper: you can save effort but risk adhesion issues, trapped moisture, and pattern show-through. If you remove, you get a clean surface but more labor.
| Option | Pros | Cons |
|---|---|---|
| Overpaper | Faster, less mess | Bond/appearance risks |
| Remove first | Better finish, durability | Time, labor intensive |
Covering with paneling or beadboard as a quick fix
When wallpaper repair isn’t worth the effort, you can hide bubbles and damaged paper quickly by installing paneling or beadboard—this gives you a clean, durable surface and a fresh style without stripping the walls first.
You’ll measure, cut, and secure panels over problem areas, caulk seams, and paint or stain. It’s fast, hides flaws, adds insulation, and’s reversible if you change your mind.
Materials, Tools, and Products Recommended
You’ll want the right adhesives, primers, and sealers designed for painted wallpaper to guarantee a durable bond without damaging the surface.
Gather repair tools like injector syringes, seam rollers, and scoring tools for precise application and removal.
After repairs, choose compatible paint and finishes—typically a latex primer and a low-sheen acrylic topcoat—to blend the patch and protect the wall.
Adhesives, primers, and sealers to use on painted wallpaper
If your painted wallpaper has bubbles, picking the right adhesives, primers, and sealers will make repairs stick and blend in.
Use acrylic wallpaper adhesive for reattaching loose edges, multipurpose clear PVA for small lifts, high-adhesion contact cement for stubborn areas, and a breathable acrylic primer before painting.
Finish with a water-based clear sealer to protect and match sheen.
- Acrylic wallpaper adhesive
- Clear PVA
- Contact cement
- Breathable acrylic primer
Tools for repair and removal (injector syringes, seam rollers, scoring tools)
A few simple tools will make repairing or removing bubbled wallpaper much faster and neater: an injector syringe for injecting adhesive under lifted areas, a seam roller for smoothing and seating edges, and a scoring tool for controlled punctures that let adhesive reach the backing.
Use them with a putty knife and damp sponge to finish cleanly.
- Injector syringe
- Seam roller
- Scoring tool
- Putty knife
Paint and finish recommendations after repair
1 clear step after fixing wallpaper bubbles is choosing the right paint and finish so patched areas blend seamlessly with the rest of the wall.
Use high-quality acrylic latex for durability and adhesion. Match sheen—eggshell or satin hides imperfections; flat hides texture but isn’t washable.
Prime patched spots with stain-blocking primer.
Recommended tools: angled brush, small roller, and trim pad for smooth blending.
Common Mistakes to Avoid When Fixing Bubbles
Don’t just paint over a bubble—you’ll hide adhesion problems that’ll come back.
Make sure you use the correct adhesive and only the amount recommended, and prep the surface before any repainting.
If you wait too long to fix secondary damage, tears and mold can spread and make repairs harder.
Painting over without addressing adhesion
If you paint over wallpaper bubbles without fixing the underlying adhesion, the bubbles will almost always reappear and the new paint will look uneven or peel.
Don’t skip prep: remove loose sections, clean adhesive residue, and press edges firmly. You’ll save time and avoid repeat repairs.
Properly addressing adhesion guarantees a smooth, durable finish instead of trapped air and failing paint.
Using the wrong adhesive or too much glue
When you pick the wrong adhesive—or slather on too much—you’ll create new problems instead of fixing the bubble: excess glue can seep through paper, stay tacky, or squeeze out at the seams, while the wrong formula won’t bond properly to the backing or wall.
Use a recommended wallpaper adhesive sparingly, apply thin even coats, and test a small area so the patch sets cleanly without bleeding or shifting.
Skipping surface prep before repainting
Although it might seem quicker to paint over a repaired area, skipping proper surface prep before repainting almost always causes the bubble to reappear or the patch to show through.
You should sand smooth, remove dust, prime patched spots, and guarantee edges are sealed. If you don’t, paint won’t adhere evenly, texture and sheen will differ, and the repair will be obvious.
Waiting too long to repair secondary damage risks
Because delays let hidden problems grow, you should tackle secondary damage as soon as you spot a bubble—waiting lets moisture, mold, or adhesive failure spread and makes repairs harder and costlier.
Inspect quickly, peel carefully, dry and treat any mold, then re-glue or replace affected paper. Acting promptly limits repair scope, prevents health risks, and saves time and money.
Prevention and Best Practices to Avoid Future Bubbles
To avoid future wallpaper bubbles, you’ll want to follow proper installation steps and prep surfaces with thorough cleaning and a suitable primer.
Control moisture and improve ventilation in damp areas, and consider choosing paint instead of wallpaper in consistently humid rooms.
These practices will cut down on bubbling and make repairs less likely.
Proper wallpaper installation tips
Start by preparing the wall and work area so you won’t trap air or moisture under the paper; clean, dry, smooth walls and consistent room temperature make a huge difference.
Apply adhesive evenly, book pasted panels for proper soak, align seams precisely, and use a smoothing brush or plastic roller to expel air from center outward.
Trim excess and allow proper drying time before painting.
Surface prep before painting wallpaper (priming, cleaning)
1 essential step before painting wallpaper is thorough cleaning and priming so you won’t trap dirt or moisture that causes bubbles later.
Remove dust, grease, and loose paper with a mild detergent, rinse, and let dry fully.
Spot-prime seams and repairs with a stain-blocking primer, then apply a quality bonding primer over the whole surface to guarantee paint adheres and minimizes future bubbling.
Moisture control and ventilation strategies
Proper cleaning and priming set the stage, but you also need strict moisture control and good airflow to keep bubbles from reappearing.
Keep indoor humidity below 50% with a dehumidifier or HVAC settings, run exhaust fans during showers and cooking, and air out rooms after wet tasks.
Fix leaks promptly, dry walls thoroughly, and maintain steady ventilation to prevent adhesive failure and future bubbling.
When to choose wallpaper vs. paint for humid rooms
If you’re dealing with a humid room, weigh durability and maintenance: paint—especially moisture-resistant or satin finishes—is usually the safer bet for bathrooms, laundry rooms, and basements because it resists mold and won’t peel from trapped moisture the way many wallpapers can.
Choose wallpaper only in well-ventilated areas or with vinyl-coated, moisture-resistant papers; prep surfaces, use mildew-resistant adhesives, and keep ventilation consistent.
Cost, Timeframe, and When to Call a Professional
Fixing small bubbles yourself usually costs just a few dollars and 15–30 minutes per spot, while larger repairs or replacing a strip can take a few hours and more supplies.
If you spot extensive bubbling, peeling over large areas, or signs of structural moisture or mold, call a pro to avoid bigger problems.
When you do hire someone, ask about their experience with wallpaper, whether they’ll check for underlying issues, estimated timelines, and a clear written quote.
Estimated DIY costs and time per repair type
When you tackle wallpaper bubbles yourself, costs are usually low—most repairs need only basic supplies like a syringe or seam roller, adhesive, a utility knife, and a smoothing tool, totaling roughly $10–$30 per small repair; expect larger or multiple patches to push that toward $50–$100 for materials.
| Repair type | Cost | Time |
|---|---|---|
| Small bubble | $10–$30 | 10–30 min |
| Medium patch | $30–$60 | 30–90 min |
| Multiple/large | $50–$100 | 1–3 hrs |
Signs you should hire a pro (extensive damage, structural issues)
Because wallpaper problems can signal deeper issues, call a pro if you spot widespread bubbling, peeling over large areas, persistent moisture stains, crumbling drywall, or mold—these often mean water damage, poor adhesion from structural movement, or ventilation problems that DIY fixes won’t resolve.
A pro assesses underlying causes, estimates repair and painting costs, schedules remediation, and prevents recurring damage, saving time and costly mistakes.
Questions to ask a contractor
Wondering what to ask a contractor about wallpaper repair?
Ask for a clear cost estimate, including materials, labor, and contingencies.
Confirm the projected timeframe, daily work windows, and cleanup expectations.
Ask about licensing, insurance, references, and examples of similar jobs.
Clarify when you’d need a specialist—structural issues, mold, or extensive removal—and get guarantees in writing.
FAQ Frequently Asked Questions
You probably have a few quick questions about painting, adhesive injections, timing, and whether bubbling can come back.
We’ll cover whether you can paint over bubbles, if injected glue harms finishes, how long to wait before repainting, permanent fixes for recurring bubbling, and the role of moisture behind walls.
Read on for concise answers and when you should call a pro.
Can you paint over bubbled wallpaper and expect it to look fine?
Can you paint over bubbled wallpaper and expect it to look fine? You can, but results vary.
Small, tight bubbles may hide under smooth paint if you prep, sand, and use filler. Large, loose bubbles will telegraph through or peel, creating visible flaws.
For a reliable finish, repair or remove unstable sections before painting to avoid uneven texture and failure.
Will injecting adhesive damage the paint finish?
Will injecting adhesive ruin the paint finish? You’re unlikely to harm a cured paint layer if you use the right adhesive, a fine needle, and low pressure.
Work slowly, blot excess promptly, and avoid over-saturating. Test in an inconspicuous spot first.
If the paint is fragile or already cracking, consider removing the wallpaper patch instead to prevent finish damage.
How long after repair should I wait before repainting?
Wait at least 24–48 hours after the adhesive or patching compound has dried before repainting, and longer if the product instructions call for it.
Check that the surface is fully cured, dry to the touch, and free of tackiness.
Sand smooth, remove dust, and use a primer if recommended.
Rushing can trap moisture or cause adhesion failures, so be patient for best results.
Is there a permanent fix for wallpaper that keeps bubbling?
If your wallpaper keeps bubbling despite repeated fixes, there’s rarely a single permanent cure because recurring bubbles usually stem from underlying issues like persistent moisture, poor wall prep, or failing adhesive.
You can, however, stop the problem long-term by identifying and correcting the root cause—drying out leaks, improving ventilation, stripping and re-prepping the wall, and using the right adhesive and installation techniques.
Address causes, replace damaged paper, and reinstall properly.
Can moisture from behind walls cause recurring bubbles?
Because moisture trapped behind drywall or plaster can keep seeping into the wallpaper, you’ll often see bubbles that reappear even after you patch them.
You should locate and fix the moisture source—leaks, condensation, or poor ventilation—before repairing wallpaper.
Dry the wall fully, treat any mold, and install a vapor barrier or improved ventilation.
Otherwise bubbles will return despite surface repairs.
