
How to Get Rid of Shiny Spots on Painted Walls for Good
Diagnose the cause first: shiny patches usually come from overworked/burnished paint, oils or fingerprints, humidity, or cleaning residue. Dim the lights and use a low-angle flashlight to see if shine fades after wiping. Clean with a damp microfiber and mild detergent, then rinse and dry—if water beads, you’ve got residue. If sheen won’t match, lightly scuff only the gloss, spot-prime, and apply two thin, feathered coats without over-brushing until fully cured. Keep going to learn the exact checklist.
Diagnose Shiny Spots Fast

Before you try to fix shiny spots, you need to figure out why they happened—because the cure depends on the cause. Start with shiny spot diagnosis: press a soft cloth lightly. If the sheen shifts, you likely rubbed down fresh paint or trapped oils.
Next, do a wall sheen assessment by moving a flashlight across the surface at a low angle. Look for caulk lines, patch seams, or cleaner residue halos. Smudges suggest wax or oil; glossy patches that won’t change suggest a different binder, over-sanded spots, or roller marks.
Then match your fix to what you find.
Use This 5-Minute Sheen Checklist
Want to confirm what you’re seeing in under five minutes? Do a quick sheen evaluation before you touch a rag. You’ll spot whether the highlight is surface grime, inconsistent sheen, or a bonding issue that affects paint durability.
- Dim lights, then shine a flashlight across the wall at a low angle.
- Check one small 12×12 section; note how fast the shine fades when you wipe once.
- Compare edges to the center—steady gloss usually means uniform coating.
- Feel texture: if it stays smooth and dry, stop and reassess.
If the sheen changes, you’re dealing with buildup, not damage.
Find The Cause: Overworked Paint
Overworked paint often causes those shiny spots when you keep rubbing the same area long after it starts to get tacky. If you chase drips or blend edges repeatedly, you overwork paint and compress the top layer, leaving a glossy patch.
Next time, stop touching that spot as soon as the sheen changes. Use steadier application techniques: work in small sections, keep a wet edge, and load your roller evenly.
Don’t go back with a dry brush to “fix” coverage. Let it cure fully before evaluating.
Spot Oily Fingerprints In The Right Light
When the wall catches the light just right, you can spot those “shiny spots” as oily fingerprints rather than paint problems—tiny areas where skin oils changed the finish.
Focus on that light reflection: it reveals oily fingerprints fast, especially near doorways and handles.
1) Wipe the spot gently with a microfiber cloth, using light pressure.
2) Follow with a slightly damp cloth; don’t scrub hard.
3) If needed, dab a small amount of degreaser on the cloth, then wipe clean.
4) Recheck in angled light and let it dry fully.
Check For Humidity And Uneven Drying
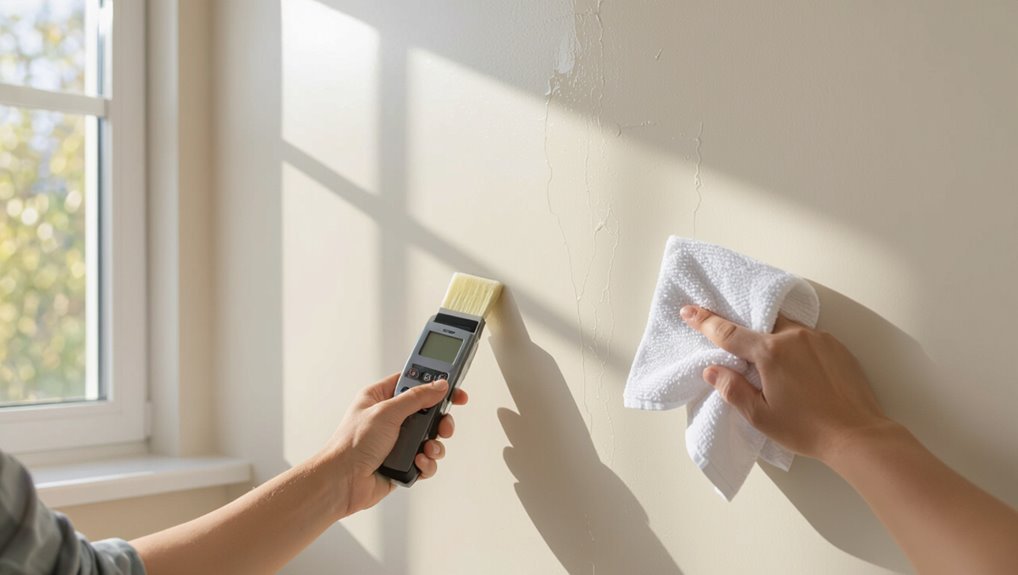
Before you blame the paint, you should check for humidity and uneven drying, because those issues can create dull patches or “shiny” zones that look like fingerprints. Walk the wall in natural light and feel for cool, clammy areas; those signal moisture. Verify your humidity control by running a dehumidifier or improving ventilation until the air stabilizes. Then, test drying techniques: maintain steady temperature, avoid drafts, and keep coats evenly thick. Use this quick guide:
| Clue | Fix |
|---|---|
| Cool damp spot | Dry and dehumidify |
| Glossy streak edge | Recoat evenly |
| Patchy sheen | Reapply over cured areas |
| Bubbles | Stop and dry fully |
| Soft spots | Let cure longer |
Look For Cleaning Residue Halos
Cleaning residue can mimic paint “shiny spots,” so you should inspect for halos where grime, soap, or cleaner left behind a thin film.
After washing, you’ll often see light patches that catch angles.
After washing, you’ll often see light patches that catch angles, revealing where residue or uneven cleaning remains.
Use these cleaning techniques to locate and fix them quickly:
- Hold a flashlight low to the wall and scan for curved shine rings.
- Swipe with a clean, damp microfiber; residue transfers, paint won’t.
- Reclean the halo area with mild detergent, then rinse lightly.
- Dry thoroughly to prevent re-deposit.
These steps support effective shine removal without guesswork.
Confirm There’s No Wax Or Polish
Before you start scrubbing, check for wax or polish that can trap shine.
Spot test a small hidden area with a few drops of water—if the gloss blooms or beads up, you’ve got residue.
Wipe it away with a cleaner made for painted surfaces, then reassess the spot.
Check For Wax Or Polish
First, inspect the shiny spots to see if someone previously used wax or polish—this finish can cause glare even after regular washing. You need surface testing with the lightest touch. Look for a slick feel or rainbow haze when you move across the area.
Then do these quick checks:
- Rub a hidden spot with a soft microfiber.
- Apply a tiny amount of denatured alcohol to gauge wax removal.
- Scan the sheen edges for “buffed” changes.
- Clean and recheck under angled light.
If the shine persists in one direction, you’ve likely got wax or polish residue, not just dirt.
Test With Water Spotting
Now that you’ve ruled out obvious wax-like slickness, test the surface with water spotting to confirm there’s no lingering polish: lightly mist the shiny area with clean water and watch how it behaves. Use room-temperature water temperature so you don’t distort the finish. Notice surface tension: if water beads tightly and won’t spread, residue or contamination may remain. If it sheets and darkens evenly, you’re likely past polish.
| Water behavior | Likely cause |
|---|---|
| Beads sharply | Wax/polish residue |
| Spreads evenly | Solid paint/primer |
| Dries streaky | Dirty surface or oils |
Rule Out Poor Adhesion From Weak Prep
If your painted wall develops shiny spots, you should rule out poor adhesion caused by weak prep—paint can’t bond well when dust, grease, chalky residue, or loose flakes stay on the surface.
Start by inspecting for powdery chalk, greasy streaks, or bubbling edges. Then run adhesion checks and redo your preparation techniques so the coat can grip.
- Wipe with a degreaser, then rinse and dry fully.
- Scrape off any loose flakes, feather remaining edges.
- Remove chalky residue with a cleaner, not just water.
- Recoat only after the surface feels firm and uniform.
Decide: Clean Vs Sand Vs Prime
Before you touch shiny spots again, decide whether you need to clean, sand, or prime based on what’s causing the sheen.
First, do sheen assessment: check if glare shifts after dry wiping. If it dulls, use cleaning methods—mild detergent or degreaser—then rinse and dry for solid surface preparation.
If the shine stays and feels slick or raised, use sanding techniques: lightly scuff, feather edges, and dust thoroughly.
If the area still won’t accept paint, choose priming options matched to stains and paint finishes.
Make wall maintenance decisions now with smart product selection.
Gather Tools And Supplies First
Gather everything you need before you tackle shiny spots on painted walls, because the right supplies help you remove grime, scuff the surface, and prep for new paint without making the problem worse.
Gather everything you need first—right tools remove grime, scuff safely, and prep shiny spots without worsening the paint.
Start with tool organization: clear a workspace and keep supplies within reach for quick switches.
Use this supply checklist to lock in project readiness:
- Microfiber cloths and a tack cloth
- Mild degreasing cleaner, sponge, and bucket
- Fine-grit sanding sponge or sandpaper
- Primer/patch compound and a putty knife
As you gather resources, follow your preparation strategy and confirm you have the essential materials before you begin.
Choose Safe Wall Cleaner For Degreasing
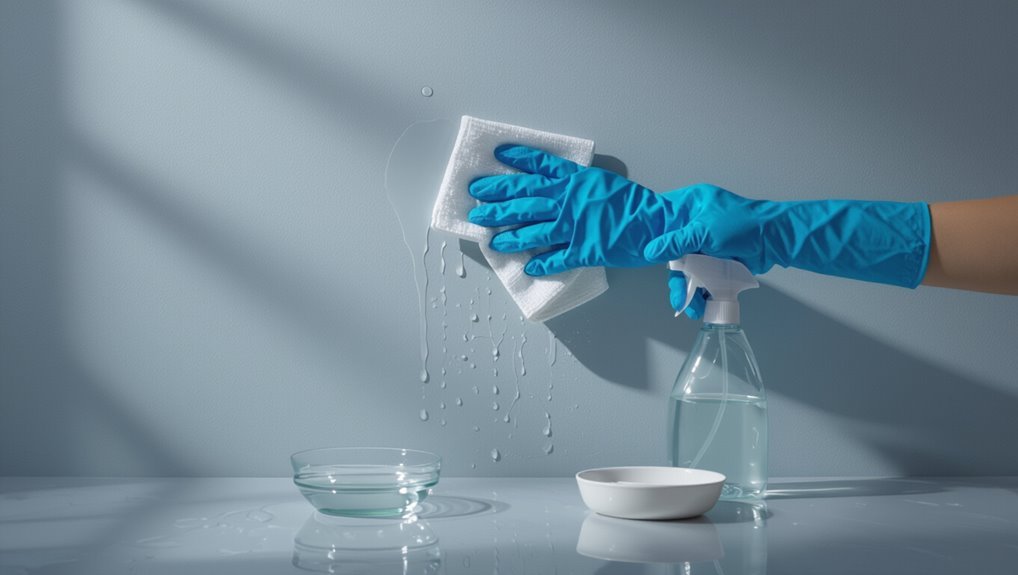
Pick a gentle degreasing cleaner made for painted walls, and avoid harsh solvents that can dull the finish.
Before you start scrubbing, test the cleaner on a hidden spot and check for streaks or color change.
If it looks good, use it on the shiny area with light pressure and wipe clean.
Pick Gentle Degreasing Cleaners
To tackle shiny spots without damaging paint, choose a gentle degreasing cleaner made for painted walls. You’ll avoid harsh solvents that can leave more glare.
Start by picking gentle cleaners labeled for walls, then use effective solutions that cut greasy residue without stripping finish.
Follow these steps:
- Read the label to confirm “paint-safe” and “degrease.”
- Choose low-suds formulas to minimize streaking.
- Apply with a soft microfiber cloth, not abrasive pads.
- Wipe with clean water afterward if the product calls for it.
With the right product, you lift buildup and restore a matte look.
Test Cleaner On Hidden Spot
Before you start wiping the shiny area, test your degreasing cleaner on a hidden spot to make sure it won’t dull, stain, or lighten the paint.
Choose a spot behind a chair, near the baseboard, or inside a closet door. Dip a soft cloth or sponge into your test cleaner, then rub gently in small circles for 10–15 seconds.
Wait 10 minutes, then check the surface in bright light. If the paint looks unchanged, proceed.
If you see discoloration or a different sheen, switch to a milder cleaner and retest.
Rinse And Dry Completely (Don’t Rush)
After you finish rinsing the affected area, give it time to dry completely. Don’t rush, because shiny spots often come from leftover cleaner or trapped moisture. Use clear rinse techniques and choose drying methods that match your wall type.
- Rinse with clean water using light, even passes.
- Change water often so residue doesn’t redeposit.
- Pat edges first, then work outward to avoid streaks.
- Let the wall air-dry fully; use a fan only if it won’t overheat paint.
When it’s totally dry, check under bright light.
Sand Glossy Patches To Level Them
When you hit a glossy spot, lightly sand it until the surface feels even with the surrounding paint.
Wipe or vacuum up all dust, because leftover grit will ruin your finish.
Once it’s clean and dry, recoat the patched area and feather the edges so the shine blends in.
Sand Until Surface Levels
Sand the glossy patches until they blend into the surrounding paint. Use steady pressure and light, even strokes so you level the surface without digging. This step is your core surface preparation: it improves paint adhesion and sets you up for a clean finish.
- Choose the right sanding tools for your wall texture.
- Use fine-grit sandpaper and follow consistent sanding techniques.
- Feather the edges until no shine remains.
- Stop often and check with your fingertips.
When the sheen looks uniform, you’re ready for the next phase.
Remove Dust, Then Recoat
Once the glossy spots look level, you need to clear off every sanding residue before you repaint. You can’t skip dust mitigation.
Vacuum the area with a soft brush attachment, then wipe walls using a damp microfiber cloth, working top to bottom. After the surface dries, run your hand lightly over it to confirm it feels smooth. If you still see haze, wipe again and let it dry fully.
Next, apply primer only where you sanded, feathering edges. Finish with two coats of matching paint, following dry times for solid paint maintenance and even sheen.
Pick The Right Sandpaper Grit
Choosing the right sandpaper grit determines whether you dull the shiny spot without damaging the surrounding paint.
For grit selection, match the sheen problem, not the wall material. Start with gentle sandpaper types to scuff just the glossy layer. Use light pressure and check often so you don’t create flat patches.
- Begin with 220-grit for mild shine.
- Switch to 150–180-grit if the spot stays slick.
- Use 320-grit to smooth after sanding.
- Stop at dull, uniform texture—no troughs.
Blend The Edges So Halos Vanish
To help the shine disappear, you need to feather out the paint edges so the repair area stops looking sharp.
Lightly spot blend beyond the halo using a clean brush or roller, working in thin layers until the gloss levels out.
Keep checking under the same lighting as the rest of the wall, then stop as soon as the boundary vanishes.
Feather Out Paint Edges
Feathering out the paint edges is what makes the repair look seamless—so instead of leaving a sharp boundary that catches light, you’ll blend the surrounding area until the changeover disappears.
Use solid feathering techniques and careful edge blending while the paint is still workable.
- Load a small amount of matching paint on a clean brush or roller.
- Lightly tap the perimeter, then pull strokes outward into the old finish.
- Switch to a drier brush to soften ridges between layers.
- Feather repeatedly, letting each pass dry before the next.
Check under angled light, and adjust until the shine matches.
Reduce Halo With Spot Blending
Once you notice a halo where your patch meets the old wall, use spot blending to erase that boundary.
Lightly dampen a clean microfiber cloth, then feather-dab color from the patch into the surrounding dry paint. Work in small circles, keeping your pressure light so the sheen equalizes.
If the spot still flashes, reload your brush or roller with a thin coat and blend paint methods outward 2–3 inches, alternating directions each pass.
Finish by checking under raking light; repeat halo reduction techniques until the sheen matches and the edge disappears.
Let it cure fully before judging.
Vacuum And Tack-Cloth Before Spot-Priming
Start by vacuuming the entire wall surface with a brush attachment, paying extra attention to corners, ledges, and around the shiny spots. This sets your dust removal techniques and surface preparation tips up for success before you spot-prime.
Then follow these cleaning methods and paint application strategies:
- Vacuum loose debris thoroughly.
- Wipe with a tack cloth, changing sections often.
- Feather edges to handle texture considerations.
- Prime only the dull spots, using sheen matching techniques.
Watch humidity control methods and paint drying factors; dry conditions reduce light reflection effects.
If spots reappear, repeat gloss reduction strategies.
Use Stain-Blocking Primer For Stains
Use a stain-blocking primer to stop discolored areas from bleeding back through your finish coat.
After you’ve cleaned and prepped the surface, you’re ready for stain prevention. Choose a high-adhesion stain-blocking primer, and stir it well so solids won’t settle.
Apply it only to the affected spots, feathering edges so you won’t leave a hard ridge. Keep a consistent coat thickness; too thin won’t seal, too thick can crack.
Let the primer dry fully, then sand lightly if the surface feels rough. This primer application creates a stable base for your topcoat.
Apply Spot Primer To Stop Bleeding
After you’ve cleaned the shiny spots, use a stain-blocking spot primer directly over the problem area.
Brush or roll the primer on, then prime the edges to help prevent bleeding through the topcoat.
Let the primer cure completely before you paint, so the shine doesn’t come back.
Use Stain-Blocking Spot Primer
Even when you’ve already repainted, dark stains can creep through if the surface isn’t sealed first. You need stain-blocking spot primer to stop the culprit from migrating and turning your sheen spotty again.
Pick a shellac- or oil-based primer that matches the stain types you’re fighting, since different sources bleed differently.
Then:
- Clean and dry the spot completely.
- Apply primer only to the affected area, feathering edges.
- Let it cure fully before you touch up.
- Recoat with your wall paint for even coverage.
You’ll get primer benefits like stronger stain control and fewer shiny returns.
Prime To Prevent Bleeding
Spot primer does more than cover—it prevents the stain from bleeding back through and leaving shiny patches. After cleaning and drying, you spot-prime the discolored area with a stain-blocking product to strengthen paint adhesion. Use a small brush or roller, and feather edges so they blend.
| Step | Focus | Result |
|---|---|---|
| Clean | Surface oils | Better bonding |
| Prime | Spot area | Stops bleed |
| Feather | Edges | Smooth finish |
Choose the right primer types: oil-based for stubborn stains, shellac for fast lockout, or latex-based for general spots. Apply one thin coat.
Let Primer Cure Completely
Once you’ve spot-primed the stained area, let the primer cure completely before you paint the rest of the wall.
Don’t rush—shine returns when you trap moisture or residue under fresh color. Follow solid primer application tips and track primer drying time on the label, then add extra time if humidity is high.
Use your fingertips to check for tackiness. If you still feel stickiness, wait again.
- Ventilate the room for steady airflow.
- Keep the spot dust-free while curing.
- Apply only thin, even coats.
- Recheck before topcoating the whole wall.
Let Primer Cure Before Topcoat
Let your primer fully cure before you apply the topcoat, because rushing it can trap moisture or solvents and create shiny spots later.
Choose the right primer types for your surface—bonding, stain-blocking, or bonding over repairs—and then respect the recommended curing time. You’ll know it’s ready when the primer feels dry, firm, and uniform, with no tackiness.
If you’re painting in cool or humid weather, increase curing time and give each coat airflow.
Then apply your topcoat evenly, avoiding heavy passes that can highlight uncured areas.
Match Paint Sheen For Seamless Blend
Check the sheen level of the existing paint—matte, eggshell, satin, semi-gloss, or gloss—so you can match it exactly.
When you buy the topcoat, choose the same finish (and sheen rating if listed) to avoid new shiny or dull patches.
Test your matched paint on a small hidden spot first, then blend the edges to keep the wall looking seamless.
Identify Existing Sheen Level
Have you ever noticed how certain areas of a wall catch the light differently, even though they look “clean”? That glare usually means mismatched sheen levels or a different paint type from earlier touch-ups.
Before you do anything, you need to identify the existing sheen so you don’t make it worse.
- Shine a flashlight across the spot at a low angle.
- Note how strongly it reflects compared to nearby areas.
- Match the look to common paint types: flat, eggshell, satin, semi-gloss.
- Check if only repaired zones differ, not the whole wall.
Once you pinpoint the sheen, you’re ready to fix the cause.
Match Paint Finish Exactly
Once you’ve confirmed the sheen level, you need to match the paint finish exactly so your repair stops flashing under light.
Start with finish selection based on your paint types and sheen levels; buy the same brand and base if possible.
Do wall preparation carefully: sand, feather edges, then prime bare spots.
Use texture matching by matching roller nap or brush pattern, and test application techniques on scrap.
Account for color variations—mix or tint to match.
Let drying conditions stay consistent; humidity and temperature change gloss.
Re-check lighting effects with both daylight and lamps.
Follow maintenance tips to prevent new sheen differences.
Use Correct Brush/Roller Technique
Use the right brush or roller technique, and you’ll prevent the glossy streaks that create shiny spots on painted walls.
Start by nailing paint application with correct tool selection; match the job to brush types and roller techniques. Keep steady application pressure—too much forces shine, too little leaves skips. Use sheen control by loading evenly and stopping before the nap dries.
Follow this rhythm:
- Confirm surface preparation is clean and fully cured.
- Maintain paint consistency; thinness or thickness changes reflectivity.
- Use edge blending while the film stays wet.
- Rely on drying techniques: let coats cure undisturbed.
Don’t Overwork: Avoid Re-Glossing
Work in small sections so you can keep a wet edge and blend sheen before it sets.
Let each patch dry fully before you touch it again, because rushing leads to re-glossing and fresh shiny spots.
If the surface starts to tack up, stop and move on to the next area.
Work In Small Sections
Tackle the wall in small sections so your paint stays workable and doesn’t start to tack up before you blend. You want even sheen consistency, so focus on one tight area at a time.
Use steady strokes, keep your roller or brush loaded evenly, and stop as soon as the surface looks uniform under current lighting conditions.
- Maintain consistent paint application across corners and seams
- Watch texture variation so you can adjust pressure
- Use solid wall maintenance and check marks immediately
- Match surface preparation and product selection for smooth results
Allow Proper Drying Time
Even if your application looks perfect, you still need to let the paint dry before you “fix” it—because re-glossing while it’s tacky is exactly how shiny spots happen.
After each pass, follow drying techniques and drying times on the can. Set drying conditions: steady temperature, low humidity, and controlled moisture levels.
Improve air circulation with fans, but avoid blasting one spot. Check wall texture and paint thickness; thicker areas need longer drying methods.
Don’t overwork edges or roller marks—pause, wait, and reassess. Environmental factors change schedules, so trust the clock, then touch lightly.
Feather Touchups Into The Surrounding Paint
Once the dried spot matches the sheen, feather your touchup outward so the repair blends with the surrounding paint.
Use feather blending and careful touchup techniques to avoid a visible patch. Lightly mist a soft sponge or dry brush with the right paint, then taper edges until the shine evens out.
Use feather blending and careful touchup techniques—lightly mist a sponge or brush, taper edges, and even out the shine.
Work in short passes, wiping excess from the tool each time, so you don’t build a ridge. Follow this rhythm:
- Dab center lightly
- Pull strokes outward
- Stop before edges thicken
- Check sheen, let dry
Thin Paint Only If You Must
Test your fix with minimal paint first so you don’t overbuild the shiny spot.
Apply a thin layer only where needed, then feather the edges outward to blend with the surrounding finish.
If it’s still glossy, add another light pass rather than piling on more paint at once.
Test With Minimal Paint
Before you commit to a full repaint, spot-check the fix with a tiny amount of touch-up paint.
Use minimal paint techniques so you don’t create new shiny patches. Try it in an inconspicuous corner, then compare it under the same light that shows the glare.
Follow this quick test:
- Clean and dry the glossy spot area.
- Dab a small dot of matching color.
- Feather the edge lightly, barely blending.
- Wait 24 hours, then check paint sheen comparisons.
If it dulls evenly, proceed; if it flashes brighter, stop and reassess.
Feather Edges For Blend
Feathering helps you blend a touch-up so it matches the surrounding sheen, and you should do it only when the paint sits a bit proud. Lightly sand the edge, then wipe dust. Use a damp brush or dry roller to apply thinner paint and taper outward. This feather technique relies on blending methods: fewer strokes, lighter pressure, longer overlap, and quick dry checks.
| Tool | Where to use |
|---|---|
| 220-grit | Edge sanding |
| Soft brush | Taper coats |
| Roller lint-free | Large spots |
| Microfiber | Wipe dust |
| Light recoat | Only if proud |
Let it cure, then reassess.
Control Application Pressure And Passes
Controlling your spray or roller pressure—and how many times you pass—often fixes shiny spots before they start.
Keep your surface preparation steady, then fine-tune pressure control with light, even application techniques. Check your paint consistency so it flows without streaking; adjust as needed.
Use reliable rolling methods and limit reworking—extra passes burnish high points and ruin sheen uniformity.
Follow these steps:
- Apply thin coats, not heavy build-up.
- Keep brush strokes and roller overlaps gentle.
- Maintain consistent pressure across corners.
- Stop, then let drying conditions settle.
If spots appear, use targeted repair strategies and finish application.
Allow Full Dry Time Before Judging Sheen
You need to wait for the paint to fully cure before you judge the sheen, not just when it feels dry.
After you’ve let it cure, inspect the wall under good light and look for shiny spots or uneven gloss.
If the sheen still looks off, you can plan the next fix based on what you see.
Wait For Full Cure Time
Once the paint looks dry, you still need to wait for the full cure time before you judge the sheen, because the surface keeps changing as solvents fully evaporate and the binder hardens.
During this curing process, shiny spots can fade or even out later, improving paint durability.
To avoid premature conclusions, you should:
- Follow the label’s cure window, not just dry-to-touch time.
- Keep rooms ventilated and stable in temperature.
- Resist cleaning or rubbing until curing finishes.
- Re-check sheen only after the full cure time passes.
Inspect Sheen After Drying
After the paint dries, you still can’t accurately judge sheen—so wait through the full dry time before you inspect the surface.
Walk around the room under normal lighting and at different angles. If you rush, you’ll mistake wet gloss for real sheen variations.
Once the wall feels fully dry, gently wipe a small test area with a clean cloth and compare it to the rest.
Look closely at the surface texture too—drag marks or uneven roller pressure can mimic shine.
Only then decide if you need to sand lightly, spot-prime, or apply a uniform finish.
Recoat Only When The Surface Is Ready
Recoat only when the wall’s surface is truly ready, not just when it “looks dry.” Let the paint cure enough to resist smudging, then inspect for chalking, dust, or any remaining shiny patches; if you can wipe residue off with light pressure, stop and prep again.
Use strong surface preparation so the next coat bonds cleanly and maintain paint compatibility with your current system.
1) Touch-test for tack, not gloss.
2) Wipe with a damp cloth; no color should transfer.
3) Scrape and feather any weak edges.
4) Recoat once the sheen is gone and smudging won’t happen.
Fix Raised, Wrinkled Glossy Areas
Inspect your wall for raised, wrinkled glossy spots so you know exactly what you’re fixing.
Sand those areas smooth, patch any low spots, and let everything dry fully.
Then recoat the repaired sections evenly and blend the finish into the surrounding paint.
Inspect And Identify Raised Areas
Before you try to fix shiny spots, you need to check whether the surface has raised defects—like bumps, wrinkles, or a glossy “bubble” that catches light at an angle.
Walk the room slowly and watch sheen levels shift as you move. Use these checks:
- Note paint types and compare surface texture to surrounding areas.
- Review wall preparation and look for skipped priming or dust.
- Study lighting conditions; angled light reveals ridges fast.
- Inspect environmental factors and paint application, like humidity or bad mixing.
Mark every raised spot for your maintenance routine, then reassess after drying to confirm the defect’s size.
Sand, Patch, And Recoat Evenly
Sand down the raised or wrinkled glossy spots until the surface feels smooth to your fingertips, using fine-grit sandpaper and feathering the edges into the surrounding wall.
Wipe away dust with a damp cloth, then let it dry fully.
Spot-prime any bare area to prevent flashing, and apply a thin joint compound using patching methods that blend outward.
Let the compound cure, then sand again with sanding techniques until the wall feels uniform.
Remove dust, prime the patched zone, and recoat with matching paint using smooth, light passes.
Let it dry, then check under angled light.
Repair Peeling Spots Before Repainting
You need to fix peeling areas first so your new paint can bond properly. Start by scraping off peeling paint until you reach solid edges, then wipe dust away with a damp cloth.
Next, use repair techniques: fill low spots, feather the edges, and let the patch cure.
Follow a simple sequence:
- Scrape, then sand smooth.
- Clean the surface thoroughly.
- Apply patch compound and feather out.
- Prime any bare areas before repainting.
Once dry, sand lightly again and remove residue. Now your topcoat will grip evenly and shine spots won’t return.
Handle Wax Damage With Proper Cleaning
If wax or polish got onto your painted walls, it can cause paint to bead and create shiny spots, so start by cleaning thoroughly to remove it.
Dampen a microfiber cloth with warm water and a mild dish soap, then gently rub the affected area. If residue remains, use appropriate cleaning products and repeat in small sections.
Dampen a microfiber cloth with warm water and mild dish soap, gently rub, and repeat in small sections if residue remains.
For stubborn buildup, apply a dedicated wax removal technique: wipe with mineral spirits on a cotton pad, then immediately follow with soapy water and rinse.
Let it dry fully, then assess the sheen before repainting.
Fix Shiny Spots After Steam Cleaning
After you steam-clean the surface, you can still end up with shiny spots where heat loosened oils, soap residue, or minor grime.
To fix them fast, match your approach to your wall paint types, since some sheens burnish easily. Use these steps:
1) Let the wall dry fully, then wipe with a damp microfiber to lift residue.
2) Lightly scuff the spot with a fine pad, using gentle steam cleaning techniques to avoid spreading sheen.
3) Spot-prime with a stain-blocking primer compatible with your paint type.
4) Recoat only the patched area, feathering edges and letting it cure.
Spot Shiny Patches On Textured Walls
Once the shiny marks are gone from a smooth surface, textured walls need their own approach—steam can lift oils or soap and then catch the added moisture in the ridges, leaving brighter “patches.”
Start by letting the wall dry completely, then check the sheen under angled light to locate the exact raised areas.
You should lightly sand the shiny patch until it blends with surrounding textured paint, wiping away dust.
Then feather on a thin mist-coat of matching primer or paint, using short dabs to fill pores without flattening texture.
Let it cure, and recheck sheen variation from multiple angles.
Prevent Gloss Using Rollers And Pads Correctly
To prevent shiny patches on painted walls, load your roller and pad evenly and use consistent pressure as you work.
Keep your roller techniques steady: don’t overload, and don’t press hard during coverage. Use correct pad application by spreading paint in smooth, overlapping passes, then stop touching the surface once it starts to set.
Work from an edge toward the center to avoid dry ridges.
Follow this checklist:
- Stir paint thoroughly before use
- Lightly load roller, then roll off excess
- Apply in 3×3 ft sections, maintaining even pressure
- Feather edges immediately with the pad
Control Humidity And Airflow During Drying
Humidity and airflow during drying make or break your finish, so you need to manage both. Aim for steady humidity control; too much moisture keeps paint glossy, too little can skin it. Ventilate lightly: use a fan to move air across the room, not directly at the wet wall. Keep doors and windows mostly closed so airflow management stays consistent. If you see shine forming, don’t rush; wait for full cure before judging.
| Goal | How |
|---|---|
| Stabilize humidity | Use dehumidifier/AC |
| Keep airflow steady | Low fan, indirect |
| Prevent drafts | Seal gaps, avoid heaters |
Avoid Over-Brushing On Smooth Walls
Even with good humidity control, shiny spots can come from how you handle the wet paint. On smooth walls, you can ruin the finish fast when you keep going back over the sheen.
Use smooth wall techniques by working in one direction and staying ahead of drying. Control your brush pressure—too much compresses surface texture.
Follow this routine:
1) Load paint lightly, then spread evenly.
2) Keep bristles flat, with gentle, consistent brush pressure.
3) Stop and leave edges alone after the lay-in.
4) Feather only once, then quit.
If you must correct, let it dry first.
Prevent Fingerprints During Repairs
Ever notice how repair areas shine or dull right after you “just touch them up”? You usually leave oils from your hands, creating uneven sheen.
Use fingerprint prevention by wearing nitrile gloves before you open paint, load a brush, or touch a roller. Keep a clean microfiber cloth handy for accidental contact.
Use fingerprint prevention: wear nitrile gloves when opening paint, loading tools, and handle with care using a clean microfiber cloth.
When you apply repair techniques, work with light pressure and feather edges quickly so skin oils don’t bake into wet paint.
After drying, handle the spot only by the edges, not the face. Let it cure fully before you remove tape.
When To Repaint The Whole Section
Sometimes your touch-up looks fine at first, but it won’t hold the same sheen or color once it cures—so you need to know when to repaint the whole section instead of chasing small patches.
If you’re seeing repeated shiny spots, stop and plan your repainting frequency. Use this checklist to decide fast:
- You’ve touched up the same area twice or more.
- Shiny spots spread beyond the repair edge.
- You can’t maintain consistent color matching under daylight.
- The patch feels raised or shows visible lap marks.
When these happen, repaint the entire wall section to even out reflectivity and finish.
How To Keep Sheen Uniform Next Time
After you repaint, you can prevent shiny spots by controlling how the paint cures and levels on the surface.
Keep your work conditions steady: paint when the room’s temperature and humidity stay consistent, and avoid drafts.
Keep your work conditions steady—paint when temperature and humidity stay consistent, and avoid drafts for an even finish.
Stir paint thoroughly, then apply at the same rate each pass. Use the recommended roller nap and don’t overload it; excess paint can create uneven sheen.
Work in small sections so each layer stays wet during blending.
Let coats cure fully before touching or washing. This protects sheen consistency and keeps a uniform glossy finish.
Frequently Asked Questions
Will Shiny Spots Return After Cleaning, or Are They Permanently Removed?
They might return after cleaning. Shiny spot causes like waxy residue, grease, or uneven sheen can linger in pores, so spot cleaning won’t fully fix them. Use degreasing cleaning techniques, rinse well, and let dry; then repaint if necessary.
Can I Use Denatured Alcohol or Acetone on Painted Walls Safely?
✅ Denatured alcohol or acetone can damage paint, so you shouldn’t use them. Picture a melting candle: harsh solvents burn finish. You need surface preparation first, then test paint compatibility in a hidden spot; use mild cleaners instead.
When Should I Strip Wax or Polish Before Repainting?
Strip wax or polish before repainting when surfaces feel slick, look glossy, or show residue. Use wax removal techniques like gentle sanding or chemical stripper, then follow paint preparation tips: clean, rinse, dry, and lightly scuff for adhesion.
How Do I Fix Shiny Spots on Flat Versus Eggshell or Satin Paint?
You’ll fix shiny spots faster by lightly cleaning and scuffing, then repainting. In fact, flat paints show sheen changes sooner. For flat paint techniques, mist and re-roll thinly. For eggshell maintenance, sand 220 grit, prime, and apply matching satin-free.
Can I Skip Priming if Only a Few Small Areas Are Shiny?
Yes, you can sometimes skip priming for tiny shiny spots, but only after solid surface preparation. Lightly scuff, clean, then spot-paint matching paint finish. If the sheen comes from defects, prime anyway for adhesion and even coverage.
Conclusion
Congrats—you’ve now got the “shiny spot” problem on notice. If you diagnose it fast, stop over-brushing, and catch oily fingerprints and humidity early, you’ll get your paint looking like it means it. For stubborn shine, spot-repair or repaint that section—because pretending it’ll “blend later” is how you end up with a mural of regret. Next time, keep drying even and prevent touch-ups so your walls stay flawlessly boring.
