
How to Get Rid of Bubbles in Paint When Rolling Like a Pro
Bubbles happen when air gets trapped in paint and can’t level out before the coat skins. You’ll stop them by cleaning and lightly sanding, then wiping dust and oils. Choose the right roller nap (shorter for smoother finishes), load evenly without pressure, and keep a steady W pattern with consistent overlaps. Finish with a light S pass to pop tiny bubbles. Control temp/humidity, maintain a wet edge, and let primers cure fully so bubbles don’t return. Keep going—there’s more you can do.
Why Bubbles Form When Rolling Paint
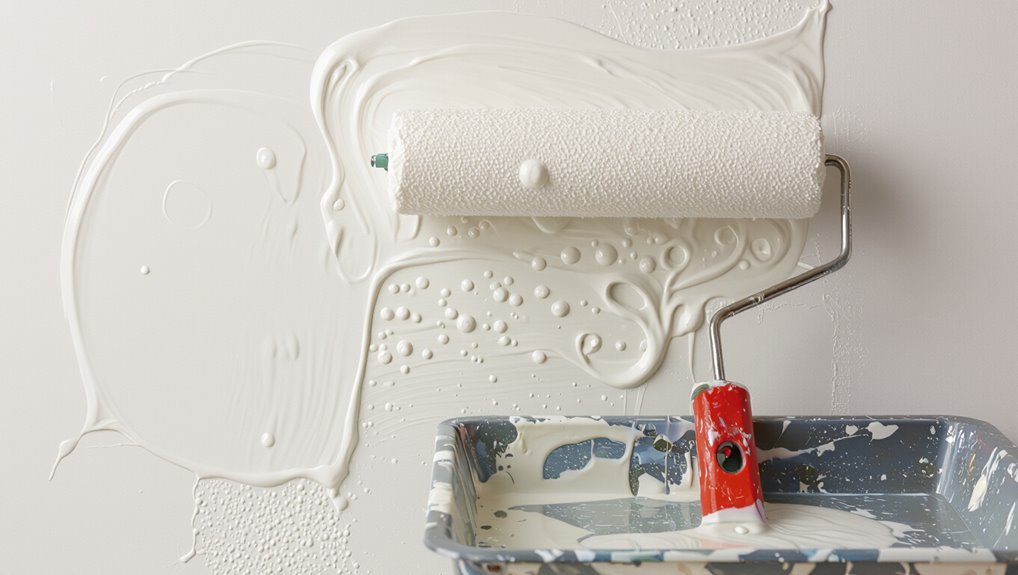
When you roll paint, bubbles usually form because air gets trapped and then expands as the paint starts to set. As you load your roller too heavily or press too hard, pockets of air don’t escape.
The roller’s nap then drags loose air into the wet film, triggering bubble formation that lifts and disrupts a smooth finish. If the surface is dusty, slick, or poorly prepared, the paint can’t bond correctly, and weak paint adhesion lets the bubbles linger or multiply.
You prevent this by using even pressure, proper loading, and clean, dry substrates.
Spot Bubble Causes Fast by Surface Signs
As bubbles start showing up, you can usually spot the cause fast by reading the surface they appear on.
Look at surface texture: pores or rough spots trap air, so you’ll see clustered pinholes. That’s your bubble identification clue for bad surface preparation or moisture.
On smoother areas, check paint viscosity—too thick traps air; too thin runs and foams.
Review your application technique and roller technique: overloading, rapid re-rolling, or uneven pressure creates pockets.
Note environmental factors too: humidity and wind affect drying conditions.
Also consider roller material and paint additives; wrong nap or air-entraining additives can worsen bubbles.
Choose the Right Roller Nap for Fewer Bubbles
Choosing the right roller nap prevents air from getting trapped, so bubbles stay unlikely. You should match the nap to how the paint flows: if you use a thicker paint viscosity, you’ll benefit from a slightly longer nap that wets out evenly.
For smoother finishes and lower film build, choose a shorter nap to reduce splashing and air pockets. Pay attention to roller quality—cheap covers shed fibers and trap microbubbles.
Before you start, load the roller consistently, roll at a steady pace, and avoid pressing hard. Keep a light, even coat, and bubbles drop.
Match Roller Nap to Texture and Paint Type
You’ll get fewer bubbles when you match the roller nap to the surface you’re covering and the paint you’re using.
Use a short nap on smooth walls and a longer nap on textured surfaces, and keep your roller type consistent with the paint’s thickness (latex, oil, or primer).
If you choose the right nap for the surface and match the nap to the paint, you’ll spread it more evenly and reduce trapped air.
Choose Nap For Surface
The right roller nap makes bubbles less likely because it controls how smoothly the paint lays on the surface. You’ll nail roller selection by matching nap height to texture and ensuring surface compatibility: short nap for smooth walls, medium for semi-textured, and longer for rough materials. Use this quick guide before you roll:
| Surface texture | Recommended nap |
|---|---|
| Smooth drywall | 3/8 in (9.5 mm) |
| Semi-textured | 1/2 in (12.7 mm) |
| Stucco / rough | 3/4–1 in (19–25 mm) |
When in doubt, test a small section first.
Match Nap To Paint
Match the roller nap to both your surface texture and your paint type to minimize bubbles and stippling. When you choose roller materials, don’t guess—match the finish.
Use these roller techniques to prevent trapped air:
- Pair a short nap (3/8 in) with smooth walls and thin latex for crisp leveling.
- Use a medium nap (1/2 in) on lightly textured drywall with most interior paints.
- Go longer (3/4–1 in) on stucco or rough masonry, especially with thicker coatings.
Press lightly, keep a steady pace, and back-roll once to even out.
Use the Correct Paint Thickness for Rolling
Getting roller-applied paint to level smoothly starts with using the right thickness, because paint that’s too thin won’t cover evenly and paint that’s too thick traps air and increases bubbles. You control this with proper paint consistency before you begin.
Stir thoroughly, then check how the paint ribbons off your stick and how it flows off the roller. If it feels draggy, thin it slightly; if it runs, thicken it or use less.
Keep your roller technique steady: load evenly, apply in light, uniform pressure, and avoid going back over glossy wet streaks.
Thin Paint Safely Without Weakening Coverage
Thin your paint only with the right ratios so it sprays and levels without sacrificing coverage.
Use thinning mediums that match your paint type, and keep the final wet film thickness at the level that normally covers.
If you need to thin, test on a scrap first and adjust until bubbles stop while coverage stays full.
Thin With Proper Ratios
To fix bubbles without sacrificing coverage, you’ll need to thin your paint with the right ratio—especially if you’re spraying or rolling in thick layers.
Start by checking paint viscosity: if it strings or drags, you’ve likely gone too thick. Use your roller type to guide the ratio—foam needs less thinning than a nap-heavy roller.
Then adjust gradually: add a small amount of water or manufacturer-recommended reducer, stir well, and test on scrap until bubbles stop.
Follow these steps:
- Measure: start with 10% thinner.
- Mix: keep it uniform.
- Roll: re-check texture and bubbles.
Use Compatible Thinning Mediums
Choose thinning mediums that match your paint type so you don’t weaken adhesion, durability, or finish. Use compatible mediums: water for water-based acrylic/latex, and manufacturer-recommended solvents or mineral spirits for oil-based paints.
Check labels for “thins with” guidance, because wrong fluids can slow cure, reduce bonding, or leave a soft, blister-prone film. When you mix, follow safe ratios and stir thoroughly.
Apply your thinning techniques by pre-mixing in a separate container, then strain if needed. Keep the batch consistent so viscosity stays uniform across roller passes.
Maintain Full Coverage Thickness
Keep a paint film thick enough to cover fully, but thin it only as much as the label allows—because underfilled areas invite dry spray, pinholes, and bubbling.
When you roll, maintain consistent thickness from edge to edge, not just in the center. Use light, even pressure, overlap each pass, and keep a wet edge so the film doesn’t start to skin.
To guarantee adequate coverage, check your nap saturation and reload the roller before it goes translucent:
1) Roll in a W pattern, then level.
2) Back-roll once, gently.
3) Stop and spot any thin streaks immediately.
Stir Paint Thoroughly Before You Start Rolling
Stir the paint thoroughly before you start rolling, because pigments and solids settle at the bottom and create uneven color and texture.
You should scrape the sides of the can, then stir slowly but completely until the mixture looks uniform. If you’re using tinted or thick paint, keep going longer.
Check the paint consistency: it should flow smoothly, not clump, so your rolling technique stays controlled.
Pour some paint into a tray, but continue gentle stirring in the can as you work. This prevents bubbles caused by unmixed solids.
If it’s too thick, add the right thinner.
Pick a Primer That Prevents Adhesion Bubbles
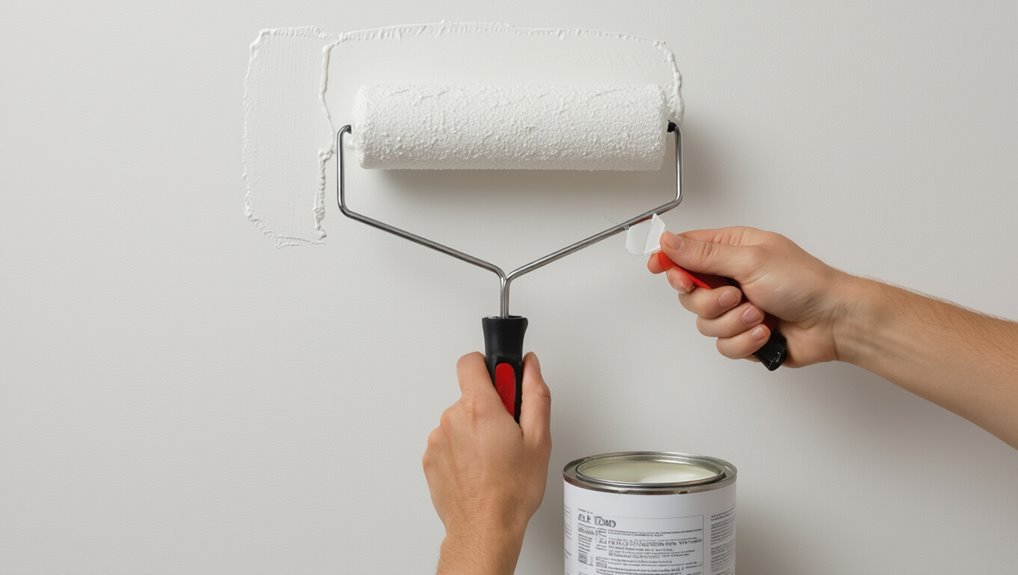
After you’ve mixed the paint until it’s uniform, use the right primer so the next coat can grip evenly instead of trapping air at the surface.
Choose primer types that match your surface and control adhesion properties. You’ll prevent adhesion bubbles when you:
Choose primer types matched to your surface for strong, even adhesion—helping prevent adhesion bubbles and tiny pockets.
- Use a bonding primer on slick or glossy areas to help paint grab without gaps.
- Pick a stain-blocking primer for repaired spots so moisture and residues don’t lift the film.
- Match drywall, wood, or metal primers for consistent grip and fewer tiny pockets.
Let the primer cure fully before rolling, and you’ll roll smoother with fewer bubbles.
Sand and Clean Surfaces Before Rolling Paint
Sand the surface lightly to smooth it out and help the paint lay down evenly.
Then wipe away dust and debris so nothing gets trapped under your roller.
Finally, clean with a degreaser solution, let it dry completely, and you’ll be ready to roll without bubbles.
Sand For Smooth Finish
Before you roll a single coat, prep the surface for adhesion and a flawless look by sanding high spots and smoothing out any dried drips or rough texture.
Choose the right sand types for the job: start medium, then fine for a silky finish. Use these sanding techniques to prevent ridges that trap air.
- Feather edges of old paint drips until they blend flat.
- Switch to finer grit after you remove sheen and scuffs.
- Wipe with a dry cloth, then inspect under raking light before rolling.
You’ll glide the roller, and bubbles won’t find easy routes.
Remove Dust And Debris
Start by clearing every bit of dust and debris so paint can bond and roll out smoothly.
After sanding, you’ll get fine particles that trap under the roller and cause blisters. Use a vacuum with a brush attachment, then wipe the surface with a clean, dry microfiber cloth to pick up leftover grit.
Keep dust control tight by working from top to bottom and covering nearby items.
For cracks and edges, use a tack cloth lightly—don’t saturate—so surface preparation stays consistent.
Let everything dry completely before you roll, and don’t touch the area again.
Clean With Degreaser Solution
Once the surface is dust-free, wipe it down with a degreaser solution to remove oils, fingerprints, and residue that can keep paint from bonding. This step improves surface preparation, reduces bubbling caused by poor adhesion, and helps your roller glide.
Choose the right degreaser types for your mess: citrus for light grease, ammonia-free for sensitive finishes, or stronger solvent-based options for heavy contamination.
Then:
- Apply with a lint-free cloth, working in sections.
- Let it dwell briefly, following label directions.
- Rinse or wipe again, and dry completely before rolling.
Control Temperature and Humidity for Smoother Flow
To prevent bubbles, you need to control the room conditions, since paint traps air more easily when the air is too cold or too damp.
Use temperature control to keep paint at room range before you roll; cold raises viscosity and hurts paint flow.
Keep paint at room temperature before rolling; cold increases thickness and can disrupt smooth flow, raising the risk of bubble formation.
Watch humidity effects—if the air feels clammy, you’ll get more entrapped air.
Match your environmental factors with your surface preparation: let patches dry fully, then prime and sand smoothly.
Apply with steady pressure and slow, even application techniques.
Plan drying conditions: keep moisture low.
Use airflow management to circulate gently, not blast directly.
Avoid Sun and Heat That Trap Air
Direct sun and heat can mess with your paint job by speeding the film’s surface set-up before trapped air has time to escape. You’ll see bubbles and poorer paint quality when heat effects make paint skin over too fast.
Before you roll, check surface conditions, then keep your work area out of sun exposure. If the day turns hot, pause and shade the wall, not the roller. Use smart roller technique to keep a steady pace and watch for air pockets forming at edges.
Follow this checklist:
- Paint in shade or late afternoon.
- Ventilate, don’t blast hot air.
- Stop if bubbles keep reappearing.
Load the Roller Evenly: Don’t Overfill
Load your roller evenly, and don’t overfill it with paint. When you load too much, excess drips off and traps air, which later turns into bubbles.
Use a tray, then roll the roller back and forth until coverage looks uniform. Lift it and lightly press against the tray slope to remove the surplus. Keep your pressure consistent; that’s your roller technique.
As you start rolling, let the nap saturate at the right pace—good paint absorption matters. Re-dip in smaller amounts rather than dumping more paint, and you’ll finish smooth, bubble-free coats.
Roll in Steady W, N, or S Patterns
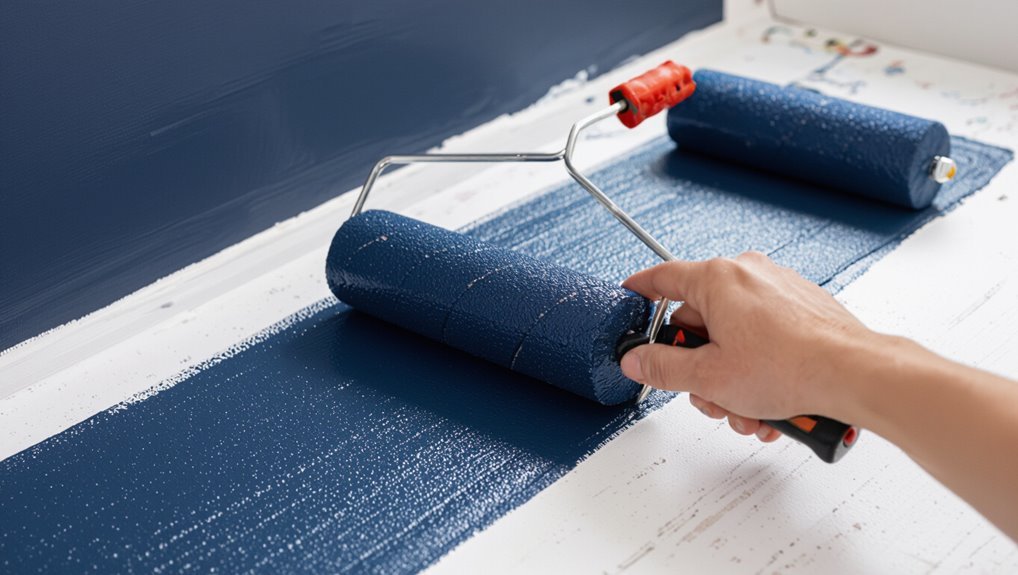
When you roll, use a steady W pattern to spread paint evenly and limit trapped air.
Keep your N overlaps consistent—slight overlap is enough to blend without piling.
Finish each section with a smooth S line roll to level the surface and push bubbles out.
Use Steady W Pattern
Roll the paint out in a steady W pattern to keep bubbles from forming and spreading—move your roller in overlapping W strokes, then continue by sweeping in consistent N or S passes to level the coat.
You’ll get smoother results when your steady technique stays light: press just enough to move paint, not to force air. Keep your wrist loose and your speed even so rolling patterns don’t trap pockets of gas.
Before you reload, watch the surface; if bubbles appear, slow down and re-roll the area gently.
- Overlap each W lightly
- Maintain consistent pressure
- Keep a steady stroke speed
Maintain Even N Overlaps
After you’ve laid down the paint with steady W strokes, keep leveling with even N overlaps. Roll so each pass lands half a roller width over the last—this even application reduces trapped air. Move in a steady W, then switch to N for straight leveling, or S only briefly to follow contours, without speeding up. Keep your wrist loose and pressure consistent; don’t skim dry edges. Watch the path like an overlap technique map:
| Pass | Coverage |
|---|---|
| 1 | Full coat |
| 2 | Half-overlap |
| 3 | Leveling pass |
| 4 | Final blend |
Finish With S Line Roll
To lock in a bubble-free finish, use a short S line roll after your leveling pass. Keep steady pressure, then roll a smooth S that stays within the wet edge—don’t press harder when you feel resistance.
Use this S line technique to pull trapped air toward the surface, then let the sheen settle. Before you repeat, check roller maintenance: remove lint, clean hardened paint, and verify the nap is evenly loaded.
Follow a simple rhythm: 1) roll the top curve, 2) reverse into the bottom curve, 3) feather the tail out to blend. Stop before the paint tacks up.
Don’t Press Hard: Let the Roller Do the Work
Use a light, even pressure when you roll the paint—don’t lean in.
In your roller technique, let the shed and nap do the lifting; you’re guiding, not forcing paint into the surface. When you press hard, you squeeze air into the film and can create bubbles or foamy texture.
Keep your roller loaded but not dripping, then move at a steady pace, overlapping each pass lightly. If you see bubbling starting, ease off immediately and let the roller smooth it out.
With the right paint application, you get a uniform finish without excess pressure.
Keep a Wet Edge to Prevent Ridges
Working with a wet edge keeps each new roller pass blending smoothly into what you already painted, so you don’t get ridges where the film starts to set. You maintain it by working in small sections and keeping your roller moving.
Use proven wet edge techniques: keep a “wet line” ahead of your progress, overlap each stroke, and don’t stop mid-wall.
- Roll top to bottom consistently.
- Reload sooner than you think to avoid drag.
- Match pace to open time for better rolling efficiency.
If you see a dry boundary forming, blend immediately with light pressure and fresh paint, not repeated hammering.
Back-Roll Lightly to Smooth the Top Coat
After you’ve applied the top coat, you should back-roll lightly to help it level.
Use even pressure and smooth, controlled strokes so the surface stays uniform and any bubbles have a chance to release.
Keep your roller moving and don’t press hard—you’ll get a smoother top coat with fewer imperfections.
Light Back-Roll For Leveling
Light back-rolling helps you level the top coat and knock down tiny bubbles before they set.
Use a clean foam roller and commit to a consistent rolling technique: you’ll lightly guide, not press. Apply light pressure on the return stroke, then lift straight off to avoid dragging.
Work one section at a time and keep a wet edge so the surface can self-level.
Follow this quick checklist:
- Roll forward once to spread evenly.
- Back-roll gently with light pressure to smooth ridges.
- Stop when the sheen turns uniform; don’t keep fussing.
Even Pressure Smooths Topcoat
Use even, light pressure as you back-roll to smooth the topcoat and prevent bubbles from forming or growing.
Keep your roller nearly flat, then apply a steady pass in one direction, followed by a light back-roll. This even pressure helps you achieve smooth application and keeps the paint in even distribution.
Don’t press hard to “fix” defects—too much force traps air and can create more blisters.
Reload minimally, overlap each stroke by about half, and watch the surface sheen; once it turns uniformly glossy, stop.
Reroll Only When Needed: Know the Timing
Reroll only when it’s truly necessary—timing matters more than frequency. You’ll use timing techniques to decide when to reroll, not just when you feel uneasy.
Keep your roller lightly loaded and watch the paint film: when it starts to level and lose sheen, you’re close. Reroll too soon and you’ll trap bubbles; too late and you’ll create ridges.
Use these cues:
- Reroll within the first few passes while wet
- Stop when bubbles pop and gloss returns evenly
- Finish only after edges stop flashing
Balance rolling strategies with calm, consistent strokes.
Transfer Paint From Brush to Roller Cleanly
Make sure you load the roller evenly so you’re transferring paint at the right thickness.
After you cut in with a brush, start rolling and use proper back rolling to smooth out what you laid down.
If you keep your stroke pattern consistent, the paint transfers cleanly and helps prevent bubbles.
Load Roller Evenly
Before you roll, load the roller evenly so paint transfers from your brush without streaks or dry spots.
Use solid roller techniques and careful paint application to keep bubbles down. Dip the roller just until the nap is coated, then roll it against the tray’s ridges to spread paint across the full width.
Work in controlled passes, not heavy reloading.
- Dip lightly, then roll on ridges 3–5 times.
- Check edges for full saturation.
- Keep a consistent pressure and pace.
Use Proper Back Rolling
Back roll right after you lay a section with the brush so the roller picks up paint smoothly instead of dragging.
Lightly press the roller into the fresh area and roll in the same direction each pass, overlapping edges by about a third.
Keep a steady, moderate pace so paint transfers without lifting or aerating. If you see dry streaks, reload and repeat the roller application, not extra force.
Use consistent back rolling techniques: short top-to-bottom strokes, then a final even pass.
Wipe drips, and maintain a uniform nap load for bubble-free finish.
Cut In With Brush First
Cut in along the edges with a brush first, then transfer the wet paint to the roller area immediately so you don’t trap air.
Use a controlled brush technique: load lightly, tap off excess, and keep a crisp, even line. As soon as the edge looks wet, roll directly into it to blend without seams.
Check your paint consistency—too thick drags and holds bubbles; too thin runs.
To keep transfer clean, do this:
1) Maintain wet contact while cutting
2) Feather the boundary with short strokes
3) Roll in one direction, then back roll lightly to smooth.
Prevent Foaming From Shaking or Splashing
To prevent foaming, stir your paint gently rather than shaking the can or snapping your wrist while you mix. You avoid trapped air by using foam reduction techniques like slow, steady stirring and letting the paint settle for a few minutes before you roll.
When you pour from a can, tilt gradually and keep the stream low to prevent splashing. Load your roller by rolling it lightly in the tray, not by flicking or whipping.
If you see bubbles, pause, skim them off, and continue with smooth, even passes using air trapping solutions—like shallow trays and controlled pour angles.
Avoid Overworking to Stop Microbubbles
When you overwork the surface, you trap air and create microbubbles.
Roll light, keep a wet edge, and don’t re-roll mid-stroke—finish one pass before you go back.
If you stop reworking while the paint still levels, you’ll prevent new bubbles from forming.
Roll Light, Maintain Wet Edge
Roll light and keep a wet edge as you work—don’t keep going back over spots. Use your roller technique to apply even pressure, so you don’t whip air into the film.
Watch paint consistency: if it’s too thick, you’ll drag and trap bubbles; too thin, and it’ll sag. Keep each pass moving in one direction and stop once it’s coated.
To maintain the wet edge, do this:
- Overlap slightly, without scrubbing.
- Work in short sections, then reload.
- Lay off gently, letting gravity level.
Stop Re-Rolling Mid-Stroke
Once the roller has laid the coat, stop re-rolling that same area mid-stroke—overworking the film whips air into the paint and turns it into microbubbles.
Keep your paint application steady: roll once, then advance. If you miss a spot, stop, load the roller, and feather out from the edge instead of doubling back.
Use firm, even pressure and a consistent roller technique: light guide, controlled speed, minimal pauses.
Work in sections with a wet edge, so new paint blends before it skins. If microbubbles appear, don’t chase them—let the surface settle and dry.
Use Pace Control So Paint Levels Out
To keep bubbles from showing up, slow your pace as you apply paint so the surface has time to level. You should use pace techniques that let the roller shed air instead of trapping it.
Slow your pace as you paint, letting the surface level so the roller sheds air instead of trapping it.
Keep a steady, unhurried rhythm, and watch your paint consistency—thicker mixes may need even slower passes.
- Roll in even W or M patterns, then pause briefly before you re-approach.
- Maintain consistent pressure so each section stays uniform.
- Overlap lightly, avoiding extra strokes that re-agitate film.
If you move too fast, the wet layer can’t flatten, and bubbles remain visible. Slow down, stay controlled.
Cut In Corners Without Entrapping Air
When you cut in corners, you help prevent bubbles by setting the roller work up for a smooth edge rather than trapping air in the paint film.
Use steady cutting techniques: keep your brush loaded but not dripping, then angle the bristles to feather into the corner. Apply light, even pressure and avoid scrubbing.
Work in short sections, letting the paint settle before you roll out to meet it. If you see streaks, smooth them immediately instead of going back later.
This limits air entrapment and keeps edges clean, so rolling stays bubble-free.
Reduce Bubbles on Rough Walls With Prep
Before you paint rough surfaces, you need to prep them so the coating has a smooth path for air to escape.
Start with solid paint preparation: inspect for ridges, flaking, or pits created by poor surface texture. Then knock down high spots and seal anything porous so bubbles don’t form when the roller pushes paint.
- Scrape and sand until the wall feels uniform.
- Vacuum and wipe away dust thoroughly.
- Spot-prime stains or bare patches, then let it dry fully.
When the substrate stays consistent, your rolling lays down paint evenly and air releases instead of trapping.
Prevent Bubbles on Drywall Seams and Patches
Before you roll, prime the seams so the paint bonds evenly instead of trapping air.
After patching, sand the edges flat and wipe away dust, then apply the right coat with the proper paint sheen to keep bubbles from forming.
Keep a steady, light pressure as you work so your finish stays smooth on every seam and patch.
Prime Seams Before Rolling
Priming seams before you roll helps stop bubbles from forming later on drywall joins and patch work.
After seam preparation, you should use solid priming techniques so your paint won’t trap air or soak unevenly. First, let compound fully cure, then spot-prime the entire seam and feathered edges with a roller or brush.
Next, keep a thin, even coat—too much primer can skin over and create blisters. Finally, allow it to dry completely before rolling your finish paint.
- Clean dust off seams
- Spot-prime joined areas
- Dry fully before topcoat
Sand Flat Patch Edges
Sand the patch edges until they feel perfectly flat to the touch. If you can feel a ridge, your roller will trap air and create bubbles.
Use steady, light pressure and feather outward several inches so the changeover disappears. After patch preparation, let compound fully cure, then sand again to remove any raised grain or pinholes.
Switch to finer grit for the last passes, and wipe away all dust with a damp cloth or tack cloth before priming and rolling.
Check with your palm from multiple angles, because tiny lips show up in paint.
Use Proper Paint Sheen
Choosing the right paint sheen helps you avoid bubbles on drywall seams and patch spots, because sheen affects how quickly the coating traps moisture as it dries.
Your paint sheen impact matters most when rolling over repairs. Use proper sheen selection so the surface releases air instead of sealing it in.
To prevent bubbles, do this:
- Pick flat or matte for repaired drywall; avoid glossy over patches.
- Stir thoroughly, then roll with light pressure to keep a uniform film.
- Let each coat flash off fully before recoating; rushing traps moisture.
If bubbles appear, stop, smooth, and re-roll once the coat dries.
Fix Bubbles Caused by Thick Spots and Ridges
Thick spots and ridges trap air and push moisture out, so bubbles pop up as the paint tries to level itself.
Check the wall after each rolling pass; if you feel lumps, you likely have thick paint buildup. Stop and let the area flash off slightly, then lightly sand high ridges for smooth ridge removal.
Wipe away dust, then reload your roller with the correct amount of paint and roll with steady, even pressure.
For stubborn pockets, use a small brush to skim thin layers, then roll again to blend edges. This prevents new bubbles forming.
Avoid Bubbles When Painting Over Glossy Surfaces
When you paint over glossy surfaces, you need to create a surface the new coating can grip. Start with solid glossy surface preparation: scuff the shine so the roller can catch the texture, then wipe off dust.
Next, control your material flow; bubbles often form when paint traps air on slick areas. Use the right primer selection—choose a bonding primer made for smooth, sealed finishes.
Then roll with steady pressure, keeping a “wet edge” so coats blend instead of skinning. Finally, work in thin layers.
- Sand to dull sheen
- Clean thoroughly
- Prime, then roll thin coats
Handle Bubbles on High-Sheen and Enamel Finishes
On high-sheen and enamel finishes, you prevent trapped air by rolling with a steady rhythm and keeping a consistent nap direction.
You control dry time and viscosity by using the right amount of thinner (if allowed) and working before the paint starts to tack.
When you finish, you use light pressure and smooth over bubbles immediately so the surface stays clean and glossy.
Prevent Trapped Air During Rolling
Prevent trapped air by loading your roller evenly and rolling in smooth, light passes—especially on high-sheen and enamel finishes that magnify imperfections.
Use smart air entrapment solutions and solid roller technique tips so bubbles don’t form under the surface. Keep a “wet edge” and avoid overworking.
- Roll in one direction, then make a single gentle cross-roll to level.
- Tap excess paint off the roller before contact; heavy loads trap air.
- Watch for stipple—stop, lightly re-roll, and pause between sections to release tension.
Control Dry Time And Viscosity
To stop bubbles from showing up on high-sheen and enamel, you need to control how long the paint sits and how thick it stays.
Focus on dry time management: don’t let rolled sections sit too long before you back-roll. Work in smaller bays, keep a steady pace, and follow the can’s recoat window.
Next, use viscosity control so the enamel levels before skin forms. If it’s too thick, add the recommended thinner gradually, then test on scrap.
Don’t overmix air in the pail—stir slowly, and strain if needed.
Use Light Pressure On Finishes
Apply only light pressure when you roll or brush high-sheen and enamel finishes—pressing too hard forces air into the film and leaves bubble marks.
In your paint application, let the roller do the work; you control direction, not force. Use your rolling technique to keep a consistent, gentle touch, and re-wet only as needed.
- Roll with minimal body weight and keep a wet edge.
- Stop pressing when foam forms; lightly lift, then continue.
- Use smoother, lint-free covers for faster release and fewer trapped bubbles.
Prevent Bubbles From Incompatible Paint Layers
When you mix incompatible paint layers—like latex over oil-based primer without proper prep—you invite bubbles as the lower coat releases trapped solvents or moisture.
Start with correct paint compatibility by matching paint types and following proven layering techniques.
Start with correct paint compatibility—match paint types and use proven layering techniques to prevent bubbles and ensure strong adhesion.
Improve surface preparation: scrape, sand, and degrease so adhesion issues don’t start bubbles.
Apply each coat with consistent application methods, letting prior layers fully cure before recoating.
Choose the right roller selection for your finish quality, using a low-shed, properly loaded nap.
Control environmental factors like humidity and temperature to support even drying and strong, bubble-free bonding.
Avoid Solvent Issues With Oil-Based Products
Even if your paint layers bond well, oil-based products can still create bubbles if trapped solvents or incompatible thinners get involved, so you should handle them with care.
Start with solid surface preparation and confirm oil based compatibility before you commit. Then, manage solvent evaporation by choosing proper product selection and sticking to the label’s drying times.
Use careful paint formulation and thinning techniques; over-thinning traps volatiles.
Follow these application methods:
- Stir thoroughly, don’t add water.
- Apply thin coats, keep a wet edge.
- Allow full drying between passes, then recheck.
Always match thinners to the system for smoother results.
Stop Bubbles When Spraying Then Rolling
Before you spray, fix any bumps or dust so the surface is smooth.
Control your thinning and spray pressure, then roll right after with light, even passes to release trapped air before bubbles form.
If you keep your pressure steady and overlap each roll stroke, you’ll get a cleaner finish faster.
Fix Surface Before Spraying
Prep your surface thoroughly so bubbles don’t show up mid-job. Before any paint, you control surface texture and moisture with solid surface preparation.
Scrape loose spots, sand smooth, and remove dust using proper cleaning methods. Check ambient conditions and let surfaces dry fully.
Choose the right primer selection to improve paint adhesion and cover stains. Use the correct paint viscosity so it rolls out evenly.
- Patch dents with repair techniques, then sand flush.
- Degrease and wipe tack-free for paint adhesion.
- Apply primer, then verify surface texture before rolling.
Finish with light, consistent roller technique and quick finishing touches.
Control Thinning And Pressure
To stop bubbles when spraying, you need to get your thinning and pressure dialed in so the paint atomizes cleanly and flows evenly. Then you follow up with smart rolling.
Use proper thinning techniques so viscosity matches your sprayer and doesn’t trap air.
Apply pressure management: reduce PSI if misty fog forms, increase slightly if it won’t wet out.
Confirm paint compatibility and correct mixing ratios.
Choose roller selection that fits finish types for smooth laydown.
Keep rolling consistency steady, and use correct application methods.
Double-check environmental factors like humidity and temperature.
With solid surface preparation, you improve bubble elimination.
Roll With Light Even Passes
Once your thinning and pressure deliver a clean, even spray, you can stop bubbles by rolling right after.
Use smooth, light passes; you’re not reworking the surface, you’re leveling it. Keep a wet edge so you don’t trap air under overlaps. Match your roller selection to the sheen: a finer nap reduces foam, while too-thick covers can blister.
- Roll with minimal downward pressure.
- Maintain steady speed and direction.
- Chase edges within seconds, feathering lightly.
These paint techniques help you pop micro-bubbles early and leave a uniform finish.
Let it cure untouched.
Remove Dust With Proper Tack and Wipe Steps
Before you paint, remove dust with tack and a clean wipe so bubbles don’t get trapped under the finish. Start surface preparation by lightly brushing the area, then press a tack cloth to pick up lint, corners, and seams. Don’t drag—use gentle, one-direction strokes. Follow with your wipe technique using a lint-free cloth slightly dampened per the paint label. If you see specks, repeat dust removal before rolling.
| Check | Fix |
|---|---|
| Visible lint | Re-tack |
| Dry spots | Re-wipe |
| Glossy residue | Let cure |
Use a Quality Tray and Liner to Reduce Splatter
A clean surface still won’t help if your paint spatters as it leaves the bucket. You can cut down splatter fast by using a quality tray and proper setup.
Start by choosing the right tray selection size for your roller width, so paint loads evenly. Next, press a liner firmly in place for liner benefits: faster cleanup and less residue buildup that can fling droplets.
Finally, pour only enough paint to fill the ribbed well, then roll back and forth lightly before lifting. This keeps bubbles and mess to a minimum.
Cut Excess Paint Off the Roller Before Rolling
Before you start rolling, wipe off excess paint on the tray so the roller isn’t overloaded.
Then scrape the roller against the edge to level out the paint and prevent trapped air.
This quick prep helps you roll smoother and greatly reduces bubbles.
Wipe Excess Paint On Tray
Start by loading less paint than you think you need, then wipe the roller against the tray’s ridges to cut the excess. Use this simple move as part of solid paint tray techniques, so you don’t over-saturate the nap.
Keep roller maintenance in mind: paint buildup ruins even coverage later. Do it like this:
- Roll in one direction across the ridges, not back-and-forth.
- Press lightly until paint stops dripping from the roller edge.
- Check the surface; it should look evenly coated, not glossy-wet.
Now you’re ready to roll smoothly, with fewer air-causing issues.
Scrape Roller To Reduce Bubbles
Scrape the roller against the tray edge to cut off extra paint so you don’t trap air. Use steady pressure, and keep the roller loaded but not dripping.
After every reload, repeat the scrape step so the nap stays even and consistent. As you roll, keep a light, uniform rhythm, rolling in one direction first, then cross-rolling with minimal paint.
This is one of the simplest bubble prevention techniques: less excess paint means fewer chances for trapped bubbles to expand.
Follow roller maintenance tips too—clean the roller thoroughly and dry it before reloading to avoid uneven texture.
Keep Roller Nap Fluffed and Free of Debris
To keep bubbles from showing up in your finish, you need a roller nap that’s fluffy and clean.
Before you roll, pause and apply solid roller maintenance tips and debris prevention techniques so paint flows evenly.
First, check the nap for lint, dust, and dried bits, then gently brush or vacuum it.
First, check the nap for lint, dust, and dried bits, then gently brush or vacuum it for a smooth, bubble-free finish.
Next, run a piece of painter’s tape over the surface to lift stubborn debris.
Finally, fluff the roller by rolling it lightly on scrap cardboard, not in your paint.
If the nap feels matted, repeat until it lifts back into an even texture.
Replace Worn Rollers to Prevent Surface Imperfections
Replace rollers that look matted, flattened, or shedding fibers—worn naps trap air and drag paint, which creates bumps and tiny pinholes in your finish.
During roller maintenance, don’t just “keep going.” After a few loads, check the roller cover and core for stiffness, bald spots, and loose threads.
Do a quick surface inspection by rolling a test patch; if the sheen looks uneven or texture shows, swap the roller.
Use the right nap for your material, then load evenly and keep light pressure.
Fresh rollers roll smoother, seal better, and prevent repeating imperfections.
Clean Between Coats to Stop Contamination Bubbles
Before you recoat, brush off every bit of dust and grit so it doesn’t turn into bubbles.
Then wipe the edges and nearby areas clean to keep coverage smooth and consistent.
When the surface is free of debris between coats, you prevent contamination bubbles from forming.
Brush Off Dust Before Recoats
Give the surface a thorough dust-off after the first coat dries—grab a clean, dry microfiber or tack cloth and wipe in one direction, then lightly brush any edges and corners.
You’re preventing contamination bubbles by using solid dust removal techniques and effective cleaning methods before you recoat.
Do this:
- Dust-sweep walls from top to bottom, changing cloths when they load up.
- Use a soft brush to lift grit trapped in corners and trim lines.
- Vacuum nearby floors and cover plastic to keep airborne particles away.
Now wipe again with one final pass, let it dry, and recoat smoothly.
Wipe Edges For Clean Coverage
After your first coat fully dries, wipe the edges carefully so you don’t trap dust and lint that later become contamination bubbles. Use a clean microfiber cloth or tack cloth, and lightly run it along every trim line, corners, and roll start/stop points. This edge treatment keeps your clean application consistent when you re-roll. Don’t press hard—contamination hides in gaps. Quick checklist:
| Risk | Fix |
|---|---|
| Dust on caulk lines | Wipe again |
| Lint on trim edges | Replace cloth |
| Dry paint crumbs | Scrape, then wipe |
| Oil fingerprints | Degrease, recoat |
Remove Tiny Bubbles With a Light Touch
To get rid of tiny bubbles, slow down and handle the paint gently—too much pressure whips air into the coating. Use your roller technique like a steady glide, not a push. Keep a light, even nap contact so trapped air rises and disappears.
When you spot micro-bubbles, don’t attack the area; smooth over them once, then leave it to level.
- 1) Re-roll in one direction only to reduce reintroducing air.
- 2) Load less paint, then keep a consistent pace for bubble prevention tips.
- 3) Pause briefly, letting the surface settle before a second pass.
Pop Bubbles Safely: Avoid Leaving Crater Marks
Once bubbles start popping, don’t press them down—let them break naturally or use a light touch to guide them open.
You reduce crater marks by popping only the surface, then immediately re-roll lightly over the area with the same direction as your last pass.
Don’t stop mid-stroke; keep a steady pace so paint levels before it skins.
Use smart bubble prevention techniques: avoid overworking, maintain proper coating thickness, and keep the roller loaded evenly.
Follow roller selection tips by choosing the right nap for your surface and using a clean, flexible roller cover.
Sand and Recoat After Bubble Removal
Sand the bubbled area lightly once the paint dries, using fine-grit sandpaper (around 220–320) to knock down any raised edges without thinning the surrounding coating too much.
Use clean, steady pressure, and blend the edges into the surrounding surface with smooth sanding techniques. Wipe away dust, then plan recoat timing so the spot bonds properly.
- Feather edges until flat
- Remove all sanding dust
- Recoat only after full cure window
Spot-Fix Bubble Clusters Before the Paint Sets
Act fast and spot-fix bubble clusters while the paint still feels workable, because waiting lets moisture and trapped air lock the damage in place.
Dampen a clean cloth, then gently press and smooth over the bubbles to collapse them. If they won’t flatten, lightly score the surface with a putty knife tip, then feather the edges as you re-spread paint.
Use roller application tips: reload properly, roll in steady W passes, and keep a light, even pressure.
Add bubble prevention techniques by avoiding over-rolling and maintaining consistent nap direction.
Let the area dry, then inspect.
Diagnose Rolling Paint Bubbles by Location
Rolling paint bubbles usually leave a clue in where they show up, so you can narrow down the cause fast. As you roll, watch the pattern of bubble locations and pick bubble remedies that match.
Check your surface and technique in this order:
1) If bubbles appear near the center of each roll pass, your paint may be too dry or you’re overworking it.
2) If they cluster in swirls and overlaps, you might be dragging a partially cured edge through wet paint.
3) If they pop along specific panels, the substrate may be contaminated or still damp.
Then adjust and re-roll lightly.
Prevent Bubbles Near Edges, Trim, and Crown
Prevent bubbles at edges, trim, and crown details by working with controlled pressure and clean contact points.
Use edge techniques: keep the roller nap flat when you start, then lighten pressure as you approach corners. For trim tips, angle the roller slightly and roll off the edge immediately after contact, so paint doesn’t trap air.
When you hit crown details, use shorter strokes, feathering into the profile instead of pressing hard. Keep a wet edge, reload frequently, and avoid dry drag.
This bubble prevention strategy improves paint application and keeps shifts smooth.
Finish With a Final Uniform Pass
Once you’ve addressed the edges and crown areas, make a final, uniform pass across the whole surface while the paint is still wet.
Use steady pressure and keep a wet edge so you don’t trap air. Your goal is a pro-level final touch: consistent coverage with no bubble pockets.
Apply your best application techniques by working in one direction, then lightly back-rolling to even out sheen.
- Load the roller evenly, don’t overload.
- Roll top-to-bottom at a consistent speed.
- Finish with light strokes to level the nap.
Follow Drying Time Steps to Avoid Rework
After your final uniform pass, don’t rush—follow drying time closely so you don’t create rework later.
Wait the manufacturer’s recommended window before touching or re-rolling any section.
Use smart drying techniques: keep a steady room temperature, improve air circulation with a fan, and avoid blasting one spot.
Use smart drying techniques: maintain steady room temperature, improve airflow with a fan, and avoid blasting one spot to prevent uneven drying.
Control drying conditions by protecting the surface from dust, humidity, and direct sun that can skin the paint unevenly.
When you schedule recoats, respect flash times and thin layers.
If you see trapped air, stop and let the surface settle instead of pressing harder.
Cure Paint Properly So Bubbles Don’t Return
Let the paint cure, not just dry, so trapped air doesn’t come back and show up as bubbles later. For solid paint curing and bubble prevention, you need patience and control.
After rolling, don’t touch or stack wet coats; give each layer time to reach recommended cure depth. Then keep the area stable: warm, ventilated, and away from drafts or sudden humidity swings.
Use these steps:
1) Follow label cure time, not just dry-to-touch.
2) Maintain steady temperature and airflow during curing.
3) Avoid recoating until the surface fully cures.
When to Call a Pro for Persistent Rolling Bubbles
If bubbles keep appearing after you roll and you’ve already followed proper curing and recoat timing, it’s time to call a pro.
You should also get help when the bubbles return in the same spots, even after you rework prep, mix ratios, and roller pressure.
A professional assessment can spot hidden causes like moisture intrusion, contaminated substrate, incompatible coatings, or wrong conditions.
For bubbles troubleshooting, ask a contractor to inspect ventilation, humidity, and temperature swings inside the space.
If you notice blistering that spreads or paint fails to level, don’t experiment—bring in an expert early.
Frequently Asked Questions
Can I Use a Hair Dryer to Pop Paint Bubbles Quickly?
Yes—you can use hair dryer techniques to pop small paint bubbles quickly, but don’t overheat. Hold it a few inches away, warm briefly, then smooth immediately. For bubble prevention, thin and roll evenly, avoiding overworking the surface.
Why Do Bubbles Appear Only After the First Coat Dries?
Bubbles appear after the first coat dries because trapped air expands as water evaporates; nearly 80% of coating defects start during application. During paint application, bubble formation can show later once surface tension releases trapped pockets.
What’s the Safest Way to Remove Bubbles Without Damaging the Finish?
Safest way: wait for paint to level, then lightly roll over bubbles with minimal pressure using smooth, dry roller. Use bubble prevention tips like proper loading and rolling technique adjustments. Don’t sand hard—touch up with thin coats only.
Do Rollers Shed Lint That Causes Bubbles or Surface Pits?
Yes—some rollers shed lint, like tiny gremlins, and they can trigger bubbles or pits during paint application. Choose low-shed, proper roller types, prep the surface, and apply steady pressure to minimize defects.
Can Water-Based Paint Bubbles Be Fixed After Full Cure?
Yes—if you catch water-based paint bubbles after partial cure, you can sand lightly, re-roll thinly, and blend. After full paint curing, you usually can only sand, patch, then repaint for reliable bubble prevention.
Conclusion
You don’t have to live with bumpy, bubble-ridden walls. Pick the right roller nap, thin the paint just enough, and roll with steady pressure—no frantic back-and-forth. Spot bubbles fast, pop them lightly, and do one smooth final pass to level everything out. Then respect drying and curing times, or those bubbles will “come back” like an uninvited guest. And if it still won’t behave, call a pro before you lose your mind.
