How to Paint 16-Foot Walls Safely and Efficiently Without Scaffolding
You can safely and efficiently paint 16-foot walls without scaffolding by using a secure telescoping ladder or rolling platform, long extension poles with quality rollers, and fall protection like a harness and anchored lanyard. Prep thoroughly: clear the area, cover floors, repair surfaces, and use primer where needed. Alternate roller work with a sprayer for speed, inspect under raking light, and keep a partner nearby for safety. Keep going to get step-by-step setup, tool lists, and tips.
How to Paint 16-Foot Walls Safely and Efficiently Without Scaffolding
You can reach 16-foot walls safely without scaffolding by choosing the right tools and techniques—here’s a quick answer and the best approach at a glance.
I’ll give a visual overview of methods like extension poles with rollers, mobile work platforms, and secure ladder systems so you can compare options fast.
With that snapshot, you’ll know which method fits your space, budget, and comfort level.
Quick Answer Best Approach at a Glance
Two smart tools and a safe plan let you paint 16-foot walls without scaffolding: an extension pole with a roller, a sturdy telescoping ladder or rolling platform, and a lightweight pump sprayer or airless sprayer for even coverage.
For how to paint 16 foot walls, prep the area, use fall protection, work from stable positions, alternate roller and spray for speed, and keep a helper nearby.
Visual Overview of Methods
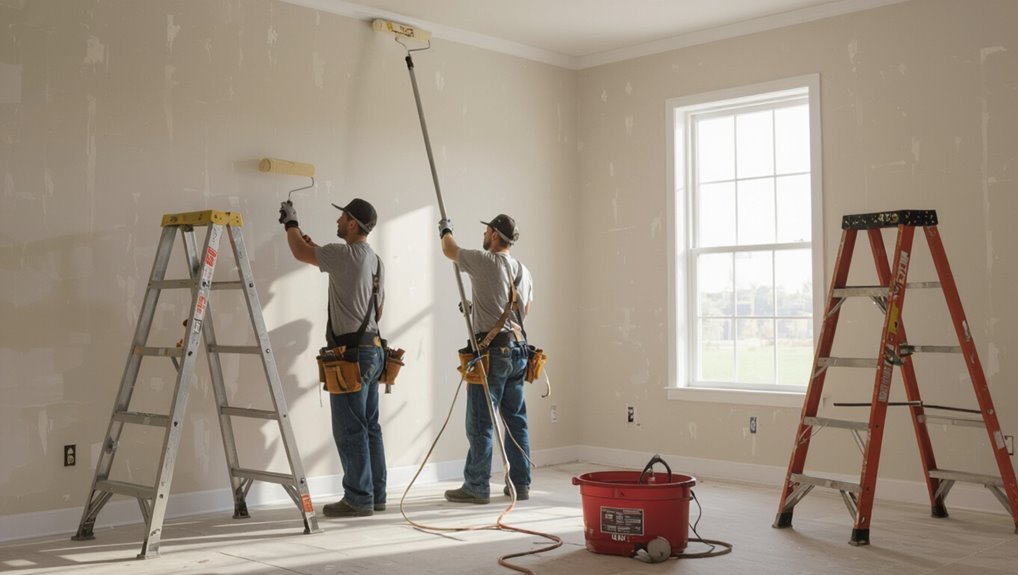
Start by picturing three practical approaches—extension-pole rolling, powered spraying, and working from a secure elevated platform—so you can quickly compare safety, speed, and quality for 16-foot walls.
Visualize pole rolling for control and minimal overspray, sprayers for fast, even coverage but more prep, and an elevated platform for precision work and safer access to edges and trim.
Understanding the Challenge
Working on 16-foot walls isn’t the same as painting a standard room — you’ll face reach limits, different paint handling, and more complex access.
You’ll need to respect fall hazards, secure footing, and safe procedures for working at height.
Plan for the right tools—telescoping poles, stable platforms or lifts, proper harnesses, and PPE—so you can work efficiently and safely.
Why 16-Foot Walls Are Different from Standard Walls
Because 16-foot walls put you well above the reach of a typical ladder, they change almost every decision you’d make for a painting job—from access and fall protection to paint application and cleanup.
You’ll need extended tools, different paint volumes and delivery methods, longer drying considerations, and precise surface prep techniques.
Planning, staging, and efficient workflows matter more to save time and materials.
Risks and Safety Considerations for Working at Height
Reaching 16-foot heights changes more than your tools—it raises the stakes for safety, and you’ll need to treat the job like a small construction project.
You’ll face fall risks, unstable footing, and increased fatigue that impair judgment.
Plan for clear access, secure anchoring, spotters, and frequent breaks.
Never improvise platforms or ignore wind, lighting, or overhead hazards that amplify danger.
Tools and Equipment Overview (what you need and why)
If you’re tackling 16-foot walls, the right gear keeps you safe and speeds the job: sturdy access (scaffolding or an articulating lift), fall protection (harness, lanyard, anchor), long-reach tools (telescoping rollers, extension poles), quality ladders, and reliable lighting and ventilation.
Choose high-quality rollers, extension poles with secure locks, breathable protective gear, a sturdy paint bucket hook, and a stable platform; inspect and maintain everything.
Options for Reaching 16-Foot Heights Without Scaffolding
To reach 16-foot walls without scaffolding, you’ll weigh options like extension ladders, telescoping pole systems, and rented aerial work platforms.
Consider ladder-stabilizing accessories, fall-arrest gear, and the pros and cons of pole rollers or brushes versus using a boom lift.
You can also combine tools—secure ladder plus long pole or a small platform with fall protection—to match the job and your skill level.
Extension Ladders When and How to Use Them Safely
When you need to work at 16 feet without scaffolding, an extension ladder can be a safe, efficient choice—provided you pick the right model, set it correctly, and follow basic ladder safety rules.
- Choose a duty-rated ladder tall enough to extend 3 feet above your work and inspect for damage.
- Angle at 75° (4:1), secure the base and top.
- Maintain three points of contact and avoid overreaching.
Telescoping Pole Systems (Roller/Brush) Pros and Cons
Because telescoping pole systems let you paint up to 16 feet from the ground, they’re a strong alternative to ladders or scaffolding for many jobs.
You’ll gain reach, less setup time, and better mobility, but expect arm fatigue, limited control on very textured surfaces, and occasional wobble at full extension.
- Reach and speed
- Fatigue and control issues
- Lightweight portability
Aerial Work Platforms & Boom Lifts Alternatives (rental considerations)
If you need stable, adjustable height without assembling scaffolding, aerial work platforms and boom lifts give you that capability while keeping you on a solid, secure platform; renting one can be quick and cost-effective for 16-foot jobs.
- Compare rental rates, minimum hours, and delivery/setup fees.
- Confirm platform capacity, outreach, and required operator certification.
- Inspect controls, emergency lowering, and insurance/liability requirements before signing.
Ladder-Stabilizing Accessories and Fall-Arrest Options
Aerial platforms offer stability, but they aren’t always available or affordable—ladders plus the right stabilizing accessories and fall-arrest gear give you a compact, lower-cost way to reach 16-foot heights safely.
- Use a ladder stabilizer, leveler, and anti-slip feet to prevent tipping and protect surfaces.
- Wear a harness with a shock-absorbing lanyard anchored to a rated point.
- Add a rope grab and helmet for redundant protection and hands-free repositioning.
Combination Techniques (ladder + pole + platform)
Combine tools to stay safe and efficient when you need to reach 16-foot heights without erecting full scaffolding: use a stable ladder as your base, extend reach with a quality pole (for rollers or brushes), and bring along a compact platform or workstand to give you a stable, level working surface at mid-height.
Anchor the ladder, position the platform securely, alternate between pole work and close-up brushwork, and inspect connections frequently.
Step-by-Step Workflow to Paint 16-Foot Walls
Start by planning the job and prepping the site so you know access points, materials, and timelines.
Inspect and repair the surface, choose the right primer, paint, and finish, then set up ladders, stands, and safety gear correctly.
Finish by cutting in from the ground with telescoping poles before rolling or back-brushing the high areas.
Step 1 Planning and Site Preparation
Before you lift a ladder or rent equipment, take time to plan the job and prep the area so you’ll work safely and efficiently.
- Map access points, power sources, and weather windows to avoid surprises.
- Clear furniture, cover floors, and secure walkways; mark no-go zones.
- Gather PPE, extension tools, drop cloths, and a communication plan so helpers know roles and timing.
Step 2 Surface Inspection and Repairs
Because high walls show every flaw up close, inspect and repair the surface thoroughly before you paint a single stroke:
- Check for cracks, loose plaster, and damp; mark repairs and remove failed material.
- Fill holes with appropriate filler, sand smooth, and feather edges for an even profile.
- Treat mold or efflorescence, prime repaired areas, and confirm the wall is clean and dry before painting.
Step 3 Choosing Paint, Primer, and Finishes
With the surface prepped and repairs primed, pick paint, primer, and finish that match the wall material, exposure, and your maintenance goals.
Choose products for durability, coverage, and drying time so you minimize trips up and down. Match sheen to hide imperfections and ease cleaning.
- Exterior vs. interior: pick compatible primer.
- High-quality acrylic for longevity.
- Mold-resistant for damp areas.
Step 4 Setting Up Ladders, Stands, and Safety Gear
When you’re working on 16-foot walls, setting up your access and safety gear correctly is as important as choosing the right paint; mistakes here create the biggest hazard and slowdowns.
You’ll inspect ladder feet, level platforms, and don fall protection. Follow local regs, secure ties, and keep tools tethered.
- Inspect and level
- Anchor and tie off
- Use PPE and tool tethers
Step 5 Cutting In from the Ground with Telescoping Poles
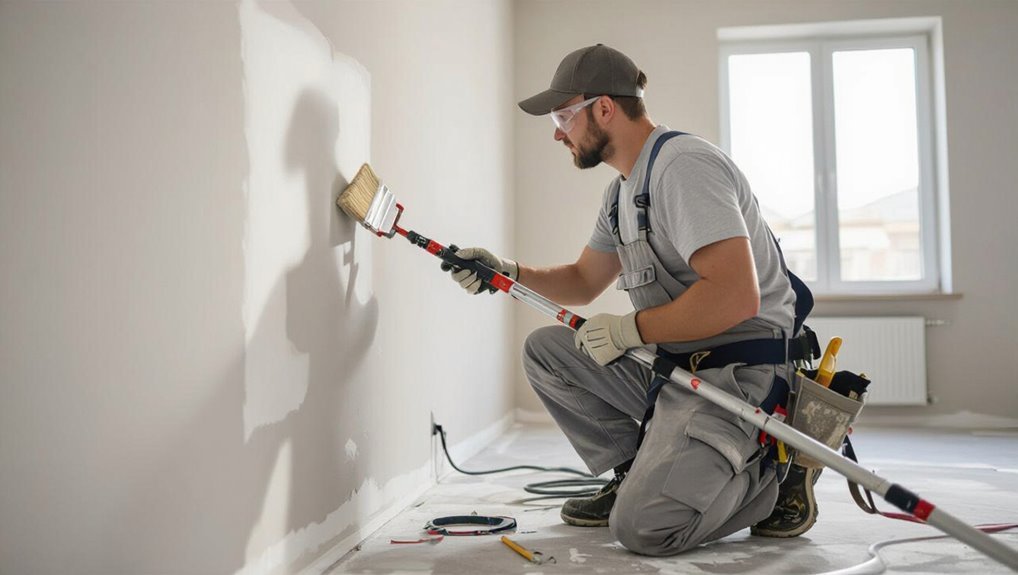
Start by attaching a proper cutting-in brush or trim pad to your telescoping pole and test its balance and stroke reach before you begin; you’ll save time and avoid drips by confirming the tool feels steady and the bristles contact the edge cleanly.
- Keep pole vertical, use light wrist motion to trace edges.
- Load sparingly to prevent blobs.
- Work in short sections, wipe excess on tray between passes.
Step 6 Rolling Technique for Even Coverage with Extension Poles
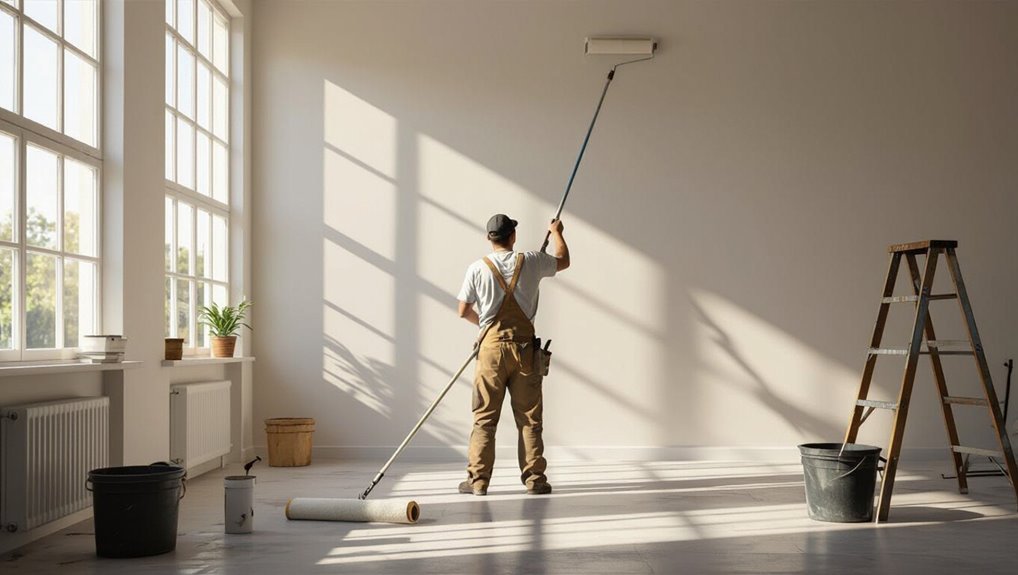
After cutting in from the ground, switch to a 9–12-inch roller head on a sturdy extension pole to cover large wall areas efficiently. You’ll keep the pole slightly tilted forward so the roller hugs the surface and maintains consistent nap contact.
Roll in overlapping W patterns, apply steady pressure, and reload often to avoid thin spots.
- Pace: steady, controlled strokes
- Angle: slight forward tilt
- Overlap: 50%
Step 7 Working in Sections and Managing Drips/Overlaps
Divide the wall into manageable 4–6 foot vertical sections and work one section at a time so you can control overlaps and catch drips before they run.
Keep a wet edge, feather overlaps, and check for drips beneath. Move steadily; don’t overload the roller.
- Feather edges lightly
- Inspect below for drips
- Wipe excess immediately
Step 8 Touch-Ups and Second Coat Strategy
1 clear rule guides your touch-ups and second coat: fix visible flaws and recoat methodically so the finish looks uniform from floor to ceiling.
Work steadily, let the first coat cure, then inspect with raking light. Target thin, even second coats; feather edges to hide overlaps.
- Spot-prime stains before recoating
- Use long-reach tools for high touch-ups
- Sand glossy spots lightly
Step 9 Clean-Up and Safe Equipment Storage
Once you’ve finished touch-ups and the second coat has cured, pack up methodically so tools stay clean and ready for the next job.
Clean rollers, brushes, and trays with appropriate solvent, label leftover paint, and ventilate containers.
Store ladders and poles secured upright. Lock hazardous materials and keep a small maintenance kit accessible.
- Clean and dry tools
- Label and seal paint
- Secure and store equipment
Tools, Materials, and Equipment Checklist
Before you start, gather the essential tools—a sturdy ladder, extension poles, rollers, and brushes—and make sure they’re in good condition.
You’ll also want recommended safety gear like harnesses, stabilizers, and basic PPE to protect yourself while working at height.
Finally, check consumables and use a quick paint-quantity estimation to confirm you’ve got enough primer, paint, and drop cloths for the job.
Essential Tools (ladders, poles, rollers, brushes)
A handful of reliable tools will make painting high walls safer and faster: a sturdy ladder or scaffolding, an extension pole with a compatible roller, quality rollers and brushes for even coverage, and basic safety gear like gloves and eye protection.
You’ll choose gear that fits your wall height, paint type, and comfort, keeping efficiency and control top priorities.
- Extension pole + roller
- Assorted rollers/nap lengths
- Angled and flat brushes
Recommended Safety Gear (harnesses, stabilizers, PPE)
While tackling high walls, you’ll want safety gear that prevents falls and keeps you steady so you can focus on the paint job.
Wear a full-body harness with shock-absorbing lanyard, secure an anchor or stabilizer to structural points, and use PPE.
Follow inspection and fit checks every time.
- Full-body harness + lanyard
- Anchor/stabilizer system
- PPE (helmet, gloves, non-slip boots)
Consumables and Paint Quantities Quick Estimation Table
Checklist: you’ll want a compact consumables and paint-quantity table to avoid runs to the store mid-job and to keep costs predictable. Use this quick guide to estimate gallons, rollers, tape, and drop cloths so you can pack once and work efficiently.
| Item | Estimate |
|---|---|
| Paint | 2–3 gal |
| Rollers/tape | 3 rollers / 2 rolls |
Time-Saving Techniques and Efficiency Hacks
As you tackle high walls, you’ll balance speed against finish—know when a faster method is worth a slight trade-off in quality.
Pick multi-functional tools and extension accessories to cut setup and reach time without overcomplicating the job.
Whenever possible, assign clear roles so a small team can work safely and finish much faster.
Speed vs. Quality Trade-offs
When you’re racing against a deadline, you can still keep quality high by choosing time-saving techniques that don’t cut corners—like using extension poles with high-capacity rollers, pre-taping smartly, and working in efficient, overlapping strokes to avoid rework.
- Prioritize prep: mask edges, clean surfaces, fix flaws.
- Batch tasks: cut in, roll, inspect in logical zones.
- Pace work: balance speed with short quality checks.
Using Multi-Functional Tools and Extension Accessories
Although high walls add complexity, the right multi-functional tools and extension accessories let you work faster without sacrificing finish—think telescoping poles that accept different rollers and brushes, combination edgers with built-in shields, and scaffolding platforms that convert to ladders.
- Use adjustable poles to reach corners without switching ladders.
- Choose combo heads for cutting in and rolling.
- Attach paint reservoirs to reduce trips.
Teamwork and Task Delegation for Faster Completion
If you want the job done faster and safer, assign clear roles so everyone knows their responsibilities before you start.
You’ll coordinate loaders, rollers, and safety spotters, keeping communication tight and breaks scheduled to maintain focus.
- Prep and mask: 1–2 people.
- Paint and extend: 2 people alternating.
- Safety and cleanup: 1 person monitoring and tidying.
Common Mistakes and How to Avoid Them
Watch your ladder setup and stance—poor positioning or wobbly feet are the biggest slip-ups and you can fix them before you climb.
Don’t overreach or twist your body; move the ladder so your center stays balanced.
Take your time with each coat and respect drying conditions so you don’t end up with drips, uneven coverage, or ruined work.
Ladder Positioning and Stability Errors
When you’re setting up a ladder for high-wall painting, positioning and stability are everything: a poorly placed ladder shifts, slips, or tips, turning a routine task into a serious hazard.
Check footing on level, firm ground, use 4-to-1 angle, lock spreaders, secure top against the wall, and tie off or have a spotter.
Inspect for damage before climbing.
Overreaching and Unsafe Body Mechanics
Even with a ladder set correctly, overreaching and poor posture are the most common causes of falls and strains.
Keep your hips centered over the ladder, move the ladder often instead of stretching, and use extension poles to reach high areas.
Maintain a slight bend in your knees, grip tools securely, and pause to reset position whenever you feel off balance.
Poor Paint Application from Too-Fast Rolling
If you rush the roller, you’ll leave lap marks, thin coverage, and an uneven finish that shows every stroke.
Work in steady, overlapping passes, reload the roller before it dries out, and maintain consistent pressure.
Use a quality nap for the surface texture and back-roll edges to blend.
Slow, deliberate motion gives uniform coverage and reduces touch-ups on high walls.
Underestimating Weather or Drying Times
Because paint cures based on temperature, humidity, and airflow, misjudging weather or drying times can wreck a project and force dangerous repeat work on high walls.
Check forecasts, avoid painting before rain or extreme heat, and schedule longer drying windows.
Use quick-dry formulas when necessary, monitor surface tack, and never climb until paint is fully cured to prevent smudges and risky rework.
Best Practices and Safety Checklist Before You Start
Before you lift a ladder or unroll a drop cloth, walk the work area and check for tripping hazards, secure footing, and stable anchor points.
Make sure weather, lighting, and ventilation are suitable for the paint and the height you’ll be working at.
If you’re working alone, set an emergency plan and a check-in method so someone knows your schedule and can call for help if needed.
Pre-Work Safety Walkthrough
While you’re still on the ground, walk the space methodically and check every potential hazard so you don’t get surprised once the ladder or scaffold goes up.
Inspect floor, walls, fixtures, and overhead obstructions. Secure trip hazards, mark work zone, confirm tool condition.
Follow these steps:
- Clear and tape off floor and pathways.
- Check electrical outlets and cords.
- Test ladder footing and anchor points.
Weather, Light, and Ventilation Considerations
If the weather’s extreme, the lighting’s poor, or the room’s stuffy, you’ll increase risk and reduce paint quality—so check conditions and fix any issues before you climb.
You should plan for stable temperatures, bright even lighting, and fresh airflow. Address drafts, add work lights, and use fans or open windows while keeping ladders dry and surfaces dust-free.
- Check temperature and humidity
- Guarantee even lighting
- Confirm ventilation
Emergency Plan and Communication When Working Alone
Good environmental checks also mean you’ve reduced some risks, but when you’re working alone you still need a clear emergency plan and reliable ways to summon help.
Tell someone your schedule, location, and check-in times. Keep a charged phone and emergency numbers accessible.
Know basic first aid and how to describe your position.
- Schedule check-ins
- Phone + backup power
- First-aid + location info
Comparison: Scaffolding vs. Non-Scaffold Methods
You’ll want to compare scaffolding and non-scaffold options side-by-side, starting with a clear safety comparison table that highlights fall risk, stability, and required PPE.
Consider cost, setup time, and how each method affects work speed and finish quality. That way you can pick the approach that balances budget, schedule, and the level of workmanship you need.
Safety Comparison Table
Start by lining up the key safety factors—stability, fall risk, setup complexity, and rescues—so you can directly compare scaffolding with non-scaffold methods; this table will show where each option reduces hazards or introduces new ones, helping you pick the safest setup for your specific wall height, access, and skill level.
| Factor | Scaffolding | Non-Scaffold |
|---|---|---|
| Stability | High | Variable |
| Fall risk | Lower with rails | Higher |
| Setup | Complex | Simple |
| Rescue | Easier | Harder |
| Mobility | Limited | Flexible |
Cost, Time, and Quality Trade-offs
One clear trade-off when choosing scaffolding over non-scaffold methods is how each affects cost, time, and final finish: scaffolding usually demands a bigger upfront expense and longer setup but speeds repetitive work and yields more consistent quality, while ladders, poles, or lifts cut initial costs and setup time yet often slow progress, increase touch-ups, and can compromise finish uniformity on large surfaces.
- Scaffolding: higher cost, faster large-area work.
- Ladders/poles: low cost, fragmented progress.
- Aerial lifts: moderate cost, variable finish.
Case Examples and Scenarios
You’ll see practical examples that match common setups: a single person using a ladder with a pole system, a two-person team coordinating with extension ladders, and when it’s smarter to rent a lift for complex surfaces.
You’ll get clear roles and step-by-step tasks for the ladder scenarios. You’ll also learn decision points for choosing professional lift rental.
Single-Person Project Using Ladder + Pole Workflow Example
For a solo high-wall paint job using a ladder plus an extension pole, plan a step-by-step workflow that keeps you stable and efficient:
set up ladder on level ground, secure feet and lock spreaders, position drop cloths, load roller tray at ground, climb with pole preassembled, paint reachable sections in overlapping strokes, descend to reload or check progress, adjust ladder position methodically, clean tools and store safely.
Two-Person Team with Extension Ladders Roles and Tasks
After you’ve tried the ladder-plus-pole solo routine, bring in a partner when walls get taller or the job grows complex—two people with an extension ladder let you work safer and faster.
One person stabilizes base, manages ladder height and watches footing while the other paints and trims.
Swap roles frequently, communicate movements, prep tools within reach, and plan breaks to prevent fatigue and errors.
Professional Rental of Lift for Complex Surfaces When to Choose
When surfaces become too high, wide, or irregular for ladders and poles, rent a powered lift to keep the platform steady and cut risk—scissor lifts, boom lifts, and vertical personnel lifts let you reach complex façades, eaves, vaulted ceilings, and multi-level scaffolding zones safely and efficiently.
Choose rentals when access is obstructed, work spans long durations, precision is required, or ground is uneven; always verify operator training and site assessment.
Frequently Asked Questions (FAQ)
You probably have specific questions about tackling 16-foot walls safely, so let’s answer the most common ones.
We’ll cover whether an extension ladder alone is safe, what extension pole length and type work best, and when a harness, lift rental, or pros are smarter choices.
You’ll also get quick guidance on paint coverage per square foot to help estimate how much you’ll need.
Can I safely paint 16-foot exterior walls using only an extension ladder?
Wondering if an extension ladder alone will do the job? You can for some 16-foot walls, but it’s riskier and slower.
Use a tall, stable ladder with proper angle, secure footing, a spotter, and fall protection. Avoid overreaching; move the ladder often.
If walls are uneven, windy, or you need prolonged work, consider alternatives for safety and efficiency.
What length and type of extension pole is best for 16-foot walls?
Although a 16-foot wall feels tall, a 9–12 foot extension pole paired with a 4–6 foot brush or roller sleeve usually gives the reach you need without overextending; choose a pole that locks securely, extends smoothly, and supports your roller or brush weight while staying stiff enough to avoid wobble.
Opt for aluminum or fiberglass shafts, comfortable grips, and quick-change fittings for efficient, controlled painting.
Is a harness required when using a ladder for this height?
Do you need a harness on a ladder at 16 feet? You’re not legally required in many residential settings, but harnesses add protection if you’re working near edges, uneven ground, or for long periods.
Use a certified fall-arrest system if local rules or jobsite conditions demand it.
Prioritize stable footing, a spotter, and follow ladder angle and weight ratings regardless of harness use.
How much paint will I need for a 16-foot wall (per square foot guideline)?
A good rule of thumb is 1 gallon of paint covers about 350–400 sq ft per coat.
So for a 16‑foot wall, you’ll first calculate the wall’s square footage (height × width) and then divide by that coverage number to estimate gallons per coat.
Remember to account for windows/doors, the number of coats, surface texture, and primer when finalizing how much to buy.
Measure width, subtract openings, divide by coverage, round up, and add 10–15% for touchups.
When should I rent a lift or hire professionals instead of DIY?
When should you call in pros or rent a lift instead of tackling high-wall painting yourself?
If you lack experience with heights, need specialized equipment, face complex repairs, or can’t commit time, hire pros.
Rent a lift if the job is short, access is straightforward, and you’re trained.
Prioritize safety, insurance coverage, and local regulations when deciding.
Final Checklist and Quick Reference
Before you climb the ladder, run through this concise final checklist to make sure your setup, safety gear, and paint plan are ready—you’ll save time and avoid common hazards.
Before climbing the ladder, run this quick checklist to ensure gear, setup, and safety are ready—avoid common hazards.
- Confirm ladder stability, footing, tie-off points, and non-slip shoes.
- Check harness, helmet, eye protection, and clear fall zone.
- Verify paint, brushes, extension poles, drop cloths, and emergency phone.