
How to Paint a Basement Ceiling for a Clean Modern Look
You can give your basement a clean, modern look by first clearing the space, checking for moisture or mold, and repairing or priming surfaces. Choose a bright white to open the room, black beams for contrast, or a uniform neutral for a sleek ceiling. Use low‑VOC primer and paint, roll or spray for even coverage, and mask fixtures for crisp edges. Follow safety and ventilation steps, and keep going to learn tools, techniques, and common pitfalls.
Quick Answer: Paint a Basement Ceiling Step-by-Step
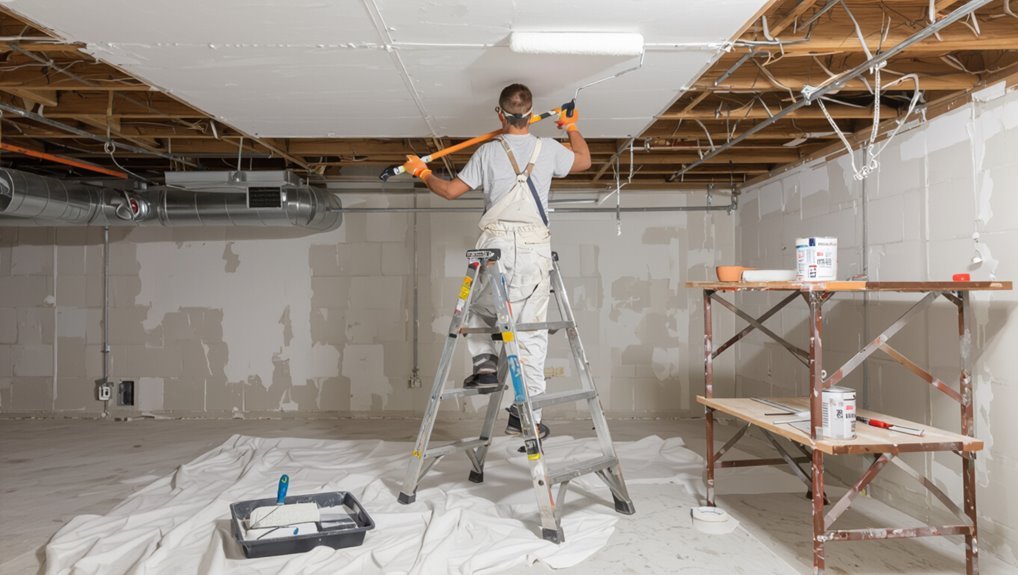
Start by clearing the area and protecting floors and fixtures with drop cloths or plastic sheeting.
Then remove or mask light fixtures and vents.
You’ll clean and prime surfaces, repair cracks, and choose paint suited to moisture.
Use rollers and extension poles for even coverage, cutting edges with a brush.
Finish with a second coat if needed, considering ceiling aesthetics and current paint trends.
Why Paint a Basement Ceiling: Light, Style, and Value
Painting your basement ceiling can make the room feel brighter by reflecting light and reducing shadows.
It also ties exposed ducts and joists into a modern, cohesive look that complements the rest of your home.
Plus, a finished ceiling can boost resale value by making the space look intentional and well-maintained.
Brighter Ambient Lighting
A fresh coat of ceiling paint can make a basement feel considerably brighter by reflecting more light from fixtures and windows.
This means you’ll need fewer lamps and can rely on softer, more even ambient illumination.
Use ambient lighting techniques like recessed fixtures and uplights to maximize ceiling color effects; choose a reflective, warm-toned paint to bounce light evenly and reduce harsh shadows.
Modern Cohesive Style
Many homeowners underestimate how a painted ceiling ties a basement’s elements together; when you pick a modern, cohesive color scheme, the ceiling becomes a deliberate design layer that unifies exposed beams, flooring, and furnishings while boosting perceived height and value.
- You’ll reinforce modern aesthetics with muted neutrals.
- You’ll use contrast to define beams.
- You’ll match undertones for cohesive design.
- You’ll simplify fixtures for a clean look.
Increased Home Value
Perception matters, and a well-painted basement ceiling can boost your home’s market appeal by making the space look brighter, cleaner, and more finished.
You’ll attract buyers and appraisers who value thoughtful home improvement; a finished ceiling suggests care and increases usable square footage perception.
That perceived upgrade can sway real estate comparisons, helping your property command a higher price and faster sale.
Choosing the Look: White, Black Beams, or Uniform Color
You can make the room feel larger and brighter with a bright white ceiling that reflects light.
Painting the exposed beams black will add contrast and hide ductwork while keeping the ceiling visually open.
Or you can choose a uniform color for a cohesive, finished look that simplifies maintenance and hides imperfections.
Bright White Ceiling
Bright white ceilings open up a basement, reflecting light and making low or windowless spaces feel taller and airier.
You’ll use clean white to neutralize dark corners and highlight architectural lines while considering ceiling texture and color psychology.
- Boost perceived height with gloss or satin
- Hide imperfections with flat white
- Pair with light fixtures for contrast
- Keep trim crisp and minimal
Painted Black Beams
If you liked the crisp openness of a white ceiling, consider keeping the plane light but painting exposed beams black to add definition and drama.
You’ll create striking contrast and modern black beam aesthetics without losing brightness.
Use satin or semi-gloss for durability, touch up edges yearly, and follow maintenance tips like dusting and spot-priming to keep lines sharp and finishes uniform.
Uniform Color Scheme
When deciding between a crisp white plane, dramatic black beams, or a uniform color, think about how you want the room to feel and function.
A uniform color creates cohesion, hides imperfections, and follows current design trends while leveraging color psychology to set mood.
Consider:
- Seamless visual flow
- Easier maintenance
- Lighting balance
- Coordination with furnishings
Identify Your Ceiling Type: Drywall, Joists, or Drop Ceiling
Before you grab paint and rollers, figure out which ceiling type you have—drywall, exposed joists, or a drop (suspended) ceiling—because each needs different prep, tools, and paint.
Inspect drywall types and ceiling textures to determine sanding, priming, or skim-coating. For joists, plan for spraying or painting beams; for drop ceilings, remove tiles or paint in place.
Choose appropriate primers and finishes.
Check for Moisture and Mold Before Painting
Because moisture ruins paint and hides mold, you should inspect the basement thoroughly before any painting begins.
Use simple moisture detection and prioritize mold prevention so your finish lasts.
Check these areas and actions:
- Look for water stains and damp spots on joists and drywall.
- Smell for musty odors in corners and vents.
- Use a moisture meter on suspect areas.
- Address leaks and ventilation before painting.
Tools and Materials for Painting a Basement Ceiling
Tools and materials determine how smoothly the job goes and how durable the finish will be, so gather them before you climb the ladder.
You’ll need primer, appropriate paint types (flat for flaws, satin for durability), rollers with extension poles, angled brushes, drop cloths, painter’s tape, respirator, and LED work lights.
Match tools to ceiling textures and prep supplies for clean adhesion.
How to Calculate Paint and Primer Quantities
Start by measuring the ceiling area so you know exactly how much primer and paint you’ll need: multiply the length by the width of each room, add any additional ceilinged spaces, and subtract large fixtures or open areas; this gives you the square footage to base coverage estimates on.
- Use paint coverage calculations per gallon.
- Factor primer quantity estimates for porous surfaces.
- Divide total by coats needed.
- Buy a little extra for touch-ups.
Budget-Friendly Paint and Primer Options
You can save a lot by choosing an affordable primer that still blocks stains and promotes adhesion.
Look for low-VOC paint options so you keep fumes down without paying premium prices.
Balance coverage and cost by comparing hide (coverage) ratings—fewer coats can cut both time and expense.
Affordable Primer Choices
Because basement ceilings often show stains, rust, or uneven textures, choosing an affordable primer that blocks stains and bonds well can save you time and money down the line.
You’ll want affordable primers from reliable budget brands that seal and promote topcoat adhesion.
Consider these options:
- Shellac-based stain blocker
- Oil-based universal primer
- Water-based bonding primer
- Rust-inhibiting metal primer
Low-VOC Paint Options
When you’re tackling a basement ceiling on a budget, choosing low-VOC paint and primer keeps indoor air safer without costing a fortune. Many affordable brands now offer low-odor, low-VOC formulas that still block stains and bind well to common ceiling materials.
You’ll find eco friendly options labeled for basements that balance paint durability and finish, resist mildew, and require minimal coats for a modern, clean look.
Coverage vs. Cost
Low-VOC choices you’ve just read about can still vary widely in how much area a single gallon covers and how many coats you’ll need, so balancing coverage against price matters most for a budget basement ceiling.
You should weigh coverage options and perform a quick cost analysis to pick primer and paint that cut coats without sacrificing finish.
- Estimate square footage
- Compare spread rates
- Factor primer needs
- Choose durable finish
Selecting Paint Finish for Basements: Flat to Gloss
Choosing the right paint finish for a basement matters more than you might think because it affects durability, light reflection, and how easy surfaces are to clean.
You’ll weigh paint finish options: flat hides imperfections, eggshell or satin balances sheen choices and washability, semi-gloss boosts moisture resistance and cleanup, and gloss maximizes light but emphasizes flaws.
Match finish to traffic and humidity.
Picking the Right Primer for Metal, Wood, Gypsum
1 clear primer choice can make the difference between a lasting finish and peeling, so match primer type to the substrate:
use a metal-specific, rust-inhibiting primer for steel or iron; a stain-blocking, oil- or shellac-based primer for raw or tannin-rich wood; and a gypsum/drywall primer or PVA sealer for bare or patched gypsum board.
- Metal: rust-inhibitor
- Wood: stain-blocker
- Gypsum: PVA/drywall primer
- Tips: proper application techniques, thin coats, sanding between layers
Choose primer types carefully and follow precise application techniques for durable results.
Protecting HVAC, Pipes, and Electrical Fixtures
Before you start painting, cover HVAC ducts, pipes, and electrical fixtures to prevent overspray, drips, and clogging of vents and connections.
You’ll use HVAC protection like plastic sheeting and tape, apply Pipe covering to insulated and bare pipes, unplug or isolate circuits for Electrical safety, and include these steps in Surface preparation so paint doesn’t foul systems or create hazards.
Clearing the Space and Covering Floors and Furniture
Start by removing loose items like boxes, tools, and décor so you’ve got a clear workspace.
Cover the floor with drop cloths or plastic sheeting and tape seams to prevent paint bleed-through.
Drape furniture with breathable cloths or plastic and secure edges so dust and drips won’t reach them.
Remove Loose Items
Clear the area of loose items—boxes, tools, and anything that can be lifted—so you have an unobstructed workspace and nothing gets splattered.
You’ll focus on organizing tools and decluttering space before painting. Remove small items, group hardware, and bag debris.
- Gather screws, nails, and fittings
- Consolidate paint supplies
- Stack boxes away from the drop zone
- Bag loose trash
Protect Floors & Furniture
1. Clear the space, then lay down durable floor protection—drop cloths or rosin paper taped at seams.
Move small items out; group larger furniture and cover with plastic or canvas for full furniture coverage.
Secure coverings with painter’s tape so they won’t shift.
Keep a clear pathway for tools and paint, and check coverings periodically for paint drips or gaps.
Cleaning Surfaces: Degrease, Dust, and Treat Mold
Before you paint, make sure the ceiling is clean and dry: remove grease with a degreaser, wipe away dust with a microfiber cloth or vacuum, and treat any mold with a mildew cleaner or a bleach solution so the paint will adhere and last.
- Use proper surface preparation before priming.
- Scrub stains and rinse well.
- Apply mold treatment where needed.
- Let everything fully dry before painting.
Repair Drywall Seams, Cracks, and Nail Pops
Before you paint, you’ll want to prep the ceiling thoroughly by removing loose material and sanding around problem areas.
Patch cracks and seams with joint compound and tape, feathering the edges for a smooth finish.
Finally, sink and re-nail or use drywall screws on nail pops, then cover and sand the fastener before priming.
Prep Surface Thoroughly
Start by checking every seam, crack, and nail pop so you can fix problems now rather than after painting.
Do thorough surface inspections and use proper cleaning methods before any repairs.
Then:
- Remove dust and loose texture
- Wipe with a mild cleaner
- Sand rough edges lightly
- Prime bare patches
This prep prevents adhesion issues and guarantees an even, modern finish.
Fix Cracks And Seams
Once you’ve prepped the surface, tackle cracks, seams, and nail pops promptly so they don’t telegraph through the paint or worsen over time.
For crack repair, widen hairline cracks slightly, fill with joint compound, and sand smooth.
For seam treatment, apply fiberglass tape or paper, embed with compound, feather edges, then sand and prime.
Inspect again before painting.
Address Nail Pops
After fixing cracks and seams, turn your attention to nail pops—those raised or protruding fasteners that can telegraph through paint and create weak spots in the ceiling.
During your ceiling inspection, locate pops, drive them below the surface, and patch.
For nail pop repair, follow steps:
- Mark each pop
- Sink fastener, add screw
- Fill with compound
- Sand and prime
Treat Rust and Corrosion on Metal Joists and Pipes
Before you paint, inspect metal joists and pipes for rust so you can stop corrosion from spreading and guarantee a long-lasting finish.
Scrape loose scale, wire-brush firmly, and wipe with solvent. Apply a rust treatment primer, let it cure, then use corrosion prevention paint or enamel designed for metal.
Check fittings and touch up annually to maintain protection.
Sanding Flaky or Uneven Ceiling Surfaces
Start by scraping and sanding any loose paint so it won’t keep flaking after you prime and paint.
Focus on smoothing rough patches with a sanding block or pole sander until the surface feels even to the touch.
Wipe away dust thoroughly before moving on to priming.
Remove Loose Paint
Scrape away any loose, flaking paint and then sand the surrounding area until the edges are feathered smooth so new paint will bond evenly.
- Wear a mask and goggles while removing loose paint.
- Use a stiff scraper, then medium-grit sandpaper for surface preparation.
Vacuum and wipe dust with a tack cloth.
Check for remaining adhesion issues before priming.
This prevents peeling and guarantees a durable finish.
Smooth Rough Patches
Smooth out any remaining rough or flaky spots by sanding them until the ceiling feels even to the touch and the edges blend into the surrounding surface.
Use a sanding block or pole sander with medium grit, then fine grit for final smoothing.
Apply appropriate patch materials for deeper defects, feather edges, and follow proper smoothing techniques so paint adheres and the finish looks seamless.
Masking and Taping for Crisp Edges
Before you roll paint on the joists, tape and mask every surface you don’t want painted so your edges stay crisp and clean.
Prep carefully: choose proper tape types and practice edge techniques. Work methodically, press edges, and overlap protective sheeting. Keep tools handy.
- Painter’s tape for trim
- Low-tack tape for delicate surfaces
- Plastic sheeting
- Clean microfiber cloth
Drop Ceilings: Paint Tiles vs Replace Them
When deciding whether to paint drop-ceiling tiles or replace them, weigh condition, cost, and the look you want—painting can refresh clean, intact tiles cheaply, while replacement is better for stained, sagging, or water-damaged panels. You’ll choose between drop ceiling options: tile painting for budget refresh, replacement for durability and modern style.
| Option | Pros | Cons |
|---|---|---|
| Paint | Cheap, quick | Won’t hide damage |
| Replace | Durable, clean look | Higher cost |
| Hybrid | Targeted swaps | Requires matching |
Painting Exposed Joists and Rafters Efficiently
If you want a clean, cohesive look without rebuilding the ceiling, painting exposed joists and rafters is a fast, cost-effective option that also helps protect wood from moisture and dust.
Painting exposed joists and rafters gives a clean, cohesive ceiling look—fast, affordable, and protective against moisture and dust
You’ll prep, prime, and apply paint with efficient application in mind, using targeted brush techniques for edges.
- Clean and sand
- Prime exposed wood
- Paint joists first
- Touch up rafters
Choose Roller, Brush, or Sprayer for Your Ceiling
You’ll pick a roller for even coverage across exposed joists, a brush for tight spots and detail work, or a sprayer when you need speed.
Consider surface texture, obstacles, and your comfort level with overspray. Each tool has trade-offs, so choose the one that matches the job and your skill.
Roller For Even Coverage
Pick the right roller to get even coverage across a basement ceiling without fighting texture or drips.
You’ll save time using proper roller techniques and coverage tips while avoiding overlap marks. Work in sections, maintain a wet edge, and use extension poles for reach.
- Choose a 3/8–3/4″ nap
- Load evenly
- Roll in a “W” pattern
- Finish light passes
Brush For Detail Work
1 good angled brush lets you tidy edges, cut around fixtures, and reach tight spots the roller can’t.
You’ll use precise brush techniques for trim, joists, and shadowed corners. Work from clean lines outward, load minimally to avoid drips, and keep a steady wrist.
For detail painting, pause to smooth bristle marks so the finish looks seamless next to rolled areas.
Sprayer For Speed
Consider a sprayer when speed and uniform coverage matter—especially for exposed-joist or textured basement ceilings where rollers struggle.
You’ll choose among sprayer types and use speed techniques to finish fast and even. Prep, mask, and test spray.
Benefits:
- Fast coverage
- Smooth, consistent finish
- Less fatigue than rolling
- Ideal for complex surfaces
Set Up a Paint Sprayer for a Basement Ceiling
Start by laying out your sprayer, hoses, and nozzle on a clean, covered area near the work zone so everything’s within reach and you won’t track paint across the floor.
Check sprayer settings, match filter and tip to paint thickness, and thin per manufacturer.
Wear a mask and goggles, tape edges, test spray on cardboard, adjust pattern and flow, then work systematically across the ceiling.
Rolling Techniques for Smooth and Textured Ceilings
Once your sprayer run is tested and you’ve taped off edges, switch to rolling for areas where a sprayer would overspray or struggle with texture.
Use these rolling techniques for smooth and textured finishes:
- Choose nap length to match texture
- Load roller evenly, avoid drips
- Roll in consistent overlapping passes
- Finish with light cross-rolling for uniform sheen
Cutting In Around Lights, Vents, and Tight Spots
Before you start cutting in, mask small fixtures like light trim and vent edges with painter’s tape to protect them and keep lines sharp.
Use a steady hand and a high-quality angled brush to paint cleanly around tight spots, working from the fixture outward.
Take your time and reload the brush lightly so you don’t get drips or blobbed edges.
Masking Small Fixtures
Masking small fixtures means cutting in carefully around lights, vents, and other tight spots so paint stays neat and functional.
You’ll use fixture protection and proven masking techniques to avoid drips and keep access clear.
Tips:
- Tape edges tightly around fixtures
- Cover bulbs and grills with paper
- Use low-tack tape for paint removal
- Trim masking for flush fit
Precision Brush Techniques
Start by choosing the right brush—an angled sash brush about 2–2.5 inches wide gives you control in tight spots like light cans, vents, and joist edges. You’ll use steady brush angles, short strokes, and precision layering to build even coverage without drips. Practice steady wrist placement and remove excess paint before cutting in around fixtures.
| Tool | Stroke | Tip |
|---|---|---|
| Angled brush | Short | Less paint |
| Small brush | Detail | Light touch |
| Foam | Smooth | Blend |
When to Prime and How Long to Wait
If your basement ceiling has bare wood, exposed joists, or patched drywall, prime it first to seal porous surfaces and promote adhesion.
For previously painted ceilings in good condition, primer isn’t usually necessary. Use priming techniques and observe waiting periods to guarantee adhesion.
After priming, wait recommended cure times before painting.
- Choose stain-blocking primer
- Thin coats dry faster
- 1–2 hours tack-free
- 24 hours full cure
How Many Coats You Need for Good Coverage
Most jobs need two coats for even, durable coverage, though you may get away with one on very smooth, well-sealed surfaces.
You should assess surface color, texture, and paint types—high-hide or primer-surface combos can reduce coats.
Use proper coverage techniques: cut in, roll overlapping sections, and maintain wet edges.
Add a second coat for uniform sheen and long-lasting results.
Drying Times, Ventilation, and Fume Control
Because drying times vary with temperature, humidity, and paint type, you should plan your schedule around realistic cure windows rather than ideal conditions.
Control moisture impact and fumes, and follow safety precautions.
Use ventilation tips and fume control strategies:
- Open windows and run fans for crossflow
- Use low-VOC paint
- Dehumidify to speed curing
- Wear respiratory protection and gloves
Fix Drips, Lap Marks, and Streaks Quickly
Catch drips, lap marks, and streaks while the paint’s still tacky so you can smooth them out without redoing large areas.
Use drip removal techniques: gently roll or feather with a mini roller.
For lap mark prevention, maintain wet edges and consistent strokes.
Apply streak correction methods by blending with light passes.
Keep touch up tips ready and prioritize application consistency for a uniform ceiling.
Painting Over Insulation, Vapor Barriers, and Foil
Before you paint over insulation, vapor barriers, or foil, check local building codes so you don’t void fire or moisture-safety requirements.
Make sure the paint you choose is compatible with the material — some adhesives, foils, and vapor barriers won’t take latex or oil-based paints.
Finally, confirm the insulation is securely attached and properly prepared so paint won’t trap moisture or cause sagging.
Check Local Building Codes
When you’re planning to paint near insulation, vapor barriers, or foil-faced materials, check your local building codes and utility guidelines first to confirm what’s allowed and whether any treatments will void warranties or create moisture hazards.
You should follow building regulations and safety standards; consult inspectors if unsure.
- Confirm permitted coatings
- Verify fire/smoke requirements
- Check vapor retardant rules
- Ask about warranty impacts
Paint Compatibility With Materials
1 key consideration is whether the paint will bond to or damage the materials you’re covering—insulation, vapor barriers, and foil-faced surfaces all react differently to coatings. You’ll check paint adhesion and material compatibility; use breathable primers on insulation, avoid solvents on vapor barriers, and test foil surfaces first.
| Material | Concern | Recommendation |
|---|---|---|
| Insulation | Adhesion | Use breathable primer |
| Vapor barrier | Damage | Use water-based paint |
| Foil | Bonding | Test small area |
Preparation And Attachment Methods
Start by securing and inspecting what you’ll be painting so coatings adhere and materials stay intact: check that insulation is properly fastened, repair any tears in vapor barriers with compatible tape, and smooth or test-attach foil-faced sections.
- Match attachment methods to ceiling types.
- Use primer suited for foil and vapor barriers.
- Test paint techniques on scrap.
- Avoid compressing insulation; staple or support instead.
Lighting and Color Tips to Make a Basement Bigger
If you want your basement to feel larger, focus on bright, evenly distributed lighting and a light, cohesive color palette that reflects light instead of absorbing it. Use light reflection strategies and color psychology effects: paint ceilings white or pale tones, add layered lighting, and keep trim consistent to bounce light and open sightlines.
| Tip | Action |
|---|---|
| Ceiling | Pale white |
| Walls | Soft neutrals |
| Fixtures | Recessed/LED |
| Accents | Minimal |
| Finish | Satin |
Maintaining a Painted Basement Ceiling Over Time
Bright, even lighting and a pale, cohesive palette will keep your basement feeling open, but keeping that fresh look takes regular upkeep.
Bright, even lighting and a pale palette open up a basement—maintain that fresh feel with regular upkeep.
You’ll use simple ceiling maintenance tips to preserve paint and guarantee long term durability. Follow these steps:
- Dust and vacuum joists quarterly.
- Spot-clean with mild detergent.
- Recoat high-traffic areas every 5–7 years.
- Touch up chips promptly.
When to Call a Pro: Electrical, Structural, Moisture
When you see persistent water stains, exposed wiring, or sagging joists, call a licensed pro—these issues can hide serious moisture, electrical, or structural problems that paint and DIY fixes won’t solve. You should get electrical safety checks, moisture assessment, and structural integrity inspections. Follow professional recommendations before painting.
| Visual | Concern |
|---|---|
| Stain | Leak |
| Wire | Shock |
| Sag | Collapse |
| Mold | Damp |
| Crack | Shift |
Eco-Friendly and Low-VOC Paint Options
Although you’re aiming for a fresh, finished look, choosing low-VOC and eco-friendly paints keeps your basement healthier for you and the planet.
Pick eco friendly brands and sustainable materials, read labels, and test small areas.
Consider:
- Zero/low-VOC latex for ceilings
- Natural primers for adhesion
- Recycled-content rollers and drop cloths
- Proper ventilation during and after painting
DIY vs Pro: Cost and Time Estimates
Picking low-VOC products and prepping properly will save you time and reduce headaches whether you tackle the job yourself or hire someone.
For DIY Budgeting, list materials, tools, and realistic Time Estimates; expect weekends for prep and two coats.
When you get Professional Quotes, compare labor, materials, and warranties.
Match Project Timelines to your schedule and contingency for drying or repairs.
Showcasing Before-and-After Ceiling Renovations
If you want to sell your results or simply enjoy the transformation, before-and-after photos make the impact clear and trustworthy.
You’ll capture the renovation impact by framing consistent shots, annotating changes, and highlighting the visual transformation.
Share images showing contrast between before renovation and after renovation to build credibility and inspire viewers.
- Consistent angles
- Good lighting
- Close-up details
- Wide-room context
Top Mistakes That Ruin Basement-Ceiling Paint Jobs
One common way to undo hours of careful prep is skipping key steps—like ignoring moisture issues, failing to clean and prime, or using the wrong paint—because these errors show up fast on a basement ceiling.
Don’t rush; learn common pitfalls: poor ventilation, wrong sheen, and unsteady brushes.
Stick to proven painting techniques, prep thoroughly, and inspect for leaks before you paint.
Frequently Asked Questions
Can I Install Recessed Lighting After Painting the Ceiling?
Yes — you can install recessed lighting after painting; you’ll choose recessed lighting options that suit your room and protect fresh finish. Consider ceiling paint types that tolerate touch-ups, mask edges, and allow safe fixture cutting without damaging the coating.
Will Painted Joists Affect My Home Insurance or Building Code Compliance?
Coincidentally, you won’t usually void coverage or breach building regulations by painting joists, but you should check insurance implications and local building regulations first; they might require fire-rated coatings or restrict alterations that affect structural or fire safety.
How Do I Paint Around a Sump Pump or Mechanical Room Safely?
You’ll protect sump pump safety by keeping clearance, avoiding paint on electrical components, and using moisture‑resistant coatings; mechanical room considerations include shutting power, ventilating, using drop cloths, and labeling pipes to prevent accidental interference.
Can I Soundproof the Ceiling Before or After Painting?
Can you imagine quieter nights? You can soundproof before or after painting, but it’s easier pre-paint: install ceiling insulation and soundproofing materials, seal gaps, then paint. Post-paint retrofits work but’re more fiddly.
How Long Before I Can Hang Artwork or Ceiling Fixtures Post-Painting?
You can hang artwork or install ceiling fixtures after the paint’s dry-to-touch stage, usually 1–2 hours, but wait full drying time—24–48 hours—for secure hanging and fixture installation to avoid marks or slippage.
Conclusion
You’ve transformed a tired tower into a tidy, trendy territory—think brighter, bolder, or beautifully blacked beams. Tackle moisture, test surfaces, then trim, tape, and trust quality, low-VOC paint to do the heavy lifting. Decide DIY or delegate based on time and talent, then prep properly to prevent pricey problems. Celebrate the clean, contemporary ceiling that elevates every square foot—simple steps, stunning surprise, solid satisfaction.
