
How to Paint a Ceiling With a Brush Without Drips or Streaks
To paint a ceiling with a brush without drips or streaks, start by cleaning, patching, and sanding, then prime stains or new patches. Use flat or matte ceiling paint and a clean, lightly loaded foam-covered angled brush. Mask edges with tape, then cut in using short, steady strokes. Apply thin coats in short sections with consistent, one-direction strokes, overlapping lightly only while paint is wet. Recoat after it tacks up, let it dry fully, and fix any marks by feathering, so you’ll nail a smooth finish by doing the next steps.
Choose the Right Ceiling Paint Sheen
Before you open a can, pick the right ceiling paint sheen—because it controls how evenly your coverage lays down and how visible imperfections become.
Choose the right ceiling paint sheen first; it determines even coverage and how clearly imperfections show.
For most ceilings, choose flat or matte paint; it hides patchiness and minor flaws better than glossier finishes. If your ceiling area sees steam or frequent cleaning, pick a washable flat ceiling paint made for bathrooms and kitchens.
Keep color selection in mind: lighter shades brighten rooms and make defects less noticeable.
Use steady pressure and consistent rolling patterns so your application techniques stay uniform, minimizing pooling along edges.
Pick a Brush That Cuts Down Streaks
Pick a foam-covered angled brush so it smooths edges and helps prevent streaks.
Match the bristle type to your paint, then load the brush lightly and evenly so you don’t over-apply.
As you cut in, keep a consistent stroke and you’ll get a cleaner ceiling finish.
Choose A Foam-Covered Angled Brush
A foam-covered angled brush helps you cut crisp edges on a ceiling while minimizing streaks and drips. Choose one that’s angled so you can glide along corners and trim without overreaching.
The foam coverage matters: it holds paint more evenly, releases it gently, and spreads it smoothly across the surface. You’ll get strong foam brush benefits—less splatter, fewer streak lines, and cleaner touch-ups around fixtures.
Use angled brush advantages to keep your wrist steady and maintain consistent pressure. When you load lightly and feather each pass, your finish looks uniform.
Match Bristle Type To Paint
Match your brush bristle type to the paint so you spread it evenly and cut down streaks right away. You should match bristle types to paint compatibility: natural bristles soak thicker coatings, while synthetic ones handle water-based paints smoothly. Use this quick guide:
| Paint type | Best bristle choice |
|---|---|
| Latex / acrylic | Soft nylon-poly |
| Oil-based | Natural or blended |
| Stain-blocking primer | Stiffer synthetic |
| Ceiling enamel | Mixed flocked |
When you pick the right brush, you maintain even coverage, reduce drag, and prevent visible streaks from uneven surface wetting.
Load Brush Lightly, Evenly
To prevent streaks before they start, load your brush lightly and spread the paint as evenly as possible.
Pick a brush that cuts down streaks: shorter, denser bristles hold less paint and release it smoothly. Dip only the bristles’ bottom, then tap or wipe the excess on the tray lip so you control film thickness.
Use consistent strokes—top to bottom, slightly overlapping—so the finish blends instead of building ridges.
Follow good brush loading techniques: reload after sections, not mid-stroke.
With these paint application tips, you’ll avoid drips, lap marks, and patchy coverage.
Use the Best Brush Size for Ceilings
Choose a brush width that fits your ceiling area so you can cover passes evenly without overworking the paint.
Match the brush to the ceiling texture: use a narrower brush for smooth areas and slightly wider, denser bristles for textured surfaces.
When you hit the right size, you’ll reduce visible streaks and keep the finish looking uniform.
Choose Correct Brush Width
Picking the right brush width makes it easier to keep a wet edge and prevents unsightly streaks. For most ceilings, choose a brush width that matches your reach—typically 2–3 in for detail cuts and 3–4 in for broad edges.
If the brush is too wide, you overwork wet paint and cause runs; too narrow, and you’ll reload constantly, creating lap marks. Use brush types suited to ceilings, like angled sash brushes for corners and smooth-finish brushes for edges.
Practice brush maintenance: rinse promptly, remove dried paint, and keep bristles aligned.
Match Ceiling Texture Smoothness
Once you match the brush size to your ceiling’s texture, you’ll get a smoother finish with fewer streaks.
Use a narrower brush for popcorn or heavy ceiling texture so you can press into ridges without flooding them. For flat, smooth ceilings, switch to a medium or wider brush to spread paint evenly and keep edges consistent.
Check coverage in small sections, keeping the same direction for each stroke. Load the brush lightly, then feather the leading edge so each pass blends.
With smart paint application, you’ll minimize lap marks and keep the surface uniform.
Set Up Drop Cloths, Tape, and Edge Tools

Before you open the paint, lay down drop cloths across the room to catch drips and overspray, then tape plastic over vents, light fixtures, and any trim you don’t want painted.
Choose drop cloths types that won’t shift—canvas for reusable, plastic for maximum coverage.
Use tape techniques: press edges firmly, overlap seams, and pull tape back at a low angle after painting.
For edge tool selection, pick a 2–3 in angled sash brush or a small foam roller for corners.
After ceiling preparation, keep tools dry, clean, and ready so your first strokes stay controlled.
Ventilate the Room for Faster Ceiling Paint Drying
Open windows and turn on fans right after you start painting so the air keeps moving and the ceiling dries faster. You want steady airflow, not blasts that push paint around.
Place a box fan near an open window to pull moisture out, and keep one fan circulating inside. If you can, set humidity lower with an indoor dehumidifier. Avoid closing the room up tight; it slows curing and can cause streaking.
Follow ventilation tips consistently: keep airflow during and after the final coat, then wait for proper drying methods before walking under it or adding another layer.
Remove Dust and Patch Any Ceiling Flaws
Before you paint, clean the ceiling dust thoroughly so paint has a solid surface to grab.
Spot patch any holes and cracks, then let the compound dry and sand smooth so the area blends evenly.
Wipe away sanding residue and you’ll be ready for a clean, streak-free finish.
Clean Ceiling Dust Thoroughly
Start by removing all ceiling dust and debris so your paint sticks evenly. Use ceiling preparation by sweeping with a soft broom, then vacuum with a brush attachment for thorough dust removal.
Follow with cleaning techniques: wipe light areas using a damp microfiber cloth, changing it often to avoid smearing residue. Let the ceiling dry completely before painting.
Do a quick surface assessment—run your hand over the area to feel rough spots, then repeat dust removal where needed.
Finally, check corners and around fixtures; trapped grit causes streaks and poor adhesion.
Spot Patch Holes And Cracks
Inspect the ceiling closely and spot any holes, cracks, or flaking spots before you paint. Move furniture back and shine a strong light at an angle so flaws stand out.
Scrape away loose plaster or peeling paint with a putty knife, then brush off debris. For spot repair, fill small divots with a quick-setting joint compound or spackle, pressing firmly so it bonds.
For wider cracks, do crack filling by working compound into the gap in thin layers. Let each layer dry, then check for pinholes before priming and painting.
Sand Smooth Flaws Evenly
Once your patch compound cures, sand the whole repaired area so it blends into the surrounding ceiling.
Start by using medium-grit sandpaper types to level ridges, then switch to fine-grit for feathered edges. Use gentle, even pressure and long, light strokes to avoid making dents. Feather outward past the patch until the surface feels uniform with your fingertips.
After sanding, vacuum the area thoroughly, then wipe with a tack cloth to remove dust. Don’t rush drying; dust left behind can cause paint bumps and visible seams.
Sand Spots Smooth Before You Paint
Sand spots smooth before you paint so the finish stays even.
After patching, let the compound cure fully, then inspect for raised ridges or tiny pits by running your palm over the area.
Use sanding techniques: start with 120–150 grit to level high spots, then switch to 220 grit to feather edges.
Start with 120–150 grit to level high spots, then switch to 220 grit to feather edges for a smooth, even finish.
Press lightly and sand in small circles, keeping pressure consistent so you don’t create grooves.
Wipe dust with a dry microfiber or tack cloth—dust ruins smooth surfaces and makes paint spotty.
Feel again; if you catch bumps, repeat sanding until the patch blends in.
Clean Ceiling Edges for Better Adhesion
After you smooth the patched areas, shift your focus to the ceiling edges. Dust and residue ruin adhesion, so use careful cleaning techniques before you cut in. Vacuum or dry-dust the trim line, then wipe with a damp microfiber cloth. If grease shows up, use a mild degreaser on a cloth, not a soaked brush, and let it dry fully.
| Spot | What to do | Why |
|---|---|---|
| Dust | Vacuum, then wipe | Better grip |
| Smudges | Light degreaser | No barriers |
| Loose paint | Scrape, then wipe | Stable bond |
Follow these adhesion tips and you’ll paint cleaner, tighter edge lines.
Prime Water Stains, Marks, and New Patches
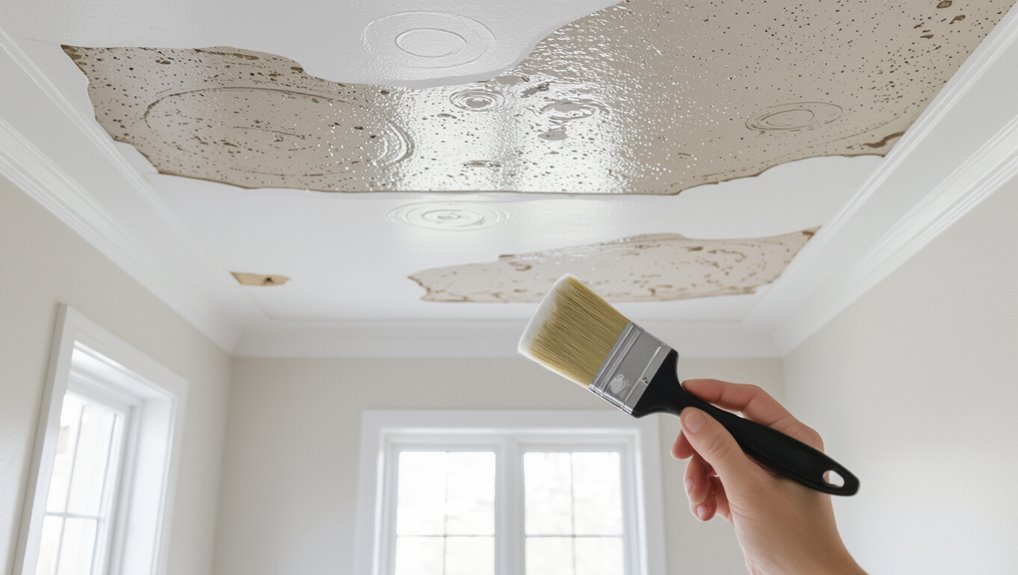
Before you cut in or roll the ceiling, prime any water stains, dark marks, and newly patched spots so they don’t bleed or telegraph through your topcoat.
Do surface inspection first; test for soft drywall, rust bleed, and loose paint. Use strong prime techniques, plus targeted stain removal: blot, dry, then spot-prime with a stain-blocking primer.
For patch preparation, feather edges smooth and skim if needed. Consider sealant options for blistered areas.
Choose application methods that don’t flood—thin coats with a brush/roller. Follow drying times, then color matching.
Match texture considerations, and lock in repair strategies with a second spot coat if needed.
Caulk Gaps So Ceiling Paint Won’t Crack
Caulk gaps first, so your ceiling paint has a stable, sealed surface instead of a set of seams that can crack as the house shifts.
Inspect corners, drywall joints, nail pops, and cracks with a bright light. Use paintable acrylic or latex caulk; cut the tip small for control.
Apply steady beads, pressing firmly so the caulk fills the void, not just sits on top. Use caulk techniques like tool-smoothing with a damp finger or sponge for an even recess.
Let it cure fully, then sand any bumps. This gap prevention step keeps your topcoat flexible and crack-resistant.
Mask Corners Without Building Thick Edges
Once your gaps are sealed, you should mask corners without piling up thick tape edges that force ridges in your finish.
Use masking techniques: press tape lightly along the wall-ceiling line, then run a firm plastic putty knife over it once to set the edge. Keep tape width minimal; use a thin strip and overlap seams tightly.
For edge precision, dampen the roller brush slightly, then feather paint right up to the tape without flooding it. After cutting in, let paint tack, then peel tape back at a low angle.
Protect Lights, Fans, and Vents Before Painting
Before you start rolling, cover every light fixture and ceiling fan so paint splatter can’t stick to them.
Seal around vents and fan housings with painter’s tape or plastic sheeting, then double-check the edges for gaps.
When you protect these spots first, you avoid messy touch-ups and keep airflow working normally.
Cover Lights And Fixtures
Start by covering every light, fan, and vent so paint can’t land on the fixtures or clog their openings. You should remove decorative shades when possible, then dust the area so tape sticks well.
Use masking tape and plastic sheeting to create tight light coverings around bulbs, switches, and ceiling mounts. For fans, cover motor housings and blades with a fitted plastic bag or wrap, securing edges with tape.
Vents need snug coverings too—tape paper or plastic around the grille without stressing it.
Do fixtures protection carefully; pull covers off slowly after paint cures.
Seal Vents And Fans Properly
With lighting and fixtures covered, you can focus on areas that often get missed—vents and fans. Shut power off, then remove fan covers if possible. Seal air grilles and duct openings with painter’s tape plus plastic, so paint doesn’t clog airflow. For ceiling vents, press edges tight and use a caulk line where gaps appear; don’t rely on tape alone. Plan ventilation techniques by opening nearby windows and running fans only after paint cures, not during brushing. Choose paint selection carefully: use low-sag interior ceiling paint to reduce mist. Reference this checklist:
| Task | Tool | Goal |
|---|---|---|
| Tape vents | Painter’s tape | Block seepage |
| Cover fan | Plastic + wrap | Stop splatter |
| Seal gaps | Caulk | Prevent leaks |
| Verify power | Switch off | Safety |
| Recheck edges | Hand press | Tight fit |
Stir Paint Thoroughly for Consistent Color
Stir your ceiling paint thoroughly so the color stays consistent from first cut-in to final pass.
Before you dip your brush, you should mix the paint using a proper stir stick, scraping the sides and bottom of the can. This supports reliable color mixing and protects your paint consistency, since pigments settle quickly.
If you’re working from multiple batches, you should stir each one the same way, then blend them together if needed.
While painting, keep the paint moving between sections so the sheen doesn’t shift mid-room.
Don’t Overload the Brush With Ceiling Paint
Load your brush lightly—too much ceiling paint is the fastest route to drips, sagging, and streaky coverage.
Dip the brush briefly, tap off excess against the can rim, and keep a steady rhythm as you work. You control drips by using brush technique that relies on light passes, not heavy paint.
Check paint consistency: it should flow but not run. If the paint feels thick or clumps, adjust per the label before you paint.
Re-load only when needed, and keep the brush from pooling on the bristles.
Load the Brush Evenly Using the Right Technique
To keep ceiling coverage smooth, you want paint on the bristles in an even layer. Dip just the tip of your brush, then shake off the excess so paint doesn’t pool near the ferrule.
Use brush loading techniques: reload with a light dip after a few strokes, not after every small gap. Rotate your wrist and keep pressure even as you coat the edge, then drag lightly to distribute.
Watch how the bristles look—if they clump, you loaded too heavy.
Apply paint application strategies by working in short sections, maintaining consistent paint depth.
Knock Off Excess Paint Before Every Stroke
Before each stroke, knock off excess paint so it won’t run down your bristles and leave marks. You’ll get smoother paint distribution when you remove drips first.
Dip your brush lightly, then tap it against the rim or scrape gently along the tray edge. Keep your brush technique consistent: light pressure, controlled speed, and a nearly dry tip.
After each pass, wipe any pooled paint off the bristles.
Use this checklist:
1) Tap off the load
2) Scrape excess on tray
3) Test on scrap board
4) Maintain even pressure
Cut In Ceiling Edges Neatly First
Tape the ceiling edges first so you get crisp lines without fighting overspray.
Control your brush cut-in by loading lightly, then following the edge steadily.
After that, feather the border with light strokes so the change stays smooth.
Tape Edges For Clean Lines
First, cut in the ceiling edges neatly so the paint has a clean border to build on.
Next, you lay tape only where you need sharp separation, using tape application that follows the ceiling-wall line without stretching. Press down firmly along the edge for edge precision, then check for gaps. Keep the tape clean and aligned before you paint.
- Use painter’s tape, not masking tape.
- Lay it straight and burnish lightly with a putty knife.
- Overlap seams slightly; avoid wrinkles.
- Remove tape after the paint skins, not fully cures.
Use Brush Cut-In Control
After your edges are taped and burnished, keep your cut-in tight by controlling the brush right from the ceiling line. Load a small amount of paint, then wipe excess on the rim so your bristles stay disciplined.
Hold the brush flat against the edge and work in short, steady strokes along the perimeter, using brush techniques that keep the paint thickness even. Dip, cut in, and immediately stop; don’t linger or you’ll build ridges.
If you miss a spot, touch it up once the edge dulls. Use cut in tips: feather only within the taped boundary, not across walls.
Feather Borders For Smoothness
Once you’ve cut in the ceiling edge cleanly, feather the border so it blends seamlessly into the field—start right at the taped line and lightly skim outward with a nearly dry brush.
Use the feather technique to smooth any ridges from your cut-in, and keep your edge blending consistent as you work.
- Reload lightly, then wipe excess on the rim so bristles stay damp, not wet.
- Stroke in short passes, tip-down, pulling just enough paint outward.
- Overlap each pass while paint is still tacky to avoid hard lines.
- Watch for streaks, and immediately re-feather with cleaner, drier brush.
Keep a Steady Brush Angle While Painting Upward
Lock in a consistent brush angle before you start lifting the paint upward—around 45 degrees is a solid baseline. Use a steady grip and commit to that angle as you move your brush line by line.
Keep your wrist firm and let your forearm guide the stroke so the bristles stay loaded evenly. When you reach the next section, don’t swing the handle; just continue the same tilt and overlap slightly to blend.
If the paint starts to look uneven, pause and re-seat the bristles, then resume with your brush technique consistent and controlled.
Apply Thin Coats to Prevent Runs and Drips
Apply thin coats so the paint can level out before it has a chance to sag.
Load your brush lightly—too much paint is what leads to runs and drips.
Let each coat dry fully, then add another thin layer for full coverage.
Thin Coats Reduce Runs
Use thin coats to keep paint from loading up and sagging into drips. When you work in layers, you control paint consistency and stop gravity from pulling heavy spots downward.
Focus on brush technique so each pass lays a light film that dries evenly.
Do this:
1) Dip lightly, then spread to thin coverage.
2) Keep strokes consistent in one direction.
3) Stop after you coat the section; don’t keep chasing.
4) Recoat only after the first layer feels dry to the touch.
This approach reduces runs, seals flaws, and keeps your ceiling smooth.
Load Brush Lightly Only
Load your brush lightly so each pass leaves a thin, even film instead of a heavy coat that can sag. Before you start, dip just the bristles, then tap the brush against the can rim to remove excess.
Keep your brush technique consistent: use light pressure, short strokes, and work in manageable sections. If you see drips forming at the ceiling edge, you loaded too much—wipe the bristles, reload lightly, and correct immediately.
Match your paint consistency to the manufacturer’s guidance; thicker paint makes overloading worse. Let each coat dry fully.
Cross-Stroke Lightly for Even Coverage
Cross-stroke lightly to spread the paint evenly: after your first pass, make a second set of strokes in the opposite direction, barely pressing the roller.
Use the cross stroke technique to build even coverage, not heavy ridges. Keep your strokes short and consistent so the ceiling stays uniform. Overlap each pass slightly, and watch for dry edges so you can blend them right away.
- Work from one wall toward the center
- Maintain light pressure on every stroke
- Overlap by about an inch
- Pause, then reload only when needed
Feather Strokes to Avoid Lap Marks
Use feathered edges so each pass blends in seamlessly instead of showing a hard line.
Keep even pressure throughout so the roller doesn’t start or stop mid-ceiling and create visible changes.
Overlap your wet passes lightly, just enough to connect the coverage before either section dries.
Feather Edges For Seamless Blending
Before you reach the next cut-in section, feather your edges so the wet paint stays seamless, not striped. Use feather blending to create seamless shifts where one pass meets the next.
Work briskly: stop short of the edge, then lightly drag a nearly dry brush tip outward to dissolve the line. Keep your strokes consistent in direction so the overlap disappears instead of flashing.
You can:
- Pull paint outward in short, gentle arcs.
- Blend back into the previous wet area before it sets.
- Use lighter pressure at the very edge.
- Check from multiple angles to spot any ridge early.
Maintain Even Pressure Control
To keep your ceiling smooth, you need even pressure as you feather each overlap so you don’t leave lap marks. Use brush techniques that spread paint with light, controlled contact.
Keep your wrist steady and guide the brush with your forearm, not your fingers. Before each pass, load the brush consistently, then press just enough to lay paint—no more. If you feel drag, reduce pressure; if paint thins too quickly, add a touch.
Maintain pressure consistency across the whole stroke, even when you slow down near edges. Clean your brush tip often to prevent buildup.
Overlap Wet Passes Lightly
After your first roller or cut-in stripe, overlap the next wet pass lightly so the edges blend instead of stacking. Use feather strokes: keep your brush angled slightly, then skim the surface to soften the boundary.
Good brush control means you don’t reload too soon, and you don’t press into the wet paint. Try these overlap techniques to prevent lap marks:
- Overlap 1–2 inches.
- Blend only the leading edge.
- Maintain a wet path—work top-down.
- Stop and re-brush only when bristles start to drag.
Keep your rhythm steady; you’ll get an even ceiling finish.
Maintain a Wet Edge for Smooth Transitions
Maintain a wet edge as you work so the next roller pass blends seamlessly into the last one.
Use reliable paint techniques: load the brush lightly, then feather the leading edge before it starts to tack up.
Keep your brush control tight by working in short sections, moving top to bottom or corner to corner without pausing.
When you pause, stop painting and finish that area later only after you’ve lightly refreshed the boundary.
Reload and overlap just enough to hide seams, but don’t scrub once the paint sets.
Use Consistent Pressure to Prevent Streaks
Keep even stroke pressure as you move across the ceiling so the paint lays down uniformly.
You should maintain the same brush pressure from start to finish, adjusting only slightly if the brush starts to drag.
If your pressure swings, you’ll notice streaks showing up right away.
Maintain Even Stroke Pressure
When you press the roller or brush with the same force every pass, you control how much paint leaves the surface. Focus on stroke consistency and pressure control as you glide across the ceiling, because uneven force creates dull bands and patchy shine.
Keep your wrist and arm moving together so you don’t “push harder” mid-stroke. If you feel yourself changing pressure, pause, reload paint, then resume with the same tempo.
Use these checks while working:
- Match your speed each stroke.
- Apply light, steady downward pressure.
- Avoid stopping mid-panel.
- Blend edges immediately with fresh wet paint.
Keep Brush Pressure Consistent
Apply steady brush pressure from start to finish. Use pressure control as you move; don’t press harder at the end of each stroke. Keep your wrist relaxed and your elbow guiding the brush.
Lightly load the bristles, then let the paint transfer evenly—too much paint and force create ridges. Practice brush techniques on a spare scrap: aim for the same spread and glide every pass.
If you notice streaks, pause and reset your grip, re-dip, and continue with the same pressure. Work in overlapping strokes for uniform coverage.
Work Dry to Wet, Not Wet to Dry
Start each stroke while the previous paint layer is still slightly tacky; otherwise, you’ll get streaks and visible lap marks. You want wet edges, so your brush techniques blend smoothly instead of dragging dried paint.
Work in manageable sections: reload less, feather the border, then continue without pausing. Keep your pace steady, and don’t “touch up” after the surface dulls.
Follow this checklist to stay on track:
- Maintain wet edges at all times.
- Stop each stroke where you can blend.
- Overlap lightly, then leave it.
- Dry between sections, not during blending.
Use Zones So Ceiling Paint Stays Even
Divide the ceiling into workable zones, and finish each area before you move on. Mark two or three sections with painter’s tape, from a light source toward the opposite wall, so you don’t rush.
Use steady paint application techniques: load the brush lightly, brush in one direction, then blend with short feather strokes at the edges. Keep a wet edge inside each zone, and overlap by about an inch to prevent lap marks.
Before you start, follow ceiling preparation tips: patch flaws, sand smooth, and remove dust so paint clings evenly.
Paint in a Grid for Reliable Coverage
Paint the ceiling in a grid so you can control coverage and avoid missed spots. Mark your plan mentally, then work systematically with consistent paint application techniques.
Start each brush load light, and spread along one grid lane at a time, keeping a wet edge so sections blend smoothly without streaks. Use these steps to sharpen your approach and enjoy grid painting benefits:
- Divide the ceiling into 2–3 ft squares.
- Lay parallel passes in each square.
- Crosshatch lightly to even sheen.
- Stop, reload, then continue the next lane.
Start in a Corner and Finish a Full Zone
Begin in a corner that’s farthest from your exit, then work toward the doorway or window so you never step into fresh paint. Load your brush lightly, and use corner techniques to cut in a clean band along both adjoining walls. Keep your strokes consistent, feathering each pass so the ceiling reads uniform. Once cut-in edges dry just slightly, fill the remaining area as one full zone without pausing. Use zone finishes to maintain wet-edge flow from start to end, not in patches.
| Task | Goal |
|---|---|
| Cut-in | Clean edges |
| Fill zone | Uniform coverage |
| Feather | No ridges |
| Stay moving | Wet edge |
Stop at Lines, Then Resume in the Same Zone
Once you’ve reached a grid line, molding, or expansion joint, stop cleanly at that boundary and don’t overshoot it. Keep your edge crisp, then reload only when you’re ready to continue within the same zone.
This is one of the best ceiling painting techniques for streak-free coverage and it depends on strong brush control strategies. To avoid visible seams, follow this flow:
- Lightly lift the brush at the line.
- Pause a beat so paint transfers evenly.
- Start the next pass a few inches back into the same area.
- Feather outward to meet the stopped edge.
Don’t Chase Runs: Let Them Set
If you’ve just stopped at a line or joint, resist the urge to fix every sagging spot right away. Let the run settle first; chasing it while paint is wet usually turns a drip into a smear. Keep your brush loaded evenly, matching your paint consistency to a smooth, brush-brushed sheen. After you spot a sag, pause and feather lightly only once, then step back. Use these drying techniques to lock the layer in:
| Time | Action |
|---|---|
| 2 min | Step back |
| 5 min | Light feather |
| 10 min | Recoat check |
| 20 min | Full set |
Fix Sagging Paint Without Smearing
Tackle sagging paint while it’s still workable—don’t scrub at it. If you keep pressing, you’ll smear the surface and spread ridges.
Tackle sagging paint while it’s still workable—don’t scrub. Pressing can smear the surface and spread stubborn ridges.
Instead, stop painting and let the ceiling level slightly, then correct the slump with quick, light strokes using a nearly dry brush.
- Feather edges with gentle, upward passes.
- Dab excess with a lint-free cloth, then reload lightly.
- Recoat only the sagging paint spot; blend 2–3 inches outward.
- Use touch up techniques: tiny cross-strokes, then leave it.
If runs start to set, wait before touching up.
Remove Brush Marks Before They Cure
As you notice brush marks, feather the edges right away so they don’t set up.
Keep moving and blend those lines into the surrounding wet paint before anything dries. If you wait too long, you’ll lock in streaks that take much more work to fix.
Feather Edges Quickly
Start feathering while the paint still feels workable, so you can smooth any ridges before they start to set. Use your brush for a light, consistent feather technique, not heavy strokes.
As soon as you see texture forming, switch to gentle edge blending: keep the bristles nearly flat and drag across fresh coverage. Work section by section so you stay ahead of curing.
Do this:
- Reload less often; wipe excess.
- Feather back into wet paint.
- Overlap 1–2 inches each pass.
- Stop when the surface looks uniform.
Blend Before Drying
Blend before the paint dries so you can erase brush marks while they’re still soft. As you paint, keep a wet edge and overlap each pass immediately using blending techniques.
Don’t wait for the surface to dull; once it starts to set, brush tracks lock in. After you spread color, lightly brush back over the same area with minimal pressure to merge ridges.
Work in short sections so you control drying times and prevent uneven sheen. If you notice marks, dampen your brush slightly and feather them out right away.
Smooth Streaks While Paint Is Still Wet
Smooth streaks start with how you keep the wet paint moving: work one section at a time and lay down thin, even coats with a roller that’s loaded but not dripping.
Use smooth application techniques: feather lightly as you go, keep a consistent brush angle, and don’t press hard. If you see ridges, stop, re-wet the surface with the roller, then re-pass in one direction for even texture adjustments.
Avoid overworking corners.
- Load tool moderately
- Feather edges while wet
- Maintain steady strokes
- Re-pass one direction only
If Paint Dries Too Fast, Adjust Your Timing
If your ceiling paint dries too fast, you need to watch the drying intervals closely and adjust your pace.
Work in smaller sections so you can keep a wet edge the whole time.
When the room’s warm or the airflow’s high, move quickly to prevent streaks and visible lap marks.
Time Drying Intervals Carefully
Pay close attention to drying time between passes, because rushing or waiting too long can cause drips, streaks, or uneven sheen.
Use timing techniques that match your drying conditions: humidity, airflow, and temperature. Before you recoat, lightly touch the surface with your brush tip or glove; if paint strings, wait longer. If it feels dry and firm, proceed steadily with an even stroke, keeping a consistent pressure.
- Check tackiness every 5–10 minutes
- Pause longer in humid rooms
- Avoid direct fan blasts on fresh paint
- Stop at uniform opacity, then leave it to cure
Work In Sections, Quickly
Work in small sections so you control where paint lands and where it settles. Start at the far corner, cut in the edge, then fill a 3–4 ft area before moving on.
Keep your section timing tight: brush on, spread evenly, and don’t overwork the same spot. If paint starts to tack up, you slow your strokes and reduce pressure, keeping a consistent brush technique.
Reload the brush often so you don’t chase gaps. Overlap each new section lightly while the prior edges are still workable.
Finish, then step back to spot streaks immediately.
Slow Drying With Humidity and Fan Control
When humidity runs high, paint takes longer to set, and that slower drying can help you blend edges instead of getting lap marks—if you control airflow.
Use humidity effects to your advantage: adjust drying techniques by managing how fast solvent evaporates. Keep fans gentle and positioned to move air across the room, not directly over your wet brushstrokes. Then you stay consistent while edges merge smoothly.
- Check room humidity; pause if it spikes.
- Set fans low, oscillating sideways.
- Maintain steady brush pressure.
- Avoid sudden door/window drafts.
Prevent Bubbles by Brushing at the Right Speed
To prevent bubbles, you need to brush at the pace that lets paint level before it traps air. Move with steady brush speed, not fast flurries or slow lingering.
After you load the brush, spread paint in smooth passes, lightly overlapping each stroke. Watch the surface: if paint looks ridged, you’re moving too quickly; if it’s starting to skin, you’re too slow.
Use gentle pressure and keep your angle consistent so the bristles glide. This simple bubble prevention reduces trapped air and helps the ceiling finish stay even.
Reduce Brush Texture on Smooth Ceiling Surfaces
Once your primer or first coat looks even, focus on minimizing brush texture so the ceiling stays smooth. Use a clean, high-quality brush and a careful brush technique to keep ridges from forming.
Before you paint, finish ceiling preparation: remove dust, patch seams, and let repairs cure fully. Then work in light passes.
- Load the brush lightly; wipe excess on the rim.
- Feather each stroke while edges stay wet.
- Keep a consistent direction, then blend with gentle cross-strokes.
- Don’t overwork dry areas—pause and let them settle.
Strain Paint to Avoid Lumps and Clumps
Before you start painting, strain your paint through a fine mesh to catch debris and stop clogs.
As you go, skim out any lumps and re-stir so your roller and brush glide smoothly.
When the paint flows evenly, you avoid bumps that can turn into visible streaks or texture.
Strain Paint Through Mesh
Straining your paint through a fine mesh keeps lumps and clumps out of your roller and sprayer, so you get a smoother finish on the first pass.
Use solid paint straining techniques to protect coverage and reduce drag. Before you load the brush, pour paint into a clean container, then strain it through a mesh funnel or paint filter, catching any debris.
Enjoy the mesh benefits: consistent texture and fewer stops.
Do this:
- Stir paint thoroughly.
- Fit the mesh securely.
- Pour slowly, letting it drain.
- Refill your tray from the strained batch.
Remove Lumps Before Painting
Lumps and clumps sabotage a smooth ceiling, so you need to treat your paint before it ever hits the roller.
Pour paint into a clean container, then use lump removal techniques: stir slowly, scrape the sides, and break up any dry bits with a paint stick. Strain the mixture again if you see grit.
If paint feels too thick, follow paint consistency tips by adding a small amount of water or manufacturer-recommended thinner, then mix thoroughly.
Keep straining until it pours like smooth cream, not cottage cheese. Stop and remix whenever lumps return.
Achieve Smooth Brush Flow
Pour your paint through a fine paint strainer or mesh screen into your roller tray so it stays lump-free and drips less.
For smooth brush flow techniques, load your brush lightly, then brush out excess against the rim before you start cutting in. Keep a steady rhythm and don’t overwork the same strip.
- Stir paint often to keep pigment moving.
- Add a tiny amount of water or conditioner only if needed.
- Use consistent pressure to prevent ridges.
- Follow brush angle tips: hold 15–30° for control, 45° for fuller coverage.
Carefully Paint Popcorn Ceilings Without Damage
Before you start rolling, cover everything you don’t want painted—flooring with plastic or a drop cloth, walls with painter’s tape, and light fixtures with bags or masking film.
Press plastic tight at baseboards so popcorn texture can’t shed onto open surfaces.
Use gentle popcorn ceiling techniques: work in small sections, keep a light brush pressure, and reload paint often instead of overloading.
Paint with straight passes, then lightly “feather” edges to avoid lap marks.
Inspect before you move on; dings happen.
Follow ceiling repair tips: patch snapped bumps, let them cure fully, and sand smooth before coating.
Keep airflow steady.
Paint Sloped Ceilings With Fewer Drips
When you paint a sloped ceiling, you can prevent most drips by controlling your paint load and your angle of attack.
Use a brush made for overhead work, then keep a light, even coating on the bristles. Maintain a steady painting technique: start at the ridge, and work downward in short passes so paint doesn’t sag on sloped ceilings.
- Dip lightly; wipe excess on the rim
- Hold the brush at a shallow 20–30° angle
- Feather each stroke before it thickens
- Pause to reload, not to “stretch” paint
You’ll get cleaner coverage with fewer drips and no streaky runs.
Use Two Coats for Coverage, Not Extra Thickness
After you’ve nailed the right brush load and angle for sloped areas, focus on coverage instead of piling on paint.
Apply your first coat thin enough to avoid thickness concerns, then stop. Let it lay down evenly across seams, edges, and corners.
Use coverage techniques: brush in one direction, then lightly feather crosswise without reloading.
If you still see faint patchiness, don’t add more paint to the same coat. Instead, go back with a second coat using the same brush amount and rhythm.
Two coats give uniform color with fewer drips, streaks, and heavy spots.
Let Each Ceiling Paint Coat Dry Fully
Let every ceiling coat dry fully before you touch it again—rushing makes streaks, drips, and uneven sheen more likely.
You should follow your paint label drying time, then plan your work around it. Use smart drying techniques: keep air moving with gentle ventilation, avoid blasting heat directly on the wet surface, and don’t re-brush areas that look slightly dull until they’re fully set.
To stay on track:
- Check the label for drying time.
- Wait for the finish to feel dry.
- Keep traffic and dust minimal.
- Inspect under bright light before any next step.
Recoat Smoothly Without Noticeable Overlap Lines
Once the prior coat feels fully set, recoat in a steady rhythm so you don’t trap edge marks. Use smooth strokes, and keep your brush loaded but not dripping.
Start at one corner, then work in light, even passes that overlap just enough to blend. Maintain the same pressure and brush angle every pass. If you see a ridge, lightly feather it before paint thickens.
Use consistent reach patterns—top to bottom or side to side—so overlap prevention stays uniform. With good recoat techniques, you’ll avoid noticeable lines and keep the ceiling finish silky.
Time Your Coats Around Drying Conditions
Drying conditions decide whether your next coat levels out or shows streaks, so you should time your recoat to the room’s temperature, humidity, and airflow.
Check the label for drying times, but also watch the surface: tacky paint drags, and fully cured paint won’t meld.
Target steady airflow—don’t blast one spot. Adjust when humidity effects slow evaporation.
Use these checks before brushing again:
- Touch test: surface feels dry.
- Visual check: no gloss remains.
- Wait window: follow label drying times.
- Ventilation: keep air moving evenly.
Clean Brush and Tools Promptly to Prevent Curing
Clean your brush and tools as soon as you finish a section, because paint can start curing in the bristles and on the roller sleeve quickly.
Don’t wait until the end of the job. Rinse with the proper solvent or warm water right away, then wash until runoff is clear.
Use cleaning techniques like working a brush in a bucket with gentle pressure, and wipe roller covers with a damp cloth before final rinsing.
Dry tools thoroughly. Store clean brushes flat or in a ventilated area.
With good tool maintenance, you prevent hard buildup, streaks, and ruined bristles.
Touch Up Spots for a Clean, Professional Finish
When you notice small misses, bumps, or thin patches after the main coat sets, touch them up right away so you don’t create visible “hot spots.”
Use the same paint and technique you used for the ceiling—lightly feather the edges with a brush or roller so the repair blends into the surrounding surface, and apply only thin layers to avoid ridges.
Use these touch up techniques with professional tools:
- Spot-check under angled light.
- Load the brush lightly; tap off excess.
- Feather outward in short strokes.
- Recoat once dry, then smooth if needed.
Let the ceiling cure fully before you judge the finish.
Frequently Asked Questions
Can I Paint Over Old Ceiling Paint Without Sanding or Priming?
Yes, you can paint over old ceiling paint without sanding or priming only if it’s solid, clean, and compatible. Identify ceiling paint types, spot peeling or stains, then use smooth brush techniques: light pressure, feather edges, and cut in carefully.
Why Does My Ceiling Paint Bubble Even After Careful Brushing?
Your ceiling paint bubbles because trapped moisture, poor prep, or incompatible paint types react under heat. Even careful paint application can lift ceiling texture. Let it fully dry, scrape blisters, and spot-prime before repainting.
How Do I Fix Streaks That Appear After the Paint Fully Dries?
Fix dried ceiling streaks fast: mix paint thoroughly, then lightly sand, wipe dust, and recoat thinly. About 60% of paint defects come from prep gaps, so use the right ceiling paint types and try streak removal techniques.
What’s the Best Way to Paint Around Ceiling Lights Safely?
Use ceiling light precautions: switch off power, let fixtures cool, and cover them with painter’s tape and plastic. Dampen your brush, keep strokes controlled, and avoid splashing. Cut in carefully along edges, then maintain consistent pressure.
How Long Should I Wait Between Coats to Prevent Lap Marks?
Wait until the first coat feels tack-free and dry, usually 2–4 hours, before the next. For ceiling paint application, follow the can’s cure time; this supports lap mark prevention by keeping edges from drying too fast.
Conclusion
Now you’ve got the steps—sheen, brush, size, prep, timing—working together like a careful countdown. But here’s the real test: the moment you stop and step back. Will those streaks appear, or will your ceiling look glass-smooth? Keep your coats even, watch the clock, and don’t let paint cure in the wrong places. When you touch up the last spot, you’ll know—without drips, without streaks.
