How to Paint Exterior Stucco for Long-Lasting Results
To get long‑lasting results on exterior stucco, start by inspecting and repairing cracks, soft spots, and moisture, then clean off loose paint, salts, and mildew and let it dry. Prime with a breathable acrylic or elastomeric primer, then apply two coats of 100% acrylic or elastomeric exterior paint in mild, low‑humidity weather, working top to bottom with consistent strokes. Follow proper patching and drainage fixes, and keep going to learn detailed prep, techniques, and troubleshooting.
Quick Step‑By‑Step: Painting Exterior Stucco
Start by preparing your surfaces and gathering the right tools so the job goes quickly and lasts longer.
Clean, repair cracks, and let stucco dry.
Prime with a breathable primer.
Apply two coats of quality exterior paint, respecting dry times.
Choose color selection that complements trim and consider texture options when selecting paint finish.
Inspect and touch up any missed spots for uniform coverage.
Why Paint Exterior Stucco? When To Repaint?
Painting your exterior stucco protects it from moisture, UV damage, and stains while revitalizing your home’s curb appeal.
You’ll want to repaint when the finish looks chalky, the color has noticeably faded, hairline cracks appear, or water is beading and causing stains.
Repainting delivers stucco benefits like extended lifespan and easier maintenance, and thoughtful color selection refreshes style while masking minor blemishes.
How To Inspect Stucco For Damage And Moisture
Start by doing a visual surface check for cracks, blistering, or stains that could signal damage.
Then gently probe suspicious areas with a screwdriver or awl to feel for soft or crumbling material.
Finish by taking moisture meter readings to confirm wet spots before you plan repairs or painting.
Visual Surface Check
Before you pick up any paint, walk the perimeter and give the stucco a close visual once-over to spot cracks, blisters, stains, or soft spots that indicate damage or moisture intrusion. Note discoloration and peeling; consider color selection and texture options for future finishes. Use this quick checklist:
| Issue | Action |
|---|---|
| Crack | Mark/monitor |
| Stain | Clean/test |
| Bulge | Document |
| Efflorescence | Investigate |
| Peeling | Scrape/prime |
Probe For Softness
After your walk‑around notes, you’ll want to probe the stucco to find soft spots or hidden moisture that a visual check can miss.
Use a pointed screwdriver or awl, press gently across suspect areas, and listen for spongy give.
Mark zones of stucco softness, document damage, and prioritize repairs before painting.
Proper prep informs your painting techniques and prevents premature failure.
Moisture Meter Readings
When you suspect hidden dampness, a moisture meter gives objective readings that guide your repairs and keep you from painting over water problems.
Use consistent moisture measurement techniques: take multiple readings across elevations, edges, and around penetrations.
Compare results to ideal moisture levels for stucco (typically below 15–18%). If readings exceed that, locate source, dry and repair before priming and painting for durable results.
Common Stucco Repairs: DIY Vs. When To Hire A Pro
If you spot small cracks, hairline fissures, or isolated chips in your stucco, you can often handle the fixes yourself with basic tools and a patching compound.
But if damage runs deep, spans large areas, or shows signs of moisture intrusion, it’s time to call a pro.
Know stucco types and repair techniques. DIY for minor issues; hire for structural or widespread damage.
- Small crack patches
- Texture matching
- Moisture-related repairs
How To Remove Loose Paint, Efflorescence, And Mildew Safely
Before you paint, you’ll need to remove any loose paint with a scraper or wire brush so new coatings will adhere properly.
Treat efflorescence by brushing away salts and fixing the source of moisture before sealing the area.
Kill and clean mildew with a bleach solution or mildew cleaner, rinse thoroughly, and let the stucco dry completely.
Remove Loose Paint
Start by scraping away all loose paint, powdery stucco, and obvious mildew so the surface is sound and ready for cleaning.
You’ll use paint scraping and gentle surface cleaning to reveal stable substrate. Follow safe prep steps:
- Use a stiff brush and scraper.
- Wear a mask and goggles.
- Collect debris and dispose of it properly.
Proceed to wash and inspect before priming.
Treat Efflorescence Areas
Since efflorescence is a sign that salts and moisture are migrating through the stucco, you’ll need to remove the powdery deposits and address the moisture source before repainting.
Use a stiff brush or a nylon scrub pad to clear the salts, rinse thoroughly, and let the wall dry completely so you can inspect for leaks or damaged flashings.
For efflorescence treatment, neutralize residues, repair flashing, and add moisture barriers where needed.
Kill And Clean Mildew
After you’ve cleared efflorescence and fixed any leaks, check the surface for mildew and loose paint, because damp conditions that drew salts often encourage fungal growth and peeling.
Remove loose paint, scrub mildew with appropriate cleaning solutions, rinse, and dry thoroughly.
For mildew prevention, guarantee ventilation and seal repairs.
Tips:
- Use bleach or fungicide mix
- Soft-bristle scrubbing
- Full rinse and sun-dry
What Primers Work Best For Stucco
Picking the right primer makes painting stucco much easier and helps your finish last, so you’ll want to choose a product that matches the surface condition and your paint type.
Use acrylic or elastomeric primers for hairline cracks and masonry; oil-based or bonding primers for chalky or smooth surfaces.
Follow proper application techniques—brush, roller, or airless sprayer—and allow full cure before topcoating.
How To Choose Exterior Paint For Stucco
Before you pick a color, make sure the stucco’s surface is clean, dry, and any repairs or primer are completed so the paint will bond properly.
Choose a paint formulated for masonry or stucco—typically 100% acrylic exterior paint—for flexibility and breathability.
Also consider finish and UV/mildew resistance to match your climate and maintenance preferences.
Surface Prep Requirements
Surface prep determines how well your exterior paint will adhere and how long it lasts, so start by inspecting the stucco for cracks, delamination, mold, and efflorescence.
You’ll address different surface types and guarantee ideal paint adhesion by cleaning, repairing, and priming.
Focus on:
- Pressure-wash and remove contaminants
- Patch and fill cracks
- Apply appropriate primer for porous or patched areas
Paint Type Selection
When choosing paint for stucco, focus on durability, breathability, and compatibility with masonry surfaces so your finish both looks good and lasts.
You’ll typically pick 100% acrylic for elasticity and moisture resistance, though high-quality latex can work on less demanding textures.
Test samples for adhesion and UV fade, factor texture into color selection, and prioritize breathable, masonry-rated formulas for long-term performance.
Tools You’ll Need For Painting Stucco
Tackling stucco painting goes smoother if you’ve got the right tools, so gather a few key items: a stiff-bristle brush or broom for cleaning, a pressure washer or hose with nozzle for deeper rinsing, caulk and a caulk gun for sealing cracks, masonry primer and paint rated for stucco, a long-nap roller or specialized stucco roller, extension poles, a high-quality paint sprayer if you’ll be spraying, drop cloths, painter’s tape, and safety gear like gloves, goggles, and a respirator.
- Choose brush types and roller selection carefully
- Match paint sprayer and primer applications to texture options
- Use surface cleaners and protective gear; consider weather considerations
Masking And Protecting Areas Around Stucco
Before you start painting, protect everything you don’t want paint on by masking and covering adjacent areas—windows, trim, doors, light fixtures, plants, and walkways.
Use masking tape and protective sheeting for edge precision, drop cloths for ground protection, and define painting zones.
Consider safety precautions, color choices, spray technique, weather considerations, and plan cleanup methods before you begin.
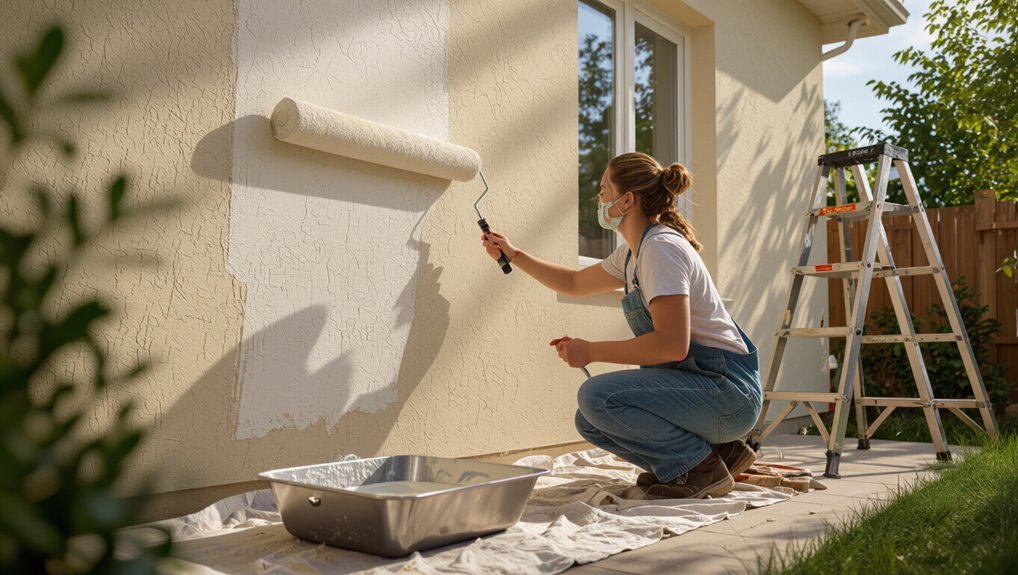
Step‑By‑Step: Painting Textured Stucco
Start by working from top to bottom so you don’t drip on freshly painted areas.
Begin at the top and work downward to avoid drips on freshly painted surfaces.
Clean, repair, and prime textured stucco. Use a roller for recesses and a brush for edges. Choose stucco color and texture options before you begin.
- Use consistent strokes
- Overlap slightly for even coverage
- Inspect for missed spots and touch up
Drying, Humidity, And Temperature For Best Results
If you want reliable results, paint only when temperatures are steady and humidity is low — perfect conditions are typically between 50°F and 85°F (10°C–29°C) with relative humidity under 70%.
You’ll monitor temperature ranges and humidity levels to control drying times and paint curing.
Consider seasonal considerations and weather impact: avoid rain, rapid swings, and high moisture factors to guarantee ideal conditions for lasting stucco.
Stucco Painting Costs, Timelines, And Planning Tips
Painting stucco typically costs more than siding because the surface needs prep, patching, and sometimes specialized primers.
You should budget for stucco paint pricing, inspections, and possible repairs, and set realistic project timelines.
Plan around weather windows, crew availability, and drying times.
- Budget for prep and primer
- Schedule for repairs and curing
- Confirm contractor timeline and guarantees
Common Problems After Painting And How To Extend The Finish
When moisture, cracking, or premature fading shows up after a fresh coat, you’ll want to diagnose the cause quickly so repairs stay small and affordable.
Check for substrate dampness, poor prep, or wrong primer—common mistakes that shorten paint lifespan.
Look for damp substrates, inadequate prep, or incorrect primer—these common errors rapidly reduce paint longevity.
Patch cracks, improve drainage, and clean before recoating.
Use breathable, high-quality exterior elastomeric or acrylic paint and schedule inspections every few years to extend the finish.
Frequently Asked Questions
Can I Paint Stucco in Cold Climates or During Winter Months?
You can, but you shouldn’t paint stucco in freezing temperatures; proper stucco preparation and choosing warm daytime windows for winter painting are essential to guarantee adhesion, curing, and long-lasting finish, so plan around milder conditions.
Will Painting Stucco Affect Indoor Air Quality or VOC Exposure?
Yes — painting stucco can raise VOC emissions and temporarily affect indoor air quality, so you’ll ventilate thoroughly during and after application, choose low-VOC paints, and keep windows and fans running to minimize exposure.
Can I Change Stucco Color Drastically Without Multiple Coats?
You can, but dramatic color changes usually need multiple coats for even coverage on textured stucco; smart color selection and proper paint application—using primer, high-quality masonry paint, and thick nap rollers or sprayers—minimize extra coats.
How Do I Clean Painted Stucco Without Damaging the Finish?
Don’t drown your house — you’ll treat it gently: use soft-bristle brushes, low-pressure washing, mild cleaning solutions like diluted detergent or vinegar, rinse thoroughly, spot-test first, and follow stucco maintenance tips to avoid scrubbing or harsh chemicals.
Are There Warranties or Guarantees for Exterior Stucco Paint Jobs?
Yes — you’ll often get warranty options from manufacturers and contractors; they’ll cover defects and sometimes limited paint longevity. Read terms closely, document prep and application, and get written guarantees to avoid disputes later.
Conclusion
You’ve prepped, repaired, and applied the right products — now it’s time to protect that investment. Like wrapping your home in a breathable, weatherproof coat, a proper stucco paint job repels moisture, resists mildew, and keeps cracks from widening. Stay vigilant with seasonal inspections, clean gently, and touch up small flaws promptly. With routine care, your exterior will look great and last for years, saving time and money down the road.