
How to Paint Finished Cabinets Without Sanding
You can refinish factory-finished cabinets without sanding by cleaning, deglossing, and repairing chips first, then using a bonding primer to promote adhesion. Degrease well, scuff with a nonabrasive pad, and test adhesion in an inconspicuous spot with tape. Apply 1–2 thin primer coats, then 1–2 thin topcoats with a foam roller or sprayer for a smooth, durable finish. Let each coat tack up before recoating and cure fully; keep going and you’ll find detailed tips and timing to finish the job right.
Can You Refinish Cabinets Without Sanding?
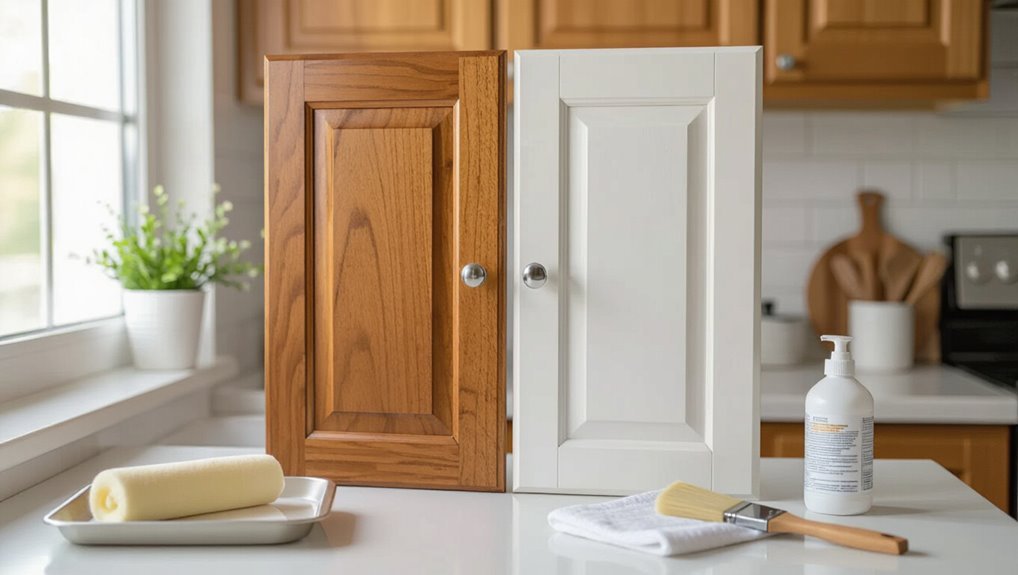
Can you refinish cabinets without sanding? Yes—you can, but success hinges on proper surface preparation.
You’ll clean, degloss, and repair chips so cabinet paint will adhere. Use a degreaser, scuff pad, and bonding primer designed for slick finishes.
If you skip these steps, paint may peel or look uneven. Follow manufacturer instructions for primers and topcoats for best results.
When to Avoid Sanding Finished Cabinets
You can often skip full sanding if you follow the cleaning, deglossing, and priming steps, but there are clear cases where sanding will do more good than harm.
If the finish is peeling, heavily damaged, or flaking, don’t rely on sanding alternatives alone. Proper surface preparation still matters: remove loose coating, repair gouges, and guarantee adhesion before painting to avoid premature failure.
Signs You Need Full Sanding Instead
If the existing finish is peeling or flaking, you’ll need to strip it back with full sanding so the new paint can adhere.
Deep gouges or scratches also require sanding to create a smooth, even surface before priming.
And if veneer is loose or bubbling, you’ll have to sand and repair or replace it rather than just painting over the problem.
Peeling Or Flaking Finish
Spotting peeling or flaking paint means you’ll need to strip down to solid substrate and do full sanding before repainting.
If you ignore peeling issues and flaking finishes, paint won’t adhere and will recur.
You’ll remove loose layers, assess for moisture or adhesion problems, then sand to clean wood or primer.
This guarantees a stable base for lasting new paint.
Deep Surface Gouges
Damage to the surface speaks plainly: deep gouges and cuts in cabinet wood or veneer mean you’ll need to strip and sand down to solid material before repainting.
You can’t hide deep scratches with filler alone; full sanding guarantees lasting adhesion and proper surface repairs. Assess damage, plan stripping, and prep thoroughly so paint won’t fail later.
- Inspect gouge depth
- Choose stripping method
- Sand to sound wood
- Reassess before priming
Loose Or Bubbling Veneer
When veneer starts lifting or forming bubbles, you’ll need to strip and sand back to solid substrate before repainting; loose veneer won’t hold primer or paint and will telegraph through any finish.
You should remove compromised veneer, address underlying moisture or glue failure, and perform proper veneer repair before refinishing. Ignoring adhesion issues leads to peeling and wasted effort—full sanding is the only reliable fix.
How to Test Adhesion for No-Sanding Jobs
Before you commit to painting, you’ll want to verify that the existing finish will hold new paint—so perform a simple adhesion test on an inconspicuous area:
Before painting, test adhesion on an inconspicuous spot to ensure the new finish will stick.
You’ll do adhesion testing and surface evaluation to confirm primer and topcoat will stick.
Try these quick checks:
- Clean area with degreaser
- Apply tape and peel after 24 hours
- Light scratch with fingernail
- Note flaking or lifting
Essential Tools for Painting Cabinets Without Sanding
You’ll need a handful of reliable tools to get a smooth, durable finish without sanding: a good degreaser and tack cloths for cleaning, a high-quality bonding primer, a foam or high-density roller and angled brush for cutting in, and a small paint sprayer if you want the most professional result; add painter’s tape, drop cloths, and a respirator to protect surfaces and yourself.
Gather essential tools and necessary materials: primer, rollers, brushes, sprayer, tape, cloths, drop cloths, respirator, mixing sticks, and quality paint for consistent coverage and long-lasting adhesion.
Best Cleaners to Remove Grease and Grime
Now that you’ve gathered your tools and products, the next step is stripping grime off cabinet surfaces so primers and paint will stick.
Use grease removal techniques with effective cleaning solutions that cut oils without harming finishes. You’ll scrub, rinse, and dry before priming.
Use grease-fighting cleaners, scrub thoroughly, rinse well, and fully dry cabinets before priming.
- Trisodium phosphate (TSP) substitute
- Degreasing dish soap
- Citrus-based cleaner
- Isopropyl alcohol
How to Degloss Cabinets for Paint Adhesion
Start by cleaning the cabinet surfaces thoroughly to remove any leftover grease and grime.
Wipe on a liquid deglosser according to the manufacturer’s directions to dull the finish and promote adhesion.
Rinse and dry the cabinets completely before you apply primer or paint.
Clean Surface Thoroughly
A clean surface is essential for paint to stick, so deglossing your cabinets comes before any primer or paint.
You’ll use proven cleaning techniques and focused surface preparation to remove grease, grime, and residue so paint adheres evenly.
- Wear gloves and ventilate the area
- Use a TSP substitute or degreaser
- Wipe with clean water afterward
- Dry completely before priming
Use Liquid Deglosser
Before priming, you’ll use a liquid deglosser to dull the finish and chemically etch the surface so primer and paint can bond without sanding.
You’ll wear gloves, work in a ventilated space, and wipe evenly with a clean cloth.
Focus on liquid deglosser benefits: improved adhesion, time savings, and avoiding dust.
Follow applying deglosser techniques—overlap strokes and allow brief flash time before priming.
Rinse And Dry Completely
Once you’ve wiped on the deglosser and given it a moment to work, rinse the surface thoroughly and let it dry completely before priming.
You’ll use a gentle rinse method, then apply proper drying techniques so paint sticks and won’t blister. Confirm no residue or moisture remains; patience prevents adhesion problems.
- Use warm water rinse
- Wring microfiber cloths
- Air-dry plus tack cloth
- Inspect for damp spots
Deglossing vs. Sanding: Pros and Cons
When you’re deciding between deglossing and sanding, weigh speed and surface strength: deglossing uses a liquid stripper to dull glossy finishes quickly and keeps the existing paint layer intact, while sanding physically removes or roughens the topcoat for stronger adhesion but takes more time and effort.
You’ll choose deglossing techniques for quick prep or sanding alternatives when durability and bite are priorities.
Choosing a Primer for Slick Cabinet Surfaces
When you’re working with slick cabinet surfaces, pick a bonding primer that’s specifically formulated for glossy or laminate finishes so the paint will adhere.
Apply it thinly and evenly with a high-density foam roller for flat areas and a synthetic brush for edges, and follow the manufacturer’s flash and recoat times.
For best results, wipe the surface with a degreaser first and scuff lightly with a scuff pad if adhesion seems uncertain.
Bonding Primer Selection
Because slick cabinet surfaces reject ordinary paint, you’ll need a true bonding primer designed to adhere to laminate, thermofoil, or glossy finishes.
Choose products labeled for slick surfaces, compare bonding primer types, and plan your primer application to guarantee adhesion without sanding.
Consider adhesion promoters and compatibility with your topcoat.
- Oil-based bonding primers
- Shellac-based options
- Acrylic adhesion primers
- Universal adhesion promoters
Application Methods And Tips
Now that you’ve picked a bonding primer suited for slick cabinetry, focus on how you’ll apply it so it actually sticks and looks professional.
For cabinet reconditioning, prioritize surface preparation then use spray techniques for even coverage, roller application for flat panels, and brush methods for edges.
Follow adhesion strategies, control paint layering, and finish durability by letting proper flash times between coats for a smooth, lasting result.
How Bonding Primers Work on Finished Cabinets
A bonding primer acts like a molecular glue between your finish and the new paint, chemically and mechanically promoting adhesion so the paint won’t peel or flake.
You’ll choose based on bonding efficacy and surface type; primer types vary (etching, adhesion-promoter, shellac, epoxy). Apply thin, even coats and let cure for best results.
- Read label for substrate
- Test a small area
- Use proper ventilation
- Sand lightly between coats
Best Paint Types for Deglossed Cabinets
Now that your cabinets are deglossed and primed, you’ll want to choose the right paint formulation for durability and finish.
Consider oil-based for hardwearing results, water-based (acrylic/latex) for easier cleanup and lower odor, and specialty bonding primers that bridge adhesion between old finishes and new topcoats.
I’ll compare their pros and cons so you can pick what fits your project and skills.
Best Paint Formulations
Which paint will stick and look good on deglossed cabinets?
You’ll want formulations that maximize paint durability and let you nail color selection. Choose low-VOC acrylic enamels, hybrid alkyd-acrylics, cabinet-specific waterborne enamels, or self-priming bonding paints.
Each offers adhesion, smooth finish, and wear resistance so you can skip sanding while achieving durable, attractive cabinets with reliable long-term results.
Oil-Based Vs. Water-Based
When deciding between oil- and water-based paints for deglossed cabinets, think about durability, drying time, odor, and cleanup. You’ll favor oil for toughness and smooth finish; oil based advantages include stain resistance but stronger fumes. Water paints dry fast and clean easily; water based disadvantages are less hardness.
| Type | Drying | Finish |
|---|---|---|
| Oil | Slow | Hard |
| Water | Fast | Softer |
Specialty Bonding Primers
Whether you pick oil or water-based paint, a specialty bonding primer can make the difference between a flaky job and a long-lasting finish on deglossed cabinets.
You’ll want specialty primers that act as strong bonding agents, resist tannin bleed, and level minor imperfections.
Apply thin, even coats and follow manufacturer flash times.
- adhesion promotion
- stain blocking
- quick drying
- easy sanding
Why Acrylic-Latex Often Beats Oil-Based Paint
Because acrylic-latex dries faster and cleans up with soap and water, it usually makes cabinet projects quicker and less messy than oil-based paints.
You’ll appreciate acrylic advantages like lower odor and quicker recoats, while latex benefits include flexibility, resistance to yellowing, and easier maintenance.
For most DIY cabinet refreshes without sanding, acrylic-latex gives reliable adhesion and a durable finish with less fuss.
Cabinet-Specific Paints: Pros and Cons
If you want a simpler path to a professional-looking cabinet finish, cabinet-specific paints are formulated to give tougher adhesion, smoother leveling, and built-in primers so you can often skip sanding and extra coats.
You’ll weigh convenience against cost and cure time; use cabinet paint comparisons and paint durability analysis to decide.
- Easier prep
- Higher cost
- Faster cure
- Longevity tradeoffs
How Many Coats of Primer and Paint You Need
Cabinet-specific paints can cut prep time, but you’ll still need to think about how many coats to apply so the finish holds up and looks smooth. You’ll commonly use 1–2 primer coats (depending on primer types) and 2 paint layers for durability. Lightly wipe between coats. Monitor coverage and tackiness; add a third paint coat only if needed.
| Coat | Purpose | Typical coats |
|---|---|---|
| Primer | Seal/adhere | 1–2 |
| Paint | Finish | 2 |
Prep Checklist: Remove Hardware, Doors, and Hinges
Start by taking everything off the cabinets: remove knobs, pulls, hinges, doors, and any magnetic catches so you can work on flat, accessible surfaces.
Start by removing knobs, pulls, hinges, doors, and catches so cabinets lie flat and ready for work.
You’ll do efficient hardware removal, label parts, and prepare doors for painting while keeping door storage tidy.
- Label hinges and door locations
- Bag screws and small parts
- Stack doors safely
- Note hinge orientation
Masking and Protecting Counters and Floors
Before you start painting, cover countertop edges with painter’s tape and a thin foam or cardboard shield to prevent drips and protect seams.
Lay down a durable floor protection—contractor paper, rosin paper, or a heavy-duty drop cloth—and tape the edges so it won’t shift.
Secure drop cloths at doorways and under cabinets with low-tack tape or weights to keep dust and paint off floors.
Covering Countertop Edges
Protecting the countertop edges is essential to keep paint off surfaces you don’t want to refinish. Tape along the seam where the cabinet meets the counter, then press the adhesive firmly into the joint so paint can’t seep underneath.
Use countertop protection and edge sealing techniques to block drips and sanding dust.
- Run painter’s tape along the join
- Burnish tape into seams
- Cover with plastic sheeting
- Replace tape after long pauses
Floor Protection Options
After you’ve sealed countertop seams and taped off edges, turn your attention to the floors beneath your cabinets—paint drips, dust, and stray tools can ruin flooring if you don’t block them.
Lay appropriate floor coverings: rosin paper for protection, reinforced plastic for wet cleanup, or canvas drop cloths types for durability.
Keep pathways clear, overlap edges, and protect thresholds to prevent damage while you work.
Securing Drop Cloths
Think of drop cloths as a temporary shield—you’ll want them taped down and snug against counters and floors so paint, dust, and foot traffic can’t get underneath.
Choose drop cloth types for the job, then apply simple securing methods to prevent slips and gaps. Follow these quick tips:
- Use canvas for durability
- Use plastic for spills
- Tape seams with painter’s tape
- Weigh edges with clips
Applying Primer Without Sanding: Step-by-Step
Start by cleaning the cabinet surfaces thoroughly so the primer can bond properly; remove grease with a degreaser, wipe away dust, and let everything dry completely. Then tape edges, stir primer, and apply thin even coats using recommended primer product recommendations and proven primer application techniques. Allow proper dry time between coats and lightly tack cloth before topcoat.
| Step | Time |
|---|---|
| Prep | 30 min |
| Prime | 1–2 hrs |
| Dry | Overnight |
Brush vs. Roller vs. Sprayer for Cabinets
With primer dry and surfaces tack‑clothed, choose the application method that matches your cabinets, skill level, and finish goals.
You’ll weigh brush advantages, roller efficiency, and sprayer precision while considering paint types and surface compatibility.
Focus on application techniques for finish durability and cleanup considerations.
- Brush: detail work, brush advantages
- Roller: speed, roller efficiency
- Sprayer: smooth, sprayer precision
- Tips: paint types, surface compatibility
How to Avoid Brush Marks for a Smooth Finish
When you want a glass‑like cabinet finish, control your brushwork and paint consistency—load the brush evenly, cut in with long, confident strokes, and keep a wet edge so each pass blends into the last.
Use a high-quality synthetic brush, thin coats, and light pressure; practice a steady brush technique and deliberate paint application.
Remove drips and tip out strokes for an even, mark-free surface.
Drying and Recoat Times for No-Sand Projects
After you’ve laid down smooth, thin coats, pay close attention to drying and recoat times—rushing this step will ruin the surface you worked to perfect.
You’ll monitor drying times, wait recommended recoat intervals, and adjust for humidity and temperature.
Follow these quick checkpoints:
- Check tackiness before touching
- Wait full manufacturer recoat intervals
- Use consistent room temperature
- Lightly sand only if necessary
Tricks for Smooth Edges and Crisp Lines
If you want crisp lines and smooth edges, take your time prepping and use the right tools—sharp painter’s tape, a quality angled brush, and a steady hand will make the difference.
Mask carefully, press tape edges, and seal with a thin coat. Use brush-tipped pulls for corners, feather strokes for smooth shifts, and edge techniques like tipping to avoid paint build-up and ragged lines.
Finishing Options: Topcoats, Polyurethanes, Wax
When you finish painting, choosing the right topcoat will protect your cabinets and set the final sheen.
Water-based polyurethane dries fast, stays clear, and resists yellowing, while oil-based polyurethane is tougher but can amber over time.
Paste wax and clear topcoats give extra durability or a soft, hand-rubbed finish depending on how much protection you want.
Water-Based Polyurethane Benefits
Because it’s low-odor, fast-drying, and crystal-clear, water-based polyurethane is a great topcoat for painted cabinets—especially if you want durability without yellowing over time.
You’ll appreciate water based advantages: quick recoats, minimal smell, and clear finish. Use proper application techniques for thin, even coats.
- Fast recoat window
- Low odor
- Clear, non-yellow finish
- Easy cleanup with soap
Oil-Based Polyurethane Traits
Water-based finishes have perks, but oil-based polyurethane brings its own strengths you might prefer for cabinet tops.
You’ll appreciate oil-based advantages like superior hardness, ambering that warms painted tones, and strong chemical resistance.
For best results, follow recommended application techniques: thin coats, long dry times, and light sanding between layers.
Ventilate well and use a high-quality brush or foam applicator.
Wax And Topcoat Uses
One clear choice you’ll make after painting cabinets is whether to seal with a durable topcoat like polyurethane or to finish with a paste wax for a subtler sheen and feel.
You’ll weigh topcoat benefits—durability and easy cleaning—against wax application’s tactile finish and easy spot repairs.
Choose by use, appearance, and maintenance needs.
- Durability vs. softness
- Cleaning ease
- Repairability
- Appearance control
How to Cure Painted Cabinets for Durability
After the paint feels dry to the touch, give your cabinets time to fully cure before heavy use so the finish hardens and resists scratches, stains, and chipping.
Use controlled temperature and humidity, avoid heavy handling for 7–30 days, and let multiple thin coats cure between applications.
These paint curing methods and cabinet durability tips help you protect finishes without reworking or premature wear.
Fixing Adhesion Failures Without Full Sanding
If paint is peeling or flaking, first identify the problem areas so you know where to focus repairs.
You’ll clean and de-grease those spots thoroughly to remove oils and contaminants that prevent adhesion.
Then apply a quality bonding primer to secure the new paint without having to fully sand the cabinets.
Identify Problem Areas
Start by inspecting every cabinet surface under bright light and running your hand over panels, edges, and corners to feel for peeling, flaking, or powdery finish—that’s where adhesion’s failed.
Use problem identification and visual inspection for damage assessment and surface evaluation. Note wear patterns, cabinet condition, repair needs, and adhesion issues as part of a quality check.
- Mark loose areas
- Photograph defects
- Prioritize repairs
- Estimate scope
Clean And De-Grease
You’ve already marked and photographed trouble spots, so now focus on cleaning and degreasing those surfaces to restore adhesion without full sanding.
Use citrus or TSP substitutes and a microfiber cloth to remove grease, grime, and residue. Rinse thoroughly, let dry, and repeat stubborn areas.
Good cabinet surface preparation relies on effective cleaning solutions and consistent technique to improve paint bonding without aggressive abrasion.
Use Bonding Primer
When adhesion’s the problem but you don’t want to sand, apply a high-quality bonding primer designed for slick or previously finished surfaces; it chemically promotes paint grip so your topcoat stays put.
You’ll see bonding primer benefits immediately if you follow proper primer application and let it cure. Then paint confidently.
- Clean surface first
- Use thin, even coats
- Follow dry times
- Lightly scuff if needed
Common Mistakes That Cause Peeling or Chipping
Although you can get great results without sanding, skipping proper prep or rushing key steps often leads to peeling and chipping. The most common mistakes are inadequate cleaning, using the wrong primer or paint, poor adhesion on glossy surfaces, and failing to allow proper drying between coats.
You should address surface preparation, paint compatibility, adhesion issues, cabinet materials, and environmental factors to improve finish durability and peeling causes — chipping prevention.
Maintenance Tips to Keep No-Sand Cabinets Looking New
Fixing prep mistakes and choosing the right products will cut down on peeling, but regular care keeps your no-sand finish looking new.
You should do cabinet cleaning, routine maintenance, and regular inspections; control humidity and temperature regulation; guarantee proper ventilation; apply protective coatings and keep touch up paint handy.
- Wipe spills promptly
- Check hinges & seams
- Reapply clear coat yearly
- Store paint touch-ups nearby
Cost & Time: Sanding vs. No-Sanding Comparison
If you’re weighing sanding against no-sanding methods, cost and time are the two biggest trade-offs you’ll face: sanding adds labor and material costs but gives a longer-lasting bond, while no-sanding approaches save hours and often money upfront yet may need touch-ups or recoats sooner. Compare visually:
| Method | Time | Cost |
|---|---|---|
| Sanding | High | Higher |
| No-sand (sanding alternatives) | Low | Better cost efficiency |
When to Hire a Pro Instead of DIYing
When the project involves complex cabinet construction, severe damage, or a tight deadline, hire a pro—you’ll save time and avoid costly mistakes.
You should seek a professional evaluation when project complexity exceeds your skills or tools, or when warranties and resale value matter.
Consider a pro if you can’t commit time or need guaranteed finishes.
- Structural repairs
- Intricate molding
- Time constraints
- Warranty concerns
Low-VOC and Eco-Friendly Products for Cabinets
When you want a healthier project, choose low-VOC paint options that cut odors and indoor pollutants.
Pair them with eco-friendly primers designed for adhesion without harsh chemicals, and finish with sustainable oils that protect wood while staying planet-friendly.
I’ll outline pros, coverage, and application tips so you can pick the best products for your cabinets.
Low-VOC Paint Options
Anyone wanting a fresh cabinet finish without harsh fumes can choose from several low-VOC and eco-friendly paints that deliver durability and good coverage.
You’ll pick water-based acrylics, hybrid enamel, or plant-based options, and pair them with compatible low VOC primers for adhesion.
Choose satin or semi-gloss for cleanability and follow manufacturer cure times.
- Water-based acrylics
- Hybrid enamel
- Plant-based formulas
- Satin/semi-gloss finishes
Eco-Friendly Primers
Because adhesion and durability start with the right base, choose a low‑VOC, eco‑friendly primer designed for cabinetry to get professional results without harsh fumes.
You’ll want products labeled for adhesion on glossy surfaces and suited to your topcoat.
Compare eco friendly options, check VOC ratings, and prefer primers that use sustainable materials and minimal solvents so you protect indoor air quality while ensuring lasting paint adhesion.
Sustainable Finishing Oils
If you want a natural, low‑VOC finish that soaks into wood and protects without harsh chemicals, choose sustainable finishing oils formulated for cabinets.
You’ll apply thin coats, wipe excess, and cure between layers. These eco friendly techniques use sustainable materials, resist moisture, and keep fumes low so you can finish indoors safely.
- Easy application
- Low‑VOC options
- Durable protection
- Natural look
Real-World Timelines for a Kitchen Cabinet Refresh
When you plan a cabinet refresh, set a realistic timeline that accounts for prep, drying times, and unexpected snags so you don’t get stuck without a working kitchen.
Begin with kitchen preparation: clear contents, protect surfaces, and label doors.
Start by clearing cabinets, protecting surfaces, and labeling doors for an organized, stress-free refresh
Estimate hours for degreasing, deglossing, primer, and two coats of paint plus cure time.
Use timeline estimation to schedule days, not just tasks.
Small Projects: Islands, Drawers, and Trim
Tackle small projects like islands, drawers, and trim separately so you can see progress quickly and avoid disrupting the whole kitchen. These pieces usually take less prep and paint time, so you can knock out an island in a day and drawers or trim in a few hours each, depending on drying and curing.
- Plan island upgrades for impact
- Use quick drawer refinishing steps
- Prioritize trim painting for cohesion
- Focus on cabinet aesthetics and hardware changes
Frequently Asked Questions
Can I Paint Over Stained Wood Cabinets Without Sanding or Stripping?
Yes — you can paint over stained wood cabinets without sanding or stripping if you clean thoroughly, use a stain blocking primer, and choose products that promote paint adhesion; you’ll get durable results when you follow prep steps.
Will Touch-Ups Match After Months if I Skip Sanding Originally?
They probably won’t match perfectly if you skipped sanding; you’ll need careful touch up techniques and precise color matching, and you’ll have to blend edges, thin coatings, and possibly repaint panels to avoid obvious differences over months.
Can I Use Spray-On Primer Inside Closed Cabinet Boxes Safely?
Yes—you can, but you shouldn’t. You’ll need ventilation, a respirator, and masked surfaces to guarantee spray safety; test primer effectiveness on scrap first, use low-overspray tips, and open cabinets while spraying for safety.
Do Hinge or Hardware Colors Affect Adhesion on Deglossed Surfaces?
Yes — hinge or hardware colors don’t greatly change adhesion on deglossed surfaces, but you’ll want adhesion techniques like proper cleaning, deglosser use, and bonding primer; match hardware finishes for aesthetics and corrosion resistance, not grip.
Are There Warranty or Resale Issues When Skipping Sanding on Cabinets?
Yes — you might void warranty implications and harm resale value if coating specs aren’t followed; you’ll want to document products and prep, disclose the method to buyers, and consider a professional touch to avoid disputes.
Conclusion
You can often skip sanding if cabinets are in good shape and you test adhesion first — I did this on my aunt’s kitchen, scuffing, priming, and painting in two weekends with zero peeling. Think of it like slipping on a grip sock before hiking: the right prep gives traction without tearing up the trail. If finishes are flaking or water-damaged, though, full sanding’s the better, safer route.
