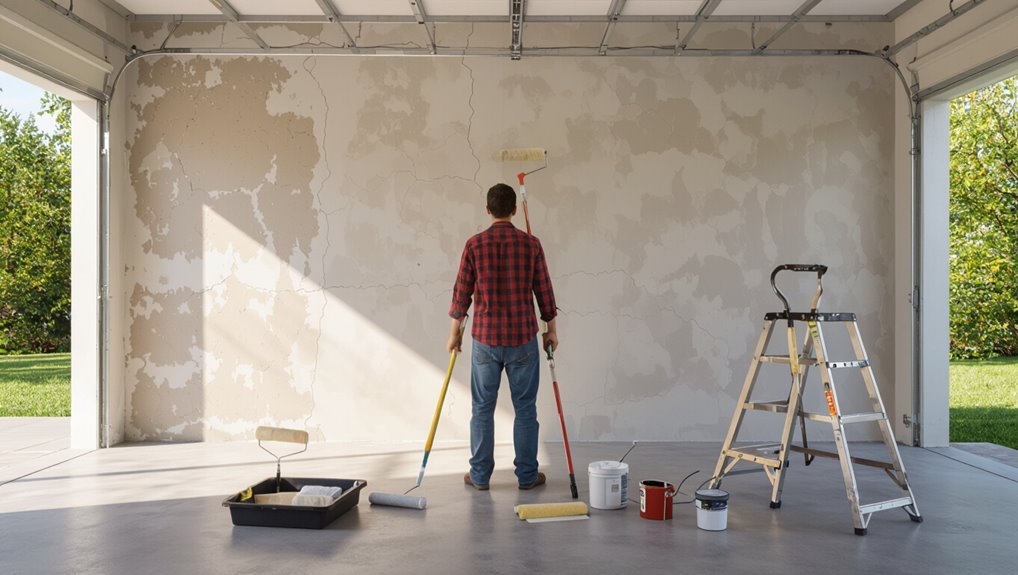
How to Paint a Garage Wall Like a Professional
You can paint your garage wall like a pro by prepping, repairing, and choosing the right paint and finish: clean grease, treat mold, fill cracks, sand, and prime. Use latex for drywall, enamel for trim, or epoxy for high-wear areas, pick a light, washable sheen, and work in 3×3-foot sections with a loaded roller, cutting in with a brush. Control overspray if you spray, allow proper dry and cure times, and follow maintenance tips to keep it fresh—keep going to get full step-by-step guidance.
When to Repaint a Garage Wall: Timing, Scope, and Results
If your garage walls show peeling, fading, stains, or mildew, it’s time to repaint; otherwise aim for a refresh every 5–7 years for interior walls and 3–5 years for exterior surfaces exposed to sun and weather.
You’ll assess damage, decide scope—spot repairs or full repaint—and set repainting frequency based on traffic, moisture, and seasonal considerations so coatings cure properly and last.
Choose the Right Paint Type for Garage Walls (Latex vs. Enamel vs. Epoxy)
When you’re picking paint for garage walls, think about durability, moisture resistance, and the surface you’ll cover—latex is user-friendly and breathable for interior drywall.
Enamel gives a tougher finish for trim and doors, and epoxy delivers the hardest, most stain- and chemical-resistant coating for floors and high-wear areas.
Choose latex benefits for easy cleanup, enamel durability where scuffs occur, or epoxy resistance for extreme wear; compare paint finishes.
Pick Finish and Color for Durability, Light, and Visibility
Because finish and color affect how well your garage stands up to wear and how bright it feels, pick them with purpose: choose a durable sheen that hides scuffs and is easy to clean, and pick lighter, neutral colors to boost light and visibility while hiding dirt where needed.
Use color psychology to influence mood, prioritize high light reflection for visibility, and pick washable finishes for longevity.
Essential Tools and Protective Gear You’ll Need
Before you start rolling, gather the right tools and protective gear so the job stays safe, fast, and tidy.
You’ll need rollers, brushes, extension poles, paint tray, drop cloths, painter’s tape, sanding block and scraper for surface preparation, plus respirator, gloves, safety glasses, and knee pads.
These items support efficient painting techniques and protect you from dust, fumes, and spills.
Inspect the Wall: Common Problems to Fix First
Now that you’ve got your tools and safety gear ready, take a close look at the garage wall to spot issues that will affect paint adhesion and finish. Perform a quick wall assessment, noting cracks, holes, mold, flaking paint, and damp spots; choose repair strategies accordingly.
| Problem | Fix |
|---|---|
| Cracks | Fill |
| Holes | Patch |
| Mold | Treat |
| Flakes | Sand |
| Damp | Diagnose |
Clean Garage Walls Fast: Degreaser, Pressure Wash, Rinse
Start by treating oil and grease spots with a strong degreaser so paint will stick.
Then pressure wash the entire wall to remove residue and old dirt.
Finish with a thorough rinse and let the surface dry before priming.
Remove Oil & Grease
Tackle oil and grease spots with a targeted cleaner so paint will stick and look uniform.
You’ll blot fresh stains with an oil absorption pad, then apply a degreaser for stubborn marks. Scrub with a stiff brush, rinse the area, and repeat until stains lift.
Proper grease removal guarantees primer and paint adhere evenly and last longer.
Pressure Wash Thoroughly
Grab a pressure washer and degreaser to blast away lingering dirt, mildew, and the last traces of oil so primer and paint will bond properly.
Mix recommended cleaning solutions, apply, then wait per instructions. Use moderate pressure settings to avoid surface damage; test an inconspicuous spot first.
Rinse thoroughly top to bottom, let walls dry completely, and inspect for missed stains before priming.
Repair Cracks, Holes, and Loose Plaster for a Smooth Base
Start by inspecting the walls to assess damaged areas and mark cracks, holes, and loose plaster.
Patch holes quickly with the right filler or compound, following product instructions for best adhesion.
Once repairs cure, smooth and sand the surface so your primer and paint go on evenly.
Assess Damage Areas
Before you paint, inspect the wall carefully for cracks, holes, and any loose or flaking plaster so you can create a solid, smooth base.
Do a damage assessment and thorough wall inspection, noting areas needing repair.
Then:
- Mark small hairline cracks
- Flag larger gaps
- Identify loose plaster patches
- Check for moisture stains
- Note uneven surfaces for sanding
Patch Holes Quickly
Patch holes quickly by removing loose material, cleaning the area, and filling gaps with the right repair compound so your wall’s surface becomes smooth and paint-ready.
Use appropriate patching techniques: press compound into holes, level edges, and apply mesh for larger gaps.
Choose quick drying products to speed workflow, follow manufacturer cure times, and spot-check firmness before proceeding to primer and paint.
Smooth And Sand Surface
Smooth the surface by scraping away loose plaster and sanding edges of repaired areas so cracks and holes sit flush with the surrounding wall.
You’ll use proper sanding techniques and thorough surface preparation to get a uniform base.
- Remove dust and debris
- Sand feathered edges
- Fill low spots
- Re-sand after drying
- Wipe clean before priming
Remove Oil, Rust, and Salt Stains (Prevent Peeling)
Oil, rust, and salt can stop paint from sticking, so you’ll need to clean and neutralize these stains before you prime or paint.
For oil stain removal, degrease with a solvent or trisodium phosphate, scrub, then rinse.
For rust treatment, use a rust remover or converter, scrub away residue, and let the surface dry fully before proceeding to painting.
Prime Garage Walls: Which Primers to Use Where
Before you start painting, pick primers based on wall material and problem spots so the paint bonds and lasts.
Use specific primers:
- Concrete: high-adhesion masonry primer, sealing pores
- Drywall: latex bonding primer for even topcoat
- Metal: rust-inhibitor primer for corrosion control
- Damp areas: moisture barrier primer to block humidity
- High-traffic: epoxy primer benefits — tough, durable base
Mask and Cover: Protect Floors, Fixtures, and Storage
Before you paint, lay down heavy-duty drop cloths or rosin paper to protect the floor from drips and spills.
Tape and plastic sheeting will keep lights, switches, and shelving free of splatter.
Move or tightly cover stored items so dust and paint won’t ruin tools or boxes.
Protect Floors Thoroughly
Start by laying down heavy-duty drop cloths or contractor-grade plastic across the entire floor and secure the edges with low-tack painter’s tape so paint, dust, and spills can’t creep underneath.
You’ll want consistent floor protection; use layered drop cloths where needed.
- Tape seams
- Cover drains
- Protect thresholds
- Anchor edges
- Inspect daily
Shield Fixtures Securely
1 simple set of masking supplies will save you hours of cleanup and prevent costly damage—gather painter’s tape, plastic sheeting, paper drop cloths, and zip-top bags for small parts.
You’ll assess fixture types and fixture placement, tape edges tightly, wrap lights and switches, and secure sheeting to prevent paint splatter.
Label bags for removed hardware and check seals before you start.
Cover Stored Items
With fixtures taped and lights wrapped, move on to covering anything you store in the garage so dust and paint won’t settle on boxes, tools, or bikes.
Use plastic sheeting and drop cloths, secure with tape, and keep aisles clear for access.
Follow simple storage solutions and item organization:
- Stack boxes on pallets
- Wrap tools in cloth
- Cover bikes with tarp
- Seal paint cans
- Label covered items
Roller and Brush Technique for Even, Pro-Looking Coverage
A smooth, professional finish comes from pairing the right roller with precise brushwork—use a 3/8″ to 1/2″ nap roller for most garage walls and a high-quality angled brush for cutting in.
You’ll master roller application by loading evenly, working in 3×3 foot sections, and maintaining a wet edge.
Use brush technique for clean corners and trim, feathering strokes to blend.
Spray vs. Roller: When to Spray and How to Control Overspray
If you’re covering large, flat areas fast, spraying can save time, but you’ll want a roller for edges and touch-ups.
Control paint fallout by masking openings, hanging drop cloths, and using a low-pressure sprayer or back-roll technique.
Follow best practices like testing spray patterns, keeping a consistent distance, and working with the wind to minimize overspray.
When To Spray
Decide between spraying and rolling based on surface size, texture, and how much time you want to spend:
- Use spray techniques for large, textured walls.
- Pick equipment selection suited to paint type and job scale.
- Spray when speed matters.
- Roll when edges or ventilation limit overspray.
- Test pattern and adjust pressure before full application.
Controlling Paint Fallout
When you choose spraying for speed and coverage, you also take on the challenge of controlling paint fallout, so plan containment and masking before you pull the trigger.
Use tarps, plastic sheeting, and taped seams as paint containment strategies. Adjust nozzle, pressure, and distance to minimize mist.
Create wind breaks, ventilate toward filters, and keep sprayer motion steady for effective overspray management.
Best Practice Tips
Choose spray or roller based on surface, speed, and control: spray for large, textured or high walls where speed and uniform coverage matter; roll for small areas, trim work, or where controlling overspray is critical.
Use these best practice tips tied to paint techniques and color psychology:
- Mask nearby items tightly
- Test nozzle pressure first
- Keep consistent distance
- Overlap passes slightly
- Use ventilation and drop cloths
Drying, Recoats, and Curing Times for Long-Lasting Paint
Although paint feels dry to the touch quickly, you’ll need to respect specific drying, recoat, and full cure times to guarantee durability and adhesion.
Check manufacturer times for drying techniques and curing methods, control temperature and humidity, and allow longer between coats in cool or damp conditions.
Wait full cure before heavy use or storage; premature stress causes adhesion failures and reduced longevity.
Simple Maintenance & Quick Fixes to Keep Garage Walls Looking New
If you want your garage to stay fresh between repainting sessions, a few simple maintenance steps and quick fixes will keep walls looking new with minimal effort.
Use preventive measures and routine inspections to catch issues early. Tackle marks, chips, and stains fast.
- Wipe scuffs with mild detergent
- Touch up chips with matching paint
- Seal small cracks
- Control moisture
- Reinspect quarterly
Frequently Asked Questions
Can I Paint Over Old Oil-Based Paint With Latex Without Stripping First?
You can, but you shouldn’t: paint compatibility issues demand surface preparation. You’ll need to degloss, sand, clean, and prime with a bonding primer designed for oil-to-latex shift to guarantee adhesion and durability.
How Do I Paint Around Installed Shelving and Cabinets in a Small Garage?
Think of painting around shelving like threading a needle: you’ll protect shelving protection with drop cloths and foam, tape cabinet masking precisely, cut in with a sash brush, then roll carefully, removing tape before fully dry.
Are There Voc-Free Paint Options Safe for Indoor Garage Painting?
Yes — you can choose VOC-free paints; they’re eco friendly options that offer indoor safety. You’ll find zero-VOC acrylics and water-based enamel formulas that reduce fumes, won’t off-gas, and let you paint confidently indoors.
What’s the Best Way to Paint Concrete Block Walls With Deep Mortar Joints?
Imagine the wall breathing relief: you’ll start with block preparation—clean, wire-brush, and fill gaps; then apply mortar sealing to smooth joints, prime with masonry primer, and roll or brush an elastomeric paint for durable, even coverage.
Can I Paint Garage Walls in Cold or Humid Weather Without Issues?
You can, but temperature effects and humidity impact matter: paint when it’s within recommended temp range and humidity’s low to moderate, or you’ll face poor adhesion, extended drying, and finish defects—wait for better conditions or use specialty coatings.
Conclusion
You’ve prepped, fixed, and painted like a pro; now step back and let the wall breathe—drying sunlight pooling on a smooth, even surface, color that brightens tools and corners alike. This finish isn’t just paint, it’s a clean slate that makes every project feel sharper and every storage bin easier to find. Keep a small kit for quick touch-ups, and your garage will stay crisp and ready, like a well-tuned tool waiting for your next move.