
How to Paint Interior Stucco Walls Without Damaging Texture
You can repaint interior stucco without flattening the texture by cleaning and repairing first, then using breathable primer and flexible acrylic or elastomeric paint. Work in small sections, use rollers or brushes with naps that follow the stucco contours, and apply thin, even coats to avoid clogging pores or smoothing peaks. Match repairs to the surrounding texture, blend new paint carefully, and keep humidity and temperature steady for curing — keep going to see specific tools, mixes, and troubleshooting tips.
Why Painting Interior Stucco Needs a Different Approach
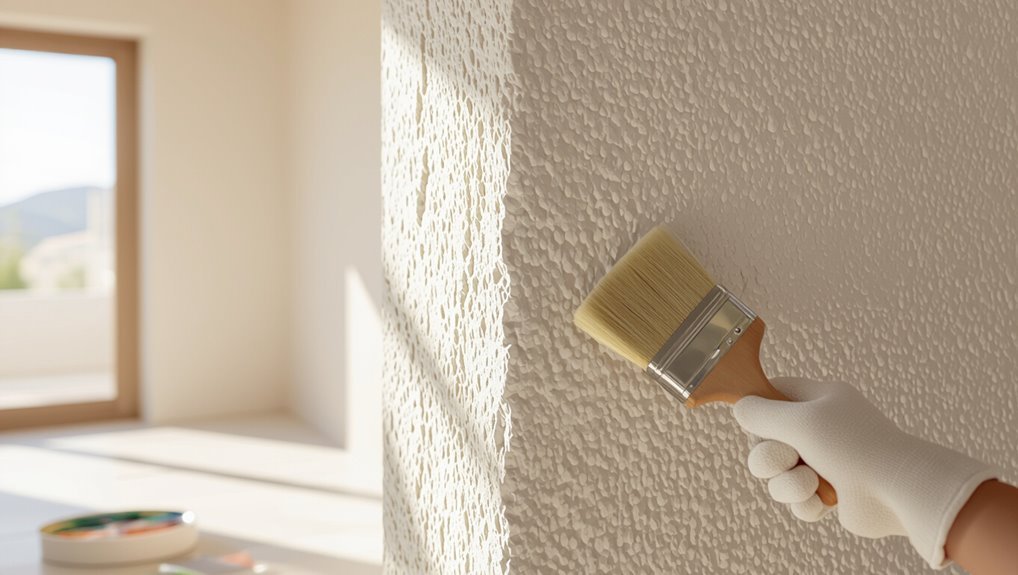
Because stucco’s texture, porosity, and movement differ from drywall, you need a different painting approach than you’d use on smooth surfaces.
You’ll adjust techniques to respect stucco characteristics: choose breathable primers and flexible paints, use gentle application to avoid clogging pores, and pick tools that follow contours.
That focus on texture preservation keeps finish uniform without flattening the surface.
When to Repaint vs. Repair Stucco First
Decide whether to repaint or repair first by inspecting the wall for cracks, delamination, efflorescence, or loose stucco—if you find structural issues, water damage, or areas that crumble when probed, repair them before painting; if the surface is sound with only faded or chalky finish, you can generally clean and repaint without major fixes.
| Condition | Action | Notes |
|---|---|---|
| Cracks | Repair | use proper repair techniques |
| Faded finish | Repaint | consider repainting frequency |
| Water damage | Repair | address moisture source |
| Chalky | Clean + Repaint | prep well before paint |
Inspecting Stucco for Loose or Flaky Areas
Before you paint, check the stucco for any loose texture by running your hand lightly over the surface.
Gently scrape or press with a putty knife to test for flaky areas that might crumble away. If material comes off easily, you’ll need to repair or remove those spots before painting.
Check For Loose Texture
Run your hand and a flat scraper across the stucco to find any loose, chalky, or flaky areas that could prevent paint from adhering. During texture inspection, note soft spots, detachment, and dust. Remove loose texture, clean surface, and mark repairs before priming.
| Issue | Severity | Action |
|---|---|---|
| Dusty surface | Low | Wipe |
| Flaking | High | Remove |
| Soft spots | High | Repair |
| Cracks | Medium | Fill |
Test For Flaky Areas
When you suspect areas might crumble, grab a stiff brush or a flat scraper and gently test small sections by scraping and rubbing—if powder, flakes, or loose granules come away, the stucco won’t hold paint and needs removal or repair before priming.
Perform a focused adhesion test across the wall, marking flaky texture spots. Then repair, patch, and recheck so paint bonds evenly.
How to Test a Small Area and Interpret Results
Pick a small, inconspicuous spot—like behind a light switch or inside a closet—and apply your chosen primer and paint exactly as you’ll do the rest of the room.
- Try different test methods: brush, roller, and spray.
- Wait full drying time before touching.
- Inspect adhesion, texture preservation, and sheen.
- Use result analysis to decide if prep or a different product’s needed.
Cleaning Stucco Before Painting: Dust, Grease, and Mildew
Before you paint, clean the stucco thoroughly so the primer and paint can bond properly: remove loose dust with a soft-bristle brush or low-pressure blower, degrease any oily spots with a mild detergent solution, and treat mildew with a bleach-and-water mix (1:3) applied, scrubbed gently, and rinsed off.
Use proven dust removal techniques and targeted mildew treatment solutions, then let surfaces dry fully.
Repairing Cracks and Chips Without Smoothing Texture
Once the stucco is clean and dry, you can tackle cracks and chips without flattening the texture.
Use compatible crack filler options and gentle trowel work, then match surrounding peaks. Don’t overwork the area; let cure.
Consider texture preservation techniques like stippling or lightweight mixes to rebuild relief.
- Clean and widen
- Choose filler
- Match texture
- Cure and prime
Patching Techniques That Keep Texture Consistent
When you patch stucco, match the existing texture by using the same compound and application tool so the repair blends in.
Work the patch edges outward and feather them into the surrounding surface to avoid hard lines.
Test and adjust your technique on scrap before touching the wall.
Match Existing Texture
Anyone can patch stucco, but matching the existing texture takes attention to detail and the right technique.
You’ll use texture matching techniques and consider interior design considerations so repairs blend with the room.
Follow these steps:
- Assess pattern and depth.
- Mix matching compound consistency.
- Test on scrap or inconspicuous area.
- Apply with tools that recreate original texture.
Feather Patch Edges
After you’ve matched the texture, blend the repair into the surrounding wall by feathering the patch edges so they disappear under paint.
Use a damp sponge or trowel to taper material thinly outward, applying a feather technique that minimizes ridges.
Once dry, sand lightly where needed for seamless edge blending.
Prime the patch, then paint to unify color and texture with the rest of the wall.
When to Use Texture Touch‑Up Compound Afterward
If your patched area still shows uneven peaks, low spots, or doesn’t blend with the surrounding finish, use a texture touch-up compound to match the wall’s pattern and hide repair seams.
Apply after following texture repair techniques and surface preparation tips to guarantee adhesion.
Use these steps:
- Test compound on scrap.
- Match pattern with tools.
- Feather edges outward.
- Let cure before painting.
Sanding Stucco Safely : When to Avoid It
Don’t sand stucco if the surface is crumbly, covered in old lead-based paint, or bonded to a delicate substrate—you’ll make damage worse or release hazardous dust.
Sanding can also change the texture and create low spots that are hard to fix.
If you’re unsure, test a small inconspicuous area or consult a pro before you start.
When Not To Sand
Although sanding can smooth rough patches and improve adhesion, you should avoid it in several situations that increase risk or cause damage.
Use sanding alternatives to protect finishes and guarantee texture preservation when needed.
- When texture pattern is delicate or original.
- If stucco is thin or crumbling.
- When old paint contains lead.
- In poorly ventilated spaces or near wiring.
Risks Of Sanding Stucco
Knowing when to skip sanding helps reduce harm, but you should also understand the risks when you do sand stucco. You can damage the texture, thin the surface, and release dust that harms finishes or health.
Choose sanding alternatives like careful hand-scraping or chemical deglossers when possible. Prioritize texture preservation and test a small area before committing to any abrasive method.
Removing Excess Paint or Filler Without Damage
When you spot excess paint or filler on stucco, act promptly and gently to avoid tearing or flattening the texture. You’ll protect texture preservation by using careful tools and small motions.
Follow these steps:
- Blot wet excess paint with a damp microfiber—don’t rub.
- Scrape dried filler lightly with a plastic putty knife.
- Use a soft-bristle brush for crevices.
- Touch up sparingly to match texture.
Choosing the Right Paint for Interior Stucco
Paint choice matters for interior stucco because the surface soaks up and shows paint differently than smooth drywall.
You’ll favor breathable, high-quality acrylic or elastomeric paint types that resist cracking and allow moisture passage.
Test samples to see how texture alters hue, then finalize color selection under real lighting.
Use stain-blocking primers and thin, even coats to protect texture and guarantee uniform coverage.
How Sheen Level Affects Stucco Texture Appearance
Because sheen determines how light reflects off peaks and valleys, it changes how textured stucco reads in a room and how visible imperfections become.
You’ll want to weigh sheen impact against texture variation to get the look you want.
- Matte hides flaws, softening peaks.
- Eggshell adds gentle depth.
- Satin boosts highlights.
- Semi-gloss emphasizes ridges.
Selecting Primers That Stick Without Filling Texture
Primer choice matters: you want a product that grabs onto porous stucco without clogging its peaks and valleys.
Choose primers labeled for masonry or high-adhesion formulas; compare adhesive types like acrylic or elastomeric for flexibility.
Pick masonry or high-adhesion primers; weigh acrylic versus elastomeric options for better flexibility and grip.
Test small areas and read primer brands’ technical sheets for VOCs, coverage, and recommended topcoats.
Proper selection guarantees grip without flattening texture, avoiding rework.
Mixing and Thinning Paint for Textured Coverage
Once you’ve picked a primer that won’t fill the texture, it’s time to prepare your topcoat for even coverage over peaks and pores.
Use correct mixing ratios and gentle thinning techniques to avoid runs. Stir thoroughly, test a small patch, then apply.
- Measure paint and water/retarder.
- Mix slowly.
- Thin minimally.
- Test and adjust.
Choosing Roller Nap for Textured Stucco
Selecting the right roller nap makes a big difference on textured stucco; you’ll want a nap long enough to reach into peaks and pores without leaving excess buildup.
Test roller types—woven, knit, or foam—against your texture. Choose nap thickness based on peak depth: 3/8″–1/2″ for light texture, 3/4″–1″ for heavy texture.
Roll evenly and avoid overloading the roller.
Brush Selection for Trim That Won’t Crush Peaks
When cutting in around stucco peaks, pick soft natural bristles so the brush flexes instead of flattening texture.
Use narrow trim brushes to reach tight angles without rubbing the high points.
Keep your pressure light and let the bristles do the work so the peaks stay crisp.
Choose Soft Natural Bristles
A soft natural-bristle brush gives you the control to cut in cleanly without flattening the textured peaks of stucco trim.
You’ll enjoy soft bristle benefits for smooth paint lay-in, less drag, and reduced touch-ups; follow simple brush maintenance to prolong life.
- Choose 100% natural hair
- Test on scrap
- Clean with gentle solvent
- Store bristles upright
Use Narrow Trim Brushes
Reach for a narrow trim brush to paint around stucco peaks without flattening them — its slim profile and tapered tip let you follow the texture closely and lay paint precisely on edges and recesses.
You’ll use narrow trim brushes to cut in clean lines at corners and fixtures.
Combine appropriate brush techniques for control and minimal contact with raised texture.
Maintain Light Brushing Pressure
Lighten your grip and let the brush skim the stucco — applying gentle, consistent pressure prevents the bristles from splaying and crushing the peaks.
- Choose a narrow, stiff-bristle trim brush for precise brush techniques.
- Practice even pressure control on a scrap board.
- Work in short, overlapping strokes.
- Reload lightly to avoid heavy buildup that flattens texture.
Sprayer Settings to Prevent Clogging and Overspray
1 key step to prevent clogging and overspray is dialing your spray gun to match the paint’s viscosity and the stucco’s texture.
Adjust nozzle size and pressure, test on scrap, and thin paint only as manufacturer recommends.
Perform regular sprayer maintenance—clean filters, needles, and passages after each use—to keep flow consistent and avoid blockages that cause uneven misting or heavy buildup on textured peaks.
Preparing the Room to Protect Furniture and Fixtures
Start by clearing as much furniture and décor from the room as you can. Then move remaining pieces to the center and cover them tightly with durable plastic or canvas drop cloths.
Use furniture covers and fixture protection to prevent dust and paint. Follow these steps:
- Remove small items.
- Cover electronics.
- Protect light fixtures.
- Seal vents and floors.
Masking and Taping Textured Stucco Correctly
Choose masking materials that flex and grab textured surfaces—like painter’s plastic with cloth tape or stretchable paper.
When you apply tape, press it along the peaks of the stucco so it seals in the high points rather than bridging over them. That way you’ll keep clean lines and prevent paint bleed into the texture.
Choose Appropriate Masking Materials
Before you tape or mask anything, pick materials that can handle rough, uneven stucco without tearing or leaving residue—because textured surfaces demand tougher supplies than smooth drywall.
Use durable masking tape and edge guards, secure painter’s film with adhesive spray, and cover floors with protective sheeting.
Keep painter’s caulk for small seals.
- Masking tape
- Painter’s film
- Adhesive spray
- Protective sheeting
Tape Along Texture Peaks
Now that you’ve picked sturdy tapes and films, it’s time to apply tape where the stucco’s peaks meet trim and openings so paint lines stay crisp.
Press tape gently along peaks, using a soft brush to seat edges without flattening texture.
Use short strips, peel slowly at 45°, and choose low-tack options.
These taping techniques prioritize texture preservation while keeping clean paint lines.
Protecting Recessed Texture During Trim Painting
When you paint trim next to recessed stucco, take steps to protect the textured recesses so paint doesn’t build up or blur the shadow lines; masking with low-tack painter’s tape and thin foam backer rods lets you seal edges without crushing the texture.
- Use texture preservation techniques: press tape lightly.
- Run a thin bead of caulk sparingly.
- Employ trim painting strategies: brush cut-in, not roll.
- Remove tape while paint’s tacky.
Setting Up Ladders and Scaffolding Safely
Because you’ll be working at height, set up ladders and scaffolding deliberately to keep yourself and the walls safe.
Check ladder stability, angle adjustment, and surface grip before climbing. Confirm scaffolding height matches the task and use proper ground support.
Anchor scaffolding, lock platforms, and wear a safety harness when required. Reinspect supports periodically to prevent slips and protect the stucco finish.
Applying Primer to Textured Stucco Without Filling Pores
Although textured stucco can trap dust and paint, you can prime it effectively without clogging the pores by choosing the right products and application technique.
Use a thin, high-penetration primer and gentle methods to avoid filling texture.
Steps:
- Clean surface thoroughly.
- Use a roll-and-brush combo.
- Thin primer per instructions.
- Test small area, let dry, inspect.
How to Apply the First Coat While Preserving Relief
If you want to keep the stucco’s relief, apply a thin, even first coat with a long-nap roller and follow the texture with light, directional brush strokes so paint settles into crevices without flattening peaks.
For first coat application, work in small sections, maintain wet edges, use minimal pressure, and employ texture preservation techniques like tipping into recesses rather than scrubbing raised areas.
Back‑Rolling to Even the Finish
Choose a nap length and roller designed for textured surfaces so the paint reaches into stucco crevices without leaving comb marks.
When back-rolling, work in overlapping vertical and horizontal passes with moderate pressure to smooth ridges and distribute paint evenly.
Keep a wet edge and check for pinholes or thin spots so you can correct them before the coat dries.
Proper Roller Selection
Picking the right roller makes back‑rolling effective: use a nap thickness that matches your stucco’s texture (3/8″ to 3/4″ for light to medium textures, 1″ or more for heavy textures) so the roller reaches into crevices and distributes paint evenly.
- Evaluate roller types for texture compatibility.
- Choose synthetic for latex, natural for oil.
- Match nap to depth, avoid short naps.
- Test on a small area before full application.
Technique For Uniform Coverage
Start by loading your roller evenly and working in manageable sections so you can back‑roll while the paint is still wet; this lets you press paint into the stucco’s crevices and smooth out lap marks for a consistent finish.
Then use a stiff nap brush to back‑roll in one direction, maintaining even pressure.
These texture preservation techniques help you avoid pooling and guarantee achieving consistent results across the wall.
Applying Subsequent Coats Without Flattening Texture
When you apply additional coats, work in thin, even layers so the texture stays crisp rather than getting smoothed out; you’ll use texture preservation techniques and paint application strategies to protect peaks and recesses.
- Roll lightly with a nap suited to stucco.
- Wait full dry times between coats.
- Inspect under good light for buildup.
- Spot-touch avoid heavy passes over raised areas.
Edge Work and Cutting In Around Trim and Fixtures
1. You’ll start by using edge preparation techniques: tape trim edges carefully, press it into stucco crevices, and seal gaps with minimal caulk.
Use a sharp angled brush and steady wrist for cutting in, letting paint skim texture without flattening it.
Adopt trim painting strategies like painting trim first or last consistently, and keep a clean wet edge to avoid overlaps.
Painting Around Outlets, Vents, and Fixtures
After you’ve handled trim and cut in cleanly, turn your attention to outlets, vents, and fixtures so they don’t become paint traps.
Remove outlet covers, label screws, and mask fixtures; use painter’s tape and lightweight barrier for fixture protection.
Replace covers after paint dries.
- Remove covers
- Tape edges
- Protect fixtures
- Reinstall covers
How to Handle Drips and Runs on Textured Surfaces
If you spot a drip or run, catch it immediately before it dries to avoid a noticeable blemish.
Gently blot any excess paint with a clean cloth or paper towel to lift the bulk without spreading it.
Then feather the area with a dry, stiff brush to blend the texture and hide the repair.
Catch Runs Immediately
Watch for drips as you paint—on textured stucco they can sink into crevices and harden into obvious runs if you don’t deal with them right away.
- Inspect panels frequently for catching drips.
- Smooth small runs with a damp brush immediately.
- Feather edges to avoid preventing streaks.
- Repaint only after fixes dry to match texture.
Blot Excess Gently
Gently blot excess paint with a clean, lint-free cloth or sponge as soon as you spot a drip so it doesn’t settle into the stucco’s crevices.
Use a gentle blotting technique, dabbing—don’t rub—to lift wet paint and reduce paint absorption into the texture.
Change cloths as they saturate, work from the outer edge inward, and repeat until the surface looks even without disturbing the finish.
Feather With Dry Brush
Feather the edge of a drip with a dry, stiff-bristled brush to blend the wet paint into the surrounding texture without lifting it off.
Use gentle feather techniques to keep texture intact and avoid overworking the area. Let paint set slightly if needed, then touch up.
- Tap, don’t scrub with a dry brush.
- Follow texture direction.
- Work small areas.
- Match pressure.
Fixing Roller Stipple or Uneven Texture After Painting
If you notice roller stipple or uneven texture after painting your interior stucco, don’t panic — you can usually correct it with a few targeted steps. Lightly sand high spots, clean dust, use a thin skim coat for texture repair, then recoat with proper nap roller to guarantee paint adhesion. Inspect and feather edges for seamless blend.
| Action | Result |
|---|---|
| Sand | Smooth peaks |
| Skim coat | Restore texture |
| Recoat | Even finish |
Dealing With High‑Contrast Lighting That Reveals Flaws
After you’ve smoothed and recoated problem areas, check your work under the kind of lighting that’ll expose flaws: strong side-lighting, low-angle sunlight, or bright spotlights.
- Use high contrast lighting to find uneven sheen and missed spots.
- Move lights to scan walls from different angles.
- Mark flaw visibility with pencil or small tape.
- Recoat subtly, feather edges to preserve stucco texture.
How to Remove Excess Paint Without Damaging Stucco
Scrape away wet runs and globs gently, then lift dried excess paint with the right tools so you don’t harm the stucco’s texture.
Use a soft plastic scraper, natural-bristle brush, or fine-grit sanding sponge for targeted paint removal techniques.
Work small, test a hidden spot, and blot with mineral spirits or mild detergent if needed.
Rinse, dry, and inspect for uniform finish as part of stucco care.
Painting Acoustic/Sprayed‑On Interior Stucco: Tips
When you’re tackling acoustic or sprayed-on interior stucco, treat it more delicately than flat plaster because the loose aggregate and soft binder can crumble or clog if handled roughly.
Handle acoustic or sprayed interior stucco gently—its loose aggregate and soft binder can crumble or clog if treated roughly.
- Test a small area with acoustic paint to check adhesion.
- Use low-pressure spray or soft roller for even texture finish.
- Avoid overworking; let coats dry fully.
- Mask and ventilate to protect surfaces and breathing.
Special Considerations for Vents, Outlets, and Fixtures
You’ll want to cover how to protect vents and grilles so paint doesn’t clog them or hurt airflow.
Tape and remove outlet covers and shut power off before you paint around electrical outlets.
For light fixtures and other wall-mounted items, either remove them or mask carefully to avoid drips and guarantee a clean edge.
Protecting Vents And Grilles
1 simple step before you start painting is to protect vents, grilles, outlets, and fixtures so paint doesn’t clog or stain them.
You’ll use vent protection and grille covering to keep airflow paths clear. Follow these steps:
- Remove washable covers.
- Tape edges with painter’s tape.
- Cover grilles with plastic.
- Label and store hardware safely.
Safeguarding Electrical Outlets
Because paint and dust can easily get into sockets and switches, you should take a few extra precautions to safeguard electrical outlets before you start rolling.
Turn power off, remove faceplates, and use outlet protection like painter’s tape and foam inserts.
Label breakers, work with a partner if unsure, and verify circuits are dead.
Prioritize electrical safety to prevent shocks and paint damage.
Working Around Wall Fixtures
Working around vents, outlets, and other fixtures requires deliberate prep so you don’t trap paint, block airflow, or create unsafe electrical conditions.
- Turn power off, remove covers for safe wall access and label screws.
- Mask vents and switches with low-tack tape for fixture protection.
- Use a small brush to cut in around openings without smearing texture.
- Reattach covers after paint dries, checking airflow and tight seals.
Estimating Paint Quantities for Textured Coverage
When you estimate paint for textured stucco, account for the extra surface area and deeper crevices that soak up more product than smooth walls.
So plan on higher coverage needs per gallon. Check paint absorption rates and texture compatibility—test a small area to measure actual consumption.
Calculate square footage adjusted for texture, add 10–20% contingency, and buy whole additional gallons for touchups.
Cost‑Saving Tips Without Sacrificing Texture Preservation
You can save money without flattening your stucco by buying quality supplies smartly—look for mid‑grade rollers and durable brushes that last.
Prep walls economically by cleaning and repairing only what’s needed, and using affordable patch compounds where appropriate.
Use cost‑effective techniques like rolling with a nap that matches the texture and cutting in carefully to avoid extra coats.
Buy Quality Supplies Smartly
Budget-conscious shoppers can still protect stucco texture by choosing a few key high-quality items and skipping unnecessary extras.
You’ll save by buying quality brands for critical tools while trimming overall supply costs. Prioritize what preserves texture and avoid cheap substitutes.
- Brush/roller rated for textured walls
- High-quality acrylic primer
- Durable painter’s tape
- Proper drop cloths
Prep Walls Economically
Start by clearing and inspecting the surface so you spot damage and loose debris before painting.
Use gentle brushes, microfiber cloths, and diluted cleaner from budget friendly materials to remove grime without harming texture.
Patch small cracks with spackling and fine sandpaper.
Buy only what you need from DIY supply sources, compare prices, and reuse trays and drop cloths to save money.
Use Cost‑Effective Techniques
One simple way to save is to choose tools and techniques that protect the stucco texture without costing a lot: rent a high-quality sprayer for large areas, use microfiber rollers designed for textured surfaces, and tack on painters’ tape only where it’s truly needed.
- Buy cost effective materials like masonry primer.
- Rent instead of buy specialty gear.
- Use budget friendly tools properly.
- Patch small areas yourself to avoid pros.
Drying Times and Climate Control for Stucco Paint
Because stucco absorbs and releases moisture slowly, you’ll need to plan paint timing around both surface dryness and ambient conditions. Consider drying conditions, humidity effects, temperature influence, and ventilation importance to avoid tacky finishes. Use dehumidifiers or heaters sparingly and guarantee airflow during curing.
| Factor | Ideal Range | Action |
|---|---|---|
| Humidity | 40–60% | Dehumidify |
| Temp | 50–75°F | Heat/cool |
| Ventilation | Steady airflow | Fans/windows |
Cleaning and Maintaining Textured Stucco Long‑Term
After the paint has fully cured and you’ve kept humidity and airflow in check, you’ll want a routine for cleaning and maintaining textured stucco so it stays looking good and performing well.
- Vacuum or soft-brush dust to aid texture preservation.
- Spot-clean with mild detergent; rinse gently.
- Inspect for cracks; seal promptly to support stucco longevity.
- Repaint only when needed, matching texture and breathable products.
How to Refresh One Accent Stucco Wall Later
Refresh that accent stucco wall by planning a targeted touch-up instead of repainting the whole room: assess the area for faded color, dirt, or small cracks, clean and patch any damage, and choose matching paint and texture techniques so the repair blends seamlessly with the surrounding finish.
Then sample color selection, feather edges, and use a soft brush or stipple roller to replicate texture and hide seams.
Signs You Need a Full Stucco Restoration Instead of Paint
If you spot deep cracks that go through the stucco, persistent moisture stains, or areas where the material is loose or crumbling, you’ll need more than a fresh coat of paint.
Those signs indicate structural or water-damage issues that paint can’t hide or fix. Before painting, have the damaged sections assessed and repaired to prevent recurring problems.
Cracks Penetrating Deeply
When you see cracks that run through the stucco and expose the underlying lath or substrate, don’t treat them like surface blemishes you can simply patch and paint; those deep fissures signal structural issues that require a full stucco restoration to prevent water intrusion and further deterioration.
- Perform a crack assessment to gauge depth and cause.
- Document locations for contractors.
- Choose professional repair techniques.
- Plan for full restoration, not cosmetic fixes.
Persistent Moisture Stains
Persistent dark or rusty stains on stucco that don’t fade after cleaning are a red flag you shouldn’t ignore; they usually signal ongoing water intrusion, trapped moisture, or corrosion of embedded metal lath that paint alone won’t fix.
You should stop and assess: persistent moisture needs repair, not cosmetics.
Skip simple stain removal attempts until you locate and fix the leak and dry the substrate.
Loose Or Crumbling Stucco
Because loose or crumbling stucco means the substrate has failed, you shouldn’t try to cover it with paint—doing so hides deeper damage and lets problems get worse.
- Inspect for delamination and deep cracks.
- Consult professionals about repair options.
- Remove unstable stucco before patching.
- Prioritize texture preservation when restoring so you can repaint safely afterward.
When to Hire a Pro vs. DIY for Textured Stucco
Wondering whether you should tackle textured stucco yourself or call in a pro?
If you’re a DIY enthusiast with steady hands and basic prep skills, small rooms and minor touch-ups are doable.
Hire a pro contractor for extensive repairs, complex textures, time constraints, or if perfect blending matters.
Budget, confidence, and desired finish should guide your choice—pick what’s realistic.
Safety Tips for Working on High or Uneven Textured Walls
When you’re working on high or uneven textured walls, make sure your ladder is on solid, level ground and tied off or held by a partner.
Wear protective gear—sturdy gloves, non-slip shoes, eye protection, and a dust mask—to guard against falls, scrapes, and airborne particles.
Take breaks to reposition safely rather than overreaching or standing on the top rungs.
Secure Ladder Placement
1. You’ll prioritize ladder stability and ladder safety before painting stucco; inspect feet, lock spreads, and set on firm, level ground.
- Check angle and secure top against a solid surface.
- Use ladder levelers or anti-slip pads on uneven floors.
- Keep hips within rails, move ladder instead of overreaching, and have a spotter when possible.
Protective Gear Essentials
Gear up before you climb: wearing the right protective equipment cuts your risk of slips, scrapes, and inhaling dust when painting high or uneven stucco walls.
You should wear a fitted respirator, safety glasses, non-slip shoes, gloves, and knee pads. Keep a hard hat handy for low eaves.
Pack protective gear and essential materials—drop cloths, painter’s tape, and a small first-aid kit—for safe, efficient work.
Cleaning Tools Used on Textured Walls for Reuse
Before you rinse anything off, sort your brushes, rollers, and scrapers so you know which tools need deep cleaning, which can be wiped and reused, and which should be discarded.
Use cleaning sponges and reusable rags for gentle wiping; reserve textured brushes for stubborn grooves.
For exterior prep, a pressure washer works—indoors stick to low-pressure rinses.
- Clean with sponge
- Wipe with rags
- Scrub with brush
- Rinse gently
Troubleshooting Common Problems After Painting Stucco
Once you’ve cleaned and sorted your tools, you’ll want to check the freshly painted stucco for common problems so you can fix them quickly.
Look for bubbling, flaking, or uneven sheen indicating poor paint adhesion; sand lightly, prime, and repaint affected spots.
Preserve texture by matching roller or brush patterns.
Address drips and thin coverage promptly to avoid noticeable repairs later.
Frequently Asked Questions
Can I Paint Stucco if It Has Active Mold or Mildew Growth?
No, you shouldn’t paint over active mold or mildew; you’ll perform mold removal first and complete surface preparation, ensuring the stucco’s clean, dry, and treated, then prime and paint so the finish adheres and mold won’t return.
Will New Paint Hide Oil or Nicotine Stains on Stucco Without Special Treatment?
Want fresh walls that actually look clean? You won’t hide oil or nicotine stains without special treatment; primers guarantee stain coverage and paint adhesion, so you’ll block stains and let topcoat bond for lasting, even results.
How Long Should I Wait Before Rehanging Pictures or Shelves on Freshly Painted Stucco?
Wait at least 24–48 hours before rehanging pictures or shelves; full curing can take up to 7 days depending on drying time and wall preparation. Don’t rush mounting hardware until paint feels fully dry.
Can I Apply Textured Paint to Change the Stucco’s Original Texture?
Yes — you can reshape the surface; think of sculpting clouds with brushes and trowels. Explore textured paint options and application techniques like additive mixes, rollers, or skim coats, testing first to match depth and pattern precisely.
Does Painting Stucco Affect Indoor Humidity or Breathability of Walls?
Painting stucco can affect humidity control and cause breathability concerns if you use non-breathable paints; choose vapor-permeable primers and breathable latex paints so moisture can escape and you won’t trap humidity inside walls.
Conclusion
You’ve treated stucco like the delicate heirloom it is — not a flat canvas. Remember my neighbor, who slapped paint on without prep and ended up with flaking like dandruff; after proper cleaning and a primer, his next coat lasted 12 years. Treat textured walls the same way: inspect, clean, spot-test, and use the right tools or pros. Do that, and your stucco will wear paint gracefully for years.
